
Introduction
If you’re a chocolate lover, get ready to fall in love with this flourless chocolate cake! This decadent dessert is rich, fudgy, and incredibly indulgent—all without a single grain of flour. Whether you’re looking for a naturally gluten-free treat or simply craving an ultra-chocolaty delight, this cake is a must-try.
With its dense yet melt-in-your-mouth texture, this cake is perfect for special occasions or whenever you need a chocolate fix. Plus, it’s surprisingly simple to make with just a handful of ingredients!
In this guide, we’ll cover everything you need to know to create the perfect no-flour chocolate cake—from choosing the right ingredients to expert baking tips and serving suggestions. Let’s dive in! 🍫✨
What Makes Flourless Chocolate Cake So Special?
If you’re looking for a decadent dessert with a simple touch, this flourless chocolate cake will captivate your senses with its rich texture and deep, melt-in-your-mouth flavor.
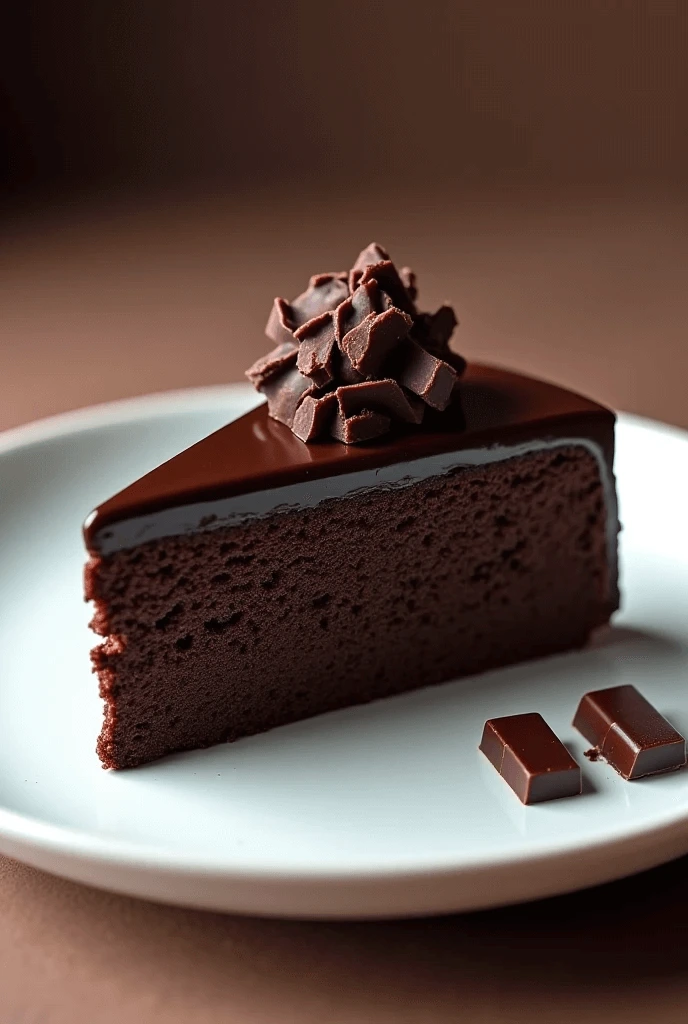
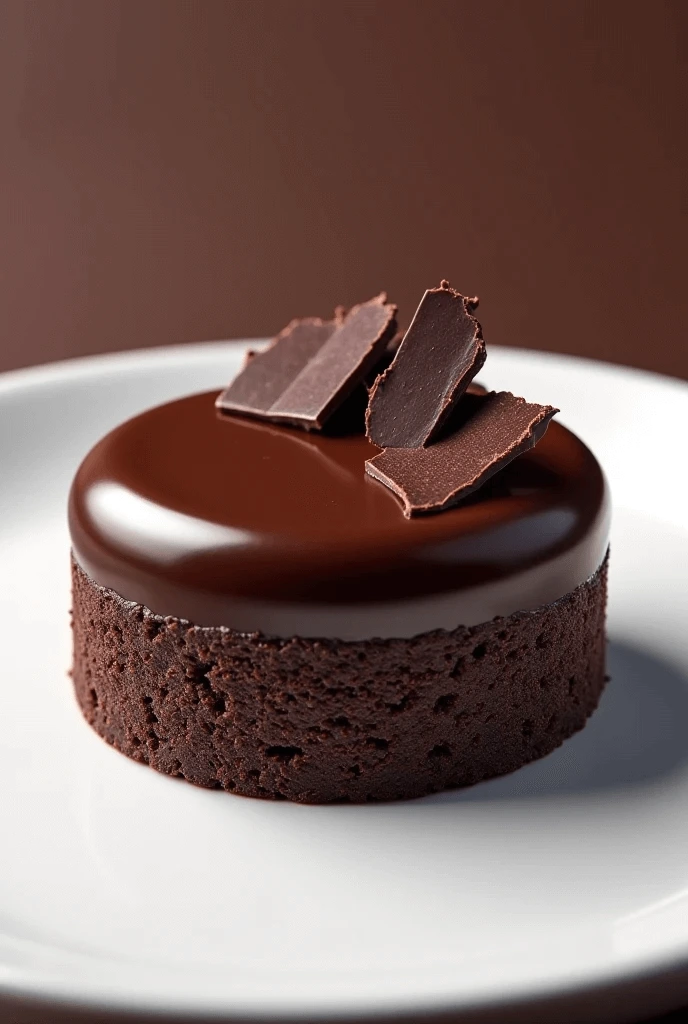
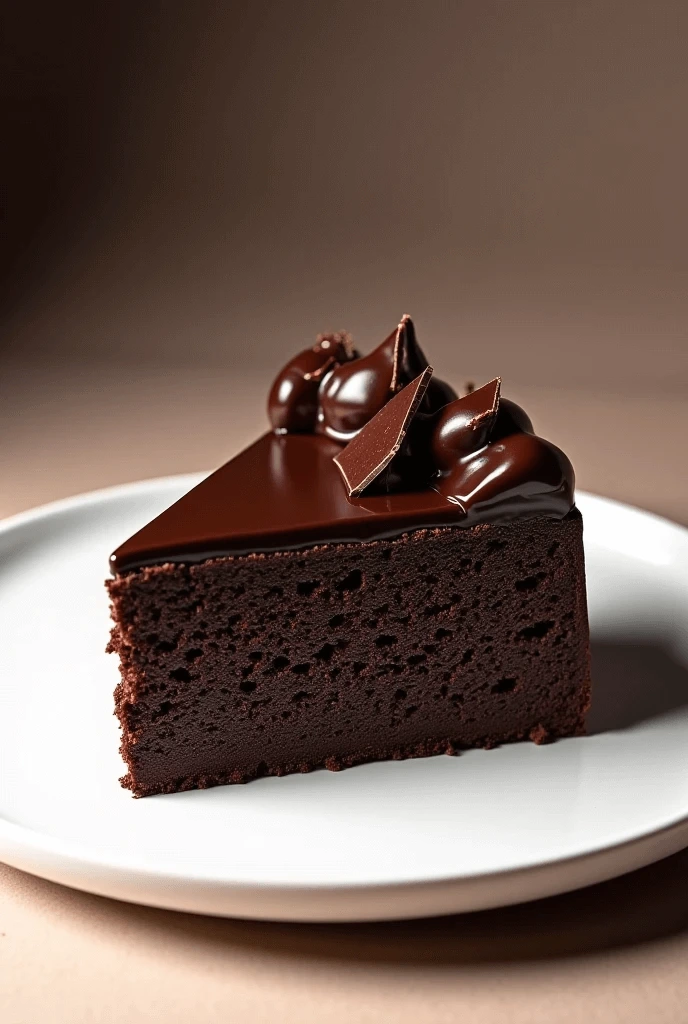
A Rich and Fudgy Chocolate Cake Without Flour
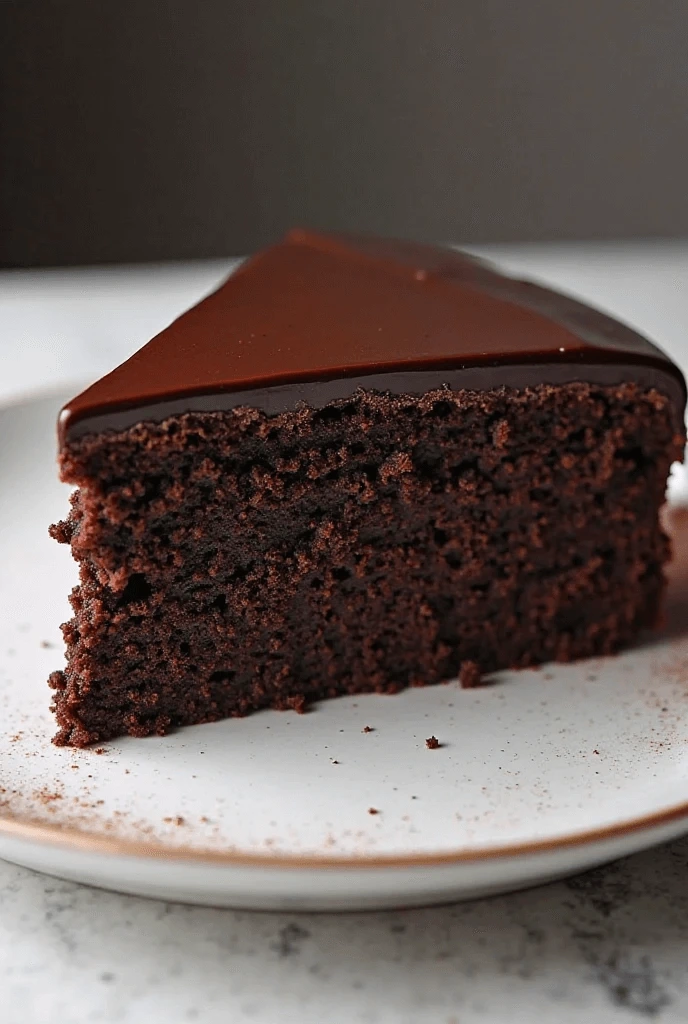
One of the biggest reasons people love flourless chocolate cake is its luxurious, fudgy texture. Unlike traditional cakes that rely on flour for structure, this cake gets its richness from melted chocolate, butter, eggs, and sugar, resulting in a dense and velvety consistency.
Why Does This Cake Have a Fudgy Texture?
The absence of flour means there are no dry ingredients to absorb moisture, allowing the chocolate and butter to create an ultra-moist and almost truffle-like texture. Additionally, eggs play a crucial role by providing structure without making the cake airy like a traditional sponge cake.
How This Cake Differs from Traditional Chocolate Cake
- Flourless Chocolate Cake: Dense, fudgy, and almost brownie-like in texture.
- Classic Chocolate Cake: Lighter and fluffier due to the presence of flour and baking powder.
- Molten Lava Cake: A partially baked version of flourless chocolate cake, with a gooey center.
The Key to Achieving the Perfect Fudgy Consistency
To ensure your cake turns out moist and rich, follow these tips:
- Use high-quality dark chocolate (at least 60% cocoa) for an intense chocolate flavor.
- Don’t overbake! The cake should be slightly soft in the center when removed from the oven—it will continue to set as it cools.
- Let it rest before serving. This allows the flavors to develop and the texture to firm up slightly while still remaining melt-in-your-mouth soft.
With its decadent, almost melt-in-your-mouth quality, this cake is perfect for special occasions or whenever you’re craving a chocolate indulgence. Whether served plain, dusted with powdered sugar, or paired with fresh berries, this cake is guaranteed to impress! 🍫✨
Naturally Gluten-Free and Easy to Make at Home
One of the best things about flourless chocolate cake is that it’s naturally gluten-free, making it a fantastic dessert option for those with gluten sensitivities or celiac disease. Unlike many gluten-free baked goods that require alternative flours or special binding agents, this cake is effortlessly flourless without compromising texture or flavor.
Why Is This Cake Naturally Gluten-Free?
Traditional cakes rely on flour for structure, but this cake uses eggs, butter, and chocolate to hold everything together. The result is a dense, fudgy texture rather than a light and airy crumb. Because it doesn’t require flour substitutes like almond or coconut flour, it’s simple to make without needing special ingredients.
A Foolproof Recipe with Minimal Ingredients
One of the best parts of this cake is how easy it is to make at home—you only need a few pantry staples:
- Dark Chocolate – The base of the cake, providing richness and deep cocoa flavor.
- Butter – Adds creaminess and keeps the cake soft and moist.
- Eggs – Give the cake structure and create a smooth texture.
- Sugar – Balances the bitterness of the chocolate and enhances the sweetness.
- Vanilla & Salt – Elevate the flavor for a more complex taste.
No Special Equipment Needed
Unlike many baked goods that require electric mixers, cake pans, or precise layering techniques, this cake is incredibly low-maintenance:
- One Bowl Mixing – Melt the chocolate and butter together, then stir in the remaining ingredients.
- No Fancy Baking Techniques – Simply pour the batter into a greased pan and bake.
- No Need for Frosting – The cake is naturally rich and decadent, but you can dust it with powdered sugar or drizzle it with chocolate ganache for extra indulgence.
Perfect for Any Occasion
Because this gluten-free chocolate cake is so easy to prepare, it’s great for:
- Dinner parties – Impress guests with a gourmet-style dessert.
- Special occasions – A perfect cake for birthdays, anniversaries, or Valentine’s Day.
- Quick cravings – With minimal ingredients and a short baking time, it’s an easy go-to dessert.
Whether you’re gluten-intolerant or simply want a no-fail, easy-to-make chocolate cake, this flourless version is the perfect choice! 🍫✨
The Ultimate Dessert for Chocolate Lovers
If you’re a true chocolate enthusiast, a flourless chocolate cake is the ultimate indulgence. With its intense cocoa flavor, rich texture, and melt-in-your-mouth decadence, this cake is more than just a dessert—it’s a chocolate lover’s dream come true. Unlike traditional cakes that might dilute the chocolate flavor with flour and leavening agents, this one is pure, undiluted chocolate bliss.
Why Chocolate Lovers Adore This Cake
A flourless chocolate cake delivers an unparalleled depth of flavor because it’s made with a high concentration of real chocolate rather than relying on cocoa powder alone. Here’s what makes it stand out:
- Rich and Velvety Texture – No flour means a dense, fudgy consistency similar to a chocolate truffle.
- Intensely Chocolatey – Every bite is packed with bold cocoa notes, perfect for satisfying even the most serious cravings.
- Balanced Sweetness – Unlike overly sweet store-bought desserts, this cake lets the natural richness of chocolate shine, with just the right amount of sugar.
Best Types of Chocolate to Use for Maximum Flavor
Since chocolate is the star ingredient, choosing the right one makes all the difference. Here are some of the best options:
- Dark Chocolate (60–70% Cocoa): Offers a deep, slightly bitter flavor for a more intense experience.
- Bittersweet Chocolate (70%+ Cocoa): Ideal for those who love bold, slightly less sweet desserts.
- Semi-Sweet Chocolate (50–60% Cocoa): A great balance between sweetness and rich cocoa notes.
- High-Quality Baking Chocolate: Avoid chocolate chips (which contain stabilizers) and opt for premium baking bars instead.
How to Take the Chocolate Flavor to the Next Level
Want to elevate the taste of your flourless chocolate cake even further? Try these expert tips:
- Add Espresso Powder or Brewed Coffee – Enhances the natural chocolate flavor without making the cake taste like coffee.
- Use a Pinch of Sea Salt – Brings out the richness and depth of the chocolate.
- Incorporate a Splash of Vanilla Extract – Softens the bitterness and adds warmth to the flavor.
- Top with Chocolate Ganache – A silky layer of melted chocolate and cream makes this cake even more decadent.
Perfect for Any Chocolate Lover’s Occasion
This cake isn’t just a dessert—it’s a show-stopping masterpiece that’s perfect for:
- Date Nights & Special Occasions – A sophisticated treat that pairs beautifully with a glass of red wine.
- Holidays & Celebrations – Impress guests with a restaurant-quality chocolate dessert.
- Everyday Indulgence – Because chocolate lovers don’t need an excuse to enjoy an ultra-rich cake!
If you crave intense chocolate desserts, this flourless chocolate cake is a must-try. It’s bold, decadent, and absolutely unforgettable—the ultimate sweet fix for any true chocolate fan! 🍫✨
Essential Ingredients for the Best Flourless Chocolate Cake
Dark Chocolate – The Key to an Intense Chocolate Flavor
The heart and soul of any flourless chocolate cake is its dark chocolate. Since this cake doesn’t rely on flour or leavening agents, the quality and type of chocolate you choose will determine its depth of flavor, richness, and overall indulgence. Using high-quality dark chocolate ensures that every bite is bold, intense, and deeply satisfying.
Why Dark Chocolate Is Essential for a Flourless Cake
Unlike milk chocolate, which contains a higher percentage of sugar and dairy, dark chocolate is packed with pure cocoa solids. This gives the cake its signature intense chocolate taste without being overly sweet.
Here’s why dark chocolate is the best choice for this dessert:
- Higher Cocoa Content = More Flavor – The more cocoa solids in your chocolate, the deeper and richer the flavor.
- Less Sugar = Balanced Sweetness – Using dark chocolate helps prevent the cake from becoming overly sugary.
- Better Texture – Dark chocolate melts smoothly, creating a silky, fudgy texture in the final cake.
Best Types of Dark Chocolate to Use
When making a flourless chocolate cake, not all dark chocolates are created equal. Here’s a guide to choosing the best one for the richest flavor:
| Type of Dark Chocolate | Cocoa Percentage | Flavor Profile |
|---|---|---|
| Semi-Sweet Chocolate | 50–60% | Mildly sweet with a balanced cocoa flavor. Best for those who prefer a lighter chocolate taste. |
| Bittersweet Chocolate | 60–70% | Rich, deep cocoa flavor with slight bitterness. Ideal for achieving an intense chocolatey taste. |
| Extra Dark Chocolate | 70%+ | Bold and slightly bitter with minimal sweetness. Best for true chocolate lovers who enjoy a luxurious, deep flavor. |
💡 Tip: Avoid using milk chocolate for this cake, as it contains too much sugar and dairy, which can affect the texture and balance of flavors.
How to Melt Dark Chocolate for the Perfect Cake Batter
To achieve a smooth and velvety consistency, melting your chocolate properly is crucial. Here are two foolproof methods:
1. Double Boiler Method (Best for Precise Control)
- Fill a saucepan with an inch of water and bring it to a gentle simmer.
- Place a heatproof bowl over the saucepan, making sure it doesn’t touch the water.
- Add chopped dark chocolate and butter, stirring continuously until melted and silky.
✅ Why use this method? It prevents overheating and ensures that the chocolate melts slowly and evenly without burning.
2. Microwave Method (Quick & Easy)
- Chop the dark chocolate into small pieces and place it in a microwave-safe bowl.
- Heat in 20-second intervals, stirring between each session, until fully melted and smooth.
✅ Why use this method? It’s fast and convenient, but be careful not to overheat, as chocolate can burn quickly in the microwave.
How to Enhance the Dark Chocolate Flavor
For an even more intense chocolate experience, consider adding these simple ingredients to boost the depth of flavor:
- Espresso Powder or Brewed Coffee – Enhances the chocolate taste without making it taste like coffee.
- A Pinch of Sea Salt – Balances the sweetness and brings out the natural cocoa notes.
- Vanilla Extract – Softens any bitterness and rounds out the flavor.
- Cocoa Powder – Adding a tablespoon of unsweetened cocoa powder can intensify the chocolate richness.
Final Thoughts
Dark chocolate is the star ingredient in a flourless chocolate cake, so choosing the right kind is essential. Opt for high-quality bittersweet or extra dark chocolate for an intensely rich and luxurious cake. When melted properly and paired with a few key ingredients, it creates a decadent, fudgy dessert that’s pure chocolate bliss. 🍫✨
Eggs – The Secret to a Moist and Fluffy Flourless Cake
In a flourless chocolate cake, eggs play a crucial role in creating structure, moisture, and the perfect texture. Even though this cake doesn’t contain flour, eggs help provide the stability needed to hold everything together while ensuring that the cake doesn’t become too dense or dry. The magic of eggs lies in their ability to transform a simple batter into a moist, rich, and slightly fluffy dessert.
Why Eggs Are Essential for Flourless Cakes
Unlike traditional cakes that use flour as the primary binder, a flourless chocolate cake relies heavily on eggs to give it structure and moisture. The key roles eggs play in this recipe are:
- Binding Agent: Eggs bind the other ingredients, particularly the melted chocolate and butter, creating a uniform batter that holds together when baked.
- Moisture Retention: Eggs help lock in moisture, keeping the cake soft and fudgy rather than dry or crumbly.
- Structure Formation: During baking, eggs set the cake and provide the necessary support for the rich, fudgy texture. They also create air pockets, which result in a slight fluffiness despite the lack of flour.
How Eggs Contribute to the Cake’s Texture
The fluffy, melt-in-your-mouth texture of a flourless chocolate cake is largely due to the way eggs interact with the batter. Here’s how they work their magic:
- Egg Yolks: When combined with the other ingredients, the yolks contribute to the richness and moisture of the cake. They help create a smooth, creamy batter and provide the cake with its dense yet tender texture.
- Egg Whites: Beating the egg whites separately and folding them into the batter introduces air bubbles into the mixture. These bubbles expand during baking, giving the cake a slight lightness and ensuring it isn’t too dense. The egg whites also help the cake rise slightly, keeping it moist but not heavy.
Pro Tip: Be careful not to overmix the batter after adding the whipped egg whites—this helps maintain the light texture that comes from the air bubbles.
How to Get the Best Results with Eggs
To get the ideal texture in your flourless chocolate cake, follow these tips:
- Room Temperature Eggs: Use eggs that are at room temperature to ensure they mix more evenly with the melted chocolate and butter. Cold eggs can cause the fat to seize, resulting in an uneven batter.
- Separate the Eggs Carefully: Be sure to separate the egg whites from the yolks carefully. Any trace of yolk in the egg whites can prevent them from whipping up to their full potential.
- Whisk the Egg Whites Properly: When beating the egg whites, make sure they form stiff peaks, but not dry peaks. Soft, glossy peaks will give your cake the right amount of lift and fluffiness without deflating.
- Gently Fold the Mixture: When incorporating the whipped egg whites into the chocolate batter, fold them in gently to preserve the airiness. Overmixing can cause the batter to lose its lift, resulting in a denser texture.
What Happens if You Don’t Use Enough Eggs?
Eggs are integral to achieving the right balance of moisture, richness, and structure in a flourless chocolate cake. If you skip or reduce the number of eggs, you might end up with a cake that:
- Is too dense and dry.
- Doesn’t rise enough, making it flat or overly heavy.
- Lacks the silky smooth texture that makes this dessert so special.
Final Thoughts
In a flourless chocolate cake, eggs are much more than just an ingredient—they’re the secret to achieving the perfect combination of moisture, structure, and fluffiness. By properly incorporating both the egg yolks and whipped egg whites, you create a cake that is rich, fudgy, and incredibly satisfying, yet surprisingly light. 🍫✨
The Role of Butter in the Flourless Chocolate Cake
Butter is crucial in the creation of a flourless chocolate cake, contributing to the richness and moistness of the final product. Here’s how butter works in this dessert:
- Adds Moisture and Tenderness: The fat in butter helps to keep the cake soft and moist, preventing it from drying out. It makes the cake more dense and fudgy, which is exactly the texture you want in a flourless cake.
- Creaminess: Butter gives the cake a velvety texture, contributing to its luxurious mouthfeel. As the butter melts into the warm chocolate, it combines with the other ingredients to create a smooth, uniform batter.
- Enhances Flavor: Butter doesn’t just add moisture; it also enhances the flavor of the cake, bringing out the richness of the dark chocolate and rounding out the overall taste. Butter has a slight savory element that balances the sweetness from the sugar.
Pro Tip: For the best results, use unsalted butter to control the amount of salt in the cake. If you use salted butter, the cake may end up too salty and overwhelm the chocolate flavor.
The Role of Sugar in the Flourless Chocolate Cake
Sugar is essential in providing the perfect balance of sweetness to counteract the bitterness of the dark chocolate. It also influences the cake’s texture and overall structure. Here’s how sugar works its magic:
- Sweetness: Dark chocolate, particularly varieties with higher cocoa content, can be quite bitter. Sugar helps balance this bitterness, ensuring the cake is decadent and not overly intense.
- Texture: Sugar helps the cake achieve a moist, slightly chewy texture, without making it overly soft or crumbly. The sugar dissolves during mixing and baking, creating a smooth batter that contributes to the overall texture of the cake.
- Crust Formation: In combination with butter, sugar helps form a thin, slightly crispy crust on the outside of the cake while keeping the inside rich and fudgy. The cake will have a slightly crusty top that contrasts nicely with the moist center.
How Butter and Sugar Work Together for the Perfect Cake
When combined, butter and sugar form the foundation of the cake’s rich, smooth, and indulgent texture. Here’s how they interact during the baking process:
- Creaming the Butter and Sugar: The process of creaming the butter and sugar together (if done separately before adding other ingredients) helps create small air pockets that lighten the batter, contributing to the cake’s tender, moist crumb. It also ensures the sugar dissolves completely, resulting in a smoother texture.
- Caramelization: As the cake bakes, the sugar and butter begin to caramelize, helping the cake form a beautifully golden brown crust while keeping the inside soft and dense. The caramelization process adds a subtle depth of flavor, creating a complex sweetness that enhances the dark chocolate flavor.
Pro Tip: Be sure to melt the butter along with the chocolate over low heat so it integrates smoothly into the batter, allowing it to combine easily with the sugar and other ingredients.
The Importance of Balancing Butter and Sugar
While butter and sugar are essential, the right balance is key to achieving the perfect texture and sweetness. Too much sugar can make the cake overly sweet and compromise the flavor of the chocolate, while too little sugar can make the cake overly bitter or too dense. Similarly, too much butter can make the cake greasy, while too little may result in a dry, crumbly texture.
By carefully measuring the butter and sugar, you’ll achieve the ideal balance, giving your flourless chocolate cake the perfect moist, fudgy texture with just the right amount of rich sweetness.
Final Thoughts
Together, butter and sugar are the foundation of a flourless chocolate cake that is moist, rich, and full of flavor. The butter adds moisture, creaminess, and depth to the chocolate, while the sugar balances out the bitterness of the dark chocolate, ensuring the cake is the perfect sweetness. When combined properly, they create a luxurious texture that elevates the chocolate flavor and makes this cake an irresistible treat. 🍫✨
Optional Additions: Vanilla, Coffee, and Salt for Extra Depth
While a flourless chocolate cake is already rich and decadent on its own, adding a few optional ingredients can elevate the flavors even further. These ingredients—vanilla, coffee, and salt—serve to enhance the natural chocolate flavor, deepen the complexity of the cake, and create a more sophisticated dessert experience. By incorporating these flavor boosters, you can take your cake to the next level, balancing sweetness, bitterness, and richness.
Vanilla – The Perfect Flavor Enhancer
Vanilla is a simple but powerful addition to a flourless chocolate cake. Although chocolate is the dominant flavor, vanilla has the ability to enhance and complement it in subtle ways. Here’s how vanilla plays a role in making your cake even more delicious:
- Deepens the Chocolate Flavor: Vanilla extract contains compounds that can enhance the natural flavors of the chocolate. It doesn’t overpower the cake; instead, it subtly rounds out the overall taste, making the chocolate more rich and well-balanced.
- Brings Warmth: Vanilla adds a warm, aromatic quality to the cake that contrasts beautifully with the intensity of the dark chocolate. This warmth can make each bite feel more comforting and indulgent.
- Improves Aroma: Vanilla also plays an important role in the scent of the cake. The fragrant aroma of vanilla enhances the overall experience, making the cake even more inviting when it’s freshly baked.
Pro Tip: Use pure vanilla extract rather than imitation vanilla for the best flavor. Imitation vanilla can have a synthetic taste that can interfere with the natural richness of the chocolate.
Coffee – Bringing Out the Full Depth of Chocolate
Coffee and chocolate are a natural pairing, and adding coffee to your flourless chocolate cake can bring out the full depth of the chocolate flavor. Even though you won’t taste coffee directly, it will amplify the chocolate’s bitterness and intensity. Here’s how coffee works wonders in a chocolate cake:
- Intensifies the Chocolate Flavor: Coffee has a natural bitterness that, when combined with dark chocolate, can make the cake taste even more chocolate-forward. It boosts the cocoa flavor without making the cake taste like coffee.
- Balances Sweetness: Coffee helps balance the sweetness of the cake, especially if you’re using a sweeter chocolate. A small amount of brewed coffee or espresso powder can cut through the richness, making the dessert feel less heavy.
- Adds Complexity: Coffee adds a layer of complexity to the cake, providing a deeper, more nuanced flavor profile. The earthy notes of coffee pair wonderfully with the richness of the chocolate, giving the cake a sophisticated taste.
Pro Tip: For the best results, use strong brewed coffee or espresso powder. You don’t need a lot; a tablespoon or two is usually enough to enhance the chocolate flavor without overpowering it.
Salt – A Simple Addition with Big Impact
It may seem counterintuitive to add salt to a dessert, but a pinch of salt can transform your flourless chocolate cake by balancing sweetness and highlighting the chocolate’s natural flavors. Here’s how salt works in chocolate desserts:
- Enhances Chocolate Flavor: Salt can bring out the complexity of the chocolate, making it taste richer and more intense. It acts as a flavor enhancer, allowing the deep notes of the dark chocolate to shine through.
- Balances Sweetness: Chocolate cake, especially flourless varieties, can be very sweet. A small amount of salt helps balance out this sweetness, preventing the cake from becoming overly sugary. This balance ensures the cake tastes more rounded and harmonious.
- Creates Contrast: When sprinkled on top of the finished cake, salt creates a delightful contrast to the smooth, rich texture. The slight crunch of the salt on your tongue makes each bite feel even more decadent and indulgent.
Pro Tip: Use flaked sea salt or Himalayan pink salt for a subtle crunch and an elevated look. Just a small sprinkle on top of the cake before baking or serving is all it takes to make a noticeable difference.
How to Add These Ingredients to Your Cake
While the flourless chocolate cake recipe may already be perfect on its own, incorporating these optional ingredients is easy:
- Vanilla: Add about 1 teaspoon of pure vanilla extract when mixing your wet ingredients, alongside the butter and chocolate.
- Coffee: For brewed coffee, add about 1–2 tablespoons to the batter. If you’re using espresso powder, dissolve 1 teaspoon of espresso powder in the melted chocolate mixture.
- Salt: Add a pinch of salt to the batter along with the other dry ingredients or sprinkle it over the top of the cake just before baking. For an extra touch, finish with a light sprinkle of salt just before serving.
Final Thoughts
While vanilla, coffee, and salt are optional, they’re excellent ways to add extra depth and complexity to your flourless chocolate cake. These ingredients enhance the chocolate flavor, bring out its richness, and create a balanced, sophisticated taste that will delight your taste buds. The next time you make this indulgent dessert, try experimenting with these additions to elevate the experience and create the ultimate chocolate lover’s dream. 🍫✨
Step-by-Step Guide to Making a Perfect Flourless Chocolate Cake
Melting Chocolate and Butter for a Smooth Cake Batter
One of the key steps in making a flourless chocolate cake is properly melting the chocolate and butter. This process ensures that the batter is smooth, velvety, and free of lumps, which is crucial for achieving the cake’s signature dense, fudgy texture. The right technique for melting chocolate and butter is essential for getting the perfect consistency and achieving the rich, luxurious flavor that makes this dessert so irresistible. Here’s a deeper look into why this step is so important and how to do it correctly.
The Importance of Properly Melting Chocolate and Butter
When making a flourless chocolate cake, the chocolate and butter are the star ingredients, contributing significantly to the cake’s texture and taste. Melting them together creates a uniform, smooth mixture that forms the base of the batter, ensuring the cake will bake to perfection. Here’s why this step is so crucial:
- Prevents Lumps: If chocolate isn’t properly melted, it can form unwanted lumps in the batter, affecting the final texture of the cake. A smooth melted chocolate and butter mixture guarantees a smooth batter without any hard bits of chocolate.
- Ensures Even Distribution: When the chocolate and butter are melted and combined, they meld together seamlessly, ensuring that both ingredients are evenly distributed throughout the batter. This results in a consistent flavor and texture across every slice of cake.
- Creates the Ideal Fudgy Texture: The smooth, silky texture of the melted chocolate and butter mixture is essential for creating that rich, fudgy texture that flourless chocolate cake is known for. The fats in the butter help keep the cake moist and dense, while the melted chocolate adds that deep, intense chocolate flavor.
How to Melt Chocolate and Butter Correctly
The key to melting chocolate and butter is to do it slowly and carefully. The goal is to create a smooth, glossy mixture without burning the chocolate or causing the butter to separate. Here’s how to melt these ingredients properly:
Using a Double Boiler (Best Method)
A double boiler is the most effective method for melting chocolate and butter together. This indirect heat method helps prevent the chocolate from overheating and ensures a smooth consistency. Here’s how to do it:
- Fill a Pot with Water: Add a few inches of water to the bottom of a saucepan.
- Place a Heatproof Bowl on Top: Choose a heatproof bowl that fits snugly over the pot without touching the water. Add your butter and chopped chocolate to the bowl.
- Heat Gently: Place the saucepan on the stove over low to medium heat. Stir the chocolate and butter occasionally as they melt, ensuring everything is evenly combined.
- Remove from Heat: Once everything is fully melted, remove the bowl from the pot and set it aside to cool slightly before mixing into your cake batter.
Using the Microwave (Quick and Convenient)
If you don’t have a double boiler, the microwave is another convenient method for melting chocolate and butter. It’s quick, but you need to be cautious to avoid overheating. Here’s how to do it:
- Combine Chocolate and Butter: Place the chopped chocolate and butter into a microwave-safe bowl.
- Microwave in Intervals: Microwave the mixture on low power in 20–30 second intervals, stirring in between. This prevents the chocolate from burning.
- Stir Until Smooth: Continue microwaving and stirring until the chocolate and butter are fully melted and combined into a smooth, glossy mixture.
- Cool Slightly: Let the melted mixture cool slightly before incorporating it into the rest of your ingredients.
Pro Tip: When melting chocolate, chop it into small, uniform pieces so it melts evenly and quickly. Large chunks of chocolate can take longer to melt and may not melt as evenly.
What Happens if You Overheat the Chocolate and Butter?
Overheating the chocolate or butter during the melting process can ruin the texture and flavor of your cake. Here’s what can go wrong:
- Burnt Chocolate: If chocolate is heated too quickly or at too high a temperature, it can burn, causing it to become bitter and grainy. Once chocolate is burned, it becomes difficult to restore its smooth texture.
- Separated Butter: Overheating butter can cause the fat to separate from the milk solids, resulting in a greasy mixture that’s hard to incorporate into the batter. If this happens, the cake might not have the smooth, moist texture you’re aiming for.
- Clumpy Texture: If the melted chocolate and butter don’t mix properly, they can become clumpy, leading to a lumpy batter that will not bake evenly. This will affect the final texture of your cake, leaving it uneven and possibly undercooked in some spots.
Pro Tip: To avoid overheating, always melt the chocolate and butter on low heat and stir gently. Using a thermometer can also help—melt the chocolate to about 115°F (46°C) for the perfect consistency.
The Result: A Smooth, Glossy Cake Batter
When done correctly, melting chocolate and butter creates a silky, smooth batter that’s easy to mix with the remaining ingredients. The result is a cake that bakes with a dense, fudgy texture and an intense chocolate flavor. As you add the eggs, sugar, and any other ingredients, the melted chocolate and butter mixture will blend effortlessly, creating a flawless batter. The end result is a cake that has the perfect consistency and flavor, setting you up for success in the baking process.
Final Thoughts
Properly melting chocolate and butter is a vital step in making a flourless chocolate cake. It ensures that the cake’s batter is smooth, consistent, and has that signature rich, fudgy texture. Whether you use a double boiler or the microwave, the key is to melt the ingredients slowly and carefully to avoid burning or separating them. With the right technique, you’ll have a perfect base for your cake, leading to an indulgent, velvety dessert that will be the star of any occasion. 🍫✨Melting Chocolate and Butter for a Smooth Cake Batter
One of the key steps in making a flourless chocolate cake is properly melting the chocolate and butter. This process ensures that the batter is smooth, velvety, and free of lumps, which is crucial for achieving the cake’s signature dense, fudgy texture. The right technique for melting chocolate and butter is essential for getting the perfect consistency and achieving the rich, luxurious flavor that makes this dessert so irresistible. Here’s a deeper look into why this step is so important and how to do it correctly.
The Importance of Properly Melting Chocolate and Butter
When making a flourless chocolate cake, the chocolate and butter are the star ingredients, contributing significantly to the cake’s texture and taste. Melting them together creates a uniform, smooth mixture that forms the base of the batter, ensuring the cake will bake to perfection. Here’s why this step is so crucial:
- Prevents Lumps: If chocolate isn’t properly melted, it can form unwanted lumps in the batter, affecting the final texture of the cake. A smooth melted chocolate and butter mixture guarantees a smooth batter without any hard bits of chocolate.
- Ensures Even Distribution: When the chocolate and butter are melted and combined, they meld together seamlessly, ensuring that both ingredients are evenly distributed throughout the batter. This results in a consistent flavor and texture across every slice of cake.
- Creates the Ideal Fudgy Texture: The smooth, silky texture of the melted chocolate and butter mixture is essential for creating that rich, fudgy texture that flourless chocolate cake is known for. The fats in the butter help keep the cake moist and dense, while the melted chocolate adds that deep, intense chocolate flavor.
How to Melt Chocolate and Butter Correctly
The key to melting chocolate and butter is to do it slowly and carefully. The goal is to create a smooth, glossy mixture without burning the chocolate or causing the butter to separate. Here’s how to melt these ingredients properly:
Using a Double Boiler (Best Method)
A double boiler is the most effective method for melting chocolate and butter together. This indirect heat method helps prevent the chocolate from overheating and ensures a smooth consistency. Here’s how to do it:
- Fill a Pot with Water: Add a few inches of water to the bottom of a saucepan.
- Place a Heatproof Bowl on Top: Choose a heatproof bowl that fits snugly over the pot without touching the water. Add your butter and chopped chocolate to the bowl.
- Heat Gently: Place the saucepan on the stove over low to medium heat. Stir the chocolate and butter occasionally as they melt, ensuring everything is evenly combined.
- Remove from Heat: Once everything is fully melted, remove the bowl from the pot and set it aside to cool slightly before mixing into your cake batter.
Using the Microwave (Quick and Convenient)
If you don’t have a double boiler, the microwave is another convenient method for melting chocolate and butter. It’s quick, but you need to be cautious to avoid overheating. Here’s how to do it:
- Combine Chocolate and Butter: Place the chopped chocolate and butter into a microwave-safe bowl.
- Microwave in Intervals: Microwave the mixture on low power in 20–30 second intervals, stirring in between. This prevents the chocolate from burning.
- Stir Until Smooth: Continue microwaving and stirring until the chocolate and butter are fully melted and combined into a smooth, glossy mixture.
- Cool Slightly: Let the melted mixture cool slightly before incorporating it into the rest of your ingredients.
Pro Tip: When melting chocolate, chop it into small, uniform pieces so it melts evenly and quickly. Large chunks of chocolate can take longer to melt and may not melt as evenly.
What Happens if You Overheat the Chocolate and Butter?
Overheating the chocolate or butter during the melting process can ruin the texture and flavor of your cake. Here’s what can go wrong:
- Burnt Chocolate: If chocolate is heated too quickly or at too high a temperature, it can burn, causing it to become bitter and grainy. Once chocolate is burned, it becomes difficult to restore its smooth texture.
- Separated Butter: Overheating butter can cause the fat to separate from the milk solids, resulting in a greasy mixture that’s hard to incorporate into the batter. If this happens, the cake might not have the smooth, moist texture you’re aiming for.
- Clumpy Texture: If the melted chocolate and butter don’t mix properly, they can become clumpy, leading to a lumpy batter that will not bake evenly. This will affect the final texture of your cake, leaving it uneven and possibly undercooked in some spots.
Pro Tip: To avoid overheating, always melt the chocolate and butter on low heat and stir gently. Using a thermometer can also help—melt the chocolate to about 115°F (46°C) for the perfect consistency.
The Result: A Smooth, Glossy Cake Batter
When done correctly, melting chocolate and butter creates a silky, smooth batter that’s easy to mix with the remaining ingredients. The result is a cake that bakes with a dense, fudgy texture and an intense chocolate flavor. As you add the eggs, sugar, and any other ingredients, the melted chocolate and butter mixture will blend effortlessly, creating a flawless batter. The end result is a cake that has the perfect consistency and flavor, setting you up for success in the baking process.
Final Thoughts
Properly melting chocolate and butter is a vital step in making a flourless chocolate cake. It ensures that the cake’s batter is smooth, consistent, and has that signature rich, fudgy texture. Whether you use a double boiler or the microwave, the key is to melt the ingredients slowly and carefully to avoid burning or separating them. With the right technique, you’ll have a perfect base for your cake, leading to an indulgent, velvety dessert that will be the star of any occasion. 🍫✨
Whisking Eggs and Sugar to Get a Light Yet Dense Texture
Whisking eggs and sugar together is one of the most critical steps in preparing a flourless chocolate cake. This process is key to achieving the perfect texture that is both light and dense—a characteristic that defines this iconic dessert. Properly whisking these ingredients helps incorporate air into the batter, creating a slight lift while maintaining a rich, fudgy consistency. Here’s a closer look at why whisking eggs and sugar correctly is essential, and how it contributes to the cake’s final texture.
The Role of Eggs in the Cake’s Texture
Eggs play a central role in any flourless cake, and whisking them correctly ensures that the cake has the right balance of moisture, structure, and fluffiness. When you whisk the eggs with sugar, you are helping to create an emulsion, which forms the structure of the cake. Here’s why eggs are so important:
- Structure and Stability: Eggs help provide the necessary structure and stability for a flourless cake, especially in the absence of flour. The proteins in the egg whites and yolks coagulate during baking, giving the cake its desired density and firmness.
- Moisture: Eggs contribute moisture to the batter, preventing the cake from becoming too dry. This is crucial for the rich, fudgy texture that is characteristic of a flourless chocolate cake.
- Air Incorporation: When eggs are whisked with sugar, they trap air, which is then incorporated into the batter. This air gives the cake a slightly lighter and more delicate crumb, while the chocolate and butter provide the cake’s rich density.
- Binding: Eggs also act as a binder, helping all the ingredients stick together and form a smooth, cohesive batter that bakes evenly.
The Role of Sugar in Achieving the Right Texture
Sugar plays a supportive role in whisking the eggs, acting as both a sweetener and a textural enhancer. Here’s how sugar works in the egg-whisking process:
- Stabilizes the Eggs: When sugar is added to eggs, it helps stabilize the egg proteins. This is especially important in flourless cakes, as it helps prevent the batter from becoming too runny or too firm.
- Adds Volume: Sugar also helps increase the volume of the batter. When whisked together with eggs, sugar helps trap air, creating a lighter texture without compromising the cake’s rich, dense structure.
- Dissolves for Smoothness: Properly whisked sugar helps dissolve into the eggs, creating a smooth, glossy batter without any graininess. This ensures that the final cake has a silky texture both in the batter and in the finished cake.
- Enhances Browning: Sugar contributes to the cake’s caramelization during baking, helping the surface of the cake develop a beautiful, slightly crispy outer layer, which contrasts nicely with the soft interior.
How to Whisk Eggs and Sugar for the Perfect Cake Texture
Proper whisking technique is essential for achieving the right texture in your flourless chocolate cake. Here’s how to do it correctly:
Use Room Temperature Eggs
Start with room-temperature eggs. Cold eggs will not incorporate air as well as eggs that have been brought to room temperature. Allow the eggs to sit at room temperature for about 20-30 minutes before whisking.
Whisking by Hand or Using an Electric Mixer
You can whisk the eggs and sugar either by hand or with an electric mixer. The goal is to aerate the mixture and achieve a pale, thick consistency.
- Hand Whisking: If you choose to whisk by hand, use a whisk with a long handle to create a faster motion and incorporate as much air as possible. It will take about 5–7 minutes of vigorous whisking to achieve the desired consistency.
- Electric Mixer: If using an electric mixer, set it to medium-high speed and beat the eggs and sugar together for about 3–5 minutes. The mixture should become light, fluffy, and have a ribbon-like consistency when lifted from the bowl.
Whisk Until the Mixture Becomes Pale and Frothy
The eggs and sugar should form a thick, frothy mixture that is much lighter in color than the original eggs. You should see visible air bubbles and the mixture should feel slightly stiffer when you lift the whisk. This is crucial for creating that light, airy texture while still retaining the cake’s dense richness.
Look for the “Ribbon Stage”
The “ribbon stage” is when the whisked eggs and sugar fall back into the bowl in a thick ribbon-like stream and hold their shape for a second before dissolving. At this point, the mixture should be light, pale, and glossy. This stage indicates that enough air has been incorporated to give the cake a delicate texture without losing the dense richness that makes a flourless cake special.
The Balance Between Lightness and Density
Achieving the right balance of lightness and density is the hallmark of a perfect flourless chocolate cake. The whisked eggs and sugar are responsible for making the cake slightly fluffy, while the combination of melted chocolate, butter, and the lack of flour gives the cake its dense and fudgy texture. Here’s how this balance works:
- Lightness: The airiness created by the whisked eggs and sugar helps the cake rise and gives it a delicate texture, preventing it from being too heavy.
- Density: Despite the lightness, the cake retains its dense, fudgy nature thanks to the heavy base of chocolate and butter. This richness is what makes flourless chocolate cake so indulgent and satisfying.
- Complementary Textures: The fluffy yet dense texture of a flourless chocolate cake makes it feel almost like a cross between a mousse and a brownie, offering the best of both worlds in every bite.
Common Mistakes to Avoid When Whisking Eggs and Sugar
To ensure the perfect texture, it’s important to avoid certain mistakes when whisking eggs and sugar:
- Under-Whisking: If the eggs and sugar are not whisked enough, the batter will not have enough volume, leading to a denser and heavier cake. Always ensure the mixture is pale and airy.
- Over-Whisking: Whisking too long can cause the mixture to become too airy, leading to a cake that doesn’t hold together as well. Stop whisking once the ribbon stage is reached.
- Using Cold Eggs: Cold eggs don’t incorporate air as well, so always use eggs that have been allowed to come to room temperature.
Final Thoughts
Whisking eggs and sugar is a vital step in making a flourless chocolate cake. By incorporating air into the batter, you create a light, fluffy structure, which contrasts perfectly with the dense, fudgy texture that defines this rich dessert. With the right technique, you’ll achieve a cake that’s both decadent and indulgent, with just the right amount of airiness to make each bite feel like an experience. So, take the time to properly whisk your eggs and sugar, and you’ll end up with a cake that’s perfectly balanced in texture and flavor. 🍫✨
Combining Ingredients for a Perfectly Balanced No-Flour Cake
The process of combining ingredients is an essential step in making the perfect flourless chocolate cake. Since there’s no flour to provide structure, every ingredient must be chosen and incorporated carefully to ensure the final result has the right richness, moisture, and fluffiness. The goal is to create a balanced batter where each ingredient plays its part in delivering a dense, fudgy texture while maintaining the silky smoothness that makes this dessert so irresistible. Let’s take a closer look at the key ingredients involved and how to combine them for a perfectly balanced no-flour cake.
Key Ingredients for a Flourless Chocolate Cake
Before diving into the process of combining the ingredients, it’s important to understand the key components that make up a flourless chocolate cake:
- Dark Chocolate: The main flavoring and textural ingredient, dark chocolate provides the rich cocoa flavor and smooth texture that flourless cakes are known for.
- Butter: Adds moisture and richness, helping the cake maintain its dense, fudgy consistency.
- Eggs: These help provide structure and moisture while contributing to the lightness and fluffiness of the cake.
- Sugar: A crucial sweetener that also helps create the ideal texture when whisked with eggs.
- Vanilla Extract (Optional): Adds a subtle depth of flavor to complement the chocolate.
- Coffee or Salt (Optional): A pinch of coffee or salt can enhance the chocolate flavor and add complexity to the cake.
Step-by-Step Process of Combining Ingredients
When making a flourless chocolate cake, the order in which ingredients are combined is just as important as the ingredients themselves. Here’s a detailed step-by-step guide for the best combination process:
1. Melt the Chocolate and Butter Together
Start by melting the dark chocolate and butter together. This step is crucial because it allows the chocolate to melt into the butter, creating a smooth and velvety base for the cake.
- Method: Melt the chocolate and butter in a heatproof bowl over a double boiler or in short bursts in the microwave. Stir the mixture occasionally to ensure it melts evenly and becomes smooth.
- Tip: Make sure the mixture is cool but not cold before proceeding to the next step. This will prevent scrambling the eggs when they are added to the chocolate mixture.
2. Whisk the Eggs and Sugar Together
While the chocolate and butter are melting, whisk the eggs and sugar together in a separate bowl. This process will create a frothy, pale mixture that is critical for giving the cake a slight lift while maintaining its dense texture.
- Tip: Whisk the eggs and sugar until they form a ribbon stage. This ensures that enough air is incorporated, giving the cake a slight rise while keeping the desired fudgy consistency.
3. Combine the Chocolate and Egg Mixtures
Once both the chocolate-butter mixture and the egg-sugar mixture are ready, it’s time to combine them. Pour the melted chocolate into the egg mixture slowly while gently stirring.
- Tip: Stir carefully and gradually to prevent the eggs from curdling. Stir until the mixture is smooth and uniform.
- Why It’s Important: This step ensures the chocolate is evenly distributed throughout the batter, giving the cake its rich, velvety texture and deep flavor.
4. Add Optional Ingredients (Vanilla, Coffee, and Salt)
At this stage, you can choose to add optional flavor boosters like vanilla extract, coffee, or a pinch of salt. These ingredients serve to enhance the chocolate flavor and bring out subtle undertones in the cake.
- Vanilla Extract: Adds a warm, aromatic depth that complements the chocolate flavor without overpowering it.
- Coffee: A small amount of brewed coffee or instant coffee powder can enhance the chocolate flavor, making it more complex and intense.
- Salt: A pinch of salt helps to balance the sweetness of the cake and accentuates the chocolate flavor, making it even more indulgent.
5. Carefully Fold in the Mixture
Once all the ingredients have been combined, it’s time to fold them together gently. Use a spatula to fold the batter rather than stirring it aggressively.
- Why Folding?: Folding ensures that the air incorporated during the whisking process isn’t deflated, which would result in a denser and less fluffy cake. This method will help keep the batter light and smooth without losing its texture.
- Tip: Be sure not to overwork the batter, as this can make the cake dense in a negative way. Just fold until you see no streaks of chocolate or egg mixture.
Achieving the Perfect Texture
The key to a successful flourless chocolate cake lies in maintaining the balance between moisture, richness, and structure. Here’s how combining the ingredients helps achieve this balance:
- Rich Chocolate Flavor: The combination of melted chocolate and butter creates a silky base that gives the cake its deep, intense chocolate flavor.
- Eggs for Structure: Whisking eggs and sugar adds lightness to the cake, while the eggs act as a binder, holding the ingredients together and ensuring the cake doesn’t fall apart.
- Sugar for Sweetness and Texture: The sugar not only provides sweetness but also helps in stabilizing the egg mixture, contributing to the overall texture.
- Optional Flavor Enhancers: Vanilla, coffee, and salt add subtle layers of flavor that enhance the richness of the chocolate, making the cake even more decadent.
Why the Order Matters
In a flourless chocolate cake, the order of combining ingredients is vital for achieving the right consistency and texture. Each ingredient must be incorporated at the right time and in the right manner to ensure that the batter is smooth, uniform, and free of lumps. Mixing the chocolate and butter first allows for the chocolate to melt perfectly and blend seamlessly with the eggs and sugar. Adding the egg mixture to the chocolate base creates a uniform batter that maintains the right amount of richness and fluffiness.
Final Thoughts on Combining Ingredients
When making a flourless chocolate cake, every step of combining the ingredients is essential to creating the perfect balance of flavors and textures. From the careful melting of the chocolate and butter to the gentle folding of the batter, each step contributes to the decadent and fudgy nature of the cake. The result is a perfectly balanced cake that is both rich and light, delivering the ultimate chocolate experience with every bite. 🍫
Baking at the Right Temperature for a Moist and Fudgy Finish
Achieving the perfect texture for a flourless chocolate cake requires more than just the right ingredients and technique—it also depends on baking at the right temperature. The temperature at which you bake your cake plays a crucial role in determining whether it turns out moist and fudgy or dry and crumbly. Since this cake is made without flour, there’s a fine balance between ensuring the center is set and that the texture remains rich and fudgy. Let’s dive deeper into why baking at the right temperature is key to a perfectly moist and fudgy flourless chocolate cake.
The Ideal Temperature: 350°F (175°C)
When it comes to baking a flourless chocolate cake, most recipes recommend a baking temperature of 350°F (175°C). This temperature is considered the sweet spot for several reasons:
- Even Heat Distribution: At 350°F, the cake bakes evenly throughout, ensuring that the outer edges don’t become overcooked while the center remains undercooked. This temperature allows for a uniform texture across the cake.
- Gentle Rise: Since there’s no flour to provide structure, the eggs and sugar work together to give the cake just a slight rise. Baking at 350°F ensures that the eggs don’t set too quickly and lock in air bubbles, helping to maintain the fudgy consistency throughout the cake.
- Crisp Outer Layer: The higher temperature helps form a delicate crust on the outside of the cake while allowing the interior to remain soft and moist. The result is a cake with a contrast between the chewy exterior and the gooey, rich interior.
The Importance of Oven Preheating
Preheating your oven to the correct temperature is essential for even baking. If you place the batter into an oven that hasn’t yet reached the desired temperature, the cake may bake unevenly, resulting in a texture that’s too dense or overly dry. Preheating ensures that the cake starts baking immediately upon entering the oven, creating the right environment for the eggs and chocolate to set and the moisture to be sealed inside.
Baking Time: Check for Doneness with Precision
Baking a flourless chocolate cake at the right temperature is only half of the equation; the baking time is just as important. While the cake bakes, it will gradually firm up on the outside, but the center should remain slightly soft and gooey. The cake should be done when the edges are set, and a slight wobble remains in the center.
Typically, baking time ranges from 20 to 30 minutes, depending on your oven and the exact size of the pan. A few ways to check for doneness include:
- Toothpick Test: Insert a toothpick or skewer into the center of the cake. If it comes out with a few moist crumbs (not wet batter), it’s ready.
- Gentle Shake: Gently shake the cake pan. The center should wobble slightly, indicating that it’s still moist inside but fully set around the edges.
- Oven Light and Window: If your oven has a light or a window, use it to observe the cake. As it bakes, it will rise slightly and form a thin crust on the edges. The center should remain somewhat soft but not runny.
Why Overbaking is a Big No-No
Flourless chocolate cakes have a delicate balance between moistness and structure, and overbaking is one of the most common mistakes. If you bake the cake for too long, it will lose its signature fudgy texture and become dry and dense, lacking the smooth, gooey center that makes this dessert so special.
When the cake is done, immediately remove it from the oven to prevent further cooking. The residual heat in the pan will continue to cook the cake slightly, so don’t leave it in the oven longer than necessary.
The Role of Resting After Baking
Once your cake is done baking, let it cool in the pan for a few minutes before transferring it to a wire rack. Cooling the cake slowly helps preserve its moisture and prevents it from shrinking too much as it cools down.
Some bakers suggest letting the cake rest in the pan for about 30 minutes before removing it. This allows the cake to firm up slightly and helps it retain its rich, fudgy texture. If you prefer a denser, fudgier texture, you can also chill the cake in the fridge for a few hours or overnight. This makes the texture even denser and more solid, and it’s perfect for serving as a decadent chilled treat.
Baking Tips for the Perfect Flourless Chocolate Cake
- Avoid opening the oven door during the first 15 minutes of baking to maintain the consistent temperature inside. Sudden temperature changes can affect the cake’s rise and texture.
- Use the right baking pan: A round 8- or 9-inch pan works best, as it helps the cake bake evenly. Lining the pan with parchment paper ensures easy removal and prevents sticking.
- Don’t rush the cooling process: After baking, allow the cake to cool properly, as this step contributes to the moist and fudgy finish.
Conclusion: Baking for a Perfect Flourless Chocolate Cake
Baking at the right temperature is key to making a flourless chocolate cake with the perfect texture. At 350°F (175°C), the cake bakes evenly, creating a rich, moist interior and a slightly crisp exterior. Remember to monitor the baking time carefully and check for doneness to avoid overbaking. With careful attention to these details, you’ll enjoy a deliciously fudgy cake that’s perfect for any occasion.
Pro Tips for the Ultimate Flourless Chocolate Cake Success
Choosing High-Quality Chocolate for the Best No-Flour Dessert
When it comes to making a flourless chocolate cake, one of the most important decisions you’ll make is selecting the right chocolate. Since chocolate is the dominant ingredient in this dessert, the quality of the chocolate will directly impact the flavor, texture, and overall success of your cake. Choosing high-quality chocolate ensures that your cake has a rich, deep flavor and a smooth, velvety texture, making it the standout feature of your dessert.
Let’s dive into the key factors to consider when selecting the best chocolate for your flourless chocolate cake and why it’s worth investing in premium ingredients.
The Role of Chocolate in a Flourless Cake
Chocolate serves as both the primary flavor base and the main structural ingredient in a flourless chocolate cake. Without flour, chocolate provides the dense, fudgy texture that defines this dessert. The fat content in chocolate helps maintain moisture, while the cocoa solids impart the deep, intense chocolate flavor. The quality of the chocolate determines how these components come together in the final cake.
In addition to flavor, the texture of the chocolate plays a role in the final consistency of the cake. High-quality chocolate melts smoothly and blends effortlessly with the other ingredients, creating a silky-smooth batter. Lower-quality chocolate, on the other hand, may result in a more grainy or uneven texture, which can compromise the cake’s rich consistency.
Choosing High-Quality Chocolate for the Best No-Flour Dessert
When making a flourless chocolate cake, the quality of the chocolate is crucial. It’s the main ingredient, and it affects both flavor and texture. Using high-quality chocolate ensures a cake that is rich, fudgy, and smooth. The right chocolate makes all the difference in creating a dessert that stands out.
The Role of Chocolate in a Flourless Cake
Chocolate gives the cake its flavor and texture. It provides the dense, fudgy texture that defines a flourless cake. The fat content in chocolate helps keep the cake moist, while the cocoa solids bring out the deep, intense chocolate flavor. The better the chocolate, the better the cake.
Choosing the Right Type of Chocolate: Dark Chocolate vs. Semi-Sweet
The type of chocolate you use makes a big impact on the final result. Here are the best options:
Dark Chocolate (70% or Higher)
- Rich Flavor: Dark chocolate with at least 70% cocoa gives the cake a deep, intense flavor. It balances sweetness well and enhances the cake’s richness.
- Smooth Melting: Higher cocoa content allows for smoother melting, creating a silky-smooth batter.
Semi-Sweet Chocolate
- Milder Flavor: Semi-sweet chocolate is a little sweeter than dark chocolate. It’s perfect for those who like a more approachable chocolate taste.
- Easy to Use: It melts well and works seamlessly with other ingredients for a soft, moist texture.
Milk Chocolate
- Less Ideal for Flourless Cake: Milk chocolate tends to be too sweet and lacks the depth of dark chocolate. It’s best used in small amounts or blended with dark chocolate.
Consider Cocoa Butter Content
Cocoa butter plays a key role in chocolate. It gives the cake its smooth texture. High-quality chocolate has more cocoa butter, making the cake moist and rich. Low-quality chocolate may result in a greasy or dry texture, so choose chocolate with a higher cocoa butter content for the best results.
Check for Purity: Avoid Additives
Always choose pure chocolate without fillers. Many low-quality chocolates contain hydrogenated oils or artificial flavors, which can negatively affect the texture and flavor of your cake. Pure chocolate with only cocoa beans, cocoa butter, and sugar ensures the best possible outcome.
Popular Chocolate Brands for Flourless Cakes
Some chocolate brands are known for their high quality. Here are a few to consider:
- Lindt: Offers rich dark chocolate with smooth texture, ideal for flourless cakes.
- Valrhona: A French brand known for luxury chocolate with complex flavors.
- Ghirardelli: A reliable choice with a balance of sweetness and rich cocoa flavor.
- Callebaut: Known for high cocoa butter content, which creates a moist, fudgy cake.
Why High-Quality Chocolate Makes a Difference
Using quality chocolate has several advantages:
- Enhanced Flavor: Premium chocolate gives the cake a more complex, deep flavor. Lower-quality chocolate may taste flat.
- Smoother Texture: High-quality chocolate melts smoothly, ensuring a creamy batter.
- Consistent Results: Quality chocolate delivers reliable results every time.
Conclusion: Invest in Quality Chocolate for the Best Results
For the best flourless chocolate cake, invest in high-quality chocolate. It makes a big difference in flavor and texture. Dark chocolate with a high cocoa content and minimal additives is the best choice. Using premium chocolate results in a rich, smooth cake that will impress every time you bake.
Avoid Overbaking – Keep Your Gluten-Free Cake Moist and Soft
One of the most important steps in making a flourless chocolate cake is getting the baking time just right. Overbaking can turn your cake from a deliciously moist and fudgy dessert into a dry, crumbly mess. Since flourless chocolate cake relies on the natural richness of the chocolate and eggs to provide structure, it’s crucial to avoid baking it for too long. Here’s how you can keep your gluten-free cake moist and soft, with the perfect texture:
The Importance of Moisture in Flourless Cakes
Flourless chocolate cake is known for its dense, fudgy texture. This is largely due to the moisture retained during baking. The eggs and chocolate work together to create a smooth batter that forms a soft, almost brownie-like consistency when baked. If you overbake the cake, the moisture will evaporate, leaving the cake dry and tough. This is especially important for a gluten-free cake, where the structure and texture are more reliant on the balance of ingredients than on gluten to hold everything together.
Signs of Overbaking
To avoid overbaking, you need to watch for key signs that your cake is done:
- Soft Center: When you insert a toothpick or cake tester, it should come out with a few moist crumbs clinging to it, but not wet batter. The center should be slightly soft but not liquid. If the tester comes out clean, it’s likely that the cake has been overbaked.
- Gentle Jiggle: A perfectly baked flourless chocolate cake will have a subtle jiggle in the center when you gently shake the pan. This jiggle indicates that the cake is still moist and hasn’t dried out.
- Edges Pulling Away: The edges of the cake will begin to pull away from the sides of the pan when it’s close to done. However, the center should still appear slightly underbaked when viewed from above.
Use the Right Oven Temperature
Baking at the right temperature is key to ensuring that your cake doesn’t overbake. Flourless chocolate cakes typically bake at a lower temperature than regular cakes—around 325°F (163°C). This lower temperature allows the cake to cook evenly without the risk of the edges drying out while the center remains raw.
For gluten-free cakes, this is particularly important because a high temperature can cause the cake to dry out more quickly. Always preheat your oven fully to maintain consistent heat throughout the baking process.
Monitor Baking Time Closely
Flourless chocolate cakes usually bake anywhere between 20 to 30 minutes, depending on the size and thickness of the cake. However, baking times can vary, so it’s essential to start checking around the 20-minute mark. The edges should be set, but the center will still look soft. This is the perfect time to take it out of the oven.
You can also use a toothpick test to check the doneness. Insert a toothpick into the center of the cake. If it comes out with a few moist crumbs attached, it’s time to take it out. If it comes out with wet batter, the cake needs a little more time. However, be careful not to leave it too long in the oven.
Let the Cake Cool Properly
After taking the cake out of the oven, let it cool slowly at room temperature. Avoid cutting it too soon, as the cake will continue to set as it cools. Letting it rest for about 15-20 minutes will allow the flavors to develop further and will also help maintain its moist and soft texture.
Resting and Serving
It’s important to note that flourless chocolate cakes can have a slightly gooey center when freshly baked. This is perfectly normal and part of what makes the cake so delicious. If you prefer a firmer texture, you can refrigerate the cake for a few hours, or even overnight. This will help the cake set and become easier to slice, while still maintaining its rich, moist quality.
When serving, remember that a slightly underbaked cake often results in a richer and more intense chocolate flavor, so don’t be afraid of a little gooeyness in the center.
Conclusion: The Key to a Perfect Flourless Cake
By avoiding overbaking, you ensure that your gluten-free flourless chocolate cake stays moist, fudgy, and soft. Monitor the baking time carefully, check for a soft center, and use the correct oven temperature to avoid drying out your cake. With these tips, you’ll be able to make a perfectly moist, rich, and decadent flourless chocolate cake every time.
How to Achieve a Smooth and Crack-Free Cake Surface
One of the hallmarks of a flourless chocolate cake is its beautiful, smooth surface. The perfect cake should have a glossy, crack-free top that looks as luxurious as it tastes. Achieving this flawless finish can be tricky, but with the right techniques and attention to detail, you can bake a cake with a smooth, even surface every time. Here’s how to ensure that your gluten-free chocolate cake turns out beautifully:
1. Proper Mixing of Ingredients
A smooth, crack-free surface often starts with the mixing process. Overmixing or undermixing the batter can affect the texture and cause cracks during baking. Here’s how to mix the ingredients properly:
- Melt the chocolate and butter thoroughly: Make sure your chocolate and butter mixture is completely melted and smooth before adding it to the egg and sugar mixture. If the chocolate isn’t fully melted, it can create uneven pockets that may cause cracks while baking.
- Gently fold the ingredients: Once you combine the wet and dry ingredients, use a folding motion to mix them. This will help incorporate air without overworking the batter, which can lead to cracks or a dense texture.
2. Use a Water Bath (Bain-Marie)
One of the most effective ways to avoid cracks is by using a water bath. A water bath involves placing the cake pan into a larger pan filled with water. This method ensures even heat distribution around the cake, preventing the edges from cooking too quickly and causing cracking.
Here’s how to do it:
- Wrap the pan in foil: Before placing your cake pan in the water, make sure to wrap the outside of the pan in aluminum foil to prevent any water from seeping into the cake.
- Fill the outer pan with hot water: Add hot water (about halfway up the sides of the cake pan) to the larger pan and bake as usual. The steam from the water helps to maintain a gentle, even temperature around the cake, ensuring that it bakes uniformly and prevents cracks from forming on the surface.
3. Monitor Oven Temperature Carefully
Baking your flourless chocolate cake at the right temperature is crucial for preventing cracks. Too high of a temperature will cause the cake to rise too quickly, then collapse and crack as it cools. Here’s how to keep the oven at the right temperature:
- Preheat the oven: Make sure your oven is fully preheated to around 325°F (163°C) before placing your cake in. This will allow the cake to cook evenly from the start.
- Avoid opening the oven door: Opening the oven door during the baking process can cause sudden temperature fluctuations, which may result in cracks. Keep the door closed, and only check on the cake once the baking time has passed.
- Use an oven thermometer: Oven temperatures can often be inaccurate, so using an oven thermometer will ensure the temperature stays consistent throughout the baking process.
4. Bake Until Just Set
Flourless chocolate cakes are particularly delicate because of their high moisture content. Overbaking causes the cake to dry out and crack, while underbaking can result in a sunken top. To get a smooth and even surface:
- Check for doneness: Test the cake by gently shaking the pan. The edges should be set, while the center should still have a slight jiggle. Use a toothpick or cake tester to check; it should come out with a few moist crumbs attached, not wet batter.
- Err on the side of underbaking: Flourless cakes often continue to cook a bit after being removed from the oven. It’s better to err on the side of slightly underbaking, as this ensures a soft, smooth texture that doesn’t crack once it cools.
5. Cool the Cake Gradually
A common cause of cracks in flourless chocolate cakes is cooling them too quickly. Sudden temperature changes cause the cake to contract, leading to cracks on the surface. Here’s how to avoid this:
- Turn off the oven and let the cake cool: Once the cake is done, turn off the oven and leave the door slightly ajar for about 10 minutes. This gradual cooling step allows the cake to adjust to room temperature without experiencing shock.
- Cool at room temperature: After the initial cooling in the oven, transfer the cake to a wire rack to cool completely at room temperature. Avoid placing it in the fridge right away, as this can cause the surface to crack.
6. Use a Thin Layer of Ganache for a Polished Finish
If your cake does develop cracks or imperfections, a thin layer of chocolate ganache can smooth over the surface and hide any flaws. Not only does ganache add an extra layer of chocolate richness, but it also enhances the glossy finish of your cake.
Here’s how to do it:
- Make a simple ganache: Heat heavy cream until it’s just simmering, then pour it over finely chopped chocolate. Stir until smooth and allow it to cool slightly before spreading it over the top of the cake.
- Even out the ganache: Once the ganache is spread over the top, use a spatula to smooth it out evenly, covering any imperfections or cracks. This will leave you with a flawless, shiny surface.
Conclusion: Perfecting the Surface of Your Cake
Achieving a smooth, crack-free surface for your flourless chocolate cake requires attention to detail and a few key techniques. Using a water bath, baking at the right temperature, and letting the cake cool gradually will all help to prevent cracks. If you do find some imperfections, a thin layer of ganache can cover up any mistakes and leave your cake looking perfectly polished. With these tips, you’ll be able to create a visually stunning and deliciously smooth flourless chocolate cake every time.
Why Letting the Cake Cool Enhances Its Fudgy Texture
When making a flourless chocolate cake, patience is key—especially when it comes to cooling. While it might be tempting to cut into the cake immediately after it’s removed from the oven, letting it cool for a while is crucial for enhancing its texture, flavor, and overall quality. Cooling the cake allows the structure to set, while also creating the fudgy texture that makes flourless chocolate cake so indulgent. Here’s why this cooling process is essential to achieving that perfect, rich texture:
1. The Role of Chocolate and Butter in Texture
A flourless chocolate cake relies heavily on the fat content from the chocolate and butter to create its smooth, fudgy texture. When you bake the cake, the batter is warm and soft, with the fat melting into a silky liquid. Allowing the cake to cool gradually enables these fats to solidify, helping the cake form its dense, moist, and fudgy texture. If you cut into the cake too early, it may seem overly soft and runny, as the fats haven’t fully set.
- Chocolate and butter solidify: As the cake cools, the butter and chocolate solidify, giving the cake a dense, rich feel that’s characteristic of a flourless chocolate cake. This setting process ensures that the cake firms up enough to hold its shape while maintaining that moist, fudgy consistency.
2. The Cooling Process Helps the Cake Set
When a flourless cake comes out of the oven, it’s still in a delicate state. It may seem a bit wobbly in the middle, and this is entirely normal. The cooling period allows the ingredients to settle and solidify, which gives the cake its final structure and texture.
- Gradual cooling allows proper setting: As the cake cools, the egg proteins and sugar that were incorporated during mixing have time to firm up, creating the cake’s characteristic dense, but tender texture. This step is what turns your cake from a messy, gooey batter into a structured, fudgy dessert that can be sliced cleanly.
3. The Magic of the Resting Time for Enhanced Flavor
Cooling also impacts the cake’s flavor. When freshly baked, the flavors might be overwhelming due to the heat, but as the cake cools, the taste profile develops more depth and richness. Allowing the cake to rest gives the ingredients time to settle into their full flavor potential, and the chocolate intensifies.
- Flavors intensify as it cools: The cake becomes more flavorful as it rests. The chocolate taste deepens, and the sweetness becomes more balanced, making every bite more enjoyable. This period of cooling also allows the residual heat to distribute throughout the cake, ensuring the flavors meld together into a harmonious experience.
4. Preventing a Runny Cake
If you cut into the cake immediately after it’s removed from the oven, you may find that it’s too soft or runny, especially in the center. Letting the cake cool helps it maintain a more structured consistency, making it easier to cut into neat, perfect slices.
- Cooling helps it firm up: The cooling process helps the cake retain its shape as it firms up. Without this crucial step, the cake may collapse or be too liquid-like, which can lead to a messy presentation. Cooling is essential for achieving that rich, fudgy bite that makes flourless chocolate cake so decadent.
5. The Right Cooling Time for the Best Texture
The ideal cooling time for a flourless chocolate cake is around 20 to 30 minutes at room temperature. After that, you can refrigerate the cake for an even firmer texture. However, it’s important not to rush the cooling process or place the cake in the fridge while it’s still too hot. Doing so could cause the cake to become overly firm or dense, which is a different texture than what you’re aiming for.
- Room temperature cooling: Allow the cake to cool for 20–30 minutes at room temperature, and then place it in the refrigerator if you prefer a firmer texture. For a more melt-in-your-mouth experience, refrigerating it overnight will give the cake time to fully set and deepen its fudgy consistency.
6. Cooling Allows for Easier Slicing
Another practical reason for letting the cake cool is that it makes slicing much easier. Flourless chocolate cakes can be delicate, and slicing into them too soon can result in messy, uneven pieces. By allowing the cake to cool, the texture will firm up just enough to make clean cuts, which helps preserve its smooth, fudgy texture.
- Prevent crumbling: If the cake is cut too soon, it’s likely to crumble. The cooling period helps ensure the cake holds together properly, giving you perfect slices that highlight its smooth, fudgy texture.
Conclusion: The Key to a Perfectly Fudgy Flourless Chocolate Cake
Letting your flourless chocolate cake cool is more than just a waiting game—it’s an essential part of achieving that perfect fudgy texture. Cooling allows the fat to set, the flavors to develop, and the cake to maintain its dense and moist consistency. By giving your cake time to cool, you ensure that every bite is rich, indulgent, and exactly what you want in a flourless chocolate dessert.
Best Ways to Serve and Enjoy Your Flourless Chocolate Cake
Topping Ideas: Powdered Sugar, Ganache, or Whipped Cream
One of the best things about making a flourless chocolate cake is that it’s already incredibly rich and decadent, but the right topping can take it to a whole new level. While the cake itself is the star, a thoughtful garnish or topping can enhance the visual appeal and elevate the flavor profile. Whether you prefer something simple or more luxurious, there are several ways to dress up your gluten-free chocolate cake. Let’s explore some of the most popular and delicious topping ideas that complement the deep, fudgy texture of your cake.
1. Powdered Sugar: The Classic and Elegant Touch
One of the simplest and most elegant ways to top your flourless chocolate cake is with a dusting of powdered sugar. This classic option adds a touch of sweetness without overpowering the rich chocolate flavor. It’s the perfect choice for when you want something quick and easy but still impressive.
- Light and airy sweetness: Powdered sugar offers a light, melt-in-your-mouth sweetness that balances the intense chocolate flavor of the cake. It doesn’t overpower the cake’s richness, making it the ideal topping for those who prefer a more subtle sweetness.
- Easy and mess-free: Dusting powdered sugar is a quick and simple process. You don’t need any special tools—just a fine mesh strainer or sifter, and you can easily achieve a beautiful, delicate layer over the cake.
- Decorative elegance: A light dusting of powdered sugar can create a sophisticated, minimalist look. It’s perfect for special occasions or when you want the cake to speak for itself while still looking visually appealing. You can even stencil patterns on top for added flair.
2. Chocolate Ganache: Decadent and Rich
For those who crave an even richer dessert, topping your flourless chocolate cake with a glossy layer of chocolate ganache is the way to go. This decadent topping is made from melted chocolate and cream, and it adds a luxurious, velvety layer that enhances the cake’s fudgy texture.
- Extra chocolate indulgence: Chocolate ganache takes the chocolate flavor to the next level, deepening its richness. It adds a silky smooth layer to the top of the cake that complements its already intense chocolate taste. You can make the ganache thicker for a more pronounced layer or thinner for a glossy finish.
- Shiny, polished finish: Ganache not only adds flavor but also gives your cake a beautiful, shiny finish that catches the light, making it look even more indulgent and professional. A smooth layer of ganache can elevate the visual appeal, making it look like a dessert from a high-end bakery.
- Optional flavoring: You can also enhance your ganache by adding a splash of vanilla extract, a pinch of sea salt, or even a shot of coffee to intensify the flavor further. Ganache is versatile, and it can be customized to suit your taste.
3. Whipped Cream: Light and Fluffy Contrast
If you want a lighter topping to balance the dense and fudgy texture of your flourless chocolate cake, whipped cream is a fantastic option. The airy, fluffy texture of freshly whipped cream contrasts beautifully with the rich cake, creating a perfect balance of flavors and textures.
- Lightens the richness: Whipped cream is not as sweet or dense as other toppings, so it won’t compete with the chocolate cake’s intense flavor. It adds a lightness to each bite, helping to balance out the richness of the cake while still complementing its flavors.
- Perfect texture contrast: The smooth, creamy texture of whipped cream provides a delightful contrast to the dense fudginess of the flourless cake. This pairing adds complexity and depth to the overall eating experience.
- Customization options: You can add a touch of vanilla, a spoonful of sugar, or even a drizzle of chocolate sauce to your whipped cream for extra flavor. For an elevated touch, consider using flavored whipped cream like cinnamon or orange zest to give your cake a unique twist.
4. Fruit Toppings: Fresh Berries or Citrus for a Bright Touch
If you want to add a pop of color and freshness to your flourless chocolate cake, consider topping it with fresh fruit like berries or citrus slices. The natural tartness of the fruit balances the cake’s sweetness and provides a refreshing contrast to the richness of the chocolate.
- Berries: Fresh raspberries, strawberries, or blackberries are particularly popular choices. Their bright, tangy flavors offer a refreshing contrast to the dense, fudgy chocolate cake. The vibrant red and purple hues also add a beautiful visual element to the dessert.
- Citrus: Orange or lemon slices can add a zesty, aromatic layer that pairs wonderfully with chocolate. You can also zest some citrus over the top for an added burst of flavor.
- Fruit compote: For a more sophisticated topping, you can make a fruit compote using berries, sugar, and a splash of lemon juice. This thick, sweetened fruit mixture can be drizzled over the cake for extra sweetness and visual appeal.
5. Nuts and Crunchy Toppings: Adding Texture
If you enjoy a bit of texture contrast with your dessert, consider topping your flourless chocolate cake with crushed nuts or other crunchy elements. Nuts like almonds, hazelnuts, or pistachios pair beautifully with chocolate and provide a delightful crunch.
- Toasted nuts: Lightly toasting your nuts before sprinkling them on top of the cake will enhance their flavor and provide an extra layer of depth. Toasted hazelnuts or almonds give a lovely nutty flavor that complements the chocolate without overwhelming it.
- Chocolate shavings or curls: Another option for adding texture is to top the cake with finely shaved or curled chocolate. This adds an extra touch of elegance and creates a beautiful visual contrast against the smooth cake surface.
6. A Sprinkle of Sea Salt: Balancing Sweetness and Richness
If you enjoy the combination of sweet and salty, adding a light sprinkle of sea salt can work wonders with your flourless chocolate cake. A few flakes of flaky sea salt on top of the cake add complexity and help balance out the cake’s sweetness, enhancing its overall flavor.
- Flavor balance: Sea salt helps to elevate the natural flavors of the chocolate and provides a delicious contrast to the richness of the cake. The salt doesn’t overpower the dessert, but instead enhances the chocolate’s taste and brings out its full depth.
- Visual appeal: Sea salt also adds a delicate, sparkling effect to the cake, making it look even more tempting and luxurious.
Conclusion: Toppings That Take Your Cake to the Next Level
Whether you opt for a simple dusting of powdered sugar, a decadent layer of ganache, or a light and airy topping of whipped cream, the right garnish can elevate your flourless chocolate cake from delicious to unforgettable. Each topping offers a different way to enhance the flavor and texture of the cake, allowing you to customize your dessert to suit your preferences. Add some fresh fruit, a sprinkle of sea salt, or even a handful of crushed nuts for extra flair and texture. The possibilities are endless, and each option will bring out the best in your cake!
Pairing Your Gluten-Free Chocolate Cake with Fresh Berries
Pairing flourless chocolate cake with fresh berries elevates the dessert. The tangy, juicy berries contrast the rich, fudgy texture of the cake. This combo balances the sweetness and creates a vibrant, flavorful treat.
1. The Contrast of Sweetness and Tartness
Berries like raspberries, strawberries, blueberries, and blackberries add a sharp, tangy note. Their tartness cuts through the cake’s rich chocolate flavor. The sweetness of strawberries complements the cake, while the tanginess of raspberries or blackberries balances the dessert.
- Balancing richness: The tart berries balance the sweetness of the cake. This prevents the cake from feeling overly heavy.
- Flavor enhancement: The tart berries bring out the chocolate’s depth, making each bite even more satisfying.
2. Visual Appeal: A Pop of Color
Berries also brighten up your gluten-free chocolate cake. The vibrant reds, purples, and blues of the berries contrast beautifully with the dark chocolate cake. The colorful combination adds visual appeal and makes the dessert feel more festive.
- Perfect for celebrations: The bright berries make this pairing perfect for special occasions. It adds a fun and festive touch.
- Customizable: You can choose berries depending on the season. For example, summer berries are refreshing, while winter berries like cranberries add a holiday feel.
3. Berries as a Light, Refreshing Contrast
While the flourless chocolate cake is rich and fudgy, the berries are light and juicy. This creates a refreshing contrast. The berries cleanse your palate between bites, making the dessert feel less heavy.
- Cleansing effect: The fresh berries cleanse your palate and make it easier to enjoy more cake.
- Balanced texture: The juicy berries contrast with the cake’s dense texture, creating variety in each bite.
4. Pairing Suggestions: Create the Perfect Combo
To get the most from this pairing, try these ideas:
- Berry compote: Simmer your berries with sugar and lemon juice to make a compote. This sauce adds extra flavor and moisture to the cake.
- Fresh berry medley: Mix different berries, like raspberries, blackberries, and strawberries. This adds complexity to both the flavor and appearance.
- Berry whipped cream: Mix fresh berries into whipped cream. The creamy texture combined with the berries adds luxury to each bite.
5. Adding a Touch of Zest for Extra Flavor
To enhance the berries and chocolate, add lemon or orange zest. The citrus notes bring brightness to the dessert.
- Lemon zest: The bright lemon zest pairs well with tart berries and chocolate, giving a clean, refreshing finish.
- Orange zest: Orange zest offers a subtle citrus flavor that complements sweeter berries like strawberries.
Conclusion: A Perfectly Balanced Dessert Experience
Fresh berries balance the rich flavor of flourless chocolate cake. They add color, texture, and a refreshing contrast that enhances the dessert. Whether fresh, in a compote, or mixed into whipped cream, berries create a delightful pairing that will impress your guests.
Serving Suggestions: Ice Cream, Coffee, or a Drizzle of Caramel
When it comes to serving your flourless chocolate cake, the possibilities are endless. Elevating the cake with the right accompaniments not only enhances its flavor but also creates a memorable dessert experience. Whether you’re looking for something creamy, rich, or simply a bit more indulgent, here are a few fantastic serving suggestions to take your gluten-free chocolate cake to the next level.
1. A Scoop of Ice Cream – The Ultimate Comfort Pairing
Ice cream is a classic dessert companion, and it pairs beautifully with the dense, fudgy texture of flourless chocolate cake. The cold, creamy texture of ice cream contrasts perfectly with the rich, warm cake, providing a luxurious mouthfeel that is irresistibly comforting. Plus, the flavors of ice cream can complement or enhance the chocolate flavor in the cake.
- Vanilla ice cream: The simple, creamy sweetness of vanilla ice cream is a great choice for chocolate cake. It allows the rich flavor of the cake to shine while adding a creamy balance.
- Chocolate or mocha ice cream: For the ultimate chocolate experience, pair the cake with chocolate or mocha ice cream. This creates a decadent dessert that’s perfect for true chocolate lovers.
- Fruit-flavored ice cream: If you’re pairing your cake with fresh berries, consider serving it with fruit-flavored ice cream like raspberry or strawberry. The fruity ice cream will complement the berries, adding a fresh twist to the dessert.
2. Coffee – A Rich and Bold Companion
Coffee is another perfect accompaniment to flourless chocolate cake, especially for those who enjoy a slightly bitter contrast to the sweet richness of the cake. The boldness of coffee enhances the deep chocolate flavor and gives the dessert an extra layer of sophistication. It’s an ideal pairing for both casual gatherings and after-dinner indulgence.
- Espresso: For a strong, rich contrast, serve your cake with a shot of espresso. The intensity of espresso will bring out the cake’s chocolate flavor while balancing its sweetness.
- Americano or black coffee: A more mellow option like Americano or black coffee works well, especially for those who prefer a less intense coffee experience. The coffee’s slight bitterness cuts through the cake’s richness without overwhelming it.
- Iced coffee: If you’re serving the cake in warmer months, consider pairing it with iced coffee for a refreshing, chilled contrast. The coolness of iced coffee complements the dense warmth of the cake perfectly.
3. Drizzle of Caramel – Sweet and Salty Perfection
A drizzle of caramel on top of your flourless chocolate cake adds a luscious sweetness that perfectly complements the deep chocolate flavor. The smooth, golden syrup brings a touch of richness and depth, while the slight saltiness of salted caramel enhances the cake’s flavor in a subtle yet delightful way.
- Classic caramel: A traditional caramel drizzle adds a buttery sweetness that melts perfectly into each bite of the cake. It creates a decadent finish that elevates the dessert without overpowering the chocolate flavor.
- Salted caramel: If you’re looking for something with a little extra complexity, try salted caramel. The balance of sweet and salty flavors brings out the chocolate’s richness, making each bite feel more indulgent.
- Caramel sauce: You can also serve the cake with a side of warm caramel sauce for dipping. This allows each guest to control how much they want to add, making it a more interactive and customizable dessert experience.
4. Garnishes for Extra Flavor and Elegance
For an even more refined presentation, consider adding a few elegant garnishes. Fresh mint leaves, a dusting of cocoa powder, or even some chopped nuts like toasted almonds or hazelnuts can add texture, color, and flavor. These simple touches make your flourless chocolate cake feel even more special and help it stand out on the dessert table.
- Mint leaves: Fresh mint not only adds a pop of green but also offers a cool, refreshing contrast to the cake’s rich chocolate flavor.
- Cocoa powder or chocolate shavings: A light dusting of cocoa powder or some delicate chocolate shavings can enhance the cake’s visual appeal and intensify its chocolate flavor.
- Nuts: Lightly toasted nuts like hazelnuts or almonds add a crunchy texture that contrasts beautifully with the soft, fudgy cake. The nuts’ mild flavor complements the chocolate without taking away from its richness.
5. Pairing with Wine or Dessert Liquor
For an elevated dessert experience, pairing your flourless chocolate cake with a glass of dessert wine or liquor can add a touch of sophistication. Sweet, fortified wines or liqueurs with chocolate undertones create a seamless pairing that brings out the cake’s flavors while offering a richer, more complex dessert experience.
- Port wine: The deep, fruity flavors of port wine pair beautifully with chocolate cake. It complements the cake’s rich texture while providing a slightly sweet, bold finish.
- Baileys Irish Cream: For a creamy, indulgent treat, try Baileys Irish Cream. Its smooth, slightly sweet, and creamy taste enhances the chocolate cake’s flavor.
- Chocolate liqueur: For the ultimate chocolate pairing, serve the cake with a glass of chocolate liqueur. This adds another layer of rich chocolate flavor that will make your dessert truly unforgettable.
Conclusion: Elevating Your Flourless Chocolate Cake
By pairing your flourless chocolate cake with ice cream, coffee, caramel drizzle, or even wine, you elevate an already amazing dessert into something even more special. Each option adds a new layer of flavor and texture, enhancing the overall experience. Whether you prefer the creamy contrast of ice cream or the rich, bold notes of coffee, these serving suggestions make your gluten-free chocolate cake an unforgettable treat for any occasion.
How to Store and Keep Your Flourless Cake Fresh for Days
Flourless chocolate cake is a decadent treat that can be enjoyed for several days after baking. Storing it properly ensures that it remains as moist, fudgy, and delicious as the day it was made. Whether you have leftover cake or want to prepare it in advance for an event, following the right storage practices will help preserve its rich texture and flavor. Here’s how to store your gluten-free chocolate cake to keep it fresh for days.
1. Storing at Room Temperature for Short-Term Freshness
If you plan to enjoy your flourless chocolate cake within a couple of days, storing it at room temperature is a convenient option. The cake is dense and moist, so it doesn’t dry out as quickly as other cakes. Here’s how to store it properly:
- Cover tightly: Wrap the cake in plastic wrap or store it in an airtight container. This will prevent it from absorbing odors from the environment and help keep it fresh.
- Keep it away from direct sunlight: Store the cake in a cool, dry area away from direct sunlight or heat sources. A kitchen counter or pantry works well as long as it’s not too warm.
- Consume within 2-3 days: For the best taste and texture, aim to consume the cake within 2 to 3 days of baking when stored at room temperature.
2. Refrigerating for Longer Shelf Life
If you have extra cake or want to prepare it ahead of time for an event, refrigerating is a great option to extend its shelf life. Storing your flourless chocolate cake in the fridge ensures it stays fresh for up to a week. Here’s how to do it:
- Wrap tightly: Ensure the cake is well-wrapped in plastic wrap or stored in an airtight container. This helps prevent the cake from drying out or absorbing other smells in the fridge.
- Store in a cool spot: Place the cake on a shelf in the fridge where it’s less likely to be disturbed. Avoid placing it near foods with strong odors.
- Allow to cool before refrigerating: If the cake is still warm, allow it to cool to room temperature before wrapping it for refrigeration. This helps prevent condensation from forming inside the wrap, which could make the cake soggy.
3. Freezing for Long-Term Storage
For even longer storage, freezing is a great option. Freezing your gluten-free chocolate cake allows you to keep it fresh for up to 2-3 months, making it perfect for planning ahead for parties or special occasions. Here’s how to freeze your cake without compromising its flavor and texture:
- Slice first (optional): If you want to store the cake in smaller portions for easier access, slice it into individual pieces before freezing. This allows you to thaw only what you need, reducing waste.
- Wrap tightly: Wrap the whole cake or individual slices tightly in plastic wrap. For extra protection, wrap the cake in aluminum foil after the plastic wrap. This double layer helps prevent freezer burn.
- Store in an airtight container or freezer bag: After wrapping, place the cake in an airtight container or a resealable freezer bag. This extra layer of protection keeps the cake fresh and prevents it from absorbing freezer odors.
- Label and date: Label the container or bag with the date you froze the cake. This will help you keep track of how long it’s been stored and ensure you use it within the recommended 2-3 months.
4. Thawing Your Flourless Cake
When you’re ready to enjoy the frozen flourless chocolate cake, you’ll need to thaw it properly to maintain its texture and flavor:
- Refrigerator thawing: The best way to thaw the cake is to move it from the freezer to the fridge and allow it to thaw overnight. This gradual thawing helps preserve the cake’s moisture and texture.
- Room temperature thawing: If you’re in a hurry, you can thaw the cake at room temperature for about 1-2 hours. Avoid microwaving or using direct heat, as this can alter the cake’s texture and cause it to lose its fudgy consistency.
- Avoid refreezing: Once the cake has thawed, avoid refreezing it. Repeated freezing and thawing can affect the texture and make the cake dry.
5. Tips to Keep Your Flourless Cake Fresh Longer
- Keep the cake uncut until serving: If you’re storing an entire cake, it’s best to keep it uncut. Slicing exposes the cake to air, which can cause it to dry out faster.
- Avoid storing with toppings: If you’ve added toppings like whipped cream, ganache, or fruit, it’s best to store the cake separately from those items. These toppings can spoil faster than the cake itself, especially if left in the fridge for an extended period. You can add fresh toppings when you’re ready to serve the cake.
- Check for freshness: Before serving leftover cake, check for any signs of spoilage. If the cake develops an off smell, texture, or appearance, it’s best to discard it.
Conclusion: The Perfect Gluten-Free Dessert
This flourless chocolate cake recipe is the ultimate gluten-free dessert for anyone who loves rich, indulgent chocolate. Its dense, fudgy texture and deep chocolate flavor make it a standout treat for any occasion. With simple ingredients and an easy-to-follow method, this cake is perfect for both novice and experienced bakers. Whether you’re making it for a special celebration or just treating yourself, this cake will always be a crowd-pleaser.
So why not give it a try? Make this deliciously moist and naturally gluten-free flourless chocolate cake for your next dessert, and experience the blissful combination of chocolatey goodness and smooth, melt-in-your-mouth texture.
If you loved this delicious cake, don’t miss out on discovering the [Best Flourless Chocolate Cake Recipe – Only 5 Ingredients Needed!] for an even simpler and equally irresistible version.
We’d love to hear how your cake turns out! Share your experiences or your favorite toppings in the comments below – and let’s keep the chocolate love going!