
Introduction
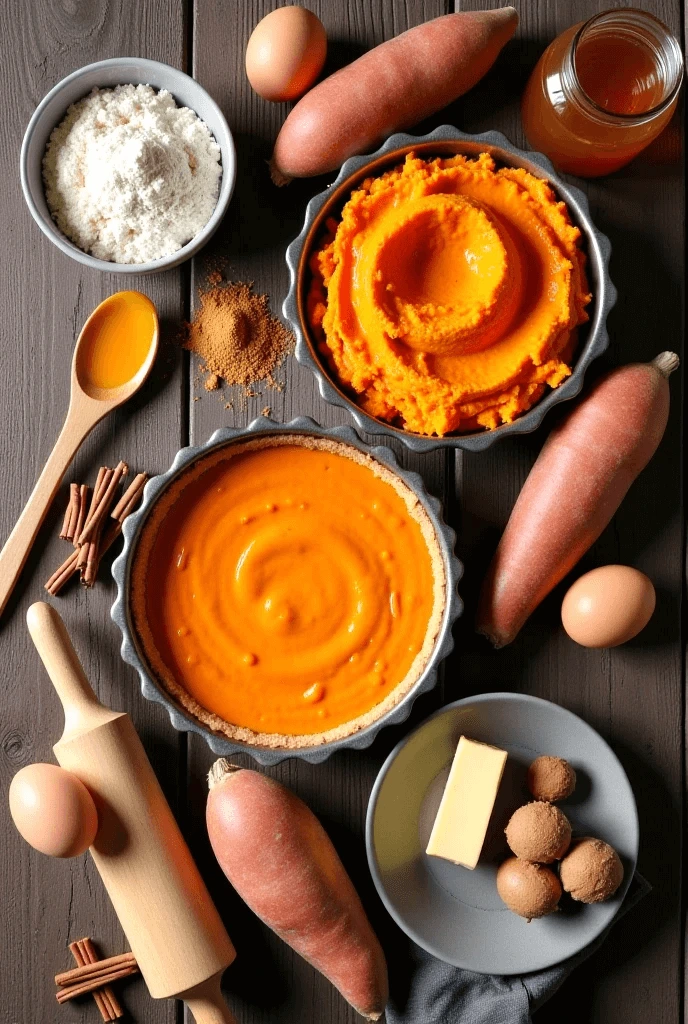
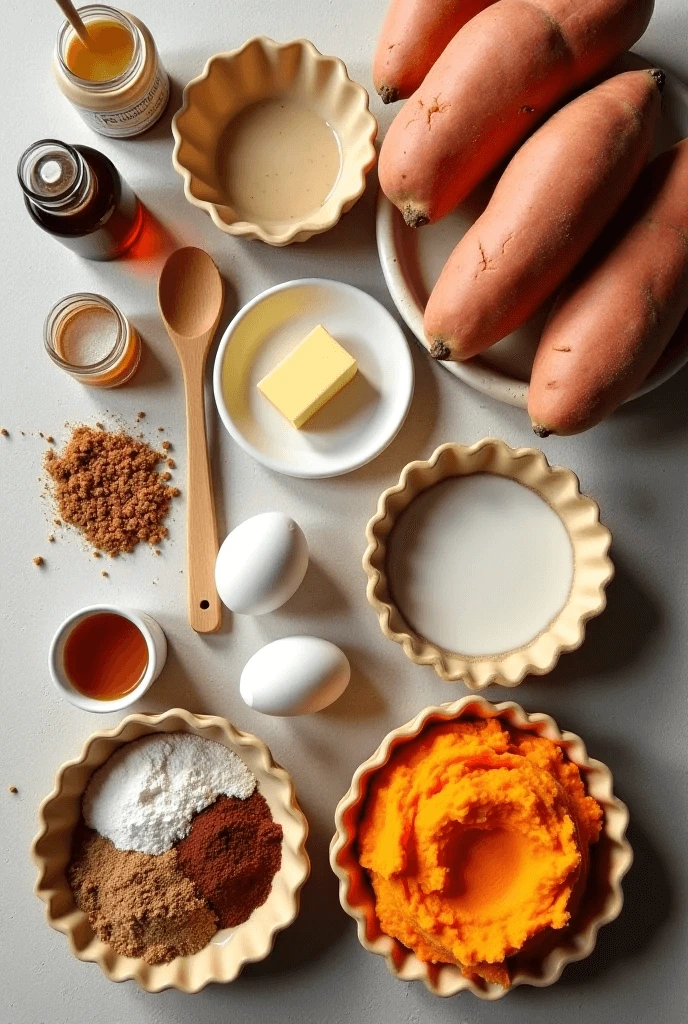
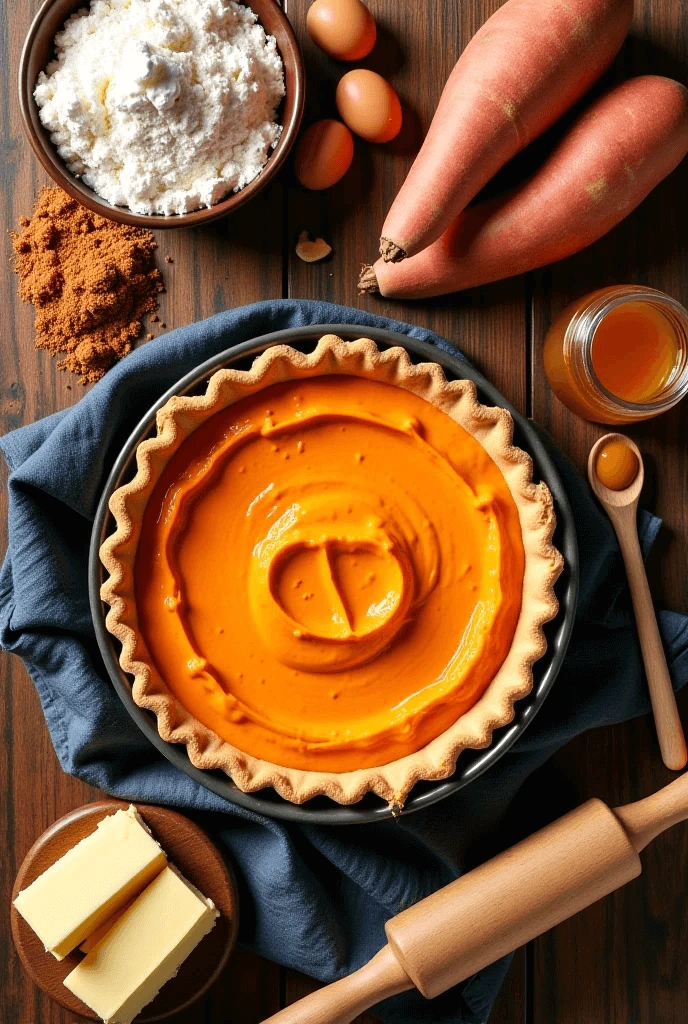
Sweet potato pie is a beloved classic dessert, perfect for any occasion. To make the best sweet potato pie, choosing the right ingredients is crucial. In this guide, we’ll explore the essential sweet potato pie ingredients, how to use them, and provide helpful baking tips to ensure your pie turns out perfectly every time.
Must-Have Sweet Potato Pie Ingredients for a Perfect Recipe
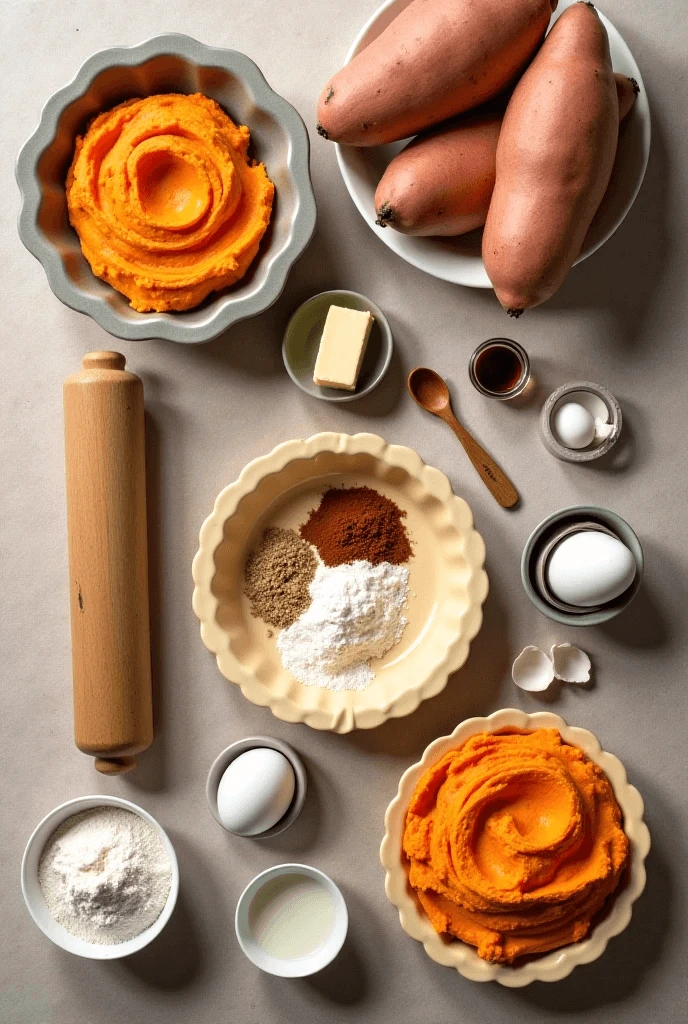
The secret to a perfect sweet potato pie lies in choosing the right ingredients. Whether you’re baking it for the first time or looking to refine your recipe, knowing the essential ingredients will help you achieve the creamy texture and rich flavor that make this pie irresistible. Let’s dive into everything you need to make it right!
Best Sweet Potatoes for Sweet Potato Pie: Which Type to Use?
Not all sweet potatoes are the same, and choosing the right variety can make a big difference in your sweet potato pie’s texture and flavor. Some are naturally sweeter, while others have a starchier or firmer consistency. Here’s a breakdown of the best types to use and what makes them ideal for baking.
1. Beauregard Sweet Potatoes (Best for a Smooth and Sweet Filling)
Beauregard sweet potatoes are one of the most popular varieties in the U.S. They have a deep orange flesh, smooth texture, and high natural sugar content, making them perfect for a rich and creamy pie filling. They also bake well and mash easily, ensuring a silky consistency without requiring too much added sugar.
2. Covington Sweet Potatoes (Balanced Sweetness and Moisture)
Covington sweet potatoes have a vibrant orange flesh and a well-balanced sweetness. They are slightly drier than Beauregard potatoes but still provide a creamy texture when mashed. Their mild, nutty flavor pairs well with classic pie spices like cinnamon and nutmeg.
3. Garnet Sweet Potatoes (Richer Flavor and Dense Texture)
Garnet sweet potatoes have a dark reddish skin and a deep orange interior. They are slightly firmer and denser than other varieties, making them a great choice if you prefer a pie with a more structured, hearty filling rather than one that’s overly soft.
4. Jewel Sweet Potatoes (Mild Flavor and Silky Texture)
Jewel sweet potatoes are similar to Beauregard but have a milder sweetness and softer flesh. They work well in pies because they create a smooth, custard-like filling without being too starchy. If you prefer a pie that’s subtly sweet and velvety, this is a great choice.
5. Can You Use White or Purple Sweet Potatoes?
While traditional sweet potato pie calls for orange-fleshed sweet potatoes, you might wonder if you can use white or purple sweet potatoes. White varieties, like O’Henry or Japanese sweet potatoes, have a drier, more starchy texture, which can make the filling denser. Purple sweet potatoes, such as Stokes Purple, add a unique color but tend to be drier and require extra moisture (like more butter or evaporated milk).
Which Sweet Potato Variety Should You Choose?
For the best results, Beauregard or Covington sweet potatoes are the top choices. They offer the right balance of sweetness, moisture, and smooth texture, ensuring a rich and creamy pie. However, if you prefer a firmer, slightly less sweet filling, Garnet or Jewel varieties work well too.
Regardless of the variety, make sure to bake, boil, or steam your sweet potatoes until fully tender before mashing them. This ensures they blend well with the other ingredients and create the perfect pie consistency.
Sweeteners for Sweet Potato Pie: Brown Sugar, Honey & More
The right sweetener can enhance the natural sweetness of sweet potatoes while adding depth of flavor to your pie. While traditional recipes often call for brown sugar, there are several other sweeteners you can use to customize the taste and texture of your sweet potato pie. Below, we’ll explore the best options and how each one affects the final dish.
1. Brown Sugar (The Classic Choice for Rich Flavor)
Brown sugar is the most common sweetener in sweet potato pie recipes, and for good reason. It contains molasses, which gives it a deep, caramel-like flavor that complements the earthiness of sweet potatoes.
- Light Brown Sugar vs. Dark Brown Sugar:
- Light brown sugar has a milder molasses flavor, resulting in a more subtle sweetness.
- Dark brown sugar contains more molasses, giving the pie a richer, slightly smoky taste.
Using brown sugar also helps retain moisture, ensuring the pie filling stays smooth and creamy.
2. Honey (A Natural Sweetener with Floral Notes)
Honey is a great alternative to processed sugar and adds a floral, slightly tangy sweetness to the pie. It also helps keep the filling moist and silky. However, since honey is sweeter than sugar, you’ll need to adjust the amount:
- Substitution Tip: Use ¾ cup of honey for every 1 cup of brown sugar, and reduce other liquid ingredients slightly to maintain the right consistency.
3. Maple Syrup (Warm, Earthy Sweetness with Depth)
Maple syrup pairs beautifully with cinnamon, nutmeg, and sweet potatoes, enhancing the pie’s overall flavor. It adds a subtle caramelized richness while keeping the texture smooth and velvety.
- Best Type to Use: Pure maple syrup (Grade A or B) works best, as artificial syrups lack the depth of flavor.
- Substitution Tip: Use ¾ cup of maple syrup for every 1 cup of sugar, and slightly reduce the liquid in the recipe.
4. Granulated White Sugar (Simple & Sweet, but Lacks Depth)
White sugar provides straightforward sweetness but lacks the depth and moisture-retaining qualities of brown sugar. If using white sugar, consider adding a touch of molasses or honey to bring back some of that richness.
5. Coconut Sugar (A Less Processed, Slightly Nutty Option)
Coconut sugar is a natural sweetener with a hint of caramel and nuttiness. It works well in sweet potato pie, though it is less sweet than white or brown sugar.
- Substitution Tip: Use a 1:1 ratio when replacing brown sugar. Keep in mind that coconut sugar may make the pie slightly denser.
6. Molasses (Bold, Smoky Sweetness in Small Amounts)
Molasses isn’t typically used as the main sweetener but can be added in small amounts to enhance the pie’s richness. It has a thick texture and a deep, smoky sweetness that pairs well with spices like cinnamon and nutmeg.
- How to Use: Add 1–2 tablespoons of molasses to deepen the flavor without overpowering the pie.
7. Alternative Sweeteners (Stevia, Monk Fruit, & Sugar Substitutes)
For those looking to reduce sugar intake, sugar alternatives like monk fruit sweetener, stevia, or erythritol can work.
- Best Option: Monk fruit sweetener is the closest match to brown sugar in taste.
- Caution: Sugar substitutes may affect the texture, so experiment with different brands to find the best fit.
Which Sweetener Should You Choose?
- For a classic, rich flavor → Use brown sugar (light or dark).
- For a healthier, natural option → Use honey or maple syrup.
- For a deep, smoky taste → Add a touch of molasses.
- For a lower-sugar option → Try monk fruit sweetener or stevia.
Final Tip:
You can also combine sweeteners for a more complex flavor. For example, using brown sugar with a little honey or maple syrup adds both richness and depth while keeping the pie perfectly moist.
Essential Dairy & Eggs: Butter, Evaporated Milk, and Their Role
Dairy and eggs are the backbone of a sweet potato pie’s texture and richness. Together, they bring smoothness, stability, and a creamy consistency, ensuring the perfect filling. Understanding how each ingredient works can help you create the best possible pie.
1. Butter: Adds Richness and Flavor
Butter is a classic ingredient in sweet potato pie because of its ability to bring richness and depth of flavor. Not only does it enhance the sweetness of the sweet potatoes, but it also contributes to a velvety texture.
Why Use Butter?
- First and foremost, butter brings richness that balances the pie’s flavors. It complements the spices like cinnamon and nutmeg beautifully, helping them to meld together.
- Additionally, it helps create a smooth texture, ensuring the filling is cohesive and creamy without becoming overly greasy.
- Butter also plays a critical role in moisture retention, ensuring that your pie remains soft and luscious throughout.
How to Use It
For best results, use unsalted butter so you can control the amount of salt. Melt the butter before mixing it into the filling to ensure it incorporates evenly. If you want an extra layer of flavor, brown the butter first to add a nutty, caramelized undertone.
2. Evaporated Milk: Creamy Texture Without Excess Moisture
Evaporated milk is an essential ingredient in sweet potato pie because it provides a rich, creamy texture while controlling the moisture content. Since it’s more concentrated than regular milk, it helps create the perfect filling consistency.
Why Use Evaporated Milk?
- It thickens the filling, ensuring the pie holds its shape once baked, without turning too watery.
- Thanks to the caramelization that occurs during the evaporation process, it adds a natural sweetness that enhances the flavor of the sweet potatoes.
- Moreover, evaporated milk is more stable at high temperatures, reducing the risk of curdling while baking.
Substitute Options
If evaporated milk isn’t available, you can opt for heavy cream or whole milk, though they might slightly alter the pie’s texture. For a dairy-free option, try coconut milk, which brings a subtle tropical flavor.
3. Eggs: The Key to a Well-Set Pie
Eggs are essential for binding the filling together and ensuring the pie sets properly. They create the structure needed for a smooth, firm consistency, so each slice holds its shape.
Why Are Eggs Important?
- Eggs help bind the filling, allowing it to firm up and hold its structure during baking.
- Moreover, they contribute richness by adding fat from the yolks, making the pie velvety.
- Another important function is that they help with texture by contributing to a creamy, smooth consistency once the pie is baked.
How to Use Eggs
It’s best to use room temperature eggs, as they mix more evenly into the filling. For a lighter texture, consider beating the egg whites before folding them in, which will give the pie a fluffier consistency.
Final Thoughts: Achieving the Right Balance
Together, butter, evaporated milk, and eggs ensure your sweet potato pie has the perfect texture and flavor. Start with melted butter for a smooth consistency and enhanced flavor. Add evaporated milk to prevent excess moisture while keeping the filling creamy. Finally, eggs help to bind the mixture and give the pie its signature set texture. By carefully balancing these ingredients, you’ll create a pie that is rich, smooth, and perfectly set!
Spices and Flavor Boosters: Cinnamon, Nutmeg, and Vanilla Extract
Spices and flavor boosters are what elevate a sweet potato pie from good to exceptional. The combination of cinnamon, nutmeg, and vanilla extract not only complements the sweet potatoes’ natural flavor but also infuses the pie with warmth and depth. These ingredients are essential for creating the rich, comforting taste that sweet potato pie is known for. Let’s dive deeper into how each one works its magic.
1. Cinnamon: The Warm, Earthy Backbone
Cinnamon is the most iconic spice in sweet potato pie, and for good reason. It brings warmth, sweetness, and earthiness to the filling, making it the perfect partner for sweet potatoes. Whether you’re using ground cinnamon or fresh sticks, it adds a comforting depth to every bite.
Why Use Cinnamon?
- Enhances natural sweetness: Cinnamon’s sweet and spicy notes amplify the natural sweetness of the sweet potatoes without making the pie overly sugary.
- Balances richness: It contrasts with the richness of the butter and the creamy texture of the filling, giving the pie a more complex flavor profile.
- Pairs well with other spices: Cinnamon works in harmony with nutmeg and ginger, creating the perfect spice blend that’s quintessential to sweet potato pie.
How to Use It
Use ground cinnamon for convenience and consistency. If you prefer a more intense cinnamon flavor, fresh cinnamon sticks can be simmered in the milk mixture before being strained out. Typically, you’ll want about 1-2 teaspoons of ground cinnamon in your sweet potato pie filling, though you can adjust to taste.
2. Nutmeg: A Subtle, Warm Kick
Nutmeg adds a subtle but powerful flavor that enhances the warmth of the pie. While cinnamon steals the spotlight, nutmeg provides complexity and depth that elevate the other spices. It’s the perfect finishing touch to achieve the right balance of sweetness and spice.
Why Use Nutmeg?
- Delicate but powerful: Nutmeg has a warm, nutty flavor with a touch of pepperiness, which complements the sweetness of the sweet potatoes.
- Enhances other spices: Nutmeg works hand-in-hand with cinnamon, bringing out the best in the spice mix. Together, they create a balanced and flavorful filling.
- Aromatic quality: The scent of nutmeg while baking creates a cozy, inviting aroma that draws everyone in for a slice.
How to Use It
- Nutmeg should be used sparingly because of its strong flavor. Typically, 1/4 to 1/2 teaspoon of ground nutmeg is perfect for most sweet potato pie recipes.
- For a more intense, fresh flavor, consider grating fresh nutmeg directly into the filling—this provides a more vibrant, aromatic kick.
3. Vanilla Extract: The Flavor Enhancer
Vanilla extract is a silent hero in sweet potato pie, subtly enhancing all the other ingredients. While it’s not as bold as cinnamon or nutmeg, vanilla extract is what brings the pie’s flavors together, adding a smooth, sweet undertone that rounds out the filling. It also balances the spices and enriches the overall flavor profile.
Why Use Vanilla Extract?
- Flavor enhancer: Vanilla works to soften the sharpness of the spices and smooth out the sweetness, making the pie taste well-rounded and balanced.
- Adds complexity: The slightly floral, warm notes of vanilla elevate the pie’s flavor without overpowering the sweet potato.
- Improves the texture: Vanilla extract can also help with even flavor distribution, ensuring that every bite tastes harmonious.
How to Use It
A small amount of pure vanilla extract (typically 1 teaspoon) is all you need. You can also experiment with vanilla bean paste or the seeds from a vanilla bean pod for a more luxurious, natural flavor.
4. Other Spice and Flavor Boosting Options
While cinnamon, nutmeg, and vanilla are the traditional flavor boosters in sweet potato pie, you can experiment with other spices to create a unique flavor profile. Here are a few ideas:
- Ginger: Adds a zesty warmth that complements the sweetness of the pie. Just a pinch or 1/4 teaspoon of ground ginger can make a noticeable difference.
- Allspice: A versatile spice with flavors reminiscent of cinnamon, nutmeg, and cloves, perfect for adding complexity to the pie’s taste. Use sparingly—1/4 teaspoon works well.
- Cloves: Ground cloves have an intense, slightly sweet flavor and should be used very sparingly—a pinch or less is often enough to enhance the spices.
- Cardamom: A fragrant spice that brings a floral, citrusy note to the pie. Use it in small amounts (around 1/4 teaspoon) to avoid overpowering the other spices.
Final Thoughts: Balancing the Spices for Perfection
The combination of cinnamon, nutmeg, and vanilla extract is the heart of a perfect sweet potato pie, but feel free to get creative with additional spices. Just remember, the goal is balance—each spice should complement the natural sweetness of the sweet potatoes and create a flavor profile that’s warm, inviting, and irresistible.
By following these tips and experimenting with your favorite spices, you can make a pie that’s uniquely yours, all while staying true to the classic flavors that make sweet potato pie so beloved.
Choosing the Right Pie Crust for Homemade Sweet Potato Pie

Homemade vs. Store-Bought Pie Crust: Which One is Better?
One of the most debated topics when making sweet potato pie is whether to use homemade pie crust or to buy a pre-made one. Each option has its pros and cons, and choosing the right one depends on factors like taste preference, time constraints, and baking experience. Let’s explore both sides of the argument so you can make an informed decision for your sweet potato pie.
1. Homemade Pie Crust: The Ultimate in Freshness and Flavor
There’s something truly special about a homemade pie crust. It adds an extra layer of richness and texture that pre-made crusts simply can’t match. Plus, making your crust from scratch gives you full control over the ingredients, allowing you to create a crust that perfectly complements your sweet potato filling. Let’s dive into the benefits of making your own pie crust.
Why Choose Homemade?
- Superior Freshness: Homemade crusts are made with fresh ingredients, and you can taste the difference. The flakiness and buttery texture of a freshly made crust provide a rich, satisfying base for your sweet potato pie.
- Control Over Ingredients: When you make your own crust, you control the quality and quantity of ingredients. You can use premium butter, flour, and even add spices to enhance the flavor, like a dash of cinnamon or nutmeg.
- Customization: You can customize the thickness, texture, and even the flavor of your pie crust. Some bakers add sugar for a slightly sweeter crust, or you can experiment with whole wheat flour or almond flour for a unique twist.
- Satisfaction of Making it Yourself: There’s something incredibly satisfying about making a pie from scratch, and your guests will appreciate the extra effort you put into creating a truly homemade treat.
How to Make Homemade Pie Crust
A basic pie crust typically requires flour, butter (or shortening), water, and a pinch of salt. The key is to keep the dough cold and handle it as little as possible to avoid a tough crust. A food processor can help you achieve the perfect texture quickly, or you can mix by hand for a more traditional approach. If you have the time, consider blind baking your crust before adding the sweet potato filling to ensure it stays crisp and doesn’t get soggy.
2. Store-Bought Pie Crust: Quick and Convenient for Busy Bakers
For many, the main advantage of using a store-bought pie crust is convenience. If you’re short on time or don’t feel confident in your pie-making skills, pre-made crusts are a great alternative. They’re designed to be easy to use and can save you significant time in the kitchen, so you can focus on perfecting your filling.
Why Choose Store-Bought?
- Time-Saving: Store-bought crusts are already rolled out and ready to use, saving you hours of prep time. This can be a game-changer for anyone in a time crunch or those who don’t want to deal with the hassle of rolling dough.
- Consistency: Pre-made pie crusts offer consistent results. The texture and flavor are predictable, and they often bake up evenly without much effort on your part.
- Easy to Store: Most store-bought crusts come frozen, which means you can keep a few in your freezer for last-minute baking projects. They’re long-lasting and can be used whenever you’re in a pinch.
- Good for Novices: If you’re not comfortable making your own crust or are just starting out as a baker, a store-bought option is a foolproof choice that still allows you to create a delicious pie.
How to Use Store-Bought Crust
Store-bought crusts are typically unbaked and should be placed directly into your pie dish. Some come in disposable aluminum pans while others are rolled-up, requiring you to fit them into your own dish. Just make sure to check the instructions on the packaging for any specific prep steps. If you like a crispy crust, consider blind-baking the crust (baking it before adding the filling) to ensure it doesn’t get soggy.
3. Taste and Texture: Which Crust Wins?
While convenience is a major factor in choosing store-bought crusts, the taste and texture of a homemade pie crust generally take the prize. Homemade crusts are known for being flakier, more tender, and buttery, offering a rich contrast to the sweet potato filling. On the other hand, store-bought crusts can sometimes be a little thicker or less flaky, though there are higher-end options that can mimic the qualities of homemade.
Taste Comparison
- Homemade crusts provide a richer, fresher flavor, which makes a noticeable difference in the overall taste of the pie. The butter used in the crust adds a deliciously indulgent flavor that complements the spices and sweet potato filling.
- Store-bought crusts can sometimes be a little bland and lack the depth of flavor that homemade ones provide. However, many premium brands offer better-tasting options that closely mimic homemade crusts.
Texture Comparison
- Homemade crusts tend to be flakier and lighter, creating a delicate contrast to the smooth, creamy filling.
- Store-bought crusts are usually thicker and can sometimes be a bit denser. However, if you opt for a high-quality store-bought crust, you can achieve a similar level of flakiness.
4. Cost: Does Homemade Crust Really Save Money?
While homemade crusts can be more cost-effective in terms of ingredients (flour, butter, etc.), keep in mind that there is a time cost involved. Making your own crust requires additional time and effort. Store-bought crusts, on the other hand, offer a set price that can be easier to calculate, especially when considering bulk purchases for large events or holidays.
Homemade Crust Costs
- The ingredients for a basic homemade crust typically cost less than $2-3. However, the time spent making the dough, rolling it out, and baking it may add up if you’re short on time.
Store-Bought Crust Costs
- A pack of two store-bought pie crusts typically costs $3-6, depending on the brand and quality. While it’s more expensive than making your own, it saves you significant time and effort.
5. Final Thoughts: Which Crust is Best for Your Sweet Potato Pie?
The choice between homemade and store-bought pie crust ultimately depends on your priorities. If you value freshness, flakiness, and full control over the ingredients, homemade crust is the clear winner. It’s perfect for bakers who want to elevate their sweet potato pie with a personal touch and extra flavor. On the other hand, if you’re short on time or looking for a more convenient option, store-bought crusts can get the job done while still creating a delicious dessert. For many, the decision comes down to time, taste, and convenience, so choose what works best for you and enjoy your sweet potato pie!
How to Make a Flaky Sweet Potato Pie Crust from Scratch
Making a flaky sweet potato pie crust from scratch is an art, but it’s also one of the most rewarding parts of pie-making. The flakiness and buttery richness of a homemade crust are what elevate a simple sweet potato pie to a whole new level. In this section, we’ll walk you through each step of the process, along with helpful tips to ensure your crust turns out perfectly tender and crispy every time.
1. Gather the Right Ingredients
The first step to a successful homemade pie crust is having the right ingredients on hand. For the best results, you’ll need:
- Flour: All-purpose flour is your best bet for a basic pie crust. You can also experiment with a combination of all-purpose flour and whole wheat flour for a nuttier flavor.
- Cold Butter: Use unsalted butter for the best flavor. Cold butter is key to creating a flaky texture because it forms layers as the crust bakes.
- Ice-Cold Water: Ice water is essential to keeping the dough cool. It prevents the butter from melting before it goes into the oven, helping to maintain the desired flaky texture.
- Salt: A pinch of salt enhances the flavor of the crust, balancing the sweetness of the filling.
- Sugar: This isn’t always necessary, but a little sugar in the crust can add a subtle sweetness that complements the sweet potato filling.
2. Create the Dough: The Key to Flakiness
Making the dough for your pie crust is the most crucial step in ensuring your crust turns out light and flaky. Here’s how you can do it:
Step-by-Step Dough Preparation
- Mix the Dry Ingredients: In a large mixing bowl, whisk together flour and salt. This ensures an even distribution of the salt and flour throughout the dough. If you’re using sugar, add it in as well.
- Cut in the Butter: Cut the cold butter into small cubes (about 1/2-inch pieces). Add the butter cubes to the flour mixture. Use a pastry cutter, fork, or your fingers to work the butter into the flour. The goal is to break the butter into pea-sized pieces. This process creates the small pockets of butter that will give the crust its signature flakiness.
- Add Ice-Cold Water: Slowly add ice-cold water, one tablespoon at a time, while stirring gently with a fork. Continue adding water until the dough begins to hold together, but be careful not to overwork it. You want the dough to stay light and crumbly.
- Bring the Dough Together: Once the dough has come together, transfer it to a floured surface. Knead it gently a few times to make sure it’s fully incorporated. Avoid overworking it, as this can lead to a tough crust.
- Chill the Dough: Wrap the dough in plastic wrap and refrigerate for at least 30 minutes. Chilling the dough allows the gluten to relax and the butter to firm up, which is key for that flaky texture when baked.
3. Roll Out the Dough: Achieving the Perfect Thickness
Rolling out the dough to the right thickness is another important step. Too thick, and the crust will be overly chewy; too thin, and it may break apart during baking. Here’s how to get it just right:
Step-by-Step Rolling Process
- Prepare the Surface: Lightly flour your rolling surface and rolling pin. You can also use parchment paper between the dough and the counter to prevent sticking.
- Roll the Dough: Unwrap the chilled dough and place it on your floured surface. Gently roll the dough out from the center outward, turning the dough 90 degrees every few rolls to ensure even thickness. Aim for a circle that’s about 12 inches in diameter.
- Maintain Even Thickness: Keep an eye on the thickness of the dough as you roll. It should be about 1/8 inch thick. If the dough is sticking, lightly flour the surface or use parchment paper to prevent it from clinging to the rolling pin.
- Transfer to Pie Dish: Once the dough is rolled out, carefully lift it using a rolling pin or your hands and transfer it to your pie dish. Gently press the dough into the bottom and sides of the dish, being careful not to stretch it. If the dough tears, patch it up with excess dough from the edges.
4. Prepare the Crust for Baking: Blind Baking for a Crispy Base
Before adding your sweet potato filling, you may want to blind bake the crust to ensure it stays crispy and doesn’t get soggy from the wet filling. Blind baking involves partially or fully baking the crust before adding the filling.
How to Blind Bake the Crust
- Preheat the Oven: Preheat your oven to 375°F (190°C).
- Dock the Dough: Use a fork to dock (poke holes) in the bottom of the dough to prevent bubbles from forming while baking.
- Add Pie Weights: Place a piece of parchment paper over the crust and add pie weights, dry beans, or rice to weigh it down. This helps the crust hold its shape while baking.
- Bake: Place the pie crust in the preheated oven and bake for 15-20 minutes or until the edges are lightly golden. Remove the parchment paper and weights, and bake for another 5-10 minutes until the bottom is set and slightly golden.
5. Tips for a Perfect Flaky Crust Every Time
Achieving a flaky pie crust comes down to a few important techniques and tips. Here are some expert suggestions to ensure success:
Chill, Chill, Chill
Keep the dough cold throughout the process. If at any point the dough becomes too warm and sticky, pop it back in the refrigerator for 10-15 minutes. The colder the dough, the flakier the crust.
Don’t Overwork the Dough
Handle the dough as little as possible. Overworking the dough can lead to a tough, dense crust instead of the light, flaky texture you want.
Use High-Quality Butter
Since butter is a primary ingredient in the crust, using high-quality, unsalted butter will yield the best flavor and texture. The better the butter, the flakier the crust.
Add a Little Vinegar
A tablespoon of vinegar or lemon juice can help tenderize the dough, ensuring that it doesn’t become tough as it bakes.
6. Final Thoughts on Making Flaky Sweet Potato Pie Crust
Making a flaky pie crust from scratch is an effort worth the time. With the right ingredients, patience, and technique, you can create a pie crust that perfectly complements the rich, creamy sweet potato filling. Whether you choose to blind bake it for extra crispiness or bake it directly with the filling, the results will be a delicious, homemade sweet potato pie that is sure to impress your family and friends.
Let this guide be your go-to resource for crafting the perfect flaky crust that will take your sweet potato pie to the next level! Happy baking! 😊
Blind Baking: A Key Step for a Perfect Sweet Potato Pie Base
Blind baking, also known as pre-baking, is an essential step in pie-making that helps ensure your crust stays crisp and holds its shape, especially when making pies with wet or custard-like fillings like sweet potato pie. Without blind baking, the bottom of your pie crust could become soggy, ruining the texture and overall experience. In this section, we’ll explore why blind baking is so important for sweet potato pie, and how to do it correctly to achieve a crispy, golden pie crust every time.
What is Blind Baking and Why is It Important for Sweet Potato Pie?
Blind baking involves pre-baking the pie crust without any filling to give it a head start before adding the sweet potato mixture. When using a wet filling like the creamy sweet potato mixture, the crust can absorb moisture during baking, which might make it soggy or unevenly baked. Blind baking solves this issue by creating a firm base that holds its structure, ensuring your pie crust stays crispy and flaky. For sweet potato pie, it’s especially important to blind bake the crust for a few reasons:
- Prevents soggy crusts: The moisture from the filling can soak into the dough and make it soggy, but blind baking helps to seal the crust before adding the filling.
- Ensures even baking: Pre-baking allows the crust to cook evenly, avoiding a raw or doughy bottom when the pie is done.
- Creates a crispier crust: Blind baking helps the crust to become more crispy and golden on the bottom, which enhances the texture and flavor of the pie.
How to Blind Bake Your Sweet Potato Pie Crust
Blind baking isn’t complicated, but it does require a few essential steps to make sure your pie crust turns out just right. Here’s how you can blind bake your sweet potato pie crust effectively:
Step 1: Prepare the Pie Crust
First, you’ll need to prepare your pie crust. If you’re using a homemade crust, follow the steps for making and chilling the dough. If you’re using a store-bought crust, simply unroll it and place it into your pie dish.
- Chill the crust: Before blind baking, it’s crucial that your pie crust is chilled. After placing the dough in the pie dish, refrigerate it for at least 30 minutes. This helps the crust maintain its shape during baking.
- Dock the dough: To prevent air bubbles from forming during baking, use a fork to poke holes (called docking) in the bottom of the crust. This ensures that the crust bakes evenly and doesn’t puff up in the middle.
Step 2: Line the Crust with Parchment Paper and Add Weights
The next step is to weigh down the crust while it bakes. This prevents it from shrinking or puffing up too much during the blind baking process.
- Parchment paper: Place a piece of parchment paper over the chilled pie crust, making sure to cover the edges.
- Pie weights or alternatives: Add pie weights (or dry beans, rice, or lentils) over the parchment paper to weigh down the crust. The weights will help prevent the crust from rising and ensure that it holds its shape.
Step 3: Bake the Crust
Now, it’s time to blind bake the crust. Follow these steps to bake it perfectly:
- Preheat the oven: Set your oven to 375°F (190°C).
- Bake with weights: Place the pie dish in the oven and bake the crust with the weights for 15-20 minutes. The edges should be lightly golden, and the crust should feel set but not fully browned.
Step 4: Remove Weights and Continue Baking
After the initial bake, remove the pie from the oven to remove the weights:
- Remove the parchment and weights: Carefully lift out the parchment paper with the pie weights or beans.
- Bake the crust further: Return the crust to the oven and bake for another 5-10 minutes to fully set the bottom and allow it to achieve a golden brown color.
By this point, the crust should be firm, lightly golden, and ready to be filled with your sweet potato filling.
Tips for Perfect Blind Baking Every Time
Blind baking can sometimes be tricky if you’re not familiar with the process. Here are some expert tips to help you get the best results:
- Don’t skip the chilling step: Chilling the dough before baking is key to keeping the crust from shrinking. It allows the butter in the dough to stay firm and creates the flakiness you want.
- Use heavy pie weights: The heavier the weights, the less likely the crust will shrink. If you don’t have traditional pie weights, use uncooked rice or dried beans, which work just as well.
- Check the edges: Keep an eye on the edges of your crust as it bakes. If they start to brown too quickly, you can cover them with foil or a pie shield to prevent burning.
- Pre-bake the crust completely: Depending on the type of pie you’re making, you might need to fully bake the crust (if the filling is already cooked). For a sweet potato pie, you should only blind bake it to set the base, as the filling will finish baking with the crust.
Should You Blind Bake for Sweet Potato Pie?
Blind baking is highly recommended for sweet potato pie for the reasons discussed above: it ensures a crisp, evenly baked crust that complements the rich, smooth filling. Without it, your pie could end up with a soggy bottom or an undercooked crust, which can detract from the texture and flavor.
Additionally, blind baking gives you more control over the baking process. You don’t have to worry about the crust becoming soggy from the wet sweet potato filling, and it ensures that the entire pie bakes evenly.
Conclusion: The Secret to a Perfect Sweet Potato Pie Crust
Blind baking is an important step for achieving the perfect sweet potato pie. It prevents the crust from becoming soggy, allows for even baking, and results in a crisp, golden crust that beautifully complements the sweet, creamy filling. By following the simple steps outlined here and keeping these tips in mind, you can make a flaky, delicious crust that takes your sweet potato pie to the next level.
Now that you know how to blind bake your crust, you’re one step closer to creating the ultimate sweet potato pie that will impress everyone at your next gathering. Happy baking! 😊
Step-by-Step Guide to Preparing Sweet Potato Pie Filling
Boiling, Roasting, or Steaming Sweet Potatoes: What Works Best?
When it comes to making a delicious sweet potato pie, the way you prepare your sweet potatoes can greatly affect the texture, flavor, and consistency of the filling. You can choose from several methods for cooking your sweet potatoes: boiling, roasting, and steaming. Each method brings its own benefits and challenges, and selecting the right one can make a significant impact on your pie’s final result. Let’s explore each cooking method, its advantages, and how it affects the overall taste and texture of the pie.
Boiling Sweet Potatoes: A Quick and Easy Method
Boiling is a common and simple method for cooking sweet potatoes. It’s especially helpful when you’re in a hurry, but you must be mindful of a few details to ensure the best outcome.
How to Boil Sweet Potatoes for Pie:
- Peel and cut the sweet potatoes into evenly sized chunks (about 1 to 2 inches).
- Place them in a pot and cover with cold water.
- Bring the water to a boil over high heat, then reduce to a simmer and cook for 15-20 minutes, or until the sweet potatoes are tender when pierced with a fork.
- Drain the water and allow the sweet potatoes to cool before mashing or pureeing for your pie filling.
Pros of Boiling:
- Quick and Convenient: Boiling sweet potatoes is one of the fastest methods, making it ideal when you’re short on time.
- Consistent Texture: Boiling creates a smooth, uniform texture that’s easy to mash, making it a great choice for a silky pie filling.
- Minimal Prep: There’s little prep work involved aside from peeling and cutting the potatoes.
Cons of Boiling:
- Flavor Dilution: The water can draw out some of the natural sweetness and flavor from the sweet potatoes, which may result in a less intense flavor than roasting.
- Watery Consistency: If you overcook the potatoes or don’t drain them properly, the mashed potatoes can become too watery, which could affect the pie’s texture.
Roasting Sweet Potatoes: Enhancing the Natural Flavor
Roasting sweet potatoes brings out their natural sweetness and rich flavor, making this method a popular choice for creating pies that are full of flavor. The caramelization that occurs during roasting adds depth and complexity to the overall taste.
How to Roast Sweet Potatoes for Pie:
- Preheat the oven to 400°F (200°C).
- Wash and prick the sweet potatoes with a fork to allow steam to escape.
- Place them on a baking sheet and roast for 45-60 minutes, depending on their size, until they are soft and the skin easily peels away.
- Allow them to cool before peeling and mashing the flesh for your pie.
Pros of Roasting:
- Enhanced Flavor: Roasting caramelizes the natural sugars in the sweet potatoes, resulting in a richer, sweeter flavor that adds depth to the pie filling.
- No Water Needed: Since roasting doesn’t involve water, there’s no risk of diluting the sweet potatoes’ flavor, and the flesh becomes incredibly rich and creamy.
- Convenient Hands-Off Method: Once the potatoes are in the oven, you can focus on other tasks while they cook.
Cons of Roasting:
- Longer Cooking Time: Roasting takes significantly longer than boiling or steaming, which could be an issue if you’re in a rush.
- Requires More Attention: You need to keep an eye on the sweet potatoes to ensure they don’t burn or overcook. If they dry out too much, it could affect the texture of your pie filling.
Steaming Sweet Potatoes: A Healthier Option
Steaming sweet potatoes is a gentle cooking method that helps retain many of their vitamins and minerals. It also prevents them from becoming too waterlogged, unlike boiling. Steaming produces a soft, fluffy texture that works well for pie fillings, especially if you want to preserve the nutrients in the sweet potatoes.
How to Steam Sweet Potatoes for Pie:
- Peel and cut the sweet potatoes into evenly sized chunks.
- Place the chunks in a steamer basket over boiling water (make sure the water doesn’t touch the potatoes).
- Cover and steam for 15-20 minutes, or until the sweet potatoes are tender and can be easily pierced with a fork.
- Allow them to cool before mashing or pureeing.
Pros of Steaming:
- Retains Nutrients: Since steaming doesn’t involve direct contact with water, the nutrients in the sweet potatoes are preserved more effectively than with boiling.
- Preserves Flavor: Steaming sweet potatoes helps preserve their natural sweetness and flavor, while keeping them moist without being too watery.
- Healthy Method: Steaming is one of the healthiest ways to cook sweet potatoes, as it doesn’t require additional fats or oils.
Cons of Steaming:
- Requires Special Equipment: Steaming requires a steamer basket or a similar setup, which may not be available in every kitchen.
- Slightly Longer than Boiling: Steaming can take a bit longer than boiling, so it might not be the fastest option if you’re in a time crunch.
Which Method is Best for Sweet Potato Pie?
The best method for preparing sweet potatoes for your pie depends on the outcome you’re aiming for.
- For a rich, flavorful pie with a deep sweetness, roasting is your best bet. The roasting process caramelizes the sugars in the sweet potatoes, which creates a fuller, more complex flavor that enhances the pie filling.
- If you’re short on time, boiling is the quickest method and yields a smooth, uniform texture, but be mindful to drain the potatoes thoroughly to avoid watery pie filling.
- For a nutritious, naturally sweet filling with a smooth texture, steaming is a great option that retains the nutrients of the sweet potatoes, while still allowing you to create a creamy filling for your pie.
Conclusion: Which Method Works Best for Your Sweet Potato Pie?
Each method—boiling, roasting, and steaming—has its advantages, and ultimately, the best choice depends on your preference for flavor, texture, and convenience. Roasting provides the most intense, caramelized sweetness, boiling is the quickest and easiest, while steaming is a healthy option that retains the most nutrients.
For a truly flavorful and creamy sweet potato pie, I recommend roasting your sweet potatoes for the best results, but feel free to experiment with different methods to find what works best for you.
Mashing vs. Pureeing: How to Get the Creamiest Sweet Potato Pie Filling
When it comes to making the perfect sweet potato pie, the texture of your filling plays a crucial role. Whether you prefer a smooth, silky texture or a slightly chunkier consistency, how you prepare the sweet potatoes—specifically whether you mash or puree them—will impact the outcome of your pie. Both mashing and pureeing are common techniques, but they each offer unique benefits that can affect the flavor, texture, and consistency of your filling. Let’s dive into both methods and explore how each one contributes to a delicious pie.
Mashing Sweet Potatoes: A Traditional Approach
Mashing sweet potatoes is the more traditional method for creating a pie filling. It involves using a potato masher or a fork to break down the cooked sweet potatoes into a soft, slightly lumpy texture. The mashed sweet potatoes will have a more rustic, homey feel, with small, pleasant chunks of sweet potato throughout the filling.
How to Mash Sweet Potatoes for Pie:
- Cook your sweet potatoes using your preferred method (boiling, roasting, or steaming).
- Once the sweet potatoes are cooked and tender, remove the skin and transfer the flesh to a bowl.
- Mash the sweet potatoes with a potato masher or a fork. If you prefer a smoother texture, mash them more thoroughly, but if you like a chunkier filling, leave some small pieces intact.
- Season and mix with your other pie ingredients like sugar, spices, eggs, and milk.
Pros of Mashing:
- Rustic Texture: Mashing leaves small pieces of sweet potato, which can create a hearty and satisfying texture in the filling. Some people prefer this slightly more textured result, especially when paired with a flaky pie crust.
- Less Equipment: Mashing requires minimal tools—just a masher or a fork—and you don’t need a blender or food processor. It’s a great option for those who want to avoid using extra equipment.
- More Control: Mashing allows you to control the consistency of the filling better. You can adjust the level of smoothness by mashing it to your preferred texture.
Cons of Mashing:
- Less Smooth Texture: Mashing can result in a filling that isn’t as smooth and silky as a pureed filling. If you’re aiming for a perfectly smooth, velvety texture, this method may not provide the desired result.
- Potential for Lumps: Without careful mashing, you might end up with lumps or uneven texture, which could affect the consistency of the pie filling.
Pureeing Sweet Potatoes: For a Silky, Smooth Filling
If you’re after a velvety smooth filling that’s creamy and perfectly uniform, pureeing your sweet potatoes is the way to go. Pureeing sweet potatoes creates a smooth texture without any lumps, making it ideal for those who prefer a creamy, luxurious pie filling. This method involves using a blender, food processor, or immersion blender to process the cooked sweet potatoes into a fine purée.
How to Puree Sweet Potatoes for Pie:
- Cook your sweet potatoes using your preferred method (boiling, roasting, or steaming).
- After the sweet potatoes have cooled slightly, remove the skin and transfer the flesh to a blender or food processor.
- Blend until smooth, adding a little bit of milk or water if necessary to help achieve a creamy consistency.
- Transfer the purée to a bowl, then mix it with the rest of your pie ingredients.
Pros of Pureeing:
- Ultra-Smooth Texture: Pureeing creates a perfectly smooth and creamy filling, which is ideal for a silky pie that’s rich in texture and flavor. This method ensures there are no lumps or uneven spots in your pie filling.
- Professional Look: A pureed filling gives your pie a more elegant and refined appearance. It can also make the pie easier to slice neatly since the filling is uniformly smooth.
- Easier to Combine Ingredients: When the sweet potatoes are pureed, the other ingredients (such as eggs, sugar, and spices) blend more easily, creating a uniform mixture without any separation.
Cons of Pureeing:
- Requires More Equipment: Pureeing requires a blender or food processor, which adds extra steps to the process and may not be ideal for those who want to keep things simple.
- Less Texture: If you enjoy the rustic feel of mashed sweet potatoes, pureeing will result in a filling that’s too smooth for your liking. Some people miss the small bits of potato that come with mashing.
- Risk of Overworking: If you puree the sweet potatoes for too long, you might accidentally make the filling too thin or runny, which could affect the final pie texture.
Mashing vs. Pureeing: Which Method is Best for Your Pie?
Choosing between mashing and pureeing really depends on the texture you want to achieve in your sweet potato pie. If you prefer a creamy, smooth filling with no lumps, pureeing is the best choice. This method is perfect for a refined pie with a silky consistency that melts in your mouth. On the other hand, if you enjoy a heartier, more rustic pie, mashing will give you the perfect filling with small bits of sweet potato that add texture and depth.
Consider your audience’s preferences as well—some people love the traditional, chunkier texture that comes with mashing, while others prefer the smoothness of pureed filling. Both methods will create a delicious pie, so it’s all about what suits your taste and the overall look and feel you want for your dessert.
Conclusion: Perfecting Your Sweet Potato Pie Filling
Whether you choose to mash or puree your sweet potatoes, the key to getting the creamiest pie filling lies in knowing how each method affects the texture and flavor. Experiment with both techniques to find the one that works best for you, or combine them by mashing the sweet potatoes first and then briefly pureeing for a slightly smoother filling. With the right approach, you’ll have a flawlessly creamy and flavorful sweet potato pie that’s sure to impress every time!
Mixing Sweet Potato Pie Ingredients for the Perfect Texture
The texture of your sweet potato pie filling is one of the most important factors in creating a delicious dessert. Achieving the perfect consistency involves not only the right ingredients but also the correct method of mixing them. Whether you prefer a creamy, smooth filling or a slightly denser pie, the way you combine the ingredients can make all the difference. In this section, we’ll explore the best practices for mixing sweet potato pie ingredients to achieve the ideal texture that complements the flavors and ensures your pie turns out perfectly every time.
1. Start with Room Temperature Ingredients
Before you begin mixing your ingredients, it’s crucial to ensure that certain items—such as eggs and butter—are at room temperature. Cold ingredients can cause the filling to have an uneven texture or even result in a pie filling that’s lumpy. For example, if you add cold eggs or butter to your mashed or pureed sweet potatoes, they may not blend smoothly, causing inconsistencies in the texture.
Why Room Temperature Ingredients Matter:
- Better Emulsion: When butter and eggs are at room temperature, they emulsify more easily, creating a smooth, cohesive filling. This helps prevent the filling from separating or becoming too runny.
- Even Mixing: Room-temperature ingredients blend together more evenly, ensuring that spices, sweeteners, and dairy are distributed throughout the filling for a consistent taste and texture.
2. Mix Wet Ingredients First, Then Add Dry Ingredients
To ensure the ingredients combine thoroughly, start by mixing the wet ingredients (such as the sweet potato purée, eggs, evaporated milk, and melted butter) together first. This will help form a smooth base for your filling. After you’ve mixed the wet ingredients, gradually incorporate the dry ingredients (such as sugar, flour, and spices). Mixing them in this order ensures that the flavors blend together more evenly, and you avoid overworking the filling, which can result in a dense or tough texture.
Step-by-Step Mixing Process:
- Combine wet ingredients: Whisk together the mashed or pureed sweet potatoes, eggs, evaporated milk, and melted butter in a large bowl until smooth.
- Incorporate sweeteners and spices: Add the brown sugar, cinnamon, nutmeg, and vanilla extract. Mix well until the sweet potato mixture is fully incorporated with the sweeteners and spices.
- Add dry ingredients: Gradually sift in the flour, salt, and any other dry ingredients. Stir gently to combine. This step should be done carefully to avoid overmixing.
- Blend to the right consistency: Mix until the filling is smooth and no lumps remain. Be sure not to overmix the ingredients to prevent the pie filling from becoming too thick or stiff.
3. Use a Gentle Hand to Avoid Overmixing
Overmixing your pie filling can negatively affect the texture. While it’s tempting to beat the filling vigorously to ensure that everything is well combined, this can lead to an overworked filling that might become too dense or even crack during baking. Overmixing can also cause the pie filling to develop an airier texture, which isn’t ideal for sweet potato pie, where a dense, rich filling is preferred.
Tips for Mixing Without Overdoing It:
- Use a spatula or whisk: A spatula or a whisk is typically gentler than an electric mixer, which can overwork the ingredients. A whisk helps incorporate the wet ingredients and aerate the mixture without beating the air out of it.
- Stop when smooth: Once your sweet potato filling is smooth and the ingredients are evenly incorporated, stop mixing. If you feel like the mixture is already blended well, there’s no need to continue stirring.
- Use a light touch: When adding the dry ingredients to the wet mixture, gently fold them in to preserve the texture of the pie. This keeps the filling light and fluffy without being too heavy.
4. Consider the Texture of Your Sweet Potato Purée
The texture of your sweet potato purée plays a significant role in the final consistency of the pie filling. If your sweet potato purée is too thick, the pie may turn out dense and dry. On the other hand, if the purée is too runny, the pie filling may not set properly and could result in a soupy texture. To achieve the best texture, make sure your sweet potato purée has a creamy, smooth consistency.
How to Achieve the Right Texture for Your Sweet Potato Purée:
- Blender or Food Processor: Pureeing the cooked sweet potatoes in a blender or food processor will give you a smooth and creamy texture that’s ideal for pie filling.
- Avoid Overcooking: If the sweet potatoes are overcooked, they can release too much moisture, which could make the filling too runny. Be mindful of cooking time to achieve the perfect consistency.
- Strain if Necessary: If your sweet potato purée has too much liquid, you can strain it through a fine mesh sieve or cheesecloth to remove excess moisture.
5. Add Adjustments as Needed
Sometimes, during the mixing process, the texture of the pie filling might not be quite right. If you find that your filling is too runny or thick, you can adjust it by adding a little more evaporated milk (for creaminess) or a spoonful of flour (for thickening). Taste and texture are essential, so don’t hesitate to make small adjustments during the mixing process.
How to Adjust the Filling Texture:
- For thicker filling: If your filling seems too runny, add a small amount of flour (1 teaspoon at a time) and mix well until the desired consistency is achieved.
- For smoother filling: If the filling is too thick or dry, add a little more evaporated milk or a splash of water to loosen it up. Stir gently to incorporate, but avoid overmixing.
Conclusion: Mixing Sweet Potato Pie Ingredients for the Perfect Texture
Achieving the perfect sweet potato pie texture comes down to how you mix your ingredients and the careful balance of wet and dry components. Start with room temperature ingredients, mix wet ingredients first, and gently incorporate the dry ingredients to avoid overmixing. By paying attention to the texture of your sweet potato purée and making any necessary adjustments along the way, you can create a smooth, creamy filling that bakes up beautifully. With these mixing techniques, your sweet potato pie will have a perfectly rich and satisfying texture that’s sure to delight anyone who takes a bite.
Baking Tips for the Best Sweet Potato Pie
Oven Temperature & Baking Time for Perfectly Cooked Sweet Potato Pie
Baking a perfect sweet potato pie requires more than choosing the right ingredients. The oven temperature and baking time are critical. If they’re off, your pie may have an undercooked center, a burned crust, or a poor texture. Let’s break down the ideal oven temperature, baking time, and tips for getting it just right.
1. Ideal Oven Temperature for Sweet Potato Pie
The right temperature helps bake the pie evenly. Too high a temperature can burn the crust before the filling cooks. Too low can leave the filling undercooked. The sweet spot is 350°F (175°C).
Why 350°F is Best:
- Even Cooking: It allows the pie to bake evenly.
- Creamy Filling: It firms up the filling without drying it out.
- Golden Crust: The crust becomes golden and flaky at this temperature.
2. How Long to Bake Sweet Potato Pie
Baking time usually ranges from 45 to 55 minutes. It can vary depending on your oven and pie size. The best way to tell when it’s done is to look for visual cues.
Signs the Pie is Done:
- Firm Center: The filling should be set with a slight jiggle in the center.
- Golden Edges: The crust should be brown and crispy. If it’s getting too dark, cover the edges with foil.
- Toothpick Test: Insert a toothpick into the center. If it comes out clean, the pie is ready.
3. Baking Time for Different Pie Sizes
Pie size affects baking time. Here’s a basic guide:
- Standard 9-inch pie: 45 to 55 minutes
- Mini pies: 30 to 35 minutes
- Deep-dish pies: 55 to 65 minutes
Mini pies bake faster, while deep-dish pies take longer.
4. The Importance of Preheating
Preheat your oven to 350°F before baking the pie. An unheated oven can cause uneven cooking, leading to undercooked filling or soggy crust.
How to Preheat:
- Set the oven to 350°F and wait for it to fully heat.
- Use an oven thermometer to check the temperature.
- Let the oven preheat for 10 to 15 minutes.
5. Use a Baking Sheet for Easy Cleanup
Place your pie on a baking sheet. This helps catch drips and prevents spills in the oven. It also ensures even baking.
Why Use a Baking Sheet:
- Catch Drips: It keeps the oven clean if the filling bubbles over.
- Better Heat Distribution: The baking sheet helps the pie bake evenly.
- Easy Cleanup: It’s much easier to clean a baking sheet than the oven.
6. Avoid Over-Baking or Under-Baking
Even with the right time and temperature, it’s important to watch for signs that the pie is done.
- Over-baking: The filling may dry out, and the crust could burn. If this happens, cover the edges with foil.
- Under-baking: The filling will still be runny. If it’s not set, bake a little longer.
Check the pie a few minutes before the time is up to avoid over-baking.
Conclusion: Perfect Oven Temperature & Baking Time
The key to a perfect sweet potato pie is 350°F and baking for 45 to 55 minutes. Keep an eye on visual cues, like a firm center and golden crust. With these tips, you’ll bake a beautiful pie every time.
How to Prevent a Soggy Sweet Potato Pie Crust
One of the biggest challenges when baking a sweet potato pie is ensuring the crust remains crisp and flaky, rather than soggy. A soggy crust can ruin an otherwise perfect pie, leaving it unappealing and affecting its texture. Fortunately, there are several techniques you can use to prevent this issue. Let’s explore the best ways to keep your sweet potato pie crust from becoming soggy, so it stays crisp and delicious all the way through.
1. Blind Baking: The Secret to a Crisp Crust
Blind baking is a technique where you bake the pie crust before adding the filling. This helps set the crust and ensures it stays crisp even with the wet filling of a sweet potato pie. Without blind baking, the moisture from the filling can seep into the crust during baking, making it soggy.
How to Blind Bake:
- Preheat your oven to 375°F (190°C).
- Line the pie crust with parchment paper or aluminum foil.
- Fill the crust with pie weights or dried beans to weigh it down.
- Bake for about 10-15 minutes until the crust is lightly golden.
- Remove the weights and parchment, then return the crust to the oven for another 5-10 minutes to finish baking. This step ensures the crust is fully cooked and crisp.
2. Use a Thick Filling
Another way to prevent a soggy crust is to make sure your sweet potato pie filling is thick enough. If the filling is too runny, it will release moisture into the crust, causing it to become soggy. By ensuring your filling has the right consistency, you can prevent excess moisture from soaking into the crust.
How to Thicken Your Filling:
- Cook the sweet potatoes well: When boiling or roasting sweet potatoes, make sure they’re cooked thoroughly and let them cool slightly before mashing or pureeing. The more moisture you remove from the potatoes at this stage, the better.
- Add a thickening agent: Ingredients like cornstarch or flour can help thicken the filling. If using flour, make sure to cook it in the butter before adding the other ingredients, as this will eliminate the raw taste and help the filling set better.
- Limit liquids: Be mindful of the amount of liquid ingredients you add, such as milk or cream. You don’t need to overload your filling with liquid; just enough to make a smooth, spreadable texture.
3. Brush the Crust with Egg Wash
One of the simplest methods to prevent a soggy crust is to apply an egg wash before baking. The egg wash creates a barrier that helps seal the crust, preventing moisture from seeping through.
How to Apply an Egg Wash:
- Whisk together 1 egg and 1 tablespoon of water.
- Brush the mixture over the crust before adding the filling.
- Bake as usual. The egg wash will create a protective layer, keeping the crust crisp while the filling bakes.
4. Bake at the Right Temperature
Baking your sweet potato pie at the right temperature is essential to ensure the crust bakes through properly. If the temperature is too low, the crust won’t cook fully and can absorb moisture from the filling, leading to sogginess. Conversely, baking at too high a temperature can cause the crust to burn before the filling has a chance to set.
Ideal Temperature for Baking Sweet Potato Pie:
- Bake your pie at 350°F (175°C) for an evenly baked pie. This temperature allows the crust to bake thoroughly while giving the filling enough time to set without overcooking.
5. Avoid Overfilling the Pie
When making your sweet potato pie, it’s important not to overfill the crust. If the filling overflows or is too thick, it can cause the crust to absorb more moisture than it can handle, which may result in a soggy bottom.
How to Avoid Overfilling:
- Leave about 1/2 inch of space between the filling and the top of the crust.
- This allows the pie to expand slightly while baking without spilling over or soaking the crust.
6. Use a Darker Pie Dish
The color of your pie dish can influence the way the crust bakes. Darker pie dishes absorb heat more efficiently, which can help the crust bake more evenly and reduce the risk of sogginess. Lighter dishes reflect heat, which might result in a crust that doesn’t bake as thoroughly.
Why Choose a Darker Dish:
- Faster, more even baking: A dark dish helps the crust brown faster and evenly, preventing it from becoming soggy before the filling is done.
- Better heat distribution: A darker dish distributes heat more evenly, ensuring that the crust cooks through without remaining underbaked.
7. Serve the Pie at the Right Time
Even if you’ve followed all the tips above, serving your sweet potato pie too soon can still result in a soggy crust. If you cut into the pie while it’s still too hot, the filling can leak and soak into the crust. It’s essential to let the pie cool for at least two hours after baking before cutting into it.
Why Let It Cool?
- Sets the Filling: Cooling allows the filling to firm up, which helps prevent it from being too runny and soaking into the crust.
- Prevents a Soggy Bottom: Allowing the pie to cool ensures that the moisture from the filling doesn’t leak into the crust right away.
Conclusion: How to Keep Your Sweet Potato Pie Crust Crisp
To prevent a soggy sweet potato pie crust, use blind baking, thicken the filling, and apply an egg wash. Bake at the right temperature and avoid overfilling your pie. Let it cool before cutting, and choose a darker pie dish for better heat distribution. By following these tips, you can enjoy a sweet potato pie with a crisp, flaky crust and a perfectly set filling.
Using a Food Processor for Smooth Sweet Potato Pie Filling
Achieving a perfectly smooth and creamy sweet potato pie filling is essential for creating a luxurious, velvety texture that complements the flaky crust. One of the easiest and most efficient tools for this job is a food processor. This kitchen gadget allows you to quickly blend your ingredients into a smooth, uniform mixture, saving you time and effort. Let’s dive deeper into why a food processor is a great choice for making sweet potato pie filling and how to use it for the best results.
1. Why Choose a Food Processor for Pie Filling?
A food processor is an excellent tool for making smooth sweet potato pie filling for several reasons. It ensures consistency and speed, especially when compared to other methods like mashing by hand or using a blender.
Advantages of Using a Food Processor:
- Consistent Texture: A food processor can puree the sweet potatoes much more smoothly than mashing them by hand or using a hand mixer. The powerful blades create a perfectly uniform texture, which is key to the creamy filling of a pie.
- Time-Saving: It’s much faster than mashing or manually mixing ingredients. Simply toss everything into the bowl, pulse, and you’re done.
- No Lumps: The food processor ensures there are no lumps in the filling, which could otherwise affect the smoothness of the pie. Lumps are particularly noticeable in a sweet potato pie and can ruin the eating experience.
2. Preparing the Sweet Potatoes for Processing
Before using the food processor, you need to prepare the sweet potatoes properly. This step is crucial for ensuring the food processor works efficiently and gives you the desired smooth filling.
How to Prepare Sweet Potatoes:
- Cook the Sweet Potatoes: Whether you choose to boil, roast, or steam your sweet potatoes, make sure they’re cooked thoroughly. Roasting tends to bring out the natural sweetness and flavor, while boiling is faster but may add excess moisture.
- Peel the Skin: After cooking the sweet potatoes, let them cool slightly. Once they’re cool enough to handle, peel off the skins. A food processor works best with peeled potatoes, as the skin can create texture that you don’t want in your filling.
- Cut into Chunks: Cut the sweet potatoes into smaller chunks, about 1-inch cubes. This will make it easier for the food processor to break them down quickly and evenly.
3. The Best Way to Use a Food Processor for Pie Filling
Once your sweet potatoes are prepped, it’s time to process them. The key to achieving the creamiest sweet potato pie filling is to blend the sweet potatoes with other ingredients in the correct order and method.
Steps to Use a Food Processor for Filling:
- Add the Sweet Potatoes First: Place the pre-cooked and peeled sweet potatoes into the bowl of the food processor. Ensure that they’re evenly distributed to allow the blades to work effectively.
- Add Other Ingredients Gradually: Add in your other ingredients like brown sugar, eggs, spices, and evaporated milk. If you add them all at once, the processor may struggle to blend everything together evenly.
- Pulse to Begin: Start by pulsing the food processor a few times to break up the chunks of sweet potato. This will ensure that the sweet potatoes are evenly processed before you start continuously blending.
- Process Until Smooth: Once the mixture is broken down, let the food processor run continuously until the mixture is smooth and silky. Scrape down the sides of the bowl as needed to ensure everything gets fully incorporated.
- Check for Consistency: Stop the processor and check the consistency. If it’s too thick, you can add a little extra milk or cream to reach the desired smoothness. If it’s too thin, add a touch more cornstarch or flour to thicken it up.
4. Tips for Achieving the Best Texture
To get the creamiest pie filling, here are a few extra tips when using the food processor:
- Add Some Butter: If you want extra richness and smoothness, adding a tablespoon or two of softened unsalted butter while blending will make the filling even more luxurious.
- Use Room Temperature Ingredients: Make sure the eggs and milk are at room temperature. Cold ingredients can cause the filling to have a lumpy texture and may not blend as smoothly.
- Avoid Over-processing: It’s easy to think that the longer you process, the smoother it will get. However, over-blending can result in a filling that’s too runny. Keep an eye on the consistency and stop processing once you reach a smooth, creamy texture.
5. How the Food Processor Impacts the Final Pie
The key advantage of using a food processor for your sweet potato pie filling is the smoothness and consistency it provides. A perfectly smooth filling results in a pie with a silky, melt-in-your-mouth texture that makes each bite irresistible. Without lumps or inconsistent texture, your sweet potato pie will have a more professional, polished look and taste.
Conclusion: The Perfect Tool for Smooth Pie Filling
Using a food processor for your sweet potato pie filling ensures a smooth, creamy, and perfectly blended texture. It’s quicker than other methods and guarantees that your pie filling will be lump-free, making for a more luxurious dessert. With a few simple steps, you can create a filling that elevates your pie to the next level, ensuring it’s just as delightful to the eyes as it is to the taste buds.
Common Mistakes to Avoid When Making Sweet Potato Pie
Using the Wrong Type of Sweet Potatoes in Your Recipe
When making sweet potato pie, the type of sweet potatoes you choose can have a significant impact on both the flavor and texture of your pie. While there are several varieties of sweet potatoes available, not all of them are ideal for pie-making. Using the wrong type can lead to a pie that is too watery, lacks flavor, or doesn’t have the right consistency. Let’s explore the different types of sweet potatoes and why selecting the proper variety is key to achieving the best results.
1. Understanding the Two Main Types of Sweet Potatoes
There are two primary types of sweet potatoes commonly found in the U.S.: orange-fleshed sweet potatoes and white-fleshed sweet potatoes. Each type has its own characteristics and works differently in recipes like sweet potato pie.
Orange-Fleshed Sweet Potatoes (The Best Choice for Pie)
- Texture: Orange-fleshed sweet potatoes, such as the Beauregard or Jewel varieties, are known for their creamy, smooth texture when cooked. This makes them the ideal choice for a pie filling that should be velvety and smooth.
- Flavor: These sweet potatoes have a natural sweetness and a rich, earthy flavor that complements the spices and sweetness in a pie recipe. Their flavor is sweeter than other varieties, which helps create that classic comforting taste in your pie.
- Moisture Content: Orange-fleshed sweet potatoes have a slightly higher moisture content, which helps in creating a smooth, creamy filling for your pie. However, they also require careful preparation to avoid excess moisture that could make the crust soggy.
White-Fleshed Sweet Potatoes (Avoid for Pie)
- Texture: White-fleshed sweet potatoes, such as the Hannah or Japanese varieties, have a firmer, drier texture. While this texture may be desirable in other dishes like fries or roasted vegetables, it’s not the best for pie filling, as it doesn’t mash or puree as smoothly as the orange variety.
- Flavor: White sweet potatoes tend to have a more subtle flavor, sometimes described as less sweet and slightly more starchy than orange sweet potatoes. This can result in a bland pie filling that lacks the richness and depth of flavor you want in a classic sweet potato pie.
- Moisture Content: The drier texture of white sweet potatoes can lead to a pie filling that’s too thick and dry. While this can be adjusted with extra liquids, it can make it harder to achieve the ideal smoothness and consistency in your pie.
2. Why Orange-Fleshed Sweet Potatoes Are Ideal for Pie
For the best sweet potato pie, orange-fleshed sweet potatoes are the gold standard. These sweet potatoes give the pie its signature creamy texture, rich flavor, and vibrant color. Here’s why they’re the top choice:
- Better Flavor: The natural sweetness of orange sweet potatoes pairs perfectly with the spices commonly used in sweet potato pie, such as cinnamon, nutmeg, and vanilla. The sweetness of the potato is enhanced during baking, creating the perfect balance of flavors.
- Creamier Texture: Orange sweet potatoes break down into a smooth, creamy texture when mashed or pureed. This helps create a filling that’s light, airy, and perfectly smooth. The richness they bring ensures that the pie’s filling has the right mouthfeel.
- Ideal Consistency: These sweet potatoes have the perfect balance of moisture to ensure your filling isn’t too thick or too runny. This helps avoid issues like a pie filling that doesn’t set properly or a soggy crust from excess moisture.
3. What Happens if You Use the Wrong Sweet Potato?
Using the wrong type of sweet potato—particularly white-fleshed varieties—can lead to several problems in your pie recipe. Here’s what can go wrong:
Too Dry or Too Watery:
- White-fleshed sweet potatoes often have a lower moisture content, which can result in a dry, crumbly filling. If you use these, you may need to add more liquid to compensate, which can alter the flavor and texture of the pie.
- On the other hand, if you use orange-fleshed sweet potatoes and overcook them, they can release too much moisture, making your filling runny and causing the crust to become soggy.
Unpleasant Texture:
- The drier, firmer texture of white sweet potatoes can cause your filling to be lumpy, and it won’t achieve the smooth, creamy consistency that makes a sweet potato pie so appealing. Even a powerful food processor may not be able to smooth out the texture fully, leaving lumps that could affect the overall quality of the pie.
Lack of Flavor:
- Sweet potato pie relies on the inherent sweetness of the potatoes, so using a less-sweet variety can lead to a pie that tastes bland or underwhelming. White sweet potatoes, with their milder flavor, may not bring out the same richness in the filling as the orange-fleshed varieties.
4. How to Select the Right Sweet Potato for Your Pie
Now that you know why orange-fleshed sweet potatoes are the best choice for pie, here’s how to select the right ones at the store:
Look for Firmness:
- Choose sweet potatoes that are firm to the touch, with no soft spots or wrinkles. Soft spots may indicate the sweet potatoes are overripe or have been improperly stored, which could affect the flavor and texture of your pie.
Check for Color:
- Orange sweet potatoes should have a deep, vibrant orange hue. Avoid those that appear pale or discolored, as they may not provide the sweetness and texture you’re looking for.
Size Matters:
- Larger sweet potatoes can sometimes be drier, so it’s better to opt for medium-sized ones that tend to have the ideal balance of moisture and flavor.
Conclusion: The Importance of Choosing the Right Sweet Potatoes
The sweet potatoes you use can make or break your pie. While it might be tempting to use any variety, the best choice for a delicious sweet potato pie is the orange-fleshed variety, such as Beauregard or Jewel. These sweet potatoes provide the perfect balance of flavor, moisture, and texture to create the creamy, sweet filling that everyone loves. By choosing the right sweet potatoes, you can ensure your pie turns out as smooth, flavorful, and delicious as possible.
Forgetting to Pre-Bake the Pie Crust Before Adding the Filling
One of the most common mistakes when making sweet potato pie is forgetting to pre-bake (or “blind bake”) the pie crust before adding the filling. This simple step can make a significant difference in the final texture and quality of your pie. Skipping it may lead to a soggy, undercooked bottom, which detracts from the pie’s overall appeal. Pre-baking ensures that the crust remains crisp and fully cooked, even after the long baking time required for the filling. Let’s explore why pre-baking is so essential and how to do it correctly.
1. Why Pre-Baking the Pie Crust Matters
Pre-baking the pie crust creates a protective layer between the filling and the crust. This barrier is important for several reasons:
Preventing a Soggy Bottom
- Sweet potato pie fillings tend to have a high moisture content. Without pre-baking, this moisture can seep into the uncooked crust, causing it to become soggy. Pre-baking the crust helps maintain its crispness.
Even Baking
- When you pre-bake the crust, it allows for more even baking. Without it, the crust could burn before the filling is fully cooked, ruining both the texture and flavor.
Enhanced Flavor and Texture
- The pre-baking process adds flavor and helps the crust achieve a golden, slightly crisp texture that contrasts nicely with the smooth filling.
2. How to Pre-Bake Your Pie Crust (Blind Baking)
Now that we understand why pre-baking is crucial, let’s look at the steps involved:
Step 1: Prepare the Crust
Begin by rolling out the dough and fitting it into your pie pan. If you’re using a store-bought crust, ensure it fits snugly. For the best results, be sure to crimp the edges neatly.
Step 2: Chill the Crust
Refrigerating the crust for at least 30 minutes before baking helps prevent shrinkage during the baking process. This step ensures that the dough retains its shape.
Step 3: Line with Parchment Paper
Once chilled, line the pie crust with parchment paper or aluminum foil. This step prevents the edges from burning while baking.
Step 4: Add Pie Weights or Beans
To keep the crust from puffing up during baking, fill the parchment paper with pie weights, dried beans, or rice. These weights will help the crust maintain its flat shape.
Step 5: Bake and Cool
Place the crust in a preheated oven at 375°F (190°C) for about 15-20 minutes, or until the edges are golden brown. Once done, remove the pie weights and parchment paper, then bake for another 5-7 minutes to crisp up the bottom. Allow the crust to cool slightly before adding the filling.
3. What Can Go Wrong If You Don’t Pre-Bake the Crust?
Skipping the pre-baking step can lead to several issues:
Soggy Pie Crust
- Without pre-baking, the moisture from the filling can make the crust soggy. This compromises the texture of the pie and makes it less enjoyable.
Under-Cooked Crust
- A raw crust may not cook properly during the pie’s long baking time, leaving you with an undercooked, doughy base. This could also cause uneven baking, where the filling bakes faster than the crust.
Uneven Baking
- Pre-baking helps the crust and filling bake evenly. Without it, the pie may end up with burnt edges and an underdone base, making it less appetizing.
4. Alternative Methods to Avoid Soggy Crust
If you’re short on time, there are alternative methods to reduce the risk of a soggy crust:
Brush the Crust with Egg Wash
- After pre-baking, brush the inside of the crust with a thin layer of egg wash (beaten egg mixed with water). This helps seal the crust, preventing moisture from the filling from seeping in.
Use a Pie Crust Shield
- A pie crust shield is a great tool to prevent the crust edges from burning while pre-baking. This allows you to protect the delicate edges of your dough while ensuring the rest of the pie cooks evenly.
Conclusion: The Importance of Pre-Baking Your Pie Crust
Pre-baking your pie crust is an essential step for achieving the perfect sweet potato pie. This process not only prevents sogginess but also ensures a crisp, golden crust that enhances the overall texture and flavor of the pie. While it might seem like an extra step, pre-baking the crust is well worth the effort, ensuring that your sweet potato pie comes out perfectly every time. Whether you choose the traditional blind baking method or opt for a quicker egg wash approach, don’t skip this crucial step!
Not Using Enough Spices: Why Cinnamon, Nutmeg, and Vanilla Matter
Spices are the soul of a sweet potato pie. They elevate the flavor profile, transforming a simple dessert into something warm, aromatic, and irresistible. While sweet potatoes themselves have a natural sweetness and earthiness, it’s the right balance of spices like cinnamon, nutmeg, and vanilla extract that really brings the pie to life. Skimping on these essential ingredients can leave your pie tasting flat and underwhelming, even if the texture is perfect. Here’s why each of these spices is critical to a great sweet potato pie.
1. Cinnamon: The Warm, Earthy Base Flavor
Cinnamon is one of the most essential spices in sweet potato pie. It has a natural warmth that pairs perfectly with the sweet, rich flavor of the potatoes. When you add cinnamon to your pie, it provides that cozy, comforting aroma that many people associate with fall baking. Ground cinnamon adds a subtle spiciness and depth to the flavor, creating a beautiful balance with the sweetness of the sweet potatoes.
- How Much to Use: It’s tempting to throw in a little dash of cinnamon, but for a truly flavorful pie, you’ll want to use about 1 to 1.5 teaspoons per pie. This amount ensures that the flavor isn’t overwhelming but is still noticeable in every bite.
- Tip: Don’t skip the cinnamon! It’s a crucial ingredient for getting the classic sweet potato pie taste. Even a little extra cinnamon can make a big difference.
2. Nutmeg: The Aromatic Spice That Complements Cinnamon
Nutmeg has a distinctive, slightly sweet and spicy flavor that pairs perfectly with cinnamon in sweet potato pie. A little nutmeg goes a long way, and it complements the natural sweetness of the sweet potatoes while providing an additional layer of complexity. The essential oils in nutmeg offer a hint of warmth and bitterness, which balances out the sweetness and richness of the pie filling. Without nutmeg, the pie may lack that signature aromatic flavor and depth.
- How Much to Use: Typically, about ½ teaspoon of freshly grated or ground nutmeg is enough for one pie. Freshly grated nutmeg will provide a more intense and flavorful aroma than pre-ground nutmeg.
- Tip: A small amount of freshly grated nutmeg can transform your pie from good to exceptional. Don’t skip this step, as it’s key to creating that signature sweet potato pie taste.
3. Vanilla Extract: The Flavor Enhancer
Vanilla extract is another key ingredient that adds depth to your sweet potato pie. While it might seem like a simple ingredient, vanilla’s smooth, rich flavor complements the spices and enhances the overall taste. It softens the sharpness of the spices and brings out the natural sweetness of the sweet potatoes. Vanilla helps balance the richness of the pie filling, preventing it from tasting too heavy or overly sweet.
- How Much to Use: Typically, 1 teaspoon of pure vanilla extract is sufficient to bring out its full potential in the pie. If you’re looking for a more pronounced vanilla flavor, you can add a bit more, but be careful not to overpower the other spices.
- Tip: Always opt for pure vanilla extract instead of imitation vanilla for a more authentic, flavorful taste. The quality of the vanilla extract can make a big difference in the final outcome of your pie.
4. The Power of Spice Balance
The magic of sweet potato pie lies in the balance between the spices. Cinnamon, nutmeg, and vanilla create a flavor profile that’s warm, sweet, and aromatic. When used in the right amounts, these spices create layers of flavor that complement each other, resulting in a balanced pie. If you don’t use enough of these spices, the pie may lack that signature taste that makes it so special. On the other hand, using too much of one spice can make the pie taste one-dimensional or overpowering.
5. Experimenting with Other Spices
While cinnamon, nutmeg, and vanilla are the traditional choices, feel free to experiment with other spices to put your personal twist on the recipe. Ginger can add a nice zesty kick, while allspice or cloves can introduce even more depth and complexity. Just be careful not to overdo it—sweet potato pie is all about balance, and adding too many spices can throw off the delicate harmony.
- Tip: If you want to experiment, try adding a pinch of ginger or allspice to your recipe. These spices can introduce a subtle warmth and complexity without overpowering the classic flavor.
Overmixing or Undermixing: The Secret to a Perfect Sweet Potato Pie
When it comes to making sweet potato pie, one of the most overlooked yet crucial steps is mixing the ingredients. Whether you’re mixing the filling by hand or with an electric mixer, the technique you use can significantly impact the final texture and consistency of the pie. Overmixing and undermixing both come with their own set of challenges. Finding the sweet spot in your mixing process is the secret to achieving that perfect, smooth, creamy, and lump-free filling that everyone loves.
1. The Dangers of Overmixing: A Watery and Airy Pie
Overmixing the pie filling might seem harmless at first, but it can cause some serious issues. When you mix the filling too much, you introduce too much air into the batter. This can result in an overly airy or frothy filling that will not set properly when baked. Overmixing can also break down the sweet potatoes too much, turning the filling too thin or watery. This not only affects the texture but can also cause the pie to leak moisture and result in a soggy crust.
- Why Overmixing Happens: Overmixing tends to happen when you’re using a high-speed mixer or beating the mixture for too long. It’s easy to get carried away trying to get a smooth texture, but the goal is to incorporate the ingredients just enough for a silky filling.
- Signs of Overmixing: If your filling has too much air, it may look too light or frothy, and you might notice bubbles forming on the surface. Additionally, the texture can become loose and thin, which can cause it to lose its custardy consistency.
- Tip: Mix the filling on low speed or by hand, and only until the ingredients are well combined. Stop mixing as soon as the filling is smooth and free of lumps. This way, you’ll retain a dense, rich texture while avoiding air bubbles.
2. The Risks of Undermixing: Lumps and Uneven Texture
On the other hand, undermixing your sweet potato pie filling can result in a lumpy, uneven texture. If the ingredients aren’t incorporated properly, you could end up with clumps of sweet potato or undissolved sugar in the filling. These lumps can affect the pie’s smooth, velvety consistency, and they may create an unpleasant eating experience.
- Why Undermixing Happens: Undermixing occurs when the ingredients are not thoroughly combined, whether due to a rushed mixing process or using too low a speed on your mixer. If you’re using hand-mixing methods, it’s easy to miss some areas of the filling, leaving lumps that won’t dissolve during baking.
- Signs of Undermixing: You may notice lumps of sweet potato or sugar in the filling, even after the pie is baked. These lumps can create an uneven texture, and some parts of the pie may be denser than others, leading to an inconsistent mouthfeel.
- Tip: To avoid undermixing, use a steady hand or a slow speed on your mixer. Scrape down the sides of the bowl periodically to ensure all ingredients are being incorporated evenly. Make sure that the sweet potatoes, sugar, and spices are fully mixed into a smooth, creamy consistency before you stop.
3. How to Achieve the Perfect Mix: Balance is Key
The key to a perfectly mixed sweet potato pie filling is to find the balance between not overworking and not underworking the ingredients. Here’s how you can achieve that sweet spot:
- Start Slow: Begin mixing at a low speed or by hand. This helps to combine the ingredients without whipping in too much air, ensuring that the filling stays dense and smooth.
- Stop When Smooth: Once the mixture is smooth and free of lumps, stop mixing. There’s no need to keep going after this point.
- Use the Right Tools: For an easier mixing process, use a hand mixer or stand mixer on low speed. Alternatively, a potato masher or even a food processor can work well for creating a lump-free filling.
- Check the Texture: The perfect sweet potato pie filling should be smooth, thick, and slightly spoonable. If it’s too runny, you’ve probably overmixed; if it’s lumpy, you’ve undermixed. If needed, use a whisk or hand mixer on low to gently smooth out the mixture.
4. The Impact of Proper Mixing on Baking
Properly mixed filling will yield a pie that bakes evenly, with a silky smooth texture that sets perfectly in the oven. Overmixed filling can result in uneven baking, where the pie might rise too much or collapse upon cooling. Undermixed filling can lead to an uneven custard texture, with some parts of the pie undercooked and others overcooked.
- The Role of the Oven: A well-mixed pie filling ensures that it bakes evenly in the oven, creating a beautiful, uniform texture throughout the pie.
- Tip: To test the consistency, you can gently tap the pie pan before baking. If the filling doesn’t move too much and has a thick consistency, it’s perfect for baking.
5. Experimenting with Different Mixing Techniques
If you’re looking to fine-tune your sweet potato pie, don’t hesitate to experiment with different mixing techniques. For example, using a food processor can give you a silky, smooth texture, while hand-mashing the sweet potatoes gives a more rustic feel. The key is to ensure that your mixing technique doesn’t overwork or underwork the mixture.
- Tip: If you prefer to use a food processor or blender, these tools can help you achieve a perfectly smooth filling without overmixing.
Conclusion
To wrap things up, creating the perfect sweet potato pie starts with choosing high-quality ingredients. The right sweet potatoes, spices, and sweeteners will make all the difference in the flavor and texture of your pie. Don’t be afraid to experiment with different variations to find what works best for your taste preferences.
Now that you know the essential ingredients for sweet potato pie, it’s time to dive into the step-by-step preparation process. Check out our How to Make Sweet Potato Pie: Step-by-Step Guide to learn how to make the perfect pie from start to finish!
Now it’s your turn—try out the recipe, play around with ingredient substitutions, and make it your own. Whether you stick with the classic ingredients or get creative, the end result will be a delicious and comforting dessert perfect for any occasion.
We’d love to hear about your experience! Share your thoughts, tips, or variations in the comments below. Have you tried any unique twists on sweet potato pie? Let us know what worked for you!