

Introduction
Chicken breast is one of the most popular and versatile ingredients in home cooking. Whether you’re looking for a quick weeknight dinner, a healthy high-protein meal, or a delicious dish the whole family will love, chicken breast recipes have you covered.
Not only is chicken breast lean, nutritious, and easy to cook, but it also works well with a variety of seasonings and cooking methods. From baked and grilled to skillet-seared and air-fried, there are endless ways to prepare juicy and flavorful chicken breast.
In this post, we’ve gathered 25 of the best chicken breast recipes to inspire your next meal. Whether you prefer something light and healthy or rich and comforting, there’s a perfect recipe for you.
Let’s explore the best ways to cook chicken breast for delicious results!
Why Chicken Breast Recipes Are Perfect for Easy and Healthy Meals
If you’re looking for new ideas for healthy and easy meals, here are some of the best chicken breast recipes you’ll love!
High-Protein Chicken Meals: Nutritious and Satisfying
Chicken breast is an excellent source of lean protein, making it a top choice for healthy meals. Whether you’re an athlete, trying to lose weight, or simply maintaining a balanced diet, high-protein chicken breast recipes help keep you full, energized, and satisfied.
Why Is Chicken Breast a Great Source of Protein?
- Low in Fat, High in Protein: Unlike fatty meats, chicken breast is naturally lean, making it a heart-healthy option.
- Packed with Essential Amino Acids: It provides all nine essential amino acids, which support muscle repair and immune function. As a result, it helps keep your body strong.
- Helps with Weight Management: Protein boosts metabolism and reduces cravings, making it easier to control portions and avoid snacking. This is especially useful for those watching their weight.
- Supports Muscle Growth and Recovery: Whether you’re working out or just staying active, protein-rich meals help with muscle repair and strength-building.
How Much Protein Does Chicken Breast Contain?
A 3.5-ounce (100g) serving of skinless, boneless chicken breast provides:
- 31 grams of protein, which is great for muscle growth.
- 165 calories, making it a low-calorie, high-protein option.
- 3.6 grams of fat, much lower than fatty cuts of meat.
- Zero carbs, making it perfect for low-carb diets.
Because of this nutritional profile, chicken breast is an ideal choice for high-protein, low-carb, or balanced diets.
Best High-Protein Chicken Breast Recipes
If you’re looking for delicious, protein-packed meals, here are some great options:
- Grilled Herb Chicken Breast – Simple, flavorful, and great for meal prep. Plus, it pairs well with many sides.
- Baked Lemon Garlic Chicken Breast – A light, high-protein dish with a fresh citrus flavor. As a bonus, it’s incredibly easy to make.
- Air Fryer Crispy Chicken Breast – A healthy twist on fried chicken without excess oil. Therefore, it’s a great guilt-free alternative.
- Skillet Garlic Butter Chicken – Rich and satisfying, packed with protein and flavor. In addition, it cooks in just minutes.
By adding these protein-rich recipes to your meal plan, you can enjoy nutritious, satisfying meals that support your health and fitness goals.
Versatile Chicken Breast Cooking Methods: Baked, Grilled, and More
One of the best things about chicken breast recipes is their versatility. Whether you prefer baking, grilling, pan-searing, or air frying, each method brings out a unique flavor and texture. As a result, the right cooking technique can make the difference between a dry, bland chicken breast and one that’s juicy, tender, and flavorful. Below, we’ll explore the best ways to cook chicken breast and share tips for perfect results every time.
1. Baked Chicken Breast: Easy and Foolproof
Why Bake?
Baking is one of the simplest ways to cook chicken breast. In addition, it requires minimal effort, yet it results in tender, juicy meat when done correctly. Moreover, it’s ideal for meal prep, as you can cook multiple pieces at once.
Best Tips for Baking Chicken Breast:
- First, brine or marinate: Soaking the chicken in a saltwater solution or marinade for at least 30 minutes helps lock in moisture.
- Next, use a meat thermometer: Overcooking dries out the chicken. Bake at 375°F (190°C) for 20–25 minutes, or until the internal temperature reaches 165°F (75°C).
- Finally, let it rest: Resting the chicken for 5 minutes before slicing allows the juices to redistribute, keeping it moist.
Delicious Baked Chicken Breast Recipes:
- Baked Lemon Herb Chicken – A light, flavorful dish with fresh herbs and citrus.
- Garlic Parmesan Baked Chicken – A crispy, cheesy option with bold flavors.
- Oven-Baked BBQ Chicken Breast – Sweet, smoky, and perfect for BBQ lovers.
2. Grilled Chicken Breast: Smoky and Flavorful
Why Grill?
Grilling adds a delicious smoky flavor and creates a crispy exterior while keeping the inside juicy. In fact, it’s also a healthy cooking method since it doesn’t require much oil.
Best Tips for Grilling Chicken Breast:
- To begin with, pound the chicken evenly: Thinner pieces cook more evenly, preventing dry spots.
- Then, oil the grill grates: This prevents sticking and gives beautiful grill marks.
- Furthermore, cook over medium heat: High heat can burn the outside before the inside is done. Grill at 375°F (190°C) for about 5–7 minutes per side.
Delicious Grilled Chicken Breast Recipes:
- Honey Garlic Grilled Chicken – A sweet and savory glaze for extra flavor.
- Cajun-Spiced Grilled Chicken – A bold, smoky dish with a kick of spice.
- Teriyaki Grilled Chicken – Perfect for pairing with rice or veggies.
3. Skillet Chicken Breast: Quick and Crispy
Why Use a Skillet?
Pan-searing chicken breast creates a golden, crispy crust while keeping the inside juicy. This method is ideal for fast weeknight dinners.
Best Tips for Skillet-Cooked Chicken Breast:
- Start with a heavy pan: A cast-iron skillet gives the best sear and even heat distribution.
- Next, don’t overcrowd the pan: Cooking in batches prevents steaming, ensuring a crispy crust.
- Also, baste with butter or oil: This enhances flavor and keeps the chicken moist.
Delicious Skillet Chicken Breast Recipes:
- Garlic Butter Skillet Chicken – Rich, buttery, and full of garlic goodness.
- Lemon Pepper Chicken – A zesty, flavorful dish perfect for a light meal.
- Creamy Mushroom Chicken – A comforting, creamy skillet dish.
4. Air Fryer Chicken Breast: Healthy and Crispy
Why Air Fry?
Air frying gives chicken a crispy exterior with minimal oil, making it a healthier alternative to frying. Moreover, it’s also fast and convenient.
Best Tips for Air Frying Chicken Breast:
- Preheat the air fryer: This ensures even cooking and a crispy finish.
- Then, use a light oil spray: A small amount of oil helps with browning.
- Finally, flip halfway through: This helps cook the chicken evenly.
Delicious Air Fryer Chicken Breast Recipes:
- Air Fryer Lemon Garlic Chicken – A quick, flavorful option with minimal ingredients.
- Crispy Air Fryer Parmesan Chicken – Crunchy, cheesy, and irresistible.
- Buffalo Air Fryer Chicken Breast – Spicy and tangy, perfect for meal prep.
Final Thoughts
With so many ways to cook chicken breast, you’ll never run out of delicious, healthy meals to try. Whether you prefer baking, grilling, pan-searing, or air frying, each method offers unique flavors and textures. So, experiment with different seasonings, marinades, and sauces to keep your chicken dishes exciting and full of flavor.
Which cooking method is your favorite? Let us know in the comments!
Meal Prep-Friendly Chicken Breast Dishes for Busy Schedules
In today’s fast-paced world, meal prepping has become a lifesaver, especially for those with busy schedules. Fortunately, chicken breast is a perfect candidate for meal prep because it’s not only easy to cook in large batches but also highly versatile in flavor combinations. As a result, you can enjoy healthy, home-cooked meals without spending hours in the kitchen every day. Below, we’ll explore several ideas for meal prep-friendly chicken breast dishes that you can prepare in advance, making your busy week much easier.
1. Grilled Chicken Breast for Salad Bowls and Wraps
Why It’s Perfect for Meal Prep:
Grilled chicken breast is not only easy to prepare, but it also stores well in the fridge for up to 4 days. Thus, it’s an excellent choice for creating quick, nutritious salads and wraps throughout the week. The smoky, charred flavor from grilling adds a depth of taste that can transform any meal.
Meal Prep Tip:
- First, grill in bulk: Grill several chicken breasts at once and store them in airtight containers in the fridge for easy access throughout the week.
- Next, use different seasonings: Marinate your chicken breasts with various herbs or spices to create variety. For example, try a lemon herb marinade, a smoky paprika rub, or a spicy Cajun seasoning for new flavors each day.
- Additionally, serve with greens: Pair the grilled chicken with fresh greens, avocado, and your favorite dressing for a simple, healthy salad. Alternatively, wrap it in a whole-wheat tortilla with veggies for an on-the-go lunch.
Example Recipes:
- Grilled Chicken Salad with Avocado and Feta
- Chicken Caesar Wraps
- Mediterranean Chicken Salad – Featuring cucumbers, olives, and a tangy vinaigrette.
2. Baked Chicken Breast with Roasted Vegetables
Why It’s Perfect for Meal Prep:
Baking chicken breast is a low-maintenance method that allows you to cook a large quantity at once. When paired with roasted vegetables, you get a well-rounded, nutritious meal that lasts for several days in the fridge.
Meal Prep Tip:
- To begin with, try one-pan baking: Arrange chicken breasts and chopped vegetables (like sweet potatoes, carrots, and bell peppers) on the same sheet pan. This not only saves time but also reduces cleanup.
- Next, pre-portion for convenience: Divide the chicken and vegetables into individual meal containers so that you can easily grab them for lunch or dinner.
- Moreover, mix up the veggies: Use seasonal vegetables to keep things exciting. For example, zucchini, cauliflower, or Brussels sprouts in the winter and tomatoes, asparagus, and green beans in the summer can add variety.
Example Recipes:
- Baked Lemon Herb Chicken with Roasted Sweet Potatoes
- Garlic Parmesan Chicken with Roasted Broccoli and Carrots
- Spicy Baked Chicken with Roasted Brussels Sprouts and Bell Peppers
3. Chicken Breast Stir-Fry for Quick Dinners
Why It’s Perfect for Meal Prep:
Stir-frying is one of the fastest ways to cook chicken, and when prepared in advance, it makes for an excellent meal prep option. Not only that, but stir-fries are also highly customizable, allowing you to add your favorite vegetables, sauces, and seasonings for different flavors every day.
Meal Prep Tip:
- To start, batch cook stir-fry: Cook a large portion of chicken and vegetables in a wok or skillet, and store them in airtight containers for easy access during the week.
- Furthermore, choose stir-fry-friendly veggies: Opt for vegetables that hold up well after cooking, such as bell peppers, broccoli, snap peas, and carrots.
- Also, use a flavorful sauce: Make a simple stir-fry sauce with soy sauce, garlic, ginger, and sesame oil to give the dish an authentic taste.
Example Recipes:
- Chicken and Vegetable Stir-Fry with Rice
- Honey Soy Chicken Stir-Fry
- Asian-inspired Chicken Stir-Fry with Snap Peas and Bell Peppers
4. Chicken Breast Bowls for Customization
Why It’s Perfect for Meal Prep:
Chicken bowls are incredibly customizable, allowing you to mix and match flavors, textures, and ingredients. As a result, they are ideal for meal prepping, as you can create different combinations based on your dietary preferences or cravings.
Meal Prep Tip:
- First, choose your base: Start with brown rice, quinoa, or cauliflower rice, and top it with your cooked chicken breast.
- Next, add toppings and sauces: Customize each bowl with a variety of toppings such as avocado, corn, black beans, salsa, or Greek yogurt. You can also prepare sauces ahead of time, like tahini, ranch dressing, or a spicy yogurt sauce.
- Additionally, pack separately: To ensure freshness, store toppings and sauces in separate containers and add them to the bowls right before eating.
Example Recipes:
- Southwest Chicken Bowl with Rice and Avocado
- Chicken Teriyaki Bowls with Veggies
- Greek Chicken Bowl with Hummus and Tzatziki
Final Tips for Successful Chicken Breast Meal Prep
- First, focus on storage: Store your meal prep containers in the fridge for up to 4 days. For longer storage, freeze portions for up to 3 months.
- Moreover, when reheating: Reheat chicken breast in the microwave or on the stovetop. Add a splash of water or broth to keep the chicken moist when reheating.
- Finally, practice portion control: Use a kitchen scale to ensure you’re pre-portioning your meals for balanced portions and to avoid overeating.
By prepping chicken breast in advance, you can save time, eat healthy, and always have a satisfying meal ready when you need it most. These meal prep-friendly chicken dishes are not only convenient but also packed with protein and flavor. Whether you prefer grilled chicken, baked chicken, stir-fries, or customizable bowls, there’s a meal prep solution for every taste!
Essential Tips for Cooking Juicy and Flavorful Chicken Breast
Best Seasonings for Chicken Breast: Garlic, Herbs, and Spices
When it comes to chicken breast, the key to making it flavorful and mouth-watering lies in the seasoning. Since chicken breast has a relatively mild taste on its own, it pairs beautifully with a variety of herbs, spices, and aromatics that can transform it into a dish bursting with flavor. Whether you prefer something garlicky, herbaceous, or spicy, the right seasoning can make all the difference. Below, we’ll dive into the best seasonings for chicken breast, along with tips on how to use them to elevate your meals.
1. Garlic: The Essential Flavor Booster
Why It’s Perfect for Chicken Breast:
Garlic is one of the most beloved ingredients in the culinary world for good reason—it adds depth and richness to any dish. Its bold flavor pairs incredibly well with chicken breast, enhancing the natural juices while creating a savory profile that’s loved by all. Notably, whether fresh or in powder form, garlic can be used in various ways to amp up the flavor.
How to Use It:
- Fresh Garlic: Chop or mince fresh garlic and mix it into your marinades or rubs. You can also sauté it with olive oil before adding the chicken to the pan to create a fragrant base.
- Garlic Powder: If you’re short on time, garlic powder can be sprinkled directly onto the chicken breast along with other seasonings, creating a more concentrated flavor with minimal effort.
Flavor Combinations:
- Garlic and lemon: For a zesty, aromatic twist, combine garlic with fresh lemon juice and zest.
- Garlic and butter: Sauté chicken breast in a mix of garlic and butter for a rich, indulgent dish.
- Garlic and rosemary: Combine garlic with rosemary to create a fragrant, Mediterranean-inspired flavor profile.
2. Fresh and Dried Herbs: Elevating Chicken Breast with Nature’s Flavors
Why It’s Perfect for Chicken Breast:
Herbs are incredibly versatile and can enhance the flavor of chicken breast without overpowering it. Fresh herbs bring a vibrant, bright taste, while dried herbs offer a deeper, more concentrated flavor. Herbs like rosemary, thyme, oregano, and parsley are some of the best to pair with chicken breast.
How to Use It:
- Fresh Herbs: Chop fresh herbs and sprinkle them over the chicken breast just before cooking. Alternatively, you can infuse your cooking oil with fresh herbs for an aromatic marinade.
- Dried Herbs: Combine dried herbs like thyme, oregano, and basil with olive oil, garlic, and lemon juice for an easy herbaceous marinade or rub. Dried rosemary can be crushed and added to spice blends for a more rustic flavor.
Flavor Combinations:
- Rosemary and garlic: The earthy taste of rosemary pairs perfectly with garlic’s savory notes.
- Thyme and lemon: Combine thyme with lemon zest for a refreshing, citrusy punch.
- Oregano and basil: These Mediterranean herbs offer a herbaceous, aromatic flavor that works wonderfully with grilled or baked chicken.
3. Spices: Adding Warmth and Heat to Your Chicken Breast
Why It’s Perfect for Chicken Breast:
Spices are a fantastic way to elevate chicken breast with complex, bold flavors. From mild to spicy, spices like paprika, cumin, chili powder, and smoked paprika can introduce warmth, smokiness, and heat to your chicken dishes. Spices also offer a great way to customize the flavor profile of your chicken, depending on the cuisine you’re preparing.
How to Use It:
- Paprika: For a smoky and sweet flavor, use smoked paprika. Regular paprika offers a milder, sweeter taste that works great as a base seasoning.
- Cumin: Add a pinch of cumin to your seasoning mix for a warm, earthy flavor with a touch of spice.
- Chili Powder: For those who love heat, chili powder will bring a mild spiciness, perfect for Mexican or Southwestern-inspired chicken dishes.
- Cayenne Pepper: If you enjoy extra heat, a pinch of cayenne pepper can boost the spice level. Just be careful not to overdo it!
Flavor Combinations:
- Paprika and garlic: A combination that brings smoky, sweet, and savory flavors to your chicken.
- Cumin and coriander: These spices create a warm, earthy profile perfect for grilled chicken.
- Chili powder and lime: Add chili powder to your chicken and finish it with a squeeze of fresh lime for a tangy kick.
4. Salt and Pepper: The Simple yet Essential Seasoning
Why It’s Perfect for Chicken Breast:
Sometimes, simplicity is key. Salt and pepper are the foundation of all great seasonings and can bring out the natural flavor of chicken breast like no other. While these two may seem basic, they are essential in building a well-seasoned dish. When used properly, they balance all other seasonings and ensure the chicken tastes deliciously savory without overwhelming it with too many flavors.
How to Use It:
- Salt: Always season chicken breast with a pinch of kosher salt or sea salt before cooking to enhance its natural flavors. You can also brine the chicken in a saltwater solution to ensure it stays moist and tender.
- Pepper: Freshly cracked black pepper adds a sharp, earthy note that contrasts nicely with the richness of the chicken. It’s also great when paired with more robust flavors like garlic or herbs.
Flavor Combinations:
- Salt and pepper with garlic: A simple yet timeless combination that enhances the chicken’s flavor.
- Salt, pepper, and rosemary: This classic mix works particularly well with roasted or baked chicken breast.
How to Use These Seasonings Together for Best Results
Now that you know the best seasonings to pair with chicken breast, why not mix and match them to create your perfect seasoning blend? For example, you could create a garlic rosemary rub, a smoky paprika and cumin marinade, or a lemon garlic herb combination. To get the best results, always marinate your chicken for at least 30 minutes (or overnight if possible) to allow the flavors to meld together. Additionally, consider balancing the richness of the chicken with a tart ingredient, like lemon juice or vinegar, to round out the dish.
By experimenting with garlic, fresh herbs, spices, and the simplest seasoning of salt and pepper, you’ll never run out of ways to prepare flavorful chicken breast. These seasonings not only improve the taste but also elevate your cooking game, turning an ordinary chicken breast into a meal that will have everyone asking for seconds.
How to Cook Chicken Breast for Maximum Juiciness (Oven, Grill, Skillet, Air Fryer)
Cooking chicken breast so it remains juicy and tender can be a challenge, as it’s often prone to drying out. The key lies in the cooking method, temperature control, and using the right techniques to lock in moisture. Whether you’re using an oven, grill, skillet, or air fryer, each method offers a unique approach to achieving the perfect chicken breast that’s both moist and flavorful. Let’s break down each cooking method and the best tips for cooking chicken breast to juicy perfection.
1. Oven Cooking: Slow and Steady for Tender Results
Why Oven Cooking Works for Juiciness:
Baking chicken breast in the oven is one of the most foolproof methods for ensuring juiciness. When done correctly, the gentle heat of the oven cooks the chicken evenly without drying it out. The key is to bake it at the right temperature and for the right amount of time. If baked at too high a temperature or for too long, the chicken will become dry, but if done properly, it will stay juicy and tender.
How to Cook in the Oven:
- Preheat your oven to 375°F (190°C) for an even cooking temperature.
- For extra juiciness, brine your chicken breasts in a saltwater solution for about 30 minutes before baking to lock in moisture.
- Place the chicken breasts on a baking sheet lined with parchment paper or lightly greased.
- Season generously with your favorite herbs, spices, and a little oil to ensure the chicken stays moist.
- Bake for about 25–30 minutes, or until the internal temperature reaches 165°F (75°C) when measured with a meat thermometer.
- Rest the chicken for 5–10 minutes after baking to allow the juices to redistribute.
Pro Tip:
To create a crispy skin or glaze, you can broil the chicken for the last 2-3 minutes of baking. This adds a golden, slightly crispy finish without sacrificing moisture.
2. Grilling: Flavorful and Smoky Juiciness
Why Grilling Works for Juiciness:
Grilling chicken breast adds a smoky flavor and delicious caramelization to the surface, which enhances its overall taste. However, grilling can be tricky because of the direct heat. To ensure juiciness, it’s essential to control the grill temperature and avoid overcooking. Grilling requires quick cooking on high heat while allowing the chicken to stay juicy inside.
How to Grill Chicken Breast:
- Preheat the grill to medium-high heat.
- Pound the chicken breasts to an even thickness to ensure they cook at the same rate.
- Lightly coat the chicken with oil and season with your favorite spices, such as paprika, garlic powder, and salt.
- Place the chicken on the grill and cook for 6–7 minutes per side, depending on thickness. Use tongs to avoid piercing the meat and losing juices.
- Check the internal temperature with a meat thermometer to ensure it reaches 165°F (75°C).
- Let the chicken rest for 5 minutes before slicing to lock in the juices.
Pro Tip:
If you’re worried about dryness, consider marinating your chicken breasts for at least 30 minutes before grilling to help retain moisture and infuse more flavor.
3. Skillet Cooking: Quick and Juicy with a Crisp Exterior
Why Skillet Cooking Works for Juiciness:
Cooking chicken breast in a skillet allows you to achieve a crispy exterior while keeping the inside moist. The key to juicy chicken is using a combination of high heat for searing and moderate heat to cook it through. This method works especially well if you’re looking for a golden, pan-seared finish.
How to Cook Chicken Breast in a Skillet:
- Heat a cast iron skillet or non-stick pan over medium-high heat and add a little oil or butter.
- Season your chicken breasts with salt, pepper, and any other spices or herbs of your choice.
- Once the skillet is hot, place the chicken in the pan. Sear each side for 3-4 minutes until golden brown.
- Lower the heat and continue cooking for another 5–7 minutes, flipping occasionally.
- Check for doneness by using a meat thermometer, ensuring it reaches 165°F (75°C).
- After cooking, let the chicken rest for 5 minutes before serving to retain all of its juices.
Pro Tip:
To make your skillet chicken even juicier, add a splash of chicken broth or wine to the skillet halfway through cooking to create steam and help keep the chicken moist.
4. Air Fryer: Crispy and Juicy with Less Oil
Why the Air Fryer Works for Juiciness:
An air fryer is an excellent choice for achieving a crispy texture on the outside while keeping the chicken breast juicy inside. The hot air circulation in an air fryer ensures that the chicken cooks evenly, with minimal oil, resulting in a moist interior and crisp exterior.
How to Cook Chicken Breast in an Air Fryer:
- Preheat your air fryer to 375°F (190°C).
- Season your chicken breast with a bit of olive oil, salt, pepper, and any other spices you prefer.
- Place the chicken in the air fryer basket, ensuring it’s not overcrowded to allow for even airflow.
- Cook the chicken for 15-18 minutes, flipping halfway through.
- Use a meat thermometer to ensure the chicken reaches 165°F (75°C).
- Let the chicken rest for 5 minutes after cooking before slicing to maintain its juiciness.
Pro Tip:
To enhance flavor and juiciness, marinate the chicken for 30 minutes before cooking. You can also lightly spray the chicken with olive oil to get a beautiful golden crust.
Key Tips for Juicy Chicken Breast:
- Brine the chicken before cooking to lock in moisture.
- Always use a meat thermometer to avoid overcooking.
- Let the chicken rest after cooking to redistribute juices.
- Pound the chicken to an even thickness to ensure uniform cooking.
- Consider marinating your chicken for added flavor and moisture.
By using the right techniques, whether you’re baking, grilling, skillet-cooking, or using an air fryer, you can cook chicken breast that’s moist, tender, and full of flavor. Don’t forget to experiment with seasonings and marinades to customize each dish to your liking!
Avoiding Common Mistakes: Dry, Overcooked, or Bland Chicken Breast
Cooking a chicken breast to perfection is an art that requires careful attention to detail. While it’s a versatile and healthy option, chicken breast is notoriously easy to overcook, resulting in a dry, bland, and rubbery texture. Avoiding common mistakes will not only help you achieve juicy, tender chicken but also elevate the overall flavor. Let’s dive into some of the most common errors when cooking chicken breast and how to fix them for the best results.
1. Overcooking the Chicken Breast: The Key to Juiciness
Why It Happens:
Overcooking is perhaps the most frequent mistake made with chicken breast. Since chicken breasts are lean and don’t have much fat, they cook quickly. Unfortunately, if left on heat for too long, they become dry and tough.
How to Avoid Overcooking:
- Use a Meat Thermometer: Always cook chicken to an internal temperature of 165°F (75°C). This ensures it’s fully cooked but not overdone.
- Monitor Cooking Time: Whether you’re grilling, baking, or pan-searing, chicken breast usually cooks in 15-20 minutes. Be sure to adjust based on the thickness of the breast.
- Rest the Chicken: Once you remove the chicken from the heat source, let it rest for 5-10 minutes. This allows the juices to redistribute and prevents them from escaping when cut.
Pro Tip: If you don’t have a meat thermometer, try the press test: Press the chicken with a finger—if it’s firm but gives slightly, it’s done. If it’s hard, it’s overcooked.
2. Not Pounding or Evenly Sizing the Chicken Breast
Why It Happens:
Uneven chicken breasts cook at different rates, leading to dry spots or undercooked portions. This typically happens when one side is much thicker than the other.
How to Avoid It:
- Pound the Chicken Evenly: Use a meat mallet or rolling pin to gently pound the chicken breast to an even thickness. This ensures even cooking and prevents the thinner parts from overcooking while the thicker parts are still raw.
- Butterfly the Chicken Breast: If the breast is too thick, you can butterfly it by cutting it horizontally and opening it up like a book. This ensures the chicken cooks more evenly.
Pro Tip: Pounding not only helps with even cooking but also tenderizes the meat, making it juicier and more flavorful.
3. Skipping the Seasoning or Using Bland Flavors
Why It Happens:
Chicken breast, being a mild-flavored protein, can taste bland without proper seasoning. Many people make the mistake of not seasoning the chicken enough or just using salt and pepper. While simple, this can leave your chicken tasting flat and uninspired.
How to Avoid It:
- Use a Marinade or Dry Rub: Marinating your chicken for at least 30 minutes before cooking adds both moisture and flavor. You can use simple ingredients like olive oil, lemon juice, garlic, and herbs, or go for more complex marinades with soy sauce, honey, and spices.
- Season Generously: Even if you’re not marinating, make sure to season the chicken with more than just salt and pepper. Try a combination of garlic powder, onion powder, paprika, thyme, rosemary, or cumin to enhance the flavor.
- Add Fresh Herbs and Aromatics: Adding fresh herbs like parsley, cilantro, or basil at the end of cooking brightens up the dish and brings out the natural flavors of the chicken.
Pro Tip: If you have the time, try brining the chicken breast in a saltwater solution for 30 minutes to 1 hour. This not only seasons the chicken but also helps it retain moisture.
4. Using High Heat for Too Long: The Burnt Exterior Problem
Why It Happens:
Cooking chicken at too high a temperature for too long can cause the outside to burn before the inside is fully cooked. This is especially true with grilling or pan-searing, where the direct heat can quickly scorch the surface.
How to Avoid It:
- Control the Heat: Use medium to medium-high heat for most cooking methods. For grilling, make sure the grill is preheated but not too hot, and for stovetop cooking, adjust the temperature to ensure the chicken is seared on the outside but cooked through.
- Cook in Phases: If necessary, sear the chicken on high heat for a few minutes to develop a crispy crust, then lower the heat to cook the inside more slowly.
- Use a Lid for Even Cooking: When pan-searing, covering the skillet with a lid after searing the chicken can help cook it more evenly without burning the outside.
Pro Tip: In the oven, consider roasting at 375°F (190°C) instead of higher temperatures, which can cause the chicken to dry out or burn. This temperature ensures a juicy, evenly cooked chicken breast.
5. Not Resting the Chicken Before Slicing
Why It Happens:
When you cut into chicken breast immediately after cooking, the juices that were inside the meat are released onto the plate, resulting in dry, bland chicken. This mistake is especially common when serving right after cooking.
How to Avoid It:
- Let It Rest: Always rest the chicken for about 5-10 minutes after cooking. This allows the juices to redistribute inside the meat, making each bite juicy and tender.
- Cover with Foil: To keep the chicken warm while resting, loosely cover it with foil. This helps trap some heat while ensuring the meat stays moist.
Pro Tip: Avoid slicing the chicken immediately; instead, cut against the grain to maintain its tenderness and texture.
In Conclusion: Avoiding Common Mistakes for Perfect Chicken Breast
By being mindful of these common mistakes, you can easily transform your chicken breast into a tender, flavorful, and juicy meal. Remember, overcooking, improper seasoning, and skipping essential steps like resting or pounding can all lead to dry, bland chicken. With the right techniques, your chicken breast will be a delicious and satisfying protein that’s perfect every time!
Easy and Healthy Chicken Breast Recipes for a Balanced Diet
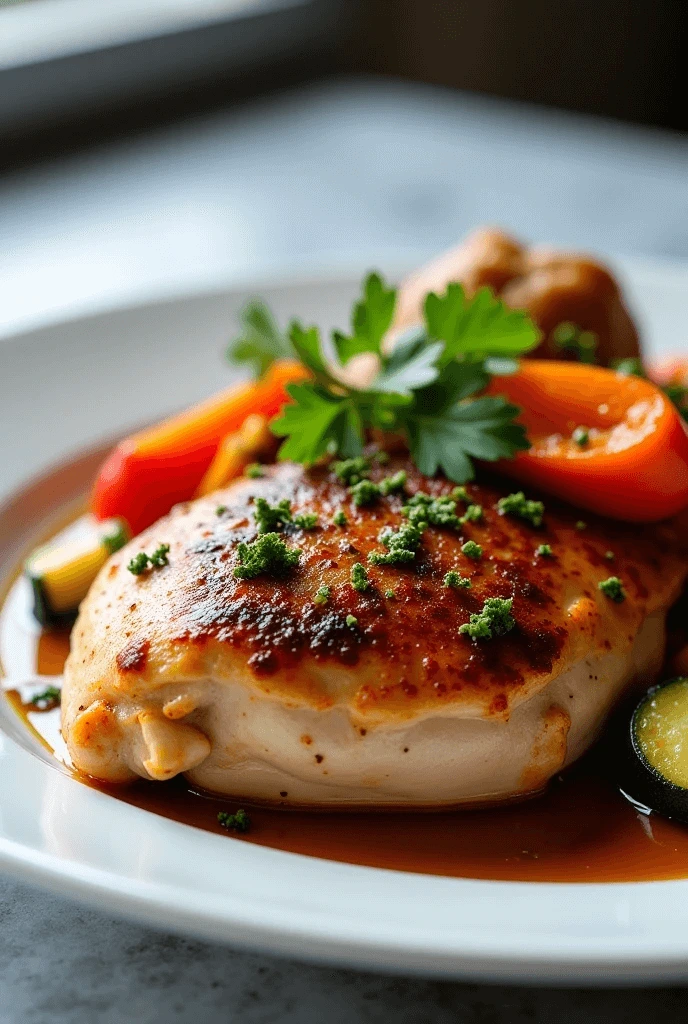
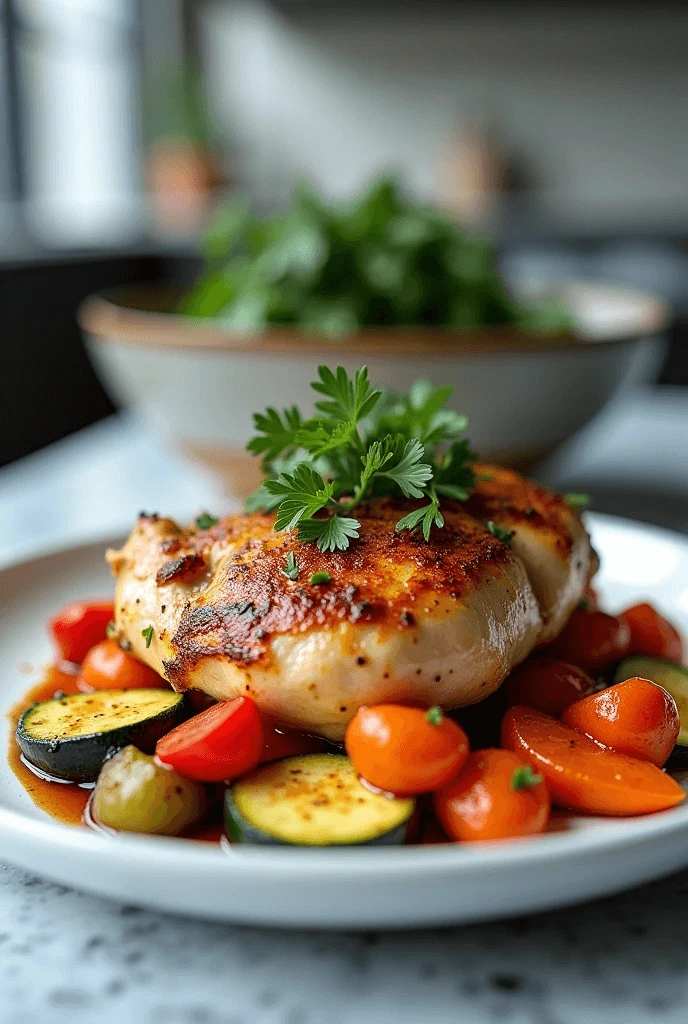
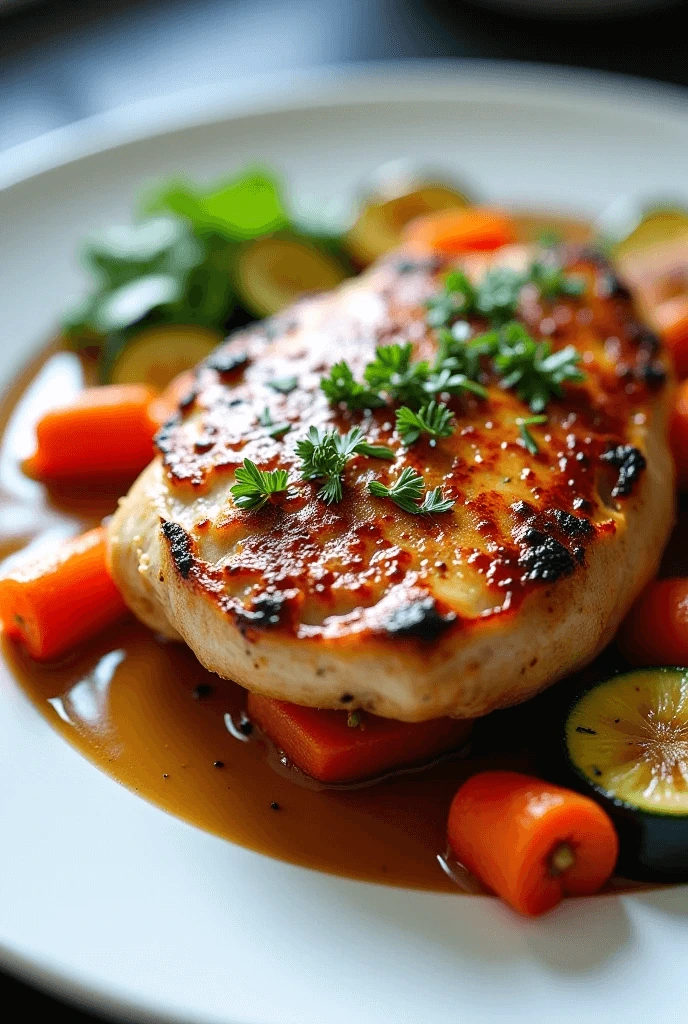
Baked Lemon Garlic Chicken Breast Recipe (Oven-Baked & Juicy)
The Baked Lemon Garlic Chicken Breast recipe is a simple yet flavorful dish that combines the bright zestiness of lemon with the rich, savory flavors of garlic. This easy-to-make recipe is perfect for busy nights or meal prep, delivering a juicy, tender chicken breast every time. Whether you’re new to cooking or a seasoned chef, this oven-baked version guarantees results that are both satisfying and delicious.
Why Lemon and Garlic Make the Perfect Pairing for Chicken Breast
Lemon and garlic complement chicken breast perfectly, adding layers of flavor that balance the mildness of the meat. The acidic nature of lemon helps tenderize the chicken, while the garlic provides a savory, aromatic element. This combination creates a dish that’s both refreshing and rich, without overwhelming the chicken’s natural flavor. Plus, the lemon acts as a natural moisture-locking agent, ensuring your chicken remains juicy throughout the cooking process.
Ingredients for the Baked Lemon Garlic Chicken Breast
Before diving into the recipe, make sure you have the following ingredients on hand:
- 4 boneless, skinless chicken breasts (preferably of even size for even cooking)
- 3 cloves of garlic, minced
- 1 lemon, zested and juiced
- 2 tablespoons olive oil
- 1 teaspoon dried oregano
- 1 teaspoon paprika
- 1 teaspoon salt
- ½ teaspoon black pepper
- Fresh parsley (optional, for garnish)
The garlic, lemon zest, and olive oil come together in this simple marinade, infusing the chicken with tons of flavor while keeping it juicy during baking.
Step-by-Step Instructions for Juicy Baked Lemon Garlic Chicken Breast
1. Preheat Your Oven to 375°F (190°C)
To start, preheat your oven to 375°F (190°C). This is the perfect temperature for baking chicken breast, ensuring it cooks through without drying out.
2. Prepare the Marinade
In a small bowl, combine the minced garlic, lemon zest, lemon juice, olive oil, oregano, paprika, salt, and pepper. Stir everything together until the ingredients are well incorporated. The olive oil helps keep the chicken moist, while the lemon juice and garlic infuse the meat with bright, savory flavors.
3. Marinate the Chicken
Place your chicken breasts in a resealable plastic bag or shallow dish and pour the marinade over them. Seal the bag or cover the dish, and let the chicken marinate for at least 15-30 minutes (or up to 2 hours) in the fridge. If you have the time, marinating overnight will intensify the flavor.
Pro Tip: The longer the chicken marinates, the more flavorful it will become. If you’re in a hurry, even a brief marination time will still yield great results!
4. Prepare the Baking Dish
After marinating, take the chicken breasts out of the fridge. Lightly grease a baking dish with a bit of olive oil or cooking spray to prevent sticking. Arrange the chicken breasts in the dish in a single layer, ensuring they’re not crowded. This allows the heat to circulate evenly around each piece, ensuring an even cook.
5. Bake the Chicken
Place the baking dish in the oven and bake the chicken breasts for 25-30 minutes, or until they reach an internal temperature of 165°F (75°C) when checked with a meat thermometer. The cooking time may vary slightly depending on the size and thickness of the chicken breasts.
Pro Tip: Avoid opening the oven door too often while the chicken is baking, as this can cause temperature fluctuations. Keep the oven closed to retain heat and ensure the chicken cooks evenly.
6. Rest the Chicken
Once the chicken is done baking, remove it from the oven and let it rest for 5-10 minutes. This resting time allows the juices to redistribute throughout the meat, keeping it tender and juicy.
Serving Suggestions for Baked Lemon Garlic Chicken Breast
After resting, slice the chicken breast into thin strips or serve whole, depending on your preference. This recipe pairs wonderfully with a variety of side dishes, such as:
- Roasted vegetables like broccoli, carrots, or zucchini
- A light garden salad with mixed greens, cucumber, and a simple vinaigrette
- Rice pilaf or mashed potatoes for a heartier meal
- Quinoa or couscous for a gluten-free side option
For a finishing touch, sprinkle the chicken with some freshly chopped parsley for added color and flavor.
Tips for the Perfect Baked Lemon Garlic Chicken Breast
- Don’t Overcook: Chicken breast can dry out easily if overcooked, so always check the internal temperature. It should be 165°F (75°C).
- Use a Baking Rack: To get more even cooking, place a baking rack in your dish and set the chicken on top. This allows heat to circulate all around the chicken for an even cook.
- Add Extra Lemon Zest: If you love a punch of lemon flavor, feel free to add a bit more zest before serving for an extra burst of freshness.
Why You’ll Love This Baked Lemon Garlic Chicken Breast Recipe
This Baked Lemon Garlic Chicken Breast recipe is not only incredibly flavorful but also simple and quick to prepare. The combination of garlic, lemon, and oregano creates a balanced flavor profile that’s both savory and refreshing. It’s perfect for weeknight dinners, meal prepping, or even impressing guests with minimal effort.
Enjoy juicy, tender chicken breast that’s full of flavor, without the fuss! Whether served with vegetables, a salad, or grains, this dish is guaranteed to be a hit at your table.
Grilled Herb Chicken Breast Recipe for BBQ and Meal Prep
Grilled Herb Chicken Breast is a perfect recipe for anyone looking for a flavor-packed, juicy chicken that’s ideal for BBQs, meal prep, or a light dinner. The infusion of fresh herbs and spices combined with the smoky flavor from grilling results in a chicken breast that’s not only delicious but versatile enough for any occasion. This recipe will guide you through making tender, juicy chicken breasts with a rich herbal flavor that will make your taste buds sing. Whether you’re hosting a BBQ or planning for the week ahead, this recipe will help you create a healthy, satisfying meal.
Why Grilled Herb Chicken Breast Works for BBQs and Meal Prep
Grilled chicken breasts are an all-time favorite at BBQs due to their light, satisfying taste, and ease of cooking. This herb-infused chicken offers the perfect balance between savory, fragrant, and juicy without overwhelming the delicate chicken flavor. Moreover, it’s an excellent choice for meal prep because the chicken remains flavorful and juicy even after being stored in the fridge. It’s versatile, and you can easily pair it with a variety of side dishes, making it a staple for easy weeknight dinners or meal prepping in advance.
Ingredients for Grilled Herb Chicken Breast
Before you get started, make sure you have these simple ingredients on hand:
- 4 boneless, skinless chicken breasts (pounded to an even thickness for consistent cooking)
- 2 tablespoons olive oil
- 3 garlic cloves, minced
- 1 tablespoon fresh rosemary, finely chopped (or 1 teaspoon dried)
- 1 tablespoon fresh thyme, finely chopped (or 1 teaspoon dried)
- 1 teaspoon fresh oregano, finely chopped (or ½ teaspoon dried)
- 1 tablespoon lemon juice
- Zest of 1 lemon
- 1 teaspoon salt
- ½ teaspoon black pepper
The fresh herbs bring vibrant flavors to the chicken, while lemon juice and zest add a refreshing zest that elevates the overall taste. Olive oil helps to keep the chicken moist and tender as it grills.
Step-by-Step Instructions for Grilled Herb Chicken Breast
1. Prepare the Marinade
Start by preparing the herb marinade. In a small bowl, combine olive oil, minced garlic, fresh rosemary, thyme, oregano, lemon juice, lemon zest, salt, and pepper. Mix everything thoroughly until the herbs are evenly distributed throughout the marinade. The olive oil acts as the perfect base, allowing the flavors to coat the chicken evenly.
2. Marinate the Chicken
Place the chicken breasts in a resealable plastic bag or shallow dish, then pour the herb marinade over the chicken. Seal the bag or cover the dish and refrigerate for at least 30 minutes to 2 hours. If you have time, marinating for a longer period will allow the flavors to penetrate the chicken more deeply.
Pro Tip: If you’re short on time, even 15 minutes of marinating will still provide great flavor, but for the best results, aim for at least 30 minutes.
3. Preheat the Grill
While the chicken marinates, preheat your grill to medium-high heat (around 375°F – 400°F / 190°C – 200°C). Clean and oil the grill grates to prevent the chicken from sticking. This step ensures you get a beautiful sear on the chicken, adding more flavor.
4. Grill the Chicken
Once the grill is ready, take the chicken breasts out of the marinade and place them on the hot grill. Grill the chicken for about 6-7 minutes per side or until the internal temperature reaches 165°F (75°C).
To ensure even cooking, avoid flipping the chicken too often. Only turn it once, after about 6 minutes on one side, to get a nice, even sear. If you’re using thicker chicken breasts, consider covering the grill for a few minutes to help cook the chicken through without drying it out.
Pro Tip: Use tongs to press the chicken down gently to ensure full contact with the grill, helping you achieve those perfect grill marks.
5. Rest the Chicken
Once the chicken is cooked through, remove it from the grill and let it rest for 5 minutes before slicing. Resting helps the juices redistribute throughout the meat, keeping the chicken moist and tender.
Serving Suggestions for Grilled Herb Chicken Breast
This Grilled Herb Chicken Breast recipe is versatile and pairs beautifully with a variety of sides. Here are some serving ideas:
- Grilled Veggies: Pair with grilled veggies like zucchini, bell peppers, or asparagus for a complete BBQ meal.
- Salad: Serve with a light salad of mixed greens, cherry tomatoes, avocado, and a lemon vinaigrette for a fresh, healthy meal.
- Rice or Quinoa: Serve with herbed rice or quinoa for an additional hearty element. You can also add a few chopped herbs to the grains for extra flavor.
- Mashed Potatoes or Sweet Potatoes: These creamy, hearty sides complement the herbaceous, juicy chicken perfectly.
For meal prep, slice the chicken and store it with any of your favorite side dishes for easy, on-the-go meals throughout the week.
Why This Grilled Herb Chicken Breast Recipe is Perfect for BBQ and Meal Prep
This Grilled Herb Chicken Breast recipe is a crowd-pleaser, perfect for BBQs, meal prep, or just a healthy dinner option. The fresh herbs and citrus create a light, refreshing flavor that contrasts beautifully with the smokiness of the grill. The best part is that it’s so versatile—pair it with different sides, turn it into a salad topping, or use it for wraps and sandwiches.
When stored in the fridge, this grilled chicken stays moist and flavorful, making it a great meal prep option for lunches or dinners throughout the week. Whether you’re hosting a BBQ or preparing meals in advance, this recipe guarantees juicy, flavorful chicken every time.
Crispy Air Fryer Chicken Breast Recipe (Healthy & Quick)
The Crispy Air Fryer Chicken Breast is a game-changer for anyone who craves the crispy exterior of fried chicken without the extra calories and grease. With the help of your air fryer, you can create tender, juicy chicken breasts with a deliciously crispy coating in a fraction of the time it takes to bake or fry. This recipe is ideal for busy nights when you need a quick, healthy meal, or if you’re meal prepping for the week ahead. The air fryer ensures that your chicken is crispy on the outside while maintaining its moist, tender interior. Whether you’re new to the air fryer or a seasoned pro, this recipe is sure to become one of your favorites.
Why Air Fryer Chicken Breast is the Perfect Solution for Healthy, Crispy Chicken
The air fryer is a revolutionary kitchen appliance that provides a healthier alternative to traditional frying by circulating hot air around the food. This creates a crispy golden exterior without needing to deep fry the chicken in oil. As a result, the chicken breast retains its juiciness while achieving the crispy texture you love, all with far less oil. In addition, cooking in the air fryer is much quicker than baking or frying, making it an excellent option for busy weeknights or when you want a fast, satisfying meal. The result is a guilt-free, crispy chicken breast that’s perfect for those who want to enjoy the crunch without the added calories.
Ingredients for Crispy Air Fryer Chicken Breast
This recipe requires a few simple ingredients that you likely already have in your pantry. Here’s what you’ll need:
- 2 boneless, skinless chicken breasts
- 1 tablespoon olive oil
- 1 teaspoon garlic powder
- 1 teaspoon onion powder
- 1 teaspoon paprika
- ½ teaspoon dried thyme (optional, for extra flavor)
- 1 teaspoon salt
- ½ teaspoon black pepper
- ¼ cup breadcrumbs (for added crispiness, optional)
- Cooking spray (optional, for an extra crispy finish)
The seasoning mix provides the perfect balance of savory, aromatic flavors that complement the mild taste of the chicken, while the breadcrumbs (optional) ensure that extra crispiness we all crave.
Step-by-Step Instructions for Crispy Air Fryer Chicken Breast
1. Preheat the Air Fryer
Start by preheating your air fryer to 375°F (190°C). This temperature ensures that your chicken will cook evenly, crisping up on the outside while staying juicy on the inside. Preheating the air fryer is essential for the perfect crispiness.
2. Season the Chicken Breasts
Pat the chicken breasts dry with paper towels to remove any excess moisture. This step helps the seasonings stick and ensures a crispier finish. Then, brush the chicken breasts with olive oil. The oil helps the seasonings adhere and contributes to the crispy texture.
In a small bowl, combine the garlic powder, onion powder, paprika, thyme, salt, and pepper. Sprinkle the seasoning mix evenly over both sides of the chicken breasts. If you like extra crispiness, sprinkle a thin layer of breadcrumbs over the seasoned chicken and press gently to make sure it sticks. The breadcrumbs add a crispy, crunchy outer layer, making the chicken even more enjoyable.
3. Air Fry the Chicken
Place the seasoned chicken breasts into the air fryer basket in a single layer. Make sure not to overcrowd the basket, as this can affect the crispiness. Spray a light coat of cooking spray over the top of the chicken (optional) for an extra crispy finish.
Set the air fryer to 375°F (190°C) and cook for 10-12 minutes, flipping halfway through. The exact cooking time may vary depending on the thickness of the chicken breasts, so it’s best to check for doneness. The chicken should reach an internal temperature of 165°F (75°C) when checked with a meat thermometer.
Pro Tip: If you have larger chicken breasts, you may need to cook them for an additional 3-5 minutes. Keep an eye on them to prevent overcooking, as chicken breast can dry out if left too long.
4. Rest the Chicken
Once the chicken is cooked, remove it from the air fryer and let it rest for 5 minutes. This allows the juices to redistribute, ensuring the chicken stays moist and tender inside.
Serving Suggestions for Crispy Air Fryer Chicken Breast
This crispy chicken is so versatile that it can be paired with almost anything! Here are some delicious serving suggestions:
- Vegetables: Serve alongside roasted vegetables, like broccoli, asparagus, or zucchini, for a well-rounded, healthy meal.
- Salad: Slice the chicken and place it on top of a fresh salad with mixed greens, avocado, cherry tomatoes, and a light vinaigrette for a low-carb, nutrient-packed dish.
- Wraps or Sandwiches: Slice the chicken and use it as a filling for wraps or sandwiches. Add sliced avocado, lettuce, and your favorite condiments for a satisfying meal.
- Rice or Quinoa: Pair it with a serving of brown rice, quinoa, or a grain salad for a more filling option. The rice will help balance the crispy chicken and provide extra nutrients.
For meal prep, slice the chicken into strips and store it in airtight containers for quick grab-and-go meals throughout the week.
Why You’ll Love This Crispy Air Fryer Chicken Breast Recipe
This Crispy Air Fryer Chicken Breast recipe delivers all the crispy, crunchy goodness of fried chicken without the excess oil and calories. The air fryer cooks the chicken in half the time of traditional methods, and with a fraction of the fat. The seasoning mix creates a flavorful, aromatic crust while keeping the chicken juicy and tender on the inside.
Whether you’re cooking for a family dinner, prepping meals for the week, or craving a healthy, quick snack, this recipe is a perfect choice. The crispy chicken also works well for meal prepping, as it stays juicy and flavorful even after being stored in the fridge. It’s the best way to enjoy healthy, crispy chicken without the guilt!
Garlic Butter Skillet Chicken Breast Recipe for a Quick Dinner
The Garlic Butter Skillet Chicken Breast recipe is a true kitchen classic that combines rich, savory flavors with a quick and easy cooking process. When you’re in the mood for a tender, juicy chicken breast with an indulgent garlic butter sauce that’s ready in under 30 minutes, this recipe is the answer. With just a few simple ingredients, you can create a delicious, restaurant-quality meal that’s perfect for a busy weeknight dinner or even a weekend treat. The garlic butter sauce infuses the chicken with flavor while keeping it moist and succulent.
Why Garlic Butter Chicken Breast is Ideal for Quick Dinners
In today’s fast-paced world, it’s important to have recipes that deliver big flavor without taking up too much time in the kitchen. This garlic butter skillet chicken breast is a perfect solution for when you’re craving something rich and flavorful but don’t want to spend hours cooking. The key to this recipe is using boneless, skinless chicken breasts, which cook quickly and evenly. The garlic butter sauce is the star, providing that rich, garlicky flavor that pairs so well with the tender chicken. It’s the perfect meal when you need something satisfying but still want it ready in a hurry.
Ingredients for Garlic Butter Skillet Chicken Breast
To make this garlic butter chicken, you’ll need just a handful of ingredients that are likely already in your kitchen. Here’s what you’ll need:
- 2 boneless, skinless chicken breasts (evenly pounded for uniform cooking)
- 2 tablespoons olive oil (for searing)
- 2 tablespoons unsalted butter (for richness)
- 4 garlic cloves, minced (the garlic is the flavor powerhouse)
- 1 teaspoon fresh thyme (or ½ teaspoon dried thyme)
- 1 teaspoon fresh rosemary, finely chopped (or ½ teaspoon dried rosemary)
- 1 tablespoon lemon juice (to add a zesty, fresh touch)
- Salt and pepper, to taste (seasoning the chicken before cooking is key)
- Chopped parsley, for garnish (optional, for color and fresh flavor)
These ingredients will create a simple, yet flavorful dish that’s easy to make and packed with rich flavors. The butter and garlic provide the perfect balance of richness and depth, while the herbs add freshness and complexity to the dish.
Step-by-Step Instructions for Garlic Butter Skillet Chicken Breast
1. Prepare the Chicken Breasts
Start by placing the chicken breasts between two sheets of parchment paper or plastic wrap. Gently pound them with a meat mallet or rolling pin until they are an even thickness, about ½ inch thick. This step ensures that the chicken cooks evenly and stays juicy. Pat the chicken breasts dry with paper towels to remove any excess moisture. Season both sides generously with salt and pepper.
Pro Tip: Seasoning the chicken before cooking ensures that the flavor permeates the meat and enhances the overall taste.
2. Sear the Chicken
In a large skillet, heat olive oil over medium-high heat. Once the oil is hot and shimmering, add the chicken breasts to the skillet. Sear the chicken on one side for about 5-6 minutes without moving it. Once the first side is golden brown, flip the chicken and cook for another 4-5 minutes on the other side, or until the internal temperature reaches 165°F (75°C). This step locks in the chicken’s juices and ensures that it cooks evenly while developing a beautiful golden crust.
Pro Tip: Avoid overcrowding the pan. If you’re cooking more than two chicken breasts, it’s best to cook them in batches to achieve that perfect sear.
3. Prepare the Garlic Butter Sauce
Once the chicken is fully cooked, remove it from the skillet and set it aside to rest. In the same skillet, reduce the heat to medium-low and add the butter. Allow it to melt completely, then add the minced garlic. Sauté the garlic for about 1-2 minutes, or until fragrant. Be careful not to burn the garlic, as it can become bitter.
Once the garlic is softened and fragrant, stir in the fresh thyme and rosemary. Add a splash of lemon juice for a refreshing, zesty contrast to the richness of the butter. Scrape up any brown bits from the bottom of the skillet with a wooden spoon. These little bits are packed with flavor and will enhance the sauce.
4. Return the Chicken to the Skillet
Add the cooked chicken breasts back into the skillet and coat them with the garlic butter sauce. Spoon the sauce over the chicken a few times to ensure it’s fully coated in that rich, garlicky goodness. Let the chicken simmer in the sauce for an additional 2-3 minutes, ensuring it’s heated through and absorbing the flavors of the garlic and herbs.
5. Garnish and Serve
Once the chicken is fully coated in the garlic butter sauce, remove it from the skillet. Garnish with freshly chopped parsley for a pop of color and added freshness. Serve immediately with your favorite sides, such as roasted vegetables, mashed potatoes, or a light salad.
Serving Suggestions for Garlic Butter Skillet Chicken Breast
This garlic butter skillet chicken pairs wonderfully with a wide variety of sides. Here are some great options:
- Roasted Vegetables: Pair the chicken with roasted Brussels sprouts, asparagus, or carrots for a balanced, healthy meal.
- Mashed Potatoes or Cauliflower Mash: Creamy mashed potatoes or a low-carb cauliflower mash are the perfect comfort food pairing for the garlic butter sauce.
- Fresh Salad: Serve the chicken alongside a mixed green salad with avocado, cherry tomatoes, and a light vinaigrette to add freshness to the dish.
- Rice or Quinoa: This chicken also works beautifully with rice or quinoa. The sauce will coat the grains, creating a flavorful, hearty meal.
For meal prep, store the chicken in airtight containers and reheat it gently with a little extra butter or broth to keep it moist.
Why This Garlic Butter Skillet Chicken Breast Recipe is Perfect for Quick Dinners
This Garlic Butter Skillet Chicken Breast is perfect for busy evenings when you need a satisfying meal in a hurry. The rich garlic butter sauce and herbs elevate the flavor of the chicken, making it feel indulgent despite the simple ingredients. The quick cooking time ensures that you’re not spending hours in the kitchen, but still get a delicious, gourmet meal. Plus, the recipe is easily customizable—add your favorite herbs or swap out the seasonings to suit your tastes. Whether you’re cooking for one, two, or a whole family, this dish is sure to impress without the stress of complicated steps or long preparation times.
Quick and Simple Chicken Breast Dinner Recipes for Busy Nights
For more delicious and quick ideas, check out the 10 best chicken breast recipes with rice for a quick dinner
One-Pan Honey Garlic Chicken Breast (Fast & Flavorful)
The One-Pan Honey Garlic Chicken Breast recipe is a perfect option for those who want a delicious, flavor-packed meal but don’t want to spend too much time in the kitchen or deal with a pile of dirty dishes. This easy-to-make recipe combines sweet honey, savory garlic, and a hint of tangy soy sauce, resulting in a perfectly balanced sauce that coats the chicken breasts beautifully. The best part? It’s all made in one pan, so cleanup is a breeze.
This quick and easy chicken breast recipe not only saves you time but also guarantees juicy, tender chicken breasts that are infused with bold flavors. Whether you’re cooking for a busy weeknight dinner or prepping a meal for the week, this recipe is sure to become a staple in your kitchen.
Why One-Pan Honey Garlic Chicken Breast is a Great Choice
In today’s fast-paced world, everyone is looking for easy, yet flavorful meals that can be cooked with minimal effort. This one-pan honey garlic chicken breast is an ideal solution. The combination of honey and garlic creates a sweet and savory flavor that enhances the chicken while keeping it moist and tender. The simplicity of the ingredients and the fact that everything cooks in one pan means less time spent cooking and cleaning up afterward.
Not only does this recipe bring a satisfying level of flavor, but it’s also versatile—you can serve it with a variety of sides, from roasted vegetables to mashed potatoes or a simple rice pilaf. It’s the perfect meal for those nights when you want something fast but don’t want to sacrifice taste.
Ingredients for One-Pan Honey Garlic Chicken Breast
This dish uses simple ingredients you likely already have in your pantry. Here’s what you’ll need for a delicious one-pan meal:
- 2 boneless, skinless chicken breasts (pounded to an even thickness for uniform cooking)
- 2 tablespoons olive oil (for searing)
- 3 tablespoons honey (adds sweetness and helps create a glaze)
- 3 cloves garlic, minced (for the perfect savory balance)
- 2 tablespoons soy sauce (adds umami flavor and depth)
- 1 tablespoon apple cider vinegar (adds acidity and cuts through the sweetness)
- 1 teaspoon Dijon mustard (optional, for a tangy kick)
- Salt and pepper, to taste (seasoning the chicken for better flavor)
- Chopped green onions or parsley, for garnish (optional, for freshness and color)
These ingredients work together to create a perfectly balanced sauce that’s both sweet and savory, and gives the chicken an irresistible glaze that’s full of flavor.
Step-by-Step Instructions for One-Pan Honey Garlic Chicken Breast
1. Prepare the Chicken
Start by preparing your chicken breasts. If they’re not already at an even thickness, use a meat mallet to gently pound them out to about ½ inch thick. This ensures that the chicken cooks evenly and stays juicy. Pat the chicken dry with paper towels, then season both sides generously with salt and pepper.
Pro Tip: If you have the time, marinate the chicken in the honey garlic sauce for 15-30 minutes before cooking to allow the flavors to penetrate the meat.
2. Sear the Chicken
In a large, deep skillet or frying pan, heat olive oil over medium-high heat. Once the oil is hot, add the chicken breasts to the pan. Sear them for 3-4 minutes per side until golden brown. This step adds a nice crispy crust to the chicken and locks in the juices, ensuring a moist result. Once both sides are seared, remove the chicken from the pan and set it aside.
Pro Tip: Avoid flipping the chicken too early—let it form a crust before turning it over.
3. Make the Honey Garlic Sauce
In the same pan, lower the heat to medium and add the minced garlic. Sauté the garlic for about 30 seconds until fragrant, but be careful not to burn it. Once the garlic is soft, add the honey, soy sauce, and apple cider vinegar to the pan. Stir the ingredients together, allowing the sauce to simmer for 2-3 minutes to thicken slightly. The sauce should become a rich, glossy glaze.
For a little extra tang, stir in Dijon mustard, which complements the sweetness of the honey and balances the flavors beautifully.
4. Return the Chicken to the Pan
Add the seared chicken breasts back to the pan, and spoon the honey garlic sauce over the chicken. Let the chicken simmer in the sauce for 5-7 minutes or until the internal temperature reaches 165°F (75°C). This allows the chicken to absorb the flavors of the sauce and become perfectly glazed.
Pro Tip: If you like your sauce extra thick, allow it to cook for an additional minute or two, stirring constantly.
5. Garnish and Serve
Once the chicken is cooked through and the sauce is thickened, remove the chicken from the skillet. Drizzle the remaining sauce over the chicken and garnish with freshly chopped green onions or parsley for a pop of color and flavor. Serve immediately with your favorite side dishes, such as roasted potatoes, steamed broccoli, or a simple salad.
Serving Suggestions for One-Pan Honey Garlic Chicken Breast
This honey garlic chicken can be served with a variety of sides, making it a versatile meal that fits many tastes. Here are some great options:
- Steamed Vegetables: Pair with broccoli, green beans, or asparagus for a healthy and light meal.
- Rice or Quinoa: The honey garlic sauce pairs wonderfully with steamed white rice or quinoa, soaking into the grains for extra flavor.
- Mashed Potatoes: For a more comforting option, serve the chicken with creamy mashed potatoes to soak up the sauce.
- Salad: A simple green salad with a light vinaigrette can balance the rich flavors of the chicken.
For meal prep, store the chicken and sauce in airtight containers and refrigerate for up to 3 days. Reheat gently in the pan with a splash of water or broth to keep it moist.
Why One-Pan Honey Garlic Chicken Breast is Perfect for Busy Nights
This One-Pan Honey Garlic Chicken Breast is a perfect solution for busy evenings. It’s quick to make (ready in under 30 minutes), flavorful, and requires minimal cleanup. Plus, the sweet and savory honey garlic sauce makes the chicken extra delicious and satisfying. The versatility of this recipe allows it to be paired with many different sides, and the one-pan method ensures it’s simple and stress-free. Whether you’re cooking for yourself, your family, or prepping meals for the week, this recipe will quickly become a favorite in your kitchen.
Creamy Tuscan Chicken Breast Recipe (Restaurant-Style at Home)
If you’re craving the rich, indulgent flavors of Italian cuisine but don’t want to spend hours in the kitchen, the Creamy Tuscan Chicken Breast recipe is the perfect solution. This restaurant-style dish combines tender chicken breasts with a velvety, garlicky cream sauce packed with sun-dried tomatoes, spinach, and aromatic herbs. It’s the perfect balance of savory and richness, making it ideal for a weeknight dinner or a special occasion meal.
What makes this recipe so special is the easy-to-follow method that transforms simple ingredients into a flavorful dish. The creamy sauce perfectly complements the chicken, while the addition of sun-dried tomatoes and spinach gives it a burst of color and flavor. Moreover, you can recreate this restaurant-quality meal in the comfort of your home without the need for special ingredients or complicated techniques.
Why Creamy Tuscan Chicken Breast is a Must-Try
This dish is a perfect example of how you can elevate the humble chicken breast into something extraordinary. The creamy sauce, with its blend of heavy cream, garlic, and parmesan cheese, envelops the chicken, creating a luxurious coating that is both comforting and satisfying. Additionally, the sun-dried tomatoes add a tangy sweetness that complements the creaminess, while the spinach brings an added freshness and nutrition. The use of Italian herbs such as basil and oregano gives the dish a distinctive flavor profile, bringing the essence of Tuscan cooking right into your kitchen.
Furthermore, this dish is not only incredibly flavorful, but it’s also quick and easy to make. In just 30 minutes, you can create a restaurant-worthy meal that will impress anyone sitting at your table. Whether you’re cooking for a family dinner, a date night, or simply treating yourself to a special meal, this creamy Tuscan chicken is sure to be a hit.
Ingredients for Creamy Tuscan Chicken Breast
This dish uses a handful of simple, high-quality ingredients that work together to create an unforgettable meal. Here’s what you’ll need:
- 4 boneless, skinless chicken breasts (or thighs, if preferred)
- 2 tablespoons olive oil (for searing the chicken)
- Salt and pepper, to taste (for seasoning)
- 3 cloves garlic, minced (for the rich, aromatic base)
- 1 cup heavy cream (creates the luxurious creamy sauce)
- ½ cup chicken broth (adds depth and helps create the sauce)
- ½ cup sun-dried tomatoes, chopped (adds sweetness and tang)
- 2 cups fresh spinach (adds color and freshness)
- ½ cup grated Parmesan cheese (adds richness and a cheesy flavor)
- 1 teaspoon dried Italian seasoning (or a mix of basil, oregano, and thyme)
- Fresh basil, chopped (for garnish, adds a fresh touch)
These ingredients work together to form a creamy, flavor-packed sauce that elevates the chicken breasts, making this dish perfect for any occasion.
Step-by-Step Instructions for Creamy Tuscan Chicken Breast
1. Prepare the Chicken
Start by seasoning the chicken breasts generously with salt and pepper on both sides. To ensure even cooking, pound the chicken breasts to an even thickness, if needed. This helps the chicken cook more uniformly and prevents parts from being dry while others are undercooked.
2. Sear the Chicken
In a large skillet, heat olive oil over medium-high heat. Once the oil is hot, add the chicken breasts to the pan. Cook for about 5-6 minutes per side, or until the chicken is golden brown on the outside and cooked through (internal temperature should reach 165°F (75°C)). Once the chicken is done, remove it from the skillet and set it aside.
Pro Tip: If your skillet is too small, cook the chicken in batches to avoid overcrowding the pan. This will ensure that each piece gets a nice sear.
3. Make the Creamy Tuscan Sauce
In the same skillet, add the minced garlic and sauté for about 30 seconds until fragrant. Be careful not to burn the garlic. Then, pour in the heavy cream and chicken broth, stirring to combine. Bring the mixture to a gentle simmer, allowing the sauce to reduce slightly and thicken. Add in the sun-dried tomatoes and Italian seasoning.
Once the sauce is simmering, stir in the Parmesan cheese, which will melt and create a smooth, creamy texture. Continue to cook for another 2-3 minutes, allowing the cheese to fully integrate into the sauce.
4. Add Spinach and Return Chicken to the Skillet
Once the sauce is creamy and well-seasoned, add the fresh spinach to the skillet. Stir it into the sauce and cook for about 2 minutes or until the spinach has wilted. Return the cooked chicken breasts to the skillet, spooning the creamy sauce over the top of each piece.
Simmer the chicken in the sauce for about 5 minutes to ensure it’s heated through and fully coated in the sauce. The sauce should thicken slightly as it cooks, giving the chicken a rich, flavorful glaze.
5. Garnish and Serve
Once the chicken is fully cooked and the sauce is thick and creamy, remove the skillet from the heat. Garnish the chicken with freshly chopped basil for a pop of color and fresh flavor.
Serve the Creamy Tuscan Chicken Breast over a bed of pasta, rice, or mashed potatoes to soak up all the delicious sauce. This dish pairs beautifully with a crisp green salad or roasted vegetables to balance out the richness.
Serving Suggestions for Creamy Tuscan Chicken Breast
This Creamy Tuscan Chicken is incredibly versatile when it comes to pairing with sides. Here are some great options:
- Pasta: Serve the chicken over fettuccine, spaghetti, or penne to enjoy the creamy sauce with a hearty pasta.
- Rice or Quinoa: For a lighter alternative, pair it with steamed rice or quinoa to balance the richness of the sauce.
- Mashed Potatoes: A comforting classic—serve the chicken with creamy mashed potatoes to soak up the Tuscan cream sauce.
- Green Vegetables: Pair with roasted asparagus, broccoli, or green beans for a healthy and vibrant side.
Why Creamy Tuscan Chicken Breast is a Perfect Choice for Special Occasions
This restaurant-style creamy chicken breast recipe brings a luxurious and flavorful meal to your table without the need for gourmet skills. The combination of rich cream, garlic, sun-dried tomatoes, and spinach makes this dish stand out as a true crowd-pleaser. Whether you’re hosting a dinner party, cooking for a romantic night in, or simply treating your family to something special, this recipe will impress with its restaurant-quality taste and elegant presentation.
This dish is not just for special occasions, though. With its quick cooking time and easy ingredients, you can easily make it part of your regular dinner rotation. It’s the perfect balance of comforting and sophisticated, making it a versatile addition to any meal plan.
Sheet Pan Chicken and Vegetables (Easy, Healthy & Delicious)
Sheet pan meals are a game-changer for anyone looking to save time in the kitchen while still enjoying a nutritious and flavorful meal. Not only does this method reduce cleanup, but it also allows the ingredients to cook together, creating a deliciously harmonious blend of flavors. Chicken breasts and vegetables are the perfect pairing for a sheet pan dinner, as the chicken remains juicy, while the veggies roast to perfection.
Why Choose a Sheet Pan Meal?
A sheet pan meal is a simple and efficient way to prepare dinner without the hassle of multiple pots and pans. In fact, one of the major advantages of this method is the convenience it offers. With minimal prep, you can toss your ingredients onto the pan, season them, and pop everything in the oven. As a result, the heat from the oven cooks the chicken and vegetables evenly, allowing for delicious results every time.
Moreover, sheet pan meals are incredibly customizable. For example, you can mix and match vegetables based on what’s in season or what you have on hand. This flexibility makes sheet pan chicken and vegetables a great option for meal planning or a quick weeknight dinner.
Ingredients for Sheet Pan Chicken and Vegetables
To create the perfect sheet pan chicken dinner, you’ll need the following ingredients:
- Chicken Breasts: Choose boneless, skinless chicken breasts for easy prep and even cooking. Alternatively, you can use chicken thighs for more flavor if preferred.
- Vegetables: Popular choices include sweet potatoes, carrots, bell peppers, zucchini, broccoli, or red onions. The variety of vegetables provides a balance of textures and flavors.
- Olive Oil: For roasting, olive oil helps the chicken and vegetables crisp up nicely in the oven. Additionally, you can use avocado oil for a slightly different flavor profile.
- Seasonings: A combination of garlic powder, onion powder, paprika, dried oregano, and rosemary will add plenty of flavor. Of course, salt and pepper to taste are a must for seasoning.
Step-by-Step Instructions
- Preheat the Oven: Start by preheating your oven to 400°F (200°C). This high temperature ensures that the chicken and vegetables cook quickly and evenly.
- Prepare the Ingredients: Cut the vegetables into uniform pieces to ensure even cooking. For instance, sweet potatoes should be diced into 1-inch cubes, while carrots can be sliced into rounds. Meanwhile, bell peppers and zucchini should be chopped into large chunks.
- Season the Chicken and Vegetables: Place the chicken breasts and vegetables onto the sheet pan. Drizzle with olive oil and sprinkle with your choice of seasonings. Toss everything together to ensure the chicken and vegetables are evenly coated.
- Roast the Sheet Pan Meal: Place the sheet pan in the oven and roast for about 25-30 minutes, depending on the thickness of the chicken breasts. For optimal results, check the internal temperature of the chicken with a meat thermometer. It should reach 165°F (74°C) when done. The vegetables should be tender and lightly browned.
- Serve and Enjoy: Once the chicken is cooked through and the vegetables are roasted to perfection, remove the sheet pan from the oven. Let the chicken rest for a few minutes before serving. Finally, garnish with fresh herbs, such as parsley or thyme, for a burst of flavor.
Why This Recipe Is a Go-To for Busy Days
- Quick and Simple: The best part of a sheet pan meal is its simplicity. There’s no need to juggle multiple pans or worry about coordinating different cooking times. Instead, everything cooks together on one pan, saving you time and energy.
- Healthy and Nutritious: This meal is packed with lean protein from the chicken and vitamins and fiber from the vegetables. As a result, it’s a wholesome choice for anyone looking to eat clean without sacrificing flavor.
- Customizable: You can easily adjust the ingredients to your taste. For example, add some cherry tomatoes for a burst of sweetness or toss in some spinach for an extra serving of greens.
- Meal Prep Friendly: This dish is perfect for meal prepping. Simply double the recipe, divide it into containers, and store it in the fridge for easy lunches or dinners throughout the week. What’s more, the flavors will only improve as the ingredients marinate together.
Variations to Try
- Spicy Sheet Pan Chicken: If you enjoy a bit of heat, try adding cayenne pepper or red pepper flakes to the seasoning mix. Alternatively, you can drizzle the chicken with a bit of hot sauce before roasting.
- Lemon Herb Version: For a refreshing twist, squeeze some lemon juice over the chicken and vegetables before serving. In addition, add a sprinkle of fresh parsley for extra brightness.
- Mediterranean Style: Opt for Mediterranean ingredients like olives, feta cheese, cherry tomatoes, and a sprinkle of oregano for a Mediterranean-inspired sheet pan dinner.
Final Thoughts: A Healthy, Easy Meal That Delivers Every Time
This sheet pan chicken and vegetable recipe is not only convenient but also a healthy and satisfying meal that the whole family will love. With minimal prep time and the ability to customize to your preferences, it’s a no-fuss meal option that’s perfect for busy weeknights. Furthermore, it’s an excellent way to eat nutritious, home-cooked meals without spending hours in the kitchen.
Give this recipe a try and enjoy the convenience of sheet pan cooking – an easy, healthy, and delicious way to enjoy chicken and vegetables.
Spicy Cajun Chicken Breast Recipe for a Bold Flavor Boost
A Spicy Cajun Chicken Breast recipe is the perfect choice when you’re craving a dish with a bold, zesty flavor profile. The combination of smoky paprika, fiery cayenne, and aromatic herbs creates an unforgettable taste that can elevate any meal. Whether you’re making it for a quick weeknight dinner or as a special treat for a gathering, this recipe delivers on both flavor and convenience.
Why Choose Spicy Cajun Chicken Breast?
Cajun cuisine, rooted in the rich culture of Louisiana, is famous for its robust flavors, and this recipe is no exception. The beauty of Cajun seasoning lies in its balance of heat, smokiness, and earthiness, which works wonders with chicken breast. Moreover, it’s incredibly versatile—you can serve it on its own with a side of veggies, slice it for wraps, or even toss it into salads.
The addition of cayenne pepper and smoked paprika gives the chicken a fiery kick, while the garlic powder, onion powder, and thyme round out the flavor with savory, herby undertones. Together, these spices create a deliciously complex crust on the chicken, locking in moisture for a tender, juicy result.
Ingredients for Spicy Cajun Chicken Breast
To make this recipe, you’ll need the following ingredients:
- Chicken Breasts: Boneless, skinless chicken breasts are ideal for this recipe because they cook quickly and remain juicy.
- Cajun Seasoning: The star of the recipe. If you have a store-bought blend, that’s fine, but homemade Cajun seasoning can elevate the flavor even more. The basic ingredients include smoked paprika, cayenne pepper, garlic powder, onion powder, thyme, oregano, and a pinch of salt.
- Olive Oil: To coat the chicken and help the seasoning adhere, plus to ensure a crisp, golden exterior when cooking.
- Lemon Juice: A squeeze of fresh lemon juice at the end adds a burst of acidity that balances the rich, spicy flavors of the chicken.
- Optional Garnishes: Fresh herbs like parsley or cilantro, and even a touch of sour cream or ranch dressing for dipping, can enhance the dish’s presentation and flavor.
Step-by-Step Instructions for Spicy Cajun Chicken Breast
- Prepare the Chicken Breasts: Start by trimming the chicken breasts if needed. For even cooking, you can pound the chicken to an even thickness or slice them horizontally into thinner cutlets. This helps them cook more quickly and evenly.
- Season the Chicken: In a small bowl, combine all your Cajun spices—smoked paprika, cayenne pepper, garlic powder, onion powder, thyme, oregano, salt, and black pepper. Toss the chicken breasts in olive oil to coat, then rub the seasoning mix generously over both sides of the chicken. Make sure each piece is evenly coated for maximum flavor.
- Cook the Chicken: Heat a large skillet over medium-high heat and add a bit of olive oil. Once hot, add the seasoned chicken breasts to the skillet. Cook for about 4-6 minutes per side, or until the internal temperature reaches 165°F (74°C). The chicken should have a golden-brown crust on the outside, and the interior should be tender and juicy.
- Finish with Lemon: Once the chicken is done, remove it from the pan and squeeze fresh lemon juice over the top. This will brighten up the flavors and balance the spiciness.
- Serve and Enjoy: Let the chicken rest for a few minutes before serving to allow the juices to redistribute. Serve it with your favorite sides, such as roasted vegetables, a fresh salad, or rice. For an added flavor boost, top with freshly chopped parsley or cilantro.
Why This Recipe Stands Out
- Quick and Simple: This Spicy Cajun Chicken is easy to make, requiring only a few pantry ingredients and about 20 minutes of your time. As a result, it’s perfect for busy weeknights when you need something flavorful but don’t have time to spend hours cooking.
- Healthier Option: Despite its bold flavor, this recipe is low in calories, high in protein, and packed with essential nutrients. For those on a health-conscious journey, Cajun chicken can be enjoyed guilt-free.
- Customizable Spice Level: The level of heat in this dish can be easily adjusted. If you prefer a milder version, you can reduce the amount of cayenne pepper or use a milder seasoning blend. Conversely, you can increase the spice if you love an extra kick of heat.
- Meal Prep Friendly: This recipe is ideal for meal prep. The chicken stays juicy and flavorful even after being stored in the fridge, making it a great option for make-ahead lunches or dinners. Simply slice it up for salads or wraps, or serve it alongside your favorite grains and vegetables.
Serving Suggestions for Spicy Cajun Chicken Breast
- Cajun Chicken Salad: Slice the Cajun chicken and toss it over a fresh salad with avocado, cherry tomatoes, red onions, and a creamy dressing. The bold flavor of the chicken will add a tasty twist to the salad.
- Spicy Chicken Wraps: For a quick lunch or dinner, slice the chicken and wrap it in a whole wheat tortilla with mixed greens, tomatoes, and a drizzle of sour cream or ranch dressing for a cooling effect.
- Rice or Quinoa: Serve the Cajun chicken over rice, quinoa, or couscous for a hearty meal. The seasoning will infuse the grains, giving them a flavorful base to complement the chicken.
- Roasted Vegetables: Pair your spicy chicken with roasted vegetables such as sweet potatoes, carrots, bell peppers, or Brussels sprouts. The sweetness of the vegetables balances out the heat from the Cajun seasoning.
Variations to Try
- Grilled Cajun Chicken: If you prefer a smoky, charred flavor, grill the chicken instead of cooking it in a skillet. The smoky grill flavor will enhance the Cajun spices and give the chicken a unique twist.
- Cajun Chicken with Shrimp: For a surf-and-turf twist, add shrimp to the dish. Toss shrimp in the same Cajun seasoning and cook them alongside the chicken for a delicious seafood-infused meal.
- Cajun Chicken Bowls: Create a meal bowl by layering cooked quinoa or rice with sautéed peppers, onions, and seasoned chicken. Top it off with a tangy dressing for an easy, flavorful meal.
Final Thoughts
This Spicy Cajun Chicken Breast recipe is a must-try for anyone who loves bold, flavorful dishes. With just a few ingredients, you can create a juicy, spicy chicken that’s packed with flavor. Whether you serve it with roasted vegetables, rice, or in a wrap, this recipe is sure to become a regular in your cooking rotation. Give it a try—the bold Cajun spices will surely spice up your meals in the best way possible.
Best Side Dishes to Serve with Chicken Breast Recipes

Classic Mashed Potatoes with Butter & Herbs
Classic mashed potatoes are a timeless side dish that pairs wonderfully with chicken breast and many other main courses. This recipe is simple, creamy, and full of rich flavor, making it the perfect accompaniment to elevate your meal. The combination of buttery goodness and fragrant herbs creates a deliciously indulgent side that can be made in just a few easy steps.
Why Choose Classic Mashed Potatoes?
Mashed potatoes are a comfort food staple that never goes out of style. Their smooth texture and mild flavor make them the ideal partner for savory meats like chicken, steak, and pork. Moreover, mashed potatoes are incredibly versatile. You can customize the flavor by adding a variety of herbs, spices, and seasonings to suit your taste. In this recipe, the addition of butter and herbs infuses the potatoes with extra richness and fragrance, making them the star of the dish.
Ingredients for Classic Mashed Potatoes with Butter & Herbs
To make these creamy, buttery mashed potatoes, you will need:
- Russet Potatoes: These potatoes are perfect for mashing because of their starchy nature, which creates a light and fluffy texture when cooked.
- Butter: Unsalted butter is best for controlling the flavor, but feel free to use salted butter for a bit of extra seasoning.
- Heavy Cream: For extra richness and creaminess, heavy cream is the ideal choice. You can substitute with milk if you prefer a lighter version.
- Garlic: A couple of cloves of garlic can be smashed and added to the potatoes for subtle flavor. Garlic and butter are a classic pairing that takes mashed potatoes to the next level.
- Fresh Herbs: Parsley, thyme, and rosemary are wonderful herbs to include. You can also try chives or dill for a different flavor profile.
- Salt & Pepper: Season to taste for a perfectly balanced dish.
- Olive Oil (Optional): For added richness and to help smooth out the potatoes, you can add a bit of olive oil in place of some of the butter.
Step-by-Step Instructions for Classic Mashed Potatoes with Butter & Herbs
- Prep the Potatoes: Start by peeling the russet potatoes and cutting them into uniform chunks. This ensures they cook evenly. Add the cut potatoes to a large pot of salted water.
- Cook the Potatoes: Bring the water to a boil and cook the potatoes for about 10-15 minutes, or until they are tender and easily pierced with a fork.
- Prepare the Butter & Cream Mixture: While the potatoes are cooking, heat the butter, heavy cream, and smashed garlic in a small saucepan over low heat. This allows the flavors of the garlic to infuse into the cream and butter.
- Mash the Potatoes: Drain the cooked potatoes and return them to the pot. Mash them using a potato masher or a ricer for an extra smooth texture.
- Add the Butter & Cream Mixture: Pour the warm butter and cream mixture into the mashed potatoes. Stir gently until everything is combined and the potatoes are creamy. If you prefer even creamier mashed potatoes, you can use a hand mixer to whip them.
- Season the Mashed Potatoes: Add freshly chopped herbs like parsley, thyme, or rosemary for a burst of flavor. Season with salt and pepper to taste. Taste and adjust the seasoning as needed.
- Serve: Transfer the mashed potatoes to a serving bowl and garnish with a few extra fresh herbs for color and a beautiful presentation.
Why These Mashed Potatoes Stand Out
- Rich, Buttery Flavor: The key to making mashed potatoes extra special is the combination of butter and cream. This duo creates a creamy, rich texture that will melt in your mouth. The garlic adds depth, and the fresh herbs introduce a fragrant, aromatic note that elevates the dish.
- Customizable: This classic recipe can be easily modified to suit different dietary preferences. For example, you can swap out heavy cream for sour cream or Greek yogurt for a tangy twist. You can also use olive oil or vegan butter if you’re looking for a dairy-free option.
- Simple, Yet Elegant: While mashed potatoes are a simple dish to prepare, the addition of fresh herbs and garlic makes them feel more luxurious. They’re perfect for special occasions like holiday dinners, but also great for weeknight meals when you need a comforting side dish.
- Perfect Pairing: Mashed potatoes are the ideal accompaniment to chicken breast, beef, turkey, or even grilled vegetables. The creamy potatoes help balance out the flavors of the main dish, especially if your chicken has a bold seasoning or glaze.
Serving Suggestions for Classic Mashed Potatoes
- As a Side for Chicken: Serve these mashed potatoes alongside a juicy grilled chicken breast or crispy air fryer chicken for a satisfying and complete meal. The richness of the potatoes complements the lean protein, making every bite delicious.
- With Roasted Vegetables: Pair the mashed potatoes with a medley of roasted vegetables such as carrots, Brussels sprouts, or sweet potatoes. The earthy flavors of the roasted vegetables are a perfect contrast to the creamy mashed potatoes.
- Top with Gravy: For an extra indulgence, serve your mashed potatoes with chicken gravy or a rich brown gravy. The savory gravy adds another layer of flavor and complements the buttery potatoes perfectly.
- In Shepherd’s Pie: If you have any leftovers, use the mashed potatoes as a topping for a classic shepherd’s pie. Layer the mashed potatoes over a mixture of ground meat and vegetables, then bake for a comforting casserole that the whole family will love.
Variations to Try
- Garlic Parmesan Mashed Potatoes: Add freshly grated Parmesan cheese and roasted garlic for an even richer, more flavorful version of the classic recipe. The nutty flavor of the cheese pairs wonderfully with the creamy potatoes.
- Cheesy Mashed Potatoes: Stir in shredded cheese such as cheddar or mozzarella for a creamy, cheesy twist. Top with extra cheese and broil for a few minutes to create a golden, cheesy crust on top.
- Bacon Mashed Potatoes: For a smoky flavor, crumble crispy bacon into the mashed potatoes. The salty, savory bacon bits add a satisfying crunch that contrasts beautifully with the creamy texture.
Final Thoughts
Classic mashed potatoes with butter and herbs are a versatile and delicious side dish that everyone loves. With their creamy texture and rich, flavorful taste, they make a fantastic complement to chicken breasts or other proteins. Whether you stick to the basic recipe or add your own twist with garlic, cheese, or bacon, these mashed potatoes will quickly become a family favorite. Give them a try next time you’re looking for a comforting, satisfying side dish!
Roasted Vegetables to Pair with Grilled or Baked Chicken Breast
Roasted vegetables are a wonderful and healthy complement to grilled or baked chicken breast. They add a rich, earthy flavor and a satisfying texture that balances out the lean protein of chicken. The versatility of roasted vegetables allows you to choose a variety of options depending on your taste, making them a perfect side dish for any occasion. The caramelization process that happens while roasting brings out the natural sweetness and depth of flavors in vegetables, enhancing their taste and making them irresistible.
Why Roasted Vegetables Are a Perfect Match for Chicken Breast
Roasted vegetables are not only delicious but also full of nutrients that support a healthy diet. Their texture contrasts beautifully with the juicy tenderness of chicken, while their smoky, caramelized flavors provide an exciting depth to your meal. Plus, they’re incredibly easy to prepare. Simply toss the veggies in olive oil, season with herbs and spices, and let the oven do the work.
When paired with grilled or baked chicken, the vegetables act as the perfect counterpart. They help round out the meal, providing fiber, vitamins, and minerals to balance the protein from the chicken. Whether you prefer sweet vegetables like carrots and sweet potatoes or more savory options like Brussels sprouts or zucchini, roasted vegetables bring a hearty, comforting element to your meal.
Best Vegetables to Roast with Chicken
There are many types of vegetables that roast beautifully, and the possibilities for combinations are endless. Here are some of the best vegetables to pair with your grilled or baked chicken breast:
- Carrots: Naturally sweet and develop a deep caramelized flavor when roasted.
- Brussels Sprouts: Nutty and slightly bitter, perfect for a contrast to savory chicken.
- Sweet Potatoes: Soft, creamy texture that pairs beautifully with grilled or baked chicken.
- Zucchini: Light, slightly sweet vegetable that roasts quickly and adds flavor.
- Cauliflower: Mellow, nutty flavor and crispy texture make it a great side dish.
- Asparagus: Earthy and tender, with a mild flavor that balances well with chicken.
- Red Onions: Caramelized sweetness and savory notes add depth to your meal.
- Squash: Sweet and creamy texture, perfect for pairing with lean chicken.
- Broccoli: Slightly smoky flavor that contrasts nicely with juicy chicken.
How to Roast Vegetables Perfectly
Roasting vegetables is one of the easiest and most flavorful ways to cook them. Follow these simple steps to achieve perfectly roasted veggies:
- Preheat the Oven: Preheat your oven to 400°F (200°C) for optimal roasting.
- Cut Evenly: Cut your vegetables into uniform sizes to ensure they cook evenly.
- Toss with Oil and Seasoning: Coat vegetables with olive oil and seasoning, making sure each piece is evenly coated.
- Spread Evenly on a Baking Sheet: Lay the veggies out on a baking sheet, making sure they’re not overcrowded.
- Roast Until Tender and Caramelized: Roast for 20-30 minutes, flipping halfway through.
- Finish with Fresh Herbs or Garnish: Add a finishing touch with fresh herbs, lemon zest, or a drizzle of balsamic glaze.
Creative Variations and Flavor Combinations
Get creative with your roasted vegetable combinations for a unique twist:
- Mediterranean Roasted Vegetables: Use zucchini, bell peppers, and tomatoes with oregano, garlic, and lemon zest for a Mediterranean-inspired twist.
- Cajun Roasted Vegetables: Toss veggies in Cajun seasoning for a spicy, smoky flavor that enhances sweet potatoes and carrots.
- Autumn Roasted Vegetables: Combine butternut squash, Brussels sprouts, and carrots with cinnamon, nutmeg, and maple syrup for a fall-inspired side.
- Root Vegetable Medley: Use parsnips, carrots, and turnips with fresh thyme and honey for a hearty, flavorful side.
Why Roasted Vegetables Are the Ideal Side for Chicken Breast
Roasted vegetables are the perfect complement to chicken breast for several reasons:
- Flavor Balance: Roasted vegetables’ earthy, savory flavors balance the mild taste of chicken, providing a well-rounded meal.
- Healthy & Nutrient-Rich: Full of fiber, vitamins, and minerals, they enhance the nutritional value of your meal.
- Easy to Prepare: Roasting requires minimal effort—just season, toss, and roast to perfection.
Final Thoughts
Roasted vegetables are an irresistible and healthy side dish that perfectly complements grilled or baked chicken breast. Their rich flavors and satisfying textures make them an ideal pairing, providing a balance of sweetness, savoriness, and nutrition to your meal. Whether you’re using simple seasonings or experimenting with bold spices, roasted vegetables are a perfect addition to your next chicken dinner.
Garlic Butter Rice: A Perfect Side for Any Chicken Dish
Garlic butter rice is a flavorful, fragrant, and comforting side dish that pairs beautifully with any chicken recipe. Its rich, savory taste and soft, fluffy texture make it the perfect accompaniment to grilled, baked, or skillet-cooked chicken breast. The combination of buttery richness and garlicky warmth enhances the flavor of chicken without overpowering it, creating a well-balanced and satisfying meal.
Why Garlic Butter Rice Is the Ideal Side for Chicken
The simple yet decadent flavor of garlic butter rice makes it a universal side that complements various chicken preparations. Whether you’re serving crispy chicken breast from the air fryer or a juicy oven-baked piece, the rice offers a neutral base that brings out the best in the chicken.
- Rich and Flavorful: The butter adds a creamy richness, while garlic infuses the rice with a savory aroma that enhances every bite of chicken.
- Perfect Texture: The rice is light and fluffy, offering a nice contrast to the tender, juicy texture of the chicken.
- Versatile Pairing: Garlic butter rice can be customized to pair with a wide range of flavors, from simple grilled chicken to more complex marinades, making it perfect for meal prepping or entertaining guests.
How to Make Garlic Butter Rice
Making garlic butter rice is quick and easy, and the result is a side dish that tastes like it took hours to prepare. Here’s how you can make it:
- Ingredients:
- 1 cup long-grain rice
- 2 tablespoons butter
- 3 cloves garlic (minced)
- 2 cups chicken broth (or water)
- Salt and pepper to taste
- Fresh parsley or thyme (optional, for garnish)
- Instructions:
- Prepare the Rice: Rinse the rice under cold water to remove excess starch.
- Cook the Garlic: In a large skillet or saucepan, melt butter over medium heat. Add the minced garlic and sauté for 1-2 minutes, or until fragrant, being careful not to burn it.
- Cook the Rice: Add the rinsed rice to the skillet and stir it into the garlic butter, ensuring each grain is coated in the butter. This helps enhance the flavor and texture.
- Add Liquid: Pour in the chicken broth (or water), and season with salt and pepper. Bring the mixture to a boil, then reduce the heat to low and cover the pan. Let the rice simmer for about 18-20 minutes, or until all the liquid is absorbed and the rice is tender.
- Fluff and Serve: Remove the skillet from the heat, and let it sit for 5 minutes before fluffing the rice with a fork. Garnish with freshly chopped parsley or thyme for an extra burst of flavor and color.
Variations on Garlic Butter Rice
While the classic version of garlic butter rice is already delicious, you can customize the dish to suit your taste and add variety:
- Lemon Garlic Butter Rice: Add a squeeze of fresh lemon juice and a pinch of lemon zest to the rice for a bright, zesty flavor that pairs wonderfully with grilled or baked chicken.
- Herbed Garlic Butter Rice: Incorporate fresh herbs like thyme, rosemary, or basil for added freshness and complexity. These herbs also pair beautifully with chicken.
- Parmesan Garlic Butter Rice: Stir in a generous handful of freshly grated Parmesan cheese for a cheesy, creamy twist on the classic recipe.
- Spicy Garlic Butter Rice: Add a pinch of red pepper flakes or a dash of hot sauce to the garlic butter sauce for a spicy kick that complements the mildness of chicken breast.
How to Pair Garlic Butter Rice with Chicken
Garlic butter rice pairs well with virtually any style of chicken:
- Grilled Chicken: The smoky flavor of grilled chicken contrasts perfectly with the rich, buttery rice. A squeeze of fresh lemon or lime on both the rice and the chicken can elevate the entire dish.
- Baked Chicken: Whether you bake your chicken with a simple seasoning or a flavorful marinade, the garlic butter rice will complement the flavors, adding a creamy texture to each bite.
- Skillet Chicken: If you cook your chicken in a skillet with seasonings and sauces, the rice can soak up the delicious juices, creating a flavorful meal that requires minimal effort.
- Air Fryer Chicken: The crispy texture of air fryer chicken pairs wonderfully with the soft, buttery rice, creating a balanced contrast in texture.
Tips for the Best Garlic Butter Rice
To make sure your garlic butter rice turns out perfect every time, keep these tips in mind:
- Use Chicken Broth: Using chicken broth instead of water adds more flavor to the rice. If you want a vegetarian option, use vegetable broth.
- Don’t Overcook the Garlic: Garlic burns quickly, so be sure to sauté it gently and avoid overcooking to prevent a bitter taste.
- Let the Rice Sit: After cooking, let the rice sit covered for a few minutes to steam and become extra fluffy.
- Make Extra: Garlic butter rice is great for leftovers! You can easily make a larger batch and store it in the fridge for several days to enjoy with future chicken meals.
Final Thoughts on Garlic Butter Rice
Garlic butter rice is the ultimate comfort food side dish that’s not only easy to make but also full of flavor. It enhances the taste of any chicken dish, whether you’re grilling, baking, or skillet-cooking your chicken. With endless variations and simple ingredients, garlic butter rice is a versatile and reliable option that can elevate your meals in no time.
Fresh Garden Salad: A Light and Refreshing Chicken Breast Companion
A fresh garden salad is the perfect companion to any chicken breast dish, adding a light, crisp, and refreshing contrast to the rich, savory flavors of the chicken. Whether you’re serving grilled, baked, or air-fried chicken, a vibrant garden salad with fresh vegetables and a simple dressing can elevate your meal, creating a well-rounded, healthy, and satisfying dish. The balance between the crunchy veggies and tender chicken provides a refreshing change in texture, while also delivering essential nutrients to complement the high-protein content of the chicken.
Why Fresh Garden Salad Pairs So Well with Chicken Breast
The versatility of a garden salad makes it an ideal side for chicken. Not only does it add a burst of freshness to every bite, but it also helps balance out the richness of the chicken. Here are a few reasons why fresh garden salad and chicken breast are the perfect pairing:
- Light and Healthy: A garden salad provides a variety of fiber-rich vegetables like lettuce, cucumbers, and tomatoes, which are low in calories and high in nutrients, making it an excellent choice for those looking for a light, healthy meal alongside their chicken.
- Nutrient Boost: A fresh salad is packed with vitamins and minerals, such as vitamin C from tomatoes and potassium from cucumbers, that complement the nutritional benefits of chicken breast, offering a well-balanced, wholesome meal.
- Crisp Contrast: The crisp, refreshing texture of fresh vegetables adds contrast to the juicy, tender chicken, making each bite satisfying and enjoyable.
How to Build a Perfect Garden Salad
Creating a garden salad that perfectly complements your chicken breast is easy! The key is to combine a variety of fresh, colorful vegetables with a flavorful dressing. Here’s how you can build the perfect salad:
- Base Ingredients (Greens):
- Start with a variety of fresh greens. Romaine lettuce, baby spinach, arugula, or mixed greens are all great choices. These leafy vegetables provide a light, nutritious base that pairs well with the chicken’s protein-rich texture.
- Vegetable Add-ins:
- Add crunchy vegetables like cucumbers, bell peppers, carrots, and radishes to enhance both the flavor and texture. Cherry tomatoes add juiciness, while red onions provide a mild, slightly sweet flavor.
- For extra fiber and antioxidants, consider adding ingredients like avocados (rich in healthy fats), beets, or even a handful of broccoli florets.
- Flavor Enhancers:
- For an extra flavor boost, include a handful of fresh herbs like parsley, basil, or cilantro. Olives or feta cheese can also add a savory, briny flavor to balance the freshness of the vegetables.
- If you’re a fan of nuts or seeds, sunflower seeds, walnuts, or almonds can be sprinkled on top for extra texture and a bit of crunch.
- Dressings:
- A simple vinaigrette made from olive oil, balsamic vinegar, and a bit of mustard is a classic choice that complements the lightness of the salad and the savory chicken.
- If you prefer a creamier dressing, try a Greek yogurt-based ranch or a lemon tahini dressing that adds a tangy kick to the vegetables.
How to Make a Simple Garden Salad
- Ingredients:
- 2 cups mixed greens (e.g., romaine, spinach, arugula)
- 1 cucumber, sliced
- 1 cup cherry tomatoes, halved
- ½ red onion, thinly sliced
- 1 carrot, grated or julienned
- ½ avocado, sliced (optional)
- Fresh herbs (parsley, cilantro, or basil)
- 2 tablespoons extra virgin olive oil
- 1 tablespoon balsamic vinegar or lemon juice
- Salt and pepper to taste
- Instructions:
- In a large salad bowl, combine the mixed greens, cucumbers, tomatoes, red onions, and carrots.
- Add sliced avocado and fresh herbs for extra flavor and nutrition.
- Drizzle with olive oil and balsamic vinegar (or lemon juice) and toss until the ingredients are evenly coated.
- Season with salt and pepper to taste. Toss again and serve immediately alongside your chicken breast.
Garden Salad Variations to Match Different Chicken Dishes
The beauty of a garden salad is that it can be customized to suit different chicken preparations. Here are a few variations to try depending on the type of chicken you’re serving:
- Grilled Chicken Salad: For grilled chicken, add a smoky element to the salad with roasted corn, black beans, or even a dash of cumin. You could also top the salad with cilantro and serve with a tangy lime dressing to complement the grilled flavors.
- Baked Chicken Salad: If you’re serving herb-baked chicken, a herbed garden salad with a lemon vinaigrette will highlight the flavors of the chicken. Add goat cheese or sliced almonds for extra richness.
- Air Fryer Chicken Salad: With the crispy, juicy texture of air fryer chicken, try a crunchy salad with crispy bacon bits or croutons. A creamy dressing like ranch or blue cheese can add depth to this meal.
- Skillet Chicken Salad: For skillet-cooked chicken that’s often seared with seasoning or sauce, add some sautéed mushrooms or grilled zucchini to the salad for extra flavor and texture. A balsamic glaze or honey mustard dressing can add sweetness and balance out the savory chicken.
Health Benefits of Fresh Garden Salad
A fresh garden salad doesn’t just add flavor—it’s also packed with nutritional benefits that complement your chicken breast. Here’s why you should make it a regular part of your meals:
- Rich in Nutrients: Vegetables like spinach, tomatoes, and cucumbers are high in vitamins A, C, and K, all of which are crucial for immune health, skin health, and bone health.
- Low in Calories: Since a garden salad is naturally low in calories, it’s an excellent choice for those looking to enjoy a balanced meal without consuming excess calories. This makes it a great option for weight management or calorie-conscious diets.
- Antioxidants and Fiber: The antioxidants found in vegetables like tomatoes, carrots, and avocados help fight inflammation, while the fiber aids digestion and promotes gut health.
Conclusion: The Ultimate Chicken Breast Side Dish
A fresh garden salad is more than just a side—it’s a nutritious and flavorful addition that balances out the richness of chicken breast. Whether you’re grilling, baking, or skillet-cooking your chicken, a garden salad provides a refreshing contrast in flavor and texture while boosting the overall nutrition of your meal. By experimenting with different dressings, herbs, and vegetables, you can customize your salad to pair perfectly with any chicken dish.
Conclusion: Why These Chicken Breast Recipes Are Must-Try for Easy Meals
Chicken breast is a versatile and nutritious option that can be transformed into countless delicious dishes with ease. Whether you’re baking, grilling, pan-searing, or using an air fryer, these chicken breast recipes are perfect for quick, healthy, and satisfying meals. In addition to being high in protein, these recipes offer a variety of cooking methods and flavors, making them ideal for busy individuals and families who want to enjoy tasty meals without spending hours in the kitchen.
From the tenderness of garlic butter chicken breast to the crispy goodness of air-fried chicken, each recipe provides unique flavors and textures that will keep your taste buds excited. Moreover, with so many ways to season, cook, and pair chicken breast, you’ll never run out of options. These recipes are designed to help you explore different cooking methods and flavors, allowing you to tailor meals to your personal preferences.
Encourage Readers to Try Different Cooking Methods and Flavors
Chicken breast is not just about one cooking method—it’s about experimenting with different techniques and flavors to find what works best for you. Whether you prefer the smoky taste of grilled chicken, the richness of creamy skillet chicken, or the crisp texture from the air fryer, there’s something for everyone. What’s more, don’t be afraid to get creative with your seasonings, sauces, and sides. The possibilities are endless, and the result is always a delicious meal!
Call to Action: Leave a Comment & Share Your Favorite Chicken Breast Recipe
Now it’s your turn! We’d love to hear from you—leave a comment below and let us know which chicken breast recipe you’re excited to try first. If you have your own favorite recipe, share it with us! Your culinary expertise could inspire others to try something new. Additionally, don’t forget to share this post with friends and family who love easy, healthy meals. Let’s keep the flavor adventure going!