
Introduction
If you’re looking to make juicy and flavorful beef recipes every time, you’ve come to the right place. The key to achieving tender, delicious beef lies in choosing the right cuts, seasoning properly, and using the right cooking techniques. With a few simple tricks and the right approach, you can transform any beef dish into a juicy, flavorful masterpiece. Let’s dive into the best practices for perfect beef every time!
Best Beef Cuts for Juicy and Flavorful Recipes
Discover the best beef cuts that ensure juicy and flavorful recipes every time, with tips for selecting the perfect cut for a delicious meal.
USDA Prime, Choice, or Select – What’s Best for Juicy Beef?
When it comes to cooking juicy and flavorful beef, the quality grade you choose makes a big difference. In the U.S., the USDA (United States Department of Agriculture) grades beef based on factors like marbling (the intramuscular fat), texture, and maturity. The three most common grades you’ll see at the grocery store are Prime, Choice, and Select—and each one affects how juicy your beef will turn out.
- USDA Prime
This is the highest quality grade and is often found in steakhouses or sold at premium butcher shops. Prime beef has abundant marbling, which melts during cooking and keeps the meat tender and juicy. It’s perfect for dry-heat cooking methods like grilling, roasting, or searing. - USDA Choice
Choice beef has less marbling than Prime but still offers good flavor and tenderness, especially in cuts like ribeye, sirloin, and tenderloin. It’s a great everyday option for home cooks and works well with both dry-heat and moist-heat cooking methods. - USDA Select
Select is a leaner grade of beef with much less marbling. While it can still be flavorful, it tends to dry out more easily if overcooked. Select cuts are best suited for slow cooking, marinating, or braising to help retain moisture and enhance flavor.
So, which one should you choose for juicy beef?
If you’re after maximum juiciness and can splurge, go with USDA Prime. For a more affordable but still flavorful option, Choice is your best bet. If you’re using moist cooking methods or marinades, Select can work, but it requires a bit more care to avoid dryness.
Pro tip: When in doubt, look at the marbling—those tiny white streaks of fat. More marbling usually means more flavor and moisture!
Top Beef Cuts for Flavor and Tenderness: Ribeye, Brisket, Chuck Roast
Not all beef cuts offer the same level of flavor and tenderness. To achieve that rich, juicy bite, you need to start with the right cut of meat. Below are three popular choices that bring out the best in your beef dishes when prepared with care.
Ribeye: Rich, Juicy, and Perfect for Grilling
Ribeye steaks consistently deliver incredible flavor and tenderness. Their abundant marbling melts during cooking, which keeps the meat moist and enhances the beefy taste. Whether you use a grill, skillet, or broiler, ribeye responds beautifully to high-heat cooking.
Best cooking methods: Grill, pan-sear, reverse sear
Pro tip: Let your ribeye rest for a few minutes after cooking to lock in the juices and deepen the flavor.
Brisket: Bold Flavor, Fall-Apart Tenderness
Brisket comes from the cow’s chest, and though it starts out tough, long and slow cooking transforms it into something amazing. The connective tissue and fat break down during braising or smoking, leaving the meat ultra-tender and packed with flavor.
Best cooking methods: Slow roast, braise, smoke
Pro tip: Cook brisket low and slow to allow the collagen to fully break down and create that melt-in-your-mouth texture.
Chuck Roast: Affordable, Flavor-Packed, and Comforting
Chuck roast, from the shoulder, offers a budget-friendly way to create flavorful, comforting meals. It contains a good amount of fat and collagen, which break down during slow cooking to make the meat tender and juicy. This cut shines in pot roasts, shredded beef, and hearty stews.
Best cooking methods: Braise, slow cook, pressure cook
Pro tip: Add onions, garlic, and herbs to your braising liquid to build deep, savory flavor.
In summary:
Reach for chuck roast to create satisfying meals with great taste at a lower cost.
Use ribeye for juicy, quick-cooked steaks.
Choose brisket when you want bold, slow-cooked flavor.
Choosing Between Grass-Fed and Grain-Fed Beef for Better Taste
When you’re aiming for juicy and flavorful beef, the way cattle are raised plays a major role in the final taste, texture, and even nutritional value of the meat. The two most common types you’ll see in stores are grass-fed and grain-fed beef. Both offer unique qualities, and knowing the difference helps you choose the best option for your recipe and flavor preferences.
Grass-Fed Beef: Lean, Earthy, and Nutrient-Rich
Cattle that are grass-fed eat a natural diet of pasture grass throughout their lives. This results in beef that’s leaner, with a firmer texture and a more robust, earthy flavor. Some people describe the taste as slightly gamey, while others appreciate its depth and natural quality.
Grass-fed beef also contains higher levels of omega-3 fatty acids, conjugated linoleic acid (CLA), and antioxidants like vitamin E. However, because it’s leaner, it can dry out more easily if overcooked.
Best for: Health-conscious eaters, slow cooking methods, and dishes with bold sauces
Pro tip: Cook it gently and avoid overcooking—use a thermometer to keep it tender and juicy.
Grain-Fed Beef: Tender, Buttery, and Classic in Flavor
Grain-fed cattle typically spend the last few months of their lives on a diet of corn, soy, and other grains. This feeding process produces beef with more marbling, which leads to a richer, buttery flavor and melt-in-your-mouth tenderness. It’s what you’ll often find in restaurants and steakhouses.
While it’s generally more tender than grass-fed beef, it can also be higher in total fat. That said, the extra marbling helps lock in moisture, making it easier to cook without losing juiciness.
Best for: Steaks, roasts, and quick-cooking recipes where tenderness is key
Pro tip: Try a ribeye or sirloin from grain-fed beef when you want a classic, juicy steakhouse experience.
Which One Is Better? It Depends on Your Taste and Cooking Style
There’s no one-size-fits-all answer here. If you’re after intense beefy flavor with health benefits, grass-fed is a great pick—just handle it gently. If you prefer ultra-tender, rich-tasting beef that’s easier to cook and more forgiving, grain-fed might suit you better.
No matter which you choose, look for freshness, good color, and visible marbling to get the best results in your kitchen.
Why Marbling Matters for Moist and Tender Beef Recipes
When it comes to juicy, flavorful beef, one of the most important factors to consider is marbling—those delicate streaks of fat running through the muscle tissue. While marbling is often overlooked by some home cooks, it plays a crucial role in both the moisture and tenderness of your beef.
What is Marbling?
Marbling refers to the intramuscular fat found within the muscle fibers of the beef. This fat appears as thin white lines or streaks within the red meat. It’s different from the fat on the outside of the meat (known as the external fat cap). While external fat can be trimmed, marbling is an essential part of the beef that affects how the meat cooks and tastes.
Marbling Equals Juiciness
One of the biggest benefits of marbling is that it keeps the meat juicy. During cooking, the fat within the marbling melts and infuses the beef with moisture, preventing it from drying out. This is especially important for leaner cuts, like sirloin or flank steak, which can become tough and dry without sufficient fat.
As the fat renders down, it creates a natural baste that coats the beef, making each bite more succulent and rich. This is one of the main reasons ribeye and New York strip steaks, which have good marbling, are known for being particularly juicy and flavorful.
Marbling Impacts Tenderness
The fat in marbled beef also plays a key role in making the meat tender. When cooked, the fat softens and breaks down the collagen in the muscle, which can otherwise make the beef tough. This process creates a melt-in-your-mouth texture, making cuts like ribeye and tenderloin so desirable.
The presence of marbling allows for more forgiving cooking. Whether you grill, roast, or pan-sear marbled beef, the fat helps retain moisture and tenderness, reducing the risk of overcooking and drying out the meat.
How Marbling Affects Flavor
Marbling also plays a direct role in the flavor of the beef. As the fat melts, it carries rich, beefy flavors throughout the meat. The fat within the marbling contributes a buttery, savory taste that you simply can’t get from leaner cuts. This is why highly marbled cuts like ribeye are often considered the most flavorful. The fat isn’t just about moisture—it’s about enhancing the natural flavors of the beef, giving each bite a deep, satisfying richness.
How to Identify Marbling
When choosing beef, look for cuts with a good balance of marbling. The higher the marbling, the more likely you are to get a tender, moist, and flavorful meal. Beef cuts labeled USDA Prime usually have the most marbling, followed by Choice cuts, and then Select. However, it’s not just about the grade—the distribution of fat within the meat is key. Even within Prime or Choice cuts, some steaks will have more evenly distributed marbling than others.
Pro Tip:
If you’re cooking a leaner cut, such as flank steak or sirloin, consider using a marinade or basting with butter to add moisture. Lean cuts lack marbling, so extra fat or moisture helps prevent the meat from drying out.
In summary, marbling is a critical factor when you want your beef to be moist, tender, and full of flavor. It not only enhances the juiciness of the meat but also contributes to its texture and taste, making it an essential quality to look for when selecting the best beef cuts for your recipes.
Beef Preparation Tips to Enhance Flavor and Tenderness
How to Marinate Beef for Rich Flavor and Juiciness
Marinating beef is one of the best ways to enhance its flavor and increase its tenderness, especially for leaner cuts that lack the natural marbling to keep the meat juicy. A good marinade not only adds depth and richness to the meat but also helps break down muscle fibers, making it more tender and moist. The key lies in choosing the right ingredients, allowing enough time for the marinade to work, and applying the correct techniques.
What Makes a Great Marinade?
A good marinade typically consists of three main components: acid, fat, and seasoning. Each part plays an essential role in enhancing both the flavor and texture of the beef.
- Acid: This can come from ingredients like vinegar, lemon juice, or wine. The acid helps break down the muscle fibers in the beef, making it more tender. It also adds a bright, tangy note that complements the natural flavors of the meat.
- Fat: Ingredients like olive oil, butter, or yogurt serve as the fat base of the marinade. The fat helps moisturize the beef and ensures it stays juicy during cooking. It also helps carry the flavor compounds from the seasonings into the meat, giving the beef a more uniform flavor throughout.
- Seasoning: Herbs, spices, and garlic are the flavor-building components of a marinade. These can range from fresh herbs like rosemary and thyme to spices such as paprika, cumin, and black pepper. Salt is also essential because it helps the marinade penetrate the beef more effectively and enhances the overall flavor.
The Best Marinades for Different Cuts of Beef
Not all cuts of beef need the same type of marinade. While tougher cuts like flank steak or brisket benefit from longer marination times and stronger flavors, more delicate cuts like ribeye or tenderloin only require a quick marinade to avoid overpowering the natural flavor.
- Tougher Cuts (e.g., flank steak, skirt steak, brisket): These cuts benefit from a marinade with a more acidic base, as the acid helps break down the tougher fibers. Soy sauce, vinegar, and citrus juice are great options for these cuts. Aim for a longer marination time—usually at least 4-6 hours, or even overnight, depending on the thickness of the cut.
- Tender Cuts (e.g., ribeye, tenderloin, sirloin): For these cuts, a lighter marinade works best. Use a mild acid like lemon juice or wine and a bit of olive oil. Since these cuts are already tender, marinate them for a shorter time—30 minutes to 2 hours—to avoid altering the meat’s texture too much.
How Long Should You Marinate Beef?
The amount of time you marinate beef can have a significant impact on its flavor and texture. However, marinating for too long can sometimes cause the beef to become mushy, especially with acid-heavy marinades. Here’s a general guideline for marinating times:
- Tough Cuts (flank steak, chuck roast, brisket): These can handle longer marination times. 4 to 12 hours (or overnight) gives the marinade ample time to tenderize the meat and infuse it with flavor.
- Tender Cuts (ribeye, tenderloin, sirloin): These require less time. 30 minutes to 2 hours is usually sufficient to add flavor without affecting the texture too much.
Pro tip: If you’re marinating beef with a strong acidic component, avoid going beyond 24 hours as the acid can break down the fibers too much, resulting in a mushy texture.
How to Marinate Beef: Step-by-Step Guide
- Prepare the Marinade:
Combine your acid (e.g., lemon juice or vinegar), fat (e.g., olive oil), and seasonings (e.g., garlic, herbs, and spices) in a bowl. Whisk the ingredients until well-blended. You can also add soy sauce or Worcestershire sauce for a deeper umami flavor. - Apply the Marinade:
Place your beef in a resealable plastic bag or shallow dish. Pour the marinade over the beef, ensuring that the meat is evenly coated. Seal the bag and refrigerate it, making sure the beef stays submerged in the marinade. - Let it Marinate:
Allow the beef to marinate in the refrigerator for the recommended time (see above for guidelines). If using a bag, turn the bag halfway through the marination process to ensure all sides of the beef are well-coated. - Cook the Beef:
After marinating, remove the beef from the marinade and discard any leftover liquid. Pat the beef dry with paper towels before cooking. This helps achieve a better sear and prevents steaming the meat.
Marinating Pro Tips
- Don’t reuse marinades: Once the marinade has been in contact with raw meat, it can carry bacteria. If you plan to use the marinade as a sauce, make sure to boil it for at least 5 minutes to kill any bacteria before using it.
- Balance the flavors: If your marinade is too salty or acidic, it can overpower the beef. Taste the marinade before using it and adjust the balance with more fat or a touch of sweetness (honey or brown sugar).
- Avoid over-marinating: As mentioned, too much acid can break down the meat too much, so be mindful of marination times, especially for tender cuts.
In summary, marinating is a simple but powerful way to enhance beef’s flavor and tenderness, especially for leaner or tougher cuts. With the right balance of ingredients and timing, you can elevate your beef dishes to new levels of richness and juiciness, creating the perfect meal every time.
Easy Ways to Tenderize Beef for Better Texture
If you’ve ever had a tough, chewy piece of beef, you know that texture is key. Tender beef not only feels better but also enhances the overall eating experience. Fortunately, there are several easy methods to improve the texture of your beef, no matter the cut.
1. Use a Meat Tenderizer (Pounding)
Pounding the beef is one of the easiest ways to tenderize it. This method helps break down muscle fibers, making the beef more tender. Use a meat mallet or tenderizer tool to gently pound the meat.
- How to do it:
Place the beef between two pieces of plastic wrap or wax paper. Use the flat side of the mallet to pound from the center out. Be gentle to avoid tearing the meat. - Best for: Lean cuts like flank steak, round steaks, or sirloin.
2. Marinate with Acidic Ingredients
Marinades with acidic ingredients like vinegar, lemon juice, or wine help tenderize beef. The acid breaks down proteins, making the meat more tender. It also enhances the flavor.
- How to do it:
Prepare a marinade with an acidic ingredient. Let the beef marinate for a few hours (or overnight for tougher cuts). Be careful not to marinate for too long, as the meat can become mushy. - Best for: Tough cuts like flank steak, brisket, and chuck roast.
3. Use Enzymatic Tenderizers (Papain & Bromelain)
Papain (from papaya) and bromelain (from pineapple) are natural enzymes that help tenderize beef. These enzymes break down proteins, making the meat more tender.
- How to do it:
Sprinkle meat tenderizer powder over the beef or use fresh papaya or pineapple. Let the beef sit for 20-30 minutes before cooking. Don’t leave it too long, as it can become mushy. - Best for: Lean cuts like sirloin or round steak.
4. Slow-Cook Tough Cuts
For tougher cuts, like brisket or chuck roast, slow-cooking is one of the best methods. Cooking these cuts at low temperatures for a long time breaks down the collagen and makes the meat tender.
- How to do it:
Use a slow cooker, braising, or stewing methods. Add liquid (broth, wine, or sauce) and cook for several hours at low heat. - Best for: Tough cuts like brisket, chuck roast, or shank.
5. Slice Against the Grain
The way you slice beef affects its texture. Cutting against the grain helps break down muscle fibers, making the beef more tender. Slicing with the grain can make it feel tougher.
- How to do it:
Look at the beef to identify the direction of the grain. Cut perpendicular to the grain. This helps shorten the muscle fibers, making each bite easier to chew. - Best for: Any cut of beef, but especially flank steak, skirt steak, and brisket.
6. Salt the Beef Before Cooking (Dry Brining)
Dry brining helps improve texture and juiciness. Salt draws moisture out of the meat but also helps it retain moisture when cooked. This method helps the beef stay juicy and flavorful.
- How to do it:
Sprinkle salt over the beef and refrigerate for 30 minutes to 2 hours. The salt will dissolve and draw moisture, which is then reabsorbed into the meat. - Best for: All cuts of beef, especially steaks and roasts.
7. Use a Pressure Cooker or Instant Pot
A pressure cooker or Instant Pot is a great tool for tenderizing tougher cuts of beef quickly. High-pressure steam breaks down fibers in a fraction of the time it would take with traditional cooking methods.
- How to do it:
Follow the recipe instructions for your pressure cooker. Add the beef and liquid, then cook on high pressure for 45 minutes to 1 hour, depending on the cut. - Best for: Tough cuts like brisket, chuck roast, or round steak.
Final Tip:
Always choose the right tenderizing method for your beef cut. Lean cuts benefit from marination or tenderizer powders, while tough cuts are best suited for slow cooking or pressure cooking. These methods will ensure your beef is tender, juicy, and delicious every time.
Seasoning Beef for Maximum Flavor – Spices, Herbs & More
Properly seasoning beef is one of the best ways to elevate the flavor of your dish. Whether you’re grilling a steak, roasting a brisket, or making a stew, the right seasoning can bring out the natural richness of the beef while adding depth and complexity to the flavor profile. The key is to balance herbs, spices, and salt while considering the cooking method and the type of beef cut you’re using.
1. The Power of Salt – Why It’s Essential for Beef
Salt is the foundation of flavor and plays a crucial role in enhancing the taste of beef. It helps to bring out the natural juices, tenderize the meat, and form a flavorful crust when searing or grilling. Without salt, beef can taste bland and unseasoned, no matter how much you add other spices or herbs.
- How to Use Salt:
The best way to season with salt is to dry brine your beef. This involves seasoning the meat with salt and letting it sit for 30 minutes to a few hours before cooking. This process draws moisture out, then reabsorbs it, making the beef juicier and more flavorful. You can also salt just before cooking for a more concentrated flavor on the surface. - Best for: All cuts of beef, particularly steaks and roasts.
2. Spices that Boost Beef’s Natural Flavors
Beef pairs wonderfully with a variety of spices that enhance its rich flavor without overpowering it. Here are some classic spices to consider:
- Black Pepper: Freshly ground black pepper adds a sharp kick that complements the natural richness of beef. It’s ideal for steaks, burgers, and roasts. Pair it with salt to bring out a simple yet effective seasoning combo.
- Garlic Powder and Onion Powder: These two pantry staples add a savory depth to beef. Garlic powder gives the beef an aromatic richness, while onion powder brings out a sweet, earthy undertone. These are great for rubs or marinades.
- Paprika: Whether smoked or sweet, paprika adds a mild heat and a rich color to beef. Smoked paprika, in particular, imparts a delicious smoky flavor, perfect for grilled beef or BBQ recipes.
- Cumin: A slightly nutty, earthy spice, cumin can enhance the flavor of beef, especially in dishes with a southwestern or Mexican flair. It pairs well with chili, tacos, or any beef stew.
- Chili Powder or Cayenne Pepper: If you want to add some heat to your beef dish, chili powder or cayenne pepper will give it a spicy kick. Use it in rubs or marinades for grilled or roasted beef.
- Best for: Steaks, burgers, roast beef, and braised dishes.
3. Fresh Herbs to Brighten the Beef’s Flavor
Herbs are the perfect complement to beef, bringing fresh, aromatic flavors that can lighten the richness of the meat. Fresh herbs like rosemary, thyme, parsley, and oregano add complexity to the flavor without overpowering the beef’s natural taste.
- Rosemary: Its strong, piney fragrance pairs wonderfully with roast beef, steaks, and braised beef dishes. Add a few sprigs of rosemary to a pan or roasting dish for added flavor.
- Thyme: This herb is known for its earthy, slightly minty flavor. Thyme complements beef in stews, roasts, or grilled dishes. It’s excellent when combined with garlic and olive oil.
- Parsley: Though it doesn’t overpower the flavor of beef, fresh parsley can add a bright finish to steaks or roasted beef. Use it as a garnish for a pop of color and a subtle fresh flavor.
- Oregano: Known for its slightly bitter, minty taste, oregano is a great choice for ground beef dishes, especially in Italian or Mediterranean-inspired recipes. It pairs perfectly with ground beef in pasta sauces or meatballs.
- Best for: Steaks, roasts, burgers, braised dishes, and ground beef recipes.
4. Creating Flavorful Beef Rubs
Rubs are a great way to infuse beef with a layered combination of flavors before cooking. A rub is typically made of spices, herbs, and sometimes sugar for a bit of sweetness. When you rub the mixture into the meat, it creates a flavorful crust when the beef is seared or grilled.
- How to Make a Simple Beef Rub:
A basic rub includes equal parts salt, black pepper, and garlic powder. You can add paprika, onion powder, cayenne, or cumin depending on your flavor preference. For a sweet and savory rub, mix in a bit of brown sugar or honey powder. - How to Use:
Rub the mixture generously over the surface of the beef, making sure it’s evenly coated. Let the beef sit for 30 minutes to an hour before cooking to allow the flavors to penetrate the meat. - Best for: Grilling, roasting, and searing steaks, brisket, and ribs.
5. Marinating for Depth of Flavor
Marinades not only season beef but also help tenderize the meat. The combination of acidic ingredients, herbs, spices, and oil in marinades allows the flavors to penetrate the beef, adding depth and richness. A good marinade also helps ensure your beef stays moist and tender.
- How to Make a Marinade:
A basic marinade consists of acid (vinegar, lemon juice, or wine), oil (olive oil or vegetable oil), and seasonings (garlic, onion, herbs, and spices). For a flavorful punch, add ingredients like soy sauce, Worcestershire sauce, or mustard. - How to Use:
Marinate the beef for at least 30 minutes, but overnight marination works best for tough cuts. Don’t over-marinate, as it can make the meat too soft. - Best for: Tough cuts like flank steak, skirt steak, brisket, and chuck roast.
6. Experiment with International Flavors
Beef is incredibly versatile and pairs well with seasonings from different cuisines around the world. Experimenting with global flavor profiles can bring an exciting twist to your beef dishes.
- Mexican Flavors: Use cumin, chili powder, coriander, and oregano for a southwestern or Mexican-inspired beef recipe like tacos or carne asada.
- Mediterranean Flavors: Use oregano, garlic, lemon, and olive oil for a fresh Mediterranean flavor. Try it in grilled steaks or braised beef.
- Asian Flavors: For an Asian-inspired beef dish, add soy sauce, ginger, garlic, and a touch of sesame oil for depth. This works wonderfully for stir-fries or beef bulgogi.
- Best for: Ground beef, stir-fries, tacos, grilled steaks, and stews.
Final Thoughts on Seasoning Beef
The key to seasoning beef is balance. While salt is essential for bringing out the natural flavor, the right mix of spices and herbs adds complexity and depth. Experiment with different combinations to find what works best for each cut and cooking method. Whether you go for a simple seasoning or a rich marinade, seasoning your beef properly will make every dish burst with flavor.
The Secret to Resting Beef for Juicier Results
One of the most important—and often overlooked—steps in cooking beef is the resting period. After your beef has been cooked, it’s essential to allow it to rest before cutting into it. Resting may seem like an extra step, but it’s crucial for ensuring your beef remains moist, juicy, and tender. Understanding the science behind resting beef can help you achieve the best results every time.
1. Why Resting Beef Is Crucial for Juiciness
When beef is cooked, the heat causes the proteins in the meat to contract, which forces the juices to move toward the center of the cut. If you cut the beef immediately after cooking, you risk losing all those flavorful juices as they spill out, leaving the meat dry and less flavorful.
By letting the beef rest, you allow the juices to redistribute throughout the meat. As the beef cools slightly, the fibers relax, and the moisture moves back to the surface, making every bite much juicier.
- The science behind it:
Resting beef allows the muscle fibers to re-expand after contracting from the heat. The juices are locked in, rather than running out when the meat is cut. This process makes a significant difference in the final texture and juiciness. - Best for: Steaks, roasts, and any cut that is seared or grilled.
2. How Long Should Beef Rest?
The resting time varies depending on the size of the cut and the cooking method. A general rule of thumb is to let your beef rest for 5 to 10 minutes for steaks and smaller cuts, and 10 to 15 minutes for larger roasts. The goal is to allow the beef to cool enough to stop the juices from running out immediately when cut.
- Steaks and smaller cuts:
For steaks like ribeye, sirloin, or flank, 5-10 minutes is sufficient. Resting them on a warm plate ensures that the meat stays hot while it reabsorbs the juices. - Larger cuts and roasts:
For larger roasts like a rib roast, brisket, or prime rib, the resting time should be longer. These cuts benefit from at least 10-15 minutes of resting. For larger roasts, you can loosely cover the meat with foil to keep it warm during the resting period.
3. What Happens if You Skip the Resting Period?
If you don’t allow your beef to rest, the juices will quickly escape when you slice into the meat. This results in a dry texture and a less flavorful experience. The outer parts of the beef will be hot and dry, while the center may be undercooked or lack the depth of flavor you’re aiming for.
- The consequences:
Cutting into beef too soon can lead to a lack of moisture in the final dish. Even if the beef is cooked to the desired doneness, skipping the resting period makes it hard to achieve that perfect, juicy bite. - Best for: Avoiding this mistake for any beef cut, but especially important for steaks and roasts.
4. How to Rest Beef Correctly
The key to resting beef is to place it on a plate or cutting board and keep it uncovered or loosely covered with foil. Avoid wrapping the beef tightly in foil, as this can cause it to sweat and lose its crispy, flavorful exterior. Resting it uncovered allows the beef to retain its texture and flavor.
- Steaks:
After grilling or pan-searing, place the steak on a warm plate or cutting board. Let it rest for at least 5-10 minutes. You can also cover the steak loosely with foil to keep it warm, but avoid sealing it tightly. - Roasts:
For larger roasts, remove the beef from the cooking vessel and place it on a cutting board. Loosely cover with foil to keep the warmth in. Let the roast rest for 10-15 minutes, depending on the size. If you plan to carve it, this also helps the meat firm up slightly, making slicing easier.
5. Can You Rest Beef for Too Long?
Resting beef is important, but you can only rest it for so long before the meat begins to cool and become less appetizing. While it’s unlikely you’d need to rest beef for more than 30 minutes, you can extend the resting period slightly without harming the quality, especially if the beef is large and thick.
- Tip:
If your beef is large and needs a long resting time, like a roast beef, it can be kept at a warm temperature in an oven set to low heat (around 140°F or 60°C) or a warming drawer. This will help maintain the heat without overcooking the beef. - Best for: Large cuts or when you need more flexibility in timing.
6. Resting Beef vs. Letting Beef Sit on the Grill or Pan
It’s important to distinguish between resting and letting the beef sit on the grill or pan after cooking. While you may briefly leave the beef on the grill or pan while it finishes cooking, this should be part of the resting process, not a substitute. The high heat from the grill or pan can cause moisture to escape, so it’s crucial to transfer the beef to a plate to rest and retain its juices.
Final Thoughts on Resting Beef
The resting period is one of the simplest yet most important techniques to ensure your beef remains moist, tender, and full of flavor. Whether you’re grilling a steak, roasting a brisket, or pan-searing a steak, make sure to rest the meat for the right amount of time. This small step will lead to the best results every time—juicy, tender, and flavorful beef with every bite.
Cooking Methods That Make Beef Juicy and Delicious
Searing Beef in a Cast Iron Skillet for Bold Flavor
Searing beef in a cast iron skillet is one of the best methods to develop a flavorful, bold crust while locking in the meat’s natural juices. The process not only enhances the beef’s overall taste but also ensures a satisfying texture with a perfect balance between the crispy exterior and tender interior. Let’s dive into why this method works so well and how you can master it.
Why Cast Iron is Ideal for Searing Beef
Cast iron skillets are exceptional for high-heat cooking. Their ability to retain heat makes them perfect for searing beef, allowing for an even and consistent caramelization process. When beef is placed in a preheated cast iron skillet, it instantly begins to brown, triggering the Maillard reaction, which is responsible for that delicious, rich flavor.
- Excellent heat retention: Cast iron skillets maintain high temperatures, ensuring the beef gets an even, crisp crust.
- Flavor development: The high heat creates the Maillard reaction, which enhances the natural flavor of the beef.
- Versatility: Cast iron skillets can seamlessly go from stovetop to oven, making them perfect for various beef cuts.
Steps for Perfectly Searing Beef in a Cast Iron Skillet
To get that irresistible, crispy exterior while keeping the beef juicy on the inside, follow these simple steps for the perfect sear.
- Preheat the Skillet Properly:
Start by preheating the cast iron skillet over medium-high to high heat. Let it heat until it is very hot, but not smoking. This ensures the beef sears instantly when added to the pan. - Oil the Beef, Not the Pan:
Coat the beef lightly with high-smoke point oil such as vegetable or canola oil. Avoid using oils like olive oil, which can burn at high temperatures. - Avoid Overcrowding the Skillet:
Place the beef in the skillet, but don’t overcrowd it. Cooking in batches ensures each piece gets enough contact with the pan to form a rich, brown crust. Overcrowding can cause the beef to steam rather than sear.
Getting the Perfect Sear: Don’t Move the Beef Around
Once the beef hits the pan, it’s tempting to move it around, but let it cook undisturbed. Allow each side to sear for 2-3 minutes (depending on thickness). Moving the beef too soon will disrupt the sear process and result in a less desirable texture.
- No flipping until the crust forms: Let one side sear for 2-3 minutes, then flip.
- Sear evenly on both sides: Once the first side is golden brown, flip the beef and sear the other side.
How to Finish the Beef: Searing and Beyond
Thicker cuts like ribeye or filet mignon benefit from a two-step process: searing and finishing in the oven.
- After searing: Transfer the skillet to a preheated oven at 375°F (190°C) and roast until the beef reaches your desired doneness.
- Baste with butter and herbs: For added flavor, during the final minute of searing, add butter and fresh herbs (like rosemary and thyme) to the skillet. Baste the beef with the melted butter to infuse it with rich flavors.
Common Mistakes to Avoid When Searing Beef
While the process is relatively simple, there are a few mistakes to watch out for:
- Not preheating the skillet: A cold skillet leads to uneven cooking. Always make sure your cast iron is properly heated.
- Using the wrong oil: Oils with low smoke points, like olive oil, can burn and affect the flavor.
- Overcrowding the pan: This prevents a good sear and can lead to a less flavorful outcome. Always work in batches if necessary.
The Benefits of Searing in a Cast Iron Skillet
Searing beef in a cast iron skillet isn’t just about creating a beautiful crust. The process enhances flavor, texture, and overall juiciness. Whether you’re cooking steaks, roasts, or tougher cuts like brisket, this method maximizes the beef’s potential.
- Improved flavor: Searing helps lock in moisture and creates deep, savory flavors.
- Texture enhancement: The crispy crust contrasts beautifully with the tender, juicy interior.
- Long-lasting heat: Cast iron ensures the meat stays warm and evenly cooked, even after the searing process.
Conclusion
Mastering the art of searing beef in a cast iron skillet is a game-changer in your cooking journey. This technique is ideal for anyone looking to achieve a bold, flavorful crust while maintaining juicy, tender meat. With the right preparation, a cast iron skillet, and a few simple tips, you can elevate your beef recipes to a whole new level.
Grilling Beef Steaks the Right Way for Juicy Results
Grilling beef steaks is a classic and highly effective method for achieving tender, juicy meat with that irresistible smoky flavor. However, grilling beef to perfection requires more than just slapping it on the grill and hoping for the best. The right technique, timing, and attention to detail can make all the difference between a dry, tough steak and one that is perfectly juicy and flavorful.
Choosing the Right Steak for Grilling
Not all steaks are created equal when it comes to grilling. The best cuts for grilling should be well-marbled, tender, and thick enough to withstand the high heat without overcooking. Marbling, the fat running through the muscle tissue, plays a significant role in keeping the steak juicy and flavorful during the grilling process.
- Ribeye: Known for its rich marbling, ribeye steaks are perfect for grilling, providing juicy results and a flavorful crust.
- New York Strip: A leaner cut than ribeye but still well-marbled, making it a great option for those who prefer a firmer texture with just the right amount of juiciness.
- Filet Mignon: This cut is prized for its tenderness. While not as flavorful as ribeye, it retains moisture well when grilled correctly.
- T-bone or Porterhouse: These cuts give you the best of both worlds, with a tenderloin on one side and a strip steak on the other. They’re ideal for grilling and offer a combination of textures.
Prepping Your Steak Before Grilling
Preparation is key to ensuring your steak cooks evenly and retains moisture during grilling. Here are a few essential steps to follow:
- Bring the Steak to Room Temperature: Before grilling, let your steak rest at room temperature for about 30 minutes. This helps the steak cook more evenly, preventing the outside from becoming overcooked while the inside remains underdone.
- Season Generously: A simple seasoning of salt and pepper works wonders, allowing the natural flavor of the beef to shine. You can also add garlic powder, onion powder, and herbs like rosemary and thyme for extra flavor. Be sure to season both sides of the steak evenly.
- Oil the Steak, Not the Grill: To prevent sticking, lightly brush your steak with oil. Use a high smoke-point oil, such as canola oil or vegetable oil, before placing it on the grill. This helps to develop a perfect sear without causing flare-ups.
Preheating and Setting Up the Grill
The right grilling setup is essential to achieving juicy steaks. Preheat your grill to a high heat, around 450°F to 500°F (232°C to 260°C), and make sure the grates are clean and well-oiled to prevent sticking.
- Two-zone grilling: Set up your grill with two heat zones: a high-heat zone for searing and a medium-heat zone for finishing the cooking process. Sear the steaks on the high heat to develop a crispy, flavorful crust, then move them to the cooler side to finish cooking without burning.
The Right Grilling Technique for Perfect Steaks
When grilling beef steaks, timing and technique are crucial to achieving the desired doneness. Here are some tips to ensure your steak stays juicy and tender:
- Sear the Steak First:
Place your steak on the hot part of the grill and sear it for about 2-3 minutes on each side. This creates a flavorful crust that locks in juices. The searing process is crucial for caramelizing the exterior, which enhances the beef’s natural flavor. - Move to the Indirect Heat Zone:
Once you’ve achieved a good sear, move the steak to the cooler side of the grill to finish cooking. Close the lid and let the steak cook for 3-7 minutes (depending on thickness) for your desired doneness. Using a meat thermometer can help you achieve the perfect internal temperature:- Rare: 120-125°F (49-52°C)
- Medium-rare: 130-135°F (54-57°C)
- Medium: 140-145°F (60-63°C)
- Medium-well: 150-155°F (66-68°C)
- Well-done: 160°F (71°C) and above
- Rest the Steak After Grilling:
Once your steak reaches the desired doneness, remove it from the grill and let it rest for at least 5 minutes. This allows the juices to redistribute throughout the meat, ensuring the steak remains juicy and tender when cut.
Enhancing Flavor with Grilling Techniques
Grilling is not just about the heat; it’s also about how you treat the steak to elevate its natural flavors. Here are a few techniques you can use to take your steak grilling to the next level:
- Basting with Butter and Herbs: For added richness, baste your steak with butter, garlic, and fresh herbs (like thyme or rosemary) during the last few minutes of grilling. This will infuse the steak with extra flavor and make the crust even more delicious.
- Using Wood Chips for Smoky Flavor: If you enjoy a smoky taste, you can add wood chips to the grill. Soak the chips in water for 30 minutes before placing them in a smoker box or directly on the grill to add a smoky flavor to your steak.
Avoiding Common Grilling Mistakes
Grilling steaks can be tricky if you don’t pay attention to a few critical details. Here are common mistakes to avoid:
- Overcooking the Steak: Be careful not to overcook the steak. Using a meat thermometer is a surefire way to ensure your steak is cooked to perfection. Avoid relying solely on time.
- Not Letting the Steak Rest: Cutting into a steak immediately after grilling releases all the juices, leaving it dry. Always allow the steak to rest for a few minutes before slicing.
- Flipping Too Often: Resist the temptation to flip your steak multiple times. Flipping it once or twice during grilling is enough to ensure an even cook.
Conclusion
Grilling beef steaks to juicy perfection is an art, but with the right technique, tools, and attention to detail, you can achieve restaurant-quality results right at home. By selecting the right cuts, prepping the steak properly, and following the right grilling method, you’ll consistently enjoy juicy, flavorful steaks that are sure to impress. Remember to rest the steak after grilling, as it’s a key step in maintaining its moisture. Happy grilling!
Slow Cooking and Braising for Tender, Moist Beef
When it comes to achieving melt-in-your-mouth tenderness and a rich, savory flavor, slow cooking and braising are two of the most effective methods for preparing beef. Both techniques work wonders for tougher cuts of meat, transforming them into dishes that are tender, juicy, and packed with flavor. Whether you’re using a slow cooker or a stovetop, the principles behind these methods are simple yet incredibly effective.
Understanding Slow Cooking and Braising
While slow cooking and braising share similarities, they have distinct differences in terms of the cooking process. Both methods involve cooking beef at low temperatures for an extended period, allowing the collagen and connective tissues in tougher cuts of beef to break down, resulting in a tender, juicy final dish.
- Slow Cooking: This method involves cooking the beef in a closed pot or slow cooker at low temperatures over several hours, typically with added moisture (such as broth or water). The beef is cooked on low heat for 6 to 10 hours, allowing the flavors to develop and the meat to become incredibly tender.
- Braising: Braising also uses low heat and moisture, but it typically involves browning the beef first in a hot pan before adding liquid and covering the pot. Braising often takes 1.5 to 3 hours, depending on the cut and size of the beef. This method also allows the beef to retain its shape while becoming wonderfully tender.
The Best Cuts of Beef for Slow Cooking and Braising
Both slow cooking and braising are best suited for cuts of beef that are rich in collagen and connective tissue. These cuts, when cooked slowly, break down and turn into juicy, tender meat.
- Chuck Roast: One of the best cuts for slow cooking and braising. The collagen in chuck roast melts into a rich, beefy flavor, making it perfect for these cooking methods.
- Brisket: Known for its tough texture, brisket benefits from long, slow cooking, resulting in moist, tender slices of beef with deep flavor.
- Short Ribs: These are ideal for both methods, as the slow cooking process breaks down the tough tissue, leaving you with fall-off-the-bone meat.
- Round (Eye Round, Bottom Round): Though leaner than chuck roast, these cuts can become tender when slow-cooked or braised, absorbing all the flavors of the cooking liquid.
- Oxtail: Often used for braising, oxtail becomes extremely tender after hours of cooking and offers a rich, hearty flavor that is perfect for stews.
How to Slow Cook Beef for Tenderness
Slow cooking is perfect for busy cooks who want to set it and forget it. Here’s how you can use a slow cooker to create mouthwatering, tender beef every time:
- Choose the Right Cut: Start with a tough cut of beef like chuck roast, brisket, or short ribs.
- Season Well: Season the beef generously with salt, pepper, and any additional spices or herbs you prefer. You can use garlic, rosemary, thyme, and onion for added depth of flavor.
- Brown the Beef (Optional): While not necessary, browning the beef in a hot skillet before slow cooking will add additional flavor through caramelization. It’s a simple step that enhances the final dish.
- Add Liquid: Pour in broth, wine, or even water to the slow cooker. The liquid should cover about one-third to halfway up the beef. The moisture helps break down the meat while infusing it with flavor.
- Set and Forget: Set the slow cooker to low and let it cook for 6 to 10 hours, depending on the size of the beef and your desired level of tenderness. The longer you cook it, the more tender the beef will become.
How to Braise Beef for Maximum Tenderness
Braising offers a slightly more hands-on approach than slow cooking but yields similar results. Here’s how to braise beef for juicy, melt-in-your-mouth tenderness:
- Brown the Beef: Begin by seasoning the beef and browning it on all sides in a hot pan with a small amount of oil. This step creates a rich, caramelized crust on the meat that will infuse the beef with incredible flavor.
- Add Aromatics: After browning, add aromatics like garlic, onions, and carrots to the pan. Sauté them for a few minutes to release their flavors before adding the cooking liquid.
- Deglaze the Pan: Once the beef is browned, pour in a small amount of wine, broth, or water to deglaze the pan, scraping up any browned bits stuck to the bottom. These bits are packed with flavor!
- Add Liquid and Herbs: Add your chosen cooking liquid (beef broth, red wine, or even beer) to the pan. The liquid should come up about halfway or two-thirds of the way up the sides of the meat. Add herbs like thyme, rosemary, and bay leaves for extra flavor.
- Cover and Simmer: Once the liquid is added, cover the pot with a tight-fitting lid and simmer over low heat for 1.5 to 3 hours. Alternatively, you can braise in a preheated oven at around 300°F (150°C).
- Check for Tenderness: After a few hours, check for tenderness by gently probing the meat with a fork. If it easily pulls apart, it’s ready.
The Science Behind Slow Cooking and Braising
Slow cooking and braising are based on the principle of collagen breakdown. Collagen is a protein found in connective tissue, and when exposed to low, slow heat for extended periods, it breaks down into gelatin, which makes the meat more tender and moist. This process is what gives braised and slow-cooked beef its signature melt-in-your-mouth texture.
- Slow cooking: In a slow cooker, the low temperature (typically around 200°F to 250°F) breaks down the collagen over a longer period, resulting in juicy, tender beef.
- Braising: In the braising process, the beef is usually cooked at slightly higher temperatures (around 300°F in an oven) with some direct heat, which helps the meat retain its shape while still becoming tender.
Flavor Development in Slow Cooking and Braising
One of the greatest advantages of slow cooking and braising is the depth of flavor that develops during the process. As the beef cooks slowly, the meat releases its natural juices, which then mix with the cooking liquid, herbs, and spices. This slow extraction of flavors results in a dish where the beef is not only tender but also infused with a rich, savory taste.
- Concentrated flavors: The long cooking time intensifies the flavors of the beef and any added ingredients, resulting in a deep, robust dish.
- Moisture retention: The slow cooking or braising process prevents the beef from drying out, ensuring a moist and juicy result.
Common Mistakes to Avoid in Slow Cooking and Braising
While these methods are relatively foolproof, there are still a few things that can go wrong. Here’s what to watch out for:
- Using the wrong cut of beef: Tough cuts with plenty of connective tissue, like chuck or brisket, are ideal. Tender cuts like sirloin or filet mignon do not benefit from slow cooking and braising.
- Overcooking: While slow cooking and braising are long processes, leaving beef in the pot too long can lead to mushy meat. Check for doneness regularly to avoid overcooking.
- Not enough liquid: Be sure to add enough liquid to the pot to keep the meat moist during cooking. Without it, the beef may dry out and toughen.
Conclusion
Slow cooking and braising are excellent techniques for transforming tough, inexpensive cuts of beef into melt-in-your-mouth masterpieces. Whether you’re preparing a hearty stew, a savory roast, or tender short ribs, these methods guarantee juicy, flavorful beef every time. By choosing the right cuts, allowing for plenty of cooking time, and adding a flavorful liquid base, you can achieve restaurant-quality beef dishes right in your own kitchen.
Using Sous Vide for Perfectly Cooked, Flavorful Beef Every Time
Sous vide cooking is a revolutionary method that guarantees perfectly cooked, flavorful beef every single time. This technique, which translates to “under vacuum” in French, involves cooking beef in a precisely controlled water bath at a consistent low temperature. With sous vide, you can achieve a level of precision and tenderness that traditional cooking methods simply can’t match.
What is Sous Vide Cooking?
Sous vide is a cooking method where food is placed in a vacuum-sealed bag and then submerged in water that is heated to a specific temperature. The beauty of sous vide lies in its ability to cook food evenly throughout without the risk of overcooking. Since the water temperature is carefully controlled, there’s no need to worry about the beef becoming dry or unevenly cooked.
- Temperature control: Unlike traditional cooking methods, sous vide uses water temperatures that are much lower than boiling or grilling, typically between 120°F and 140°F (49°C – 60°C) for beef.
- Precise cooking: Because the water temperature is consistent, beef cooks to the exact desired doneness (rare, medium-rare, medium, well-done) throughout without overcooking the edges.
Why Sous Vide is Perfect for Beef
Sous vide is a game-changer for cooking beef because it allows you to achieve consistent, restaurant-quality results. Whether you’re cooking a delicate filet mignon or a hearty ribeye, sous vide ensures that every piece of beef comes out juicy, tender, and cooked to perfection.
- Even cooking: The beef is cooked uniformly from edge to edge, ensuring no overcooked parts or undercooked centers. It eliminates the common issue of beef being overdone on the outside and underdone on the inside.
- Tenderness and juiciness: Cooking beef at a low, consistent temperature for extended periods (usually 1 to 4 hours) allows the muscle fibers to break down slowly, making the meat incredibly tender and juicy.
- Flavor infusion: The vacuum-sealed bags help lock in the natural juices and flavors, preventing them from evaporating or being lost during the cooking process. Additionally, you can add herbs, spices, and marinades directly into the bag for enhanced flavor infusion.
How to Cook Beef Sous Vide – A Step-by-Step Guide
Cooking beef with sous vide is surprisingly simple, but it does require some specialized equipment, such as a sous vide immersion circulator and vacuum-seal bags. Here’s a step-by-step guide to getting the perfect beef every time:
- Prep the Beef: Start by choosing your favorite cut of beef. Popular choices include ribeye, sirloin, filet mignon, or chuck roast. Season the beef with salt, pepper, and any additional herbs or spices you like. You can even add garlic, rosemary, or thyme to infuse the beef with extra flavor.
- Vacuum Seal the Beef: Place the seasoned beef into a vacuum-seal bag. The vacuum-sealing process ensures that there is minimal air inside the bag, which helps the beef cook evenly. If you don’t have a vacuum sealer, you can use a Ziploc bag and the water displacement method (submerge the bag in water to push the air out).
- Set the Water Temperature: Attach the sous vide immersion circulator to a pot or container of water. Set the temperature to your desired doneness:
- Rare: 120°F (49°C)
- Medium-rare: 130°F (54°C)
- Medium: 140°F (60°C)
- Medium-well: 150°F (66°C)
- Well-done: 160°F (71°C)
- Cook the Beef: Submerge the vacuum-sealed bag into the water bath, making sure the beef is fully submerged and not floating. Let the beef cook for the recommended time:
- Steaks (1-inch thick): 1 to 2 hours
- Thicker cuts (e.g., roasts): 3 to 4 hours
- Chuck roast or brisket: 8 to 24 hours for maximum tenderness
- Finishing the Beef (Searing): Once the beef is cooked sous vide, it’s important to finish it with a quick sear in a hot pan or grill. Searing the beef for 1 to 2 minutes on each side develops a caramelized crust and adds texture and flavor without overcooking the interior.
Benefits of Sous Vide Beef
Sous vide cooking offers a variety of advantages that make it ideal for beef preparation:
- Perfectly cooked beef every time: The precise temperature control ensures that your beef is cooked exactly how you want it, every time.
- Retains natural juices: Because the beef is vacuum-sealed, it retains all of its natural juices, making each bite incredibly moist and flavorful.
- No risk of overcooking: Unlike grilling or pan-searing, which can easily lead to overcooked meat, sous vide guarantees consistent results with minimal risk.
- Hands-off cooking: Once the beef is in the water bath, it requires little attention, allowing you to focus on other tasks or prepare side dishes.
Sous Vide Beef Temperature Guide for Perfect Results
Here is a simple guide to achieving the exact doneness you prefer for your beef, using sous vide:
- Rare (120°F/49°C): Cool, red center. Very tender and juicy.
- Medium-rare (130°F/54°C): Warm, red center. Tender, juicy, and slightly firmer than rare.
- Medium (140°F/60°C): Warm, pink center. Less juicy but still tender.
- Medium-well (150°F/66°C): Slightly pink center. Less tender and juicy.
- Well-done (160°F/71°C): No pink. Firm, dry texture.
Adjusting the cooking time can also influence the texture of the beef, with longer times making the meat even more tender.
Common Mistakes to Avoid with Sous Vide Beef
While sous vide cooking is foolproof, there are a few mistakes to avoid to ensure you get the best results:
- Not sealing the bag properly: If the vacuum seal isn’t tight enough, the bag can float or allow water to seep in, affecting the cooking process.
- Overcooking or undercooking: While sous vide is forgiving, it’s still important to monitor the timing. Leaving beef in the water bath for too long can make it overly soft, while cooking it for too little time may not break down the connective tissues adequately.
- Skipping the searing step: Searing adds essential texture and flavor to sous vide beef. Don’t skip this step, even if you’re in a rush!
Sous Vide and Beyond: Other Beef Cuts to Try
Sous vide is versatile and can be used with a wide range of beef cuts. Some of the best cuts for sous vide cooking include:
- Ribeye Steak: This marbled cut becomes incredibly tender and flavorful after sous vide cooking.
- Flank Steak: Thin cuts like flank steak, when cooked sous vide, stay juicy and tender, even though they’re often tough with traditional methods.
- Brisket: Tough cuts like brisket are ideal for long sous vide cook times, turning into melt-in-your-mouth goodness.
- Chuck Roast: Slow cooking a chuck roast sous vide for hours breaks down the tough fibers and creates an exceptionally tender result.
Conclusion
Sous vide is a modern kitchen technique that delivers perfectly cooked, flavorful beef with unmatched precision. Whether you’re aiming for a tender steak, juicy roast, or melt-in-your-mouth brisket, sous vide can guarantee consistently excellent results. With its precise temperature control, ability to retain natural juices, and flexibility in achieving various textures and doneness levels, sous vide is a fantastic method for any beef lover looking to elevate their cooking game.
Common Mistakes That Ruin Juicy and Flavorful Beef Recipes
Avoid Overcooking – Key to Moist and Tender Beef
Overcooking beef is one of the main causes of dry and tough meat. Understanding how to prevent this is crucial to consistently producing juicy, tender beef. Let’s dive into why overcooking happens, how it affects beef, and strategies to avoid it.
Why Overcooking Makes Beef Dry and Tough
Beef is composed of proteins and water. As it cooks, the proteins tighten and expel moisture, leading to dryness. The extent of this depends on the cut of beef:
- Lean Cuts like sirloin or tenderloin have less fat and moisture. Overcooking these cuts causes them to become dry and chewy.
- Marbled Cuts such as ribeye or chuck roast contain more fat, which helps keep them moist during cooking. However, overcooking still dries them out and causes them to become tough.
Understanding how different cuts react to heat is essential to cooking beef perfectly every time.
Ideal Cooking Temperatures for Beef Doneness
Different doneness levels require precise internal temperatures. Here’s a guide to help avoid overcooking:
- Rare (120°F – 125°F / 49°C – 52°C): Red, cool center with maximum juiciness.
- Medium-rare (130°F – 135°F / 54°C – 57°C): Warm red center, juicy and tender.
- Medium (140°F – 145°F / 60°C – 63°C): Slightly firmer, but still juicy.
- Medium-well (150°F – 155°F / 66°C – 68°C): Firm and slightly dry.
- Well-done (160°F+ / 71°C+): Overcooked, dry, and tough.
Remember, beef continues to cook after it’s removed from the heat. Aim to take it off just below your desired temperature and allow carryover cooking to finish the job.
Techniques to Prevent Overcooking
- Use a Meat Thermometer
A meat thermometer is essential to gauge doneness accurately. Insert it into the thickest part of the beef to monitor its internal temperature. - Monitor Cooking Time Carefully
Be mindful of cooking time, as it can vary by method and cut. Grilling a steak, for example, should take around 4-6 minutes per side, while thicker cuts may need finishing in the oven after searing. - Let Beef Rest After Cooking
Resting your beef after cooking is vital. During this time, juices redistribute, ensuring the meat stays moist. Rest for about 5 minutes for smaller cuts and 10-15 minutes for larger ones. - Choose Low and Slow Methods for Tough Cuts
Tougher cuts, like brisket or chuck roast, benefit from slow cooking. Methods like braising or roasting at low temperatures (around 275°F / 135°C) allow collagen to break down, resulting in a tender, juicy dish. - Sous Vide for Precision
Sous vide is a method of cooking beef in a vacuum-sealed bag at a precisely controlled temperature. This technique ensures your beef is cooked to perfection without the risk of overcooking, making it ideal for steaks and roasts.
Signs of Overcooked Beef
You can tell when beef has been overcooked by several signs:
- Dry Texture: The beef loses moisture, resulting in a dry, chewy texture.
- Grayish Color: Overcooked beef no longer has a pink or red center, instead turning gray.
- Tough and Chewy: Overcooked beef becomes tough and difficult to chew.
If you notice any of these signs, your beef has likely been overcooked. It’s important to remove the beef from heat before it reaches this point.
How to Salvage Overcooked Beef
If you’ve accidentally overcooked your beef, here are some ways to rescue it:
- Shred for Tacos or Sandwiches: Shredded beef can work well in tacos, sandwiches, or salads where you can add extra sauce and moisture.
- Add Sauces or Gravies: A rich sauce can help reintroduce moisture. Consider barbecue sauce, gravy, or a balsamic reduction.
- Slice Thinly: Thin slices can absorb sauces better and are easier to chew, making the overcooked beef more enjoyable.
Conclusion: Mastering Beef Cooking
Mastering the art of beef cooking is all about understanding how heat and time affect the meat. By monitoring temperatures, resting the beef, and using methods like sous vide or slow cooking, you can avoid overcooking and ensure your beef remains moist, tender, and full of flavor every time.
Not Using a Meat Thermometer Leads to Dry Beef
A meat thermometer is one of the most essential tools in cooking beef to perfection. Without it, it becomes far too easy to overcook or undercook your beef, leading to results that are either dry, tough, or unappetizing. This section explores why a meat thermometer is key to achieving juicy, tender beef and how it can help you avoid common mistakes in cooking.
Why Precision Is Key When Cooking Beef
Beef cuts vary significantly in thickness, fat content, and tenderness, meaning they each require different cooking times and temperatures. Without the right temperature, beef can easily go from perfectly cooked to overdone in a matter of minutes.
- Overcooked Beef: As beef reaches higher internal temperatures, the muscle fibers contract and squeeze out moisture, making it dry and tough. This happens more rapidly in lean cuts, which have less fat to protect the meat’s moisture.
- Undercooked Beef: On the other hand, undercooked beef poses health risks, especially with ground beef, which needs to reach a minimum internal temperature to ensure safety. Undercooked beef also doesn’t develop the desired texture, flavor, or color.
A meat thermometer takes the guesswork out of this process by providing an accurate reading of the internal temperature, ensuring the beef is cooked perfectly every time.
How a Meat Thermometer Works to Prevent Dry Beef
A meat thermometer works by measuring the internal temperature of the beef, which gives you a clear indicator of its doneness. When you insert the probe into the thickest part of the meat, it immediately shows the internal heat, allowing you to adjust your cooking process accordingly.
- Consistent Results: Using a thermometer ensures that your beef reaches the precise temperature for your desired doneness, whether it’s rare, medium-rare, or well-done.
- Preventing Overcooking: A thermometer helps you avoid leaving your beef on the heat for too long, a common mistake that leads to dry, tough meat. When the thermometer hits the target temperature, you can remove the beef from the heat and let it rest, ensuring it retains moisture.
By monitoring the internal temperature, you’re able to catch the beef at the perfect moment when it’s still juicy and tender, making it far easier to avoid the disappointment of overcooking.
The Correct Internal Temperatures for Beef
Here are the recommended internal temperatures for different beef doneness levels:
- Rare: 120°F – 125°F (49°C – 52°C) – A cool, red center that’s tender and juicy.
- Medium-Rare: 130°F – 135°F (54°C – 57°C) – Warm, red center with perfect tenderness.
- Medium: 140°F – 145°F (60°C – 63°C) – Slightly firm, with a hint of pink.
- Medium-Well: 150°F – 155°F (66°C – 68°C) – Firm texture, dry but still slightly juicy.
- Well-Done: 160°F (71°C) and above – Very firm, dry, and tough.
Using these guidelines, you can take your beef off the heat as it approaches the target temperature, accounting for carryover cooking once removed from the heat.
How to Use a Meat Thermometer Correctly
- Insert the Probe into the Thickest Part of the Beef: Ensure the thermometer is placed into the thickest, most central part of the meat for an accurate reading. Avoid placing the probe near bones or fatty areas, as they can give misleading results.
- Check Temperature in Multiple Spots: For large cuts like roasts or brisket, check the temperature in several spots to ensure even cooking.
- Remove the Beef Slightly Before the Desired Temperature: Remember that the beef will continue to cook after being removed from the heat. For example, if you’re aiming for medium-rare, take the beef off when it reaches 130°F (54°C), and let it rest for a few minutes to reach 135°F (57°C).
Why Some People Skip the Thermometer – And Why It’s a Mistake
Some home cooks avoid using a thermometer, thinking they can gauge doneness by touch, appearance, or time. While these methods work for experienced cooks, they are unreliable for those new to beef cooking or when using unfamiliar cuts.
- The “Touch Test”: This method compares the firmness of the beef to different parts of your hand, but it’s subjective and hard to perfect without experience.
- Judging by Time Alone: Cooking beef based on time can be risky because factors like the beef’s starting temperature, thickness, and even the type of heat source used can affect cooking time.
A meat thermometer removes this subjectivity, giving you confidence that your beef will come out perfect every time.
The Benefits of Using a Meat Thermometer
- Consistency: You can achieve the same perfect result each time you cook beef.
- Moisture Retention: By preventing overcooking, your beef will stay juicy and tender.
- Food Safety: A thermometer ensures that your beef reaches a safe internal temperature, reducing the risk of foodborne illness.
- Efficiency: You’ll save time and energy by cooking with precision, avoiding the need for trial and error.
Conclusion
Using a meat thermometer is a game-changer when it comes to cooking beef. It helps prevent overcooking, ensures your beef is at the right temperature, and keeps the meat juicy and tender. Don’t rely on guesswork—investing in a good thermometer is the easiest way to guarantee perfectly cooked beef every time.
Why You Should Never Skip the Resting Period
After cooking beef, it’s tempting to dig in immediately, especially when the aroma fills the kitchen. However, skipping the resting period is a common mistake that can result in less juicy, less flavorful beef. Resting is a crucial step in the cooking process, and understanding why it matters can elevate the quality of your beef dishes significantly.
What Happens During the Resting Period?
The resting period allows the beef to relax and redistribute its juices throughout the meat. During cooking, the muscle fibers in beef tighten and push the juices towards the center. If you cut into the beef immediately after cooking, all those precious juices spill out, leaving you with dry, flavorless meat.
- Juices Redistribution: When beef rests, the muscle fibers loosen, and the juices are redistributed evenly throughout the meat. This ensures that every bite is juicy and tender.
- Temperature Stabilization: The internal temperature of the beef continues to rise slightly after removing it from the heat (a process known as carryover cooking). Resting allows the beef to stabilize and avoid overcooking.
Allowing beef to rest ensures that the moisture remains locked inside, making each slice more flavorful and tender.
How Long Should You Let Beef Rest?
The optimal resting time depends on the size and thickness of the beef. Here’s a general guide:
- Steaks: For steaks such as ribeye, sirloin, or filet mignon, let them rest for at least 5 to 10 minutes. This allows enough time for the juices to redistribute without cooling down too much.
- Roasts: Larger cuts, like a roast or brisket, need more time to rest. Allow 15 to 20 minutes for these cuts, especially if they are thick.
- Ground Beef: While it’s not as critical for ground beef, allowing it to rest for a few minutes still helps to retain moisture, especially in burgers.
During this resting period, tent the beef loosely with aluminum foil to retain some of the heat. The beef will stay warm, and the juices will be able to redistribute without losing too much heat.
What Happens if You Skip the Resting Period?
When you skip the resting period and cut into beef too soon, the juices, which have been pushed to the center of the meat, are released onto the cutting board rather than remaining in the beef. This results in:
- Dry Beef: With the juices gone, the beef will be drier, less flavorful, and less tender.
- Tough Texture: Cutting into beef immediately can cause it to feel tougher. Without the resting time, the muscle fibers have not had the chance to relax, which affects the texture.
- Less Flavor: Juices that are lost in the process carry much of the flavor. Without resting, you miss out on that rich, concentrated taste that makes beef so delicious.
By allowing the beef to rest, you’re giving it the chance to retain its natural moisture and flavor, ensuring each bite is as tender and succulent as possible.
How Resting Affects Different Cuts of Beef
Different cuts of beef benefit from resting in different ways. Here’s how it impacts some common beef cuts:
- Steaks: Steaks with high fat content, such as ribeye, are particularly sensitive to resting. The fat within the steak needs time to redistribute, ensuring a juicy, flavorful result. Resting helps the fat to melt evenly throughout the steak, enhancing both tenderness and flavor.
- Roasts: Larger roasts, like prime rib or beef tenderloin, have a greater mass, meaning the juices are more likely to pool at the center during cooking. Resting allows the juices to move outward into the meat, ensuring that every slice is evenly tender.
- Brisket and Other Slow-Cooked Cuts: Slow-cooked or braised beef, like brisket, benefits greatly from resting. These cuts have a lot of connective tissue, and letting them rest allows the fibers to relax and reabsorb the rendered fat, resulting in a melt-in-your-mouth texture.
Why Resting Is Particularly Important for Large Cuts of Beef
For larger cuts, resting is even more important. When cooking beef roasts or whole cuts, the internal temperature continues to rise after it is removed from the oven or grill. Without resting, the outer parts of the meat can become overcooked while the inside remains underdone. Resting allows for:
- Even Distribution of Heat: The meat’s temperature will continue to rise slightly during the resting period, allowing the heat to distribute evenly throughout the cut.
- Preventing Shrinkage: The longer the beef cooks, the more it contracts, squeezing out moisture. Letting it rest reduces this effect, ensuring a juicier result when you cut into it.
Tips for Resting Beef Perfectly
- Cover Loosely with Aluminum Foil: This will help keep the beef warm while still allowing it to breathe, preventing it from sweating and losing moisture.
- Rest on a Cutting Board: Let your beef rest on a flat surface where the juices can pool evenly. A warm plate can also help retain heat, but avoid covering the beef too tightly, which can cause the meat to steam and lose texture.
- Don’t Rush It: While it can be tempting to cut into your beef right away, patience pays off. The longer the beef rests (within reason), the better the result will be.
The Bottom Line: Resting = Juicier, More Tender Beef
Resting your beef after cooking is one of the simplest and most effective ways to enhance its flavor and texture. It’s a step you should never skip if you want moist, tender, and flavorful beef. While it may feel like a small detail, the difference it makes is undeniable, transforming a good steak into a great one and a simple roast into an unforgettable dish.
By letting your beef rest, you ensure that all the delicious juices stay inside the meat, providing a much juicier and more flavorful meal. So, next time you cook beef, take the time to rest it properly—you won’t regret it!
Choosing the Wrong Cut for Your Beef Cooking Method
Selecting the right beef cut for your chosen cooking method is essential for ensuring the best flavor, texture, and overall result. Different cuts of beef have distinct characteristics, and choosing the wrong one can lead to tough, dry, or flavorless meat. Understanding the differences between cuts and their ideal cooking methods can elevate your beef dishes, making each bite a tender and juicy experience.
The Importance of Matching the Cut to the Cooking Method
Each beef cut has unique qualities, including fat content, muscle structure, and tenderness. These factors determine how well a particular cut holds up under different cooking methods. For example, tender cuts with fine muscle fibers are ideal for quick cooking methods like grilling or pan-searing, while tougher cuts with more connective tissue require slow cooking or braising to break down the fibers and become tender.
Common Mistakes When Choosing Beef Cuts
- Using Tender Cuts for Slow Cooking: Tender cuts, such as filet mignon or ribeye, are meant for quick, high-heat methods like grilling or searing. These cuts are naturally tender, and slow cooking can cause them to lose their juiciness and texture. If you slow-cook a ribeye or filet mignon, you’ll end up with overcooked, dry meat.
- Using Tough Cuts for Quick Cooking: Tougher cuts, like brisket, chuck roast, and round, contain more connective tissue and need time to break down and become tender. Trying to cook these cuts quickly—such as on the grill or in a pan—will result in chewy, rubbery beef. These cuts require slow cooking methods like braising, roasting, or slow-cooking to achieve the desired tenderness.
Best Cuts for High-Heat, Quick Cooking Methods
High-heat, quick cooking methods like grilling, pan-searing, or broiling are best for tender cuts of beef with fine muscle fibers. These cuts don’t need much time to cook through, and their natural tenderness makes them ideal for such methods:
- Ribeye: Known for its rich marbling and tenderness, ribeye steaks are perfect for grilling or pan-searing. The marbling adds flavor and juiciness, making it a favorite for those who prefer their beef flavorful and tender.
- Filet Mignon: One of the most tender cuts, filet mignon is best cooked quickly over high heat to preserve its delicate texture. It’s ideal for grilling or pan-searing, and a short resting period after cooking helps maintain its tenderness.
- New York Strip: This cut is slightly less tender than ribeye but still suitable for grilling or pan-searing. It has a good balance of meat and fat, giving it a great flavor when cooked quickly.
- Sirloin: While slightly tougher than the above cuts, sirloin is still tender enough to be grilled or seared. It’s a great choice for a leaner steak with good flavor.
Best Cuts for Slow Cooking and Braising
Tougher cuts of beef benefit from slow cooking or braising, as these methods help break down the connective tissue and turn the meat tender. These cuts are full of flavor but require time to soften and become juicy.
- Brisket: Brisket is a classic choice for slow cooking or braising. This cut has a lot of connective tissue and fat, which, when cooked slowly, breaks down to create a juicy, flavorful result. Brisket is ideal for smoking, slow roasting, or braising in a liquid to tenderize it.
- Chuck Roast: Known for its rich beefy flavor, chuck roast is perfect for slow cooking or braising. The marbled fat and connective tissue melt during cooking, creating a tender and juicy roast. It’s ideal for dishes like pot roast or beef stew.
- Round: Round cuts, like the bottom round or top round, are lean but tough and benefit from slow, moist cooking methods. They’re commonly used in slow-cooked recipes like roast beef or beef stew. These cuts are also great for braising, as they become tender and juicy when cooked slowly in a flavorful liquid.
- Short Ribs: Beef short ribs are another excellent choice for braising. Their high-fat content and connective tissue break down when cooked slowly, resulting in melt-in-your-mouth beef that’s packed with flavor.
Best Cuts for Roasting or Oven Cooking
For oven roasting, choose cuts that have a good amount of fat and muscle, as they can handle the dry heat of the oven without drying out. These cuts benefit from the even, consistent heat of roasting, which helps break down fat and connective tissue while maintaining flavor.
- Prime Rib: Prime rib is a luxurious cut that’s perfect for roasting. It’s tender, flavorful, and has a good amount of fat that renders beautifully in the oven. Roasting at a low temperature ensures it cooks evenly and remains juicy.
- Ribeye Roast: A ribeye roast is a larger version of the ribeye steak and is ideal for roasting. It’s rich in marbling, which ensures that it stays juicy and flavorful throughout the roasting process.
- Round Roast: While tougher than prime rib, round roast can still be oven-roasted if cooked slowly at a low temperature. A slow roast ensures the meat becomes tender without drying out.
Understanding the Impact of Fat and Connective Tissue
Fat and connective tissue play a significant role in how a beef cut should be cooked. Fat contributes flavor and juiciness, while connective tissue, found in tougher cuts, requires slow cooking to break down into gelatin, which adds moisture and tenderness.
- Fatty Cuts: Cuts like ribeye, T-bone, and porterhouse have more fat marbling throughout the meat, which makes them perfect for quick cooking methods. The fat enhances flavor and helps keep the meat moist.
- Tough Cuts: Cuts like brisket, chuck roast, and round cuts contain more connective tissue. These cuts require slow cooking methods such as braising, stewing, or slow roasting, which allow the connective tissue to break down and soften, resulting in tender, juicy beef.
How to Make the Right Choice
To make the right choice for your beef dish, always consider the following factors:
- Cooking Method: Will you be grilling, pan-searing, slow cooking, or roasting?
- Desired Result: Are you looking for tenderness, juiciness, or a deep, rich flavor?
- Cut Characteristics: Does the cut have a lot of fat, or is it lean and tough? Does it contain connective tissue that requires slow cooking to become tender?
By choosing the right cut based on these factors, you can ensure that your beef will be juicy, flavorful, and cooked to perfection. Remember, the best beef dishes come from understanding the strengths of each cut and pairing it with the most suitable cooking method.
Easy Beef Recipes That Are Always Juicy and Full of Flavor
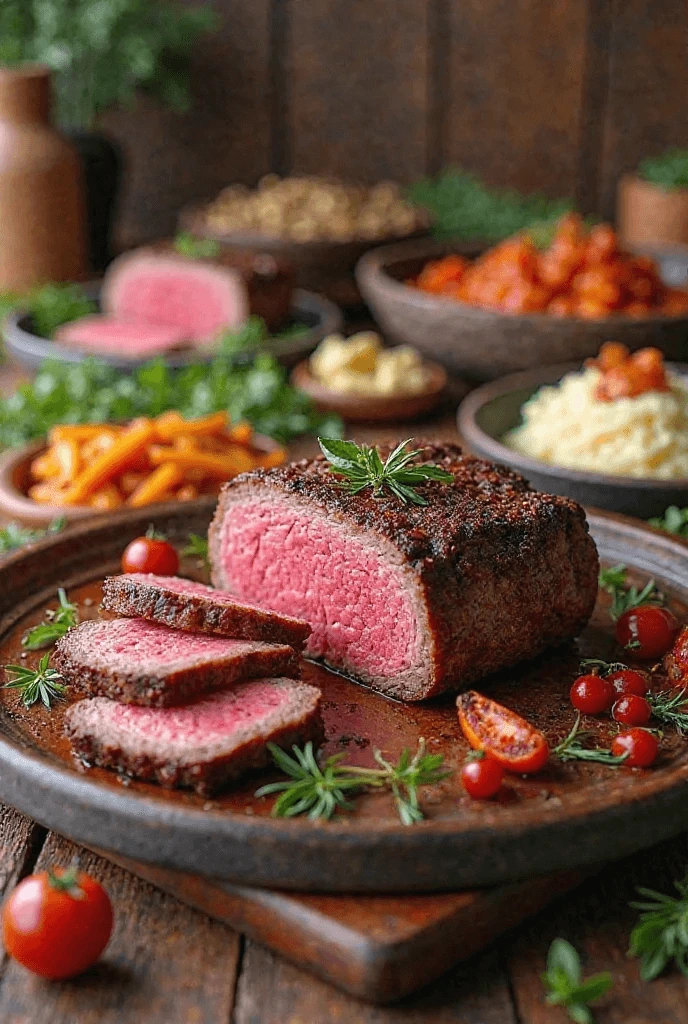
If you’re looking for a standout recipe for your upcoming celebrations, check out this fantastic Beef Wellington recipe, perfect for Christmas or New Year’s.
Herb-Infused Slow Cooked Chuck Roast with Rich Gravy
Slow cooking a chuck roast results in a melt-in-your-mouth, tender dish packed with rich flavors. The addition of fresh herbs and savory gravy takes this classic roast to the next level.
Why Chuck Roast is Perfect for Slow Cooking
Chuck roast is a tougher cut of beef, making it perfect for slow cooking. The slow-cooking process breaks down the meat’s connective tissue, enriching it with flavor and creating a tender, juicy roast. The fat and collagen in the chuck roast create a luscious, melt-in-your-mouth texture when cooked low and slow.
Choosing the Right Herbs for Maximum Flavor
Herbs play a crucial role in enhancing the flavor of the slow-cooked chuck roast. A combination of rosemary, thyme, and bay leaves imparts a deep, savory profile while complementing the natural richness of the beef.
- Rosemary adds a piney, robust flavor that pairs well with beef.
- Thyme brings a mild, earthy taste that balances the richness of the roast.
- Bay Leaves lend a subtle depth to the dish with their slightly bitter undertones.
The Slow Cooking Process: Step-by-Step
To achieve the best results, follow these simple steps for slow-cooking your chuck roast:
- Sear the Roast: Searing the chuck roast before slow cooking locks in the juices, enhancing the flavor and texture.
- Create the Gravy Base: Use the searing drippings to sauté aromatic vegetables like onions, carrots, and celery, then deglaze with wine or broth.
- Add the Liquid: Pour in beef broth and add a splash of wine or vinegar to build a flavorful base for the gravy.
- Infuse with Herbs: Tie your herbs together with twine and add them to the pot to infuse the liquid with their flavors as the roast cooks.
Slow Cooking: The Key to Tenderness
Once your roast is prepped, slow cook it at a low temperature for several hours. The connective tissue will break down, making the beef tender and juicy. Cook until the roast is fork-tender and can be easily shredded.
Making the Gravy: Thickening and Finishing Touches
After the roast is done, remove it from the pot to rest. Simmer the cooking liquid to reduce and thicken it, creating a rich gravy. If needed, use cornstarch or flour to thicken the gravy. Serve the roast with the gravy poured over the top and garnish with fresh herbs like parsley for a burst of freshness.
Garlic Butter Pan-Seared Ribeye – Juicy Every Time
A perfectly pan-seared ribeye steak with garlic butter is the epitome of indulgence. The rich, marbled texture of the ribeye combined with the fragrant, golden garlic butter creates an irresistible flavor profile. Whether you’re a novice or an experienced cook, this method will ensure your ribeye turns out juicy, tender, and bursting with flavor every time.
Why Ribeye is the Ultimate Steak for Juiciness
Ribeye steaks are known for their exceptional marbling, which refers to the streaks of fat within the muscle tissue. This fat melts as the steak cooks, infusing the meat with moisture and flavor. The marbling in ribeye ensures a juicy, tender result, even when cooked to higher temperatures. Unlike leaner cuts like sirloin, ribeye retains moisture and flavor, making it ideal for pan-searing and high-heat cooking.
Ribeye’s rich flavor is perfectly complemented by the addition of garlic butter, which melts into the steak, enhancing its juiciness and creating a deliciously savory crust on the outside.
The Key to Perfect Pan-Searing
Achieving the perfect pan-seared ribeye requires precise timing and technique. Here’s a breakdown of the essential steps to get it just right:
1. Let the Steak Rest Before Cooking
Remove your ribeye from the refrigerator 30 to 60 minutes before cooking. Allowing the steak to come to room temperature ensures even cooking, reducing the risk of a cold center and overcooked exterior.
2. Season Generously
Season your ribeye steak with salt and freshly cracked black pepper. Don’t be shy with the seasoning, as it forms the flavorful crust when seared. You can also add a pinch of garlic powder or onion powder if you like a little extra flavor.
3. Heat the Pan
Use a heavy-bottomed skillet or cast iron pan for the best results. Heat the pan over medium-high heat until it’s smoking hot. A hot pan creates a beautiful sear and locks in the juices. Add a tablespoon of vegetable oil with a high smoke point (like canola or grapeseed oil) to the pan, ensuring the steak doesn’t stick.
4. Sear the Steak
Place the ribeye steak into the hot pan and let it sear undisturbed for 3 to 4 minutes on the first side. This allows a rich, brown crust to form. Avoid moving the steak around; let it stay in place to develop that perfect sear.
5. Flip and Add Garlic Butter
Once the first side is seared, flip the steak and immediately add a couple of tablespoons of butter, smashed garlic cloves, and a few sprigs of fresh thyme or rosemary to the pan. As the butter melts, tilt the pan slightly and use a spoon to baste the steak with the garlic butter. This helps infuse the steak with flavor and keeps it moist.
6. Cook to Desired Doneness
Depending on the thickness of your ribeye and your desired doneness, continue cooking for an additional 3 to 4 minutes on the second side. For medium-rare, aim for an internal temperature of 130°F to 135°F (54°C to 57°C), medium 140°F to 145°F (60°C to 63°C), and well-done 160°F (71°C). Remember, the steak will continue to cook slightly once you remove it from the pan.
Let It Rest for Juicy Perfection
After you remove the ribeye from the pan, it’s crucial to let the steak rest for about 5 to 10 minutes. Resting the steak allows the juices to redistribute, ensuring that every bite is juicy and tender. Cutting into a steak immediately after cooking causes the juices to run out, leaving you with a dry steak. Resting gives you that perfect, juicy ribeye you crave.
The Garlic Butter Sauce – Extra Flavor Boost
While the steak is resting, you can make use of the garlic butter and pan drippings left in the skillet. Simply add a little more butter to the pan if needed and allow it to melt into the garlic and herbs. You can also incorporate a splash of white wine or beef broth to create a richer sauce. Pour this buttery goodness over the rested ribeye for an extra layer of flavor.
Serving Suggestions for the Ultimate Steak Experience
- Mashed Potatoes: The creamy texture of mashed potatoes balances the richness of the ribeye and garlic butter. Add a little extra butter or cream to the potatoes for an indulgent side dish.
- Sautéed Vegetables: Sautéed spinach, asparagus, or roasted Brussels sprouts are perfect accompaniments that add a slightly bitter flavor to cut through the richness of the steak.
- Salad: A fresh salad with a tangy vinaigrette offers a refreshing contrast to the richness of the garlic butter-ribeye combo.
- Crispy Fries: Serve with golden, crispy fries or sweet potato fries to round out the meal with a satisfying crunch.
Tips for Success Every Time
- Avoid Overcrowding the Pan: If you’re cooking more than one steak, use a larger pan or cook them in batches. Overcrowding can cause the steaks to steam instead of sear.
- Don’t Rush the Searing Process: Allow the steak to sear undisturbed for the best crust. Rushing it may result in a less flavorful, uneven sear.
- Use a Meat Thermometer: To achieve your desired level of doneness, a meat thermometer is invaluable. It ensures precision and avoids undercooking or overcooking the steak.
A garlic butter pan-seared ribeye is a quick yet luxurious way to enjoy steak at home. With the right technique and a few key ingredients, you can enjoy restaurant-quality ribeye every time. Whether for a special occasion or a casual dinner, this dish never disappoints.
Hearty Beef Stew with Tender Meat and Vegetables
A warm, comforting bowl of beef stew is a timeless dish that never fails to satisfy. It’s the ultimate meal for colder days, offering a balance of tender beef, flavorful broth, and perfectly cooked vegetables. The secret to a hearty beef stew lies in the method of cooking, the quality of the ingredients, and the time allowed for flavors to develop. Here’s how to create a beef stew that is rich in flavor and features melt-in-your-mouth beef and perfectly tender vegetables.
Choosing the Right Cut of Beef for Stew
The cut of beef you choose is crucial for achieving the perfect stew. For the most tender and flavorful result, you want to go with cuts that have a good amount of connective tissue and fat, which will break down during the slow cooking process, creating a rich, gelatinous broth and succulent beef chunks. Here are some top picks:
- Chuck Roast: This is the gold standard for beef stew. Chuck roast has plenty of marbling, which melts into the stew, making the beef tender and juicy. It also has a great balance of fat and lean meat, which ensures a rich broth.
- Brisket: Another excellent choice, brisket is known for its rich flavor. When cooked low and slow, it becomes incredibly tender, making it perfect for stews.
- Round Cuts: These are leaner cuts, but if cooked properly, they can still make a great beef stew. Round cuts, like bottom round or eye of round, benefit from longer cooking times to become tender.
Building the Flavor Base for Your Stew
The key to an unforgettable beef stew is the flavor base. This starts with searing the beef and building layers of flavor through aromatics, herbs, and seasonings. Here’s how to get it right:
- Sear the Beef for Depth: Before adding the beef to the stew, sear it in a hot pot with a little oil to develop a deep, caramelized crust. This creates a rich base flavor that will permeate the stew as it cooks.
- Add Aromatics: Onions, garlic, and carrots are essential to developing a savory stew. Sauté them in the same pot after you’ve browned the beef. This adds sweetness and complexity to the dish.
- Deglaze with Wine or Broth: After sautéing the aromatics, use wine, broth, or even a splash of beer to deglaze the pan. This will lift all the delicious caramelized bits from the bottom of the pot, which are packed with flavor.
- Herbs and Seasonings: Add thyme, bay leaves, rosemary, and black pepper to the stew. These herbs are classic in beef stew and will infuse the broth with aromatic, earthy notes. You can also include some paprika or a pinch of cayenne for extra warmth and depth.
Simmering for Tenderness
Once you’ve built the flavor base, it’s time to let the stew simmer and the magic happen. Slow cooking is essential for creating that melt-in-your-mouth tenderness in both the beef and the vegetables. Here’s how to get the best results:
- Low and Slow is Key: The best beef stew cooks at a low simmer for a long time—usually 2-3 hours. This slow cooking allows the collagen in the beef to break down, resulting in tender, juicy pieces of meat and a rich, flavorful broth.
- Stir Occasionally: While the stew is cooking, stir occasionally to make sure everything is evenly cooked and the ingredients don’t stick to the bottom. But avoid stirring too often, as it can break down the beef too much.
- Add Vegetables at the Right Time: Adding root vegetables like carrots, potatoes, and parsnips too early can cause them to break down too much. It’s best to add them about halfway through the cooking process. This ensures they stay tender but don’t turn mushy.
Perfecting the Vegetables in Your Stew
Beef stew is more than just beef; the vegetables play an important role in balancing the flavors and adding heartiness to the dish. Here’s how to ensure your vegetables are cooked to perfection:
- Carrots: Use whole carrots or large pieces, as they hold their shape better during the long cooking time. Their natural sweetness complements the savory beef perfectly.
- Potatoes: Yukon gold or red potatoes are ideal for stews because they hold their shape while absorbing the flavors of the broth. Cut them into chunks so they cook evenly.
- Mushrooms: Add mushrooms for an earthy, umami flavor. They pair wonderfully with beef and soak up the rich stew base.
- Peas or Green Beans: For a burst of color and freshness, add peas or green beans towards the end of cooking. These will retain their vibrant color and provide a crisp texture in contrast to the tender meat and soft potatoes.
Thickening the Stew for Richness
If you prefer a thicker stew, there are a few ways to achieve the desired consistency:
- Flour or Cornstarch Slurry: Before adding the vegetables, you can make a slurry by mixing a tablespoon of flour or cornstarch with water. Stir this into the simmering stew, and it will thicken the broth as it cooks.
- Puree Some of the Vegetables: Another method is to remove a portion of the vegetables from the stew, mash or blend them, and return them to the pot. This will naturally thicken the stew while adding body and depth to the broth.
Serving Your Beef Stew
Beef stew is a complete, comforting meal in itself, but it pairs well with a few simple sides:
- Crusty Bread: A thick slice of crusty bread, perfect for soaking up the delicious broth, makes an excellent accompaniment.
- Rice or Polenta: If you want something heartier, serve the stew over rice or polenta for a filling meal.
- A Simple Salad: A light salad with a tangy vinaigrette will provide a refreshing contrast to the rich stew.
Tips for Perfect Beef Stew
- Don’t Rush the Cooking: Stew gets better with time. Allow it to cook low and slow for the best results.
- Adjust Seasoning at the End: After the stew has cooked, taste and adjust the seasoning. Sometimes a pinch of salt or a dash of vinegar can elevate the flavor.
- Rest Before Serving: Like many stews, beef stew benefits from resting for about 15 minutes before serving. This allows the flavors to settle and meld together even more.
By following these steps, you’ll create a hearty, flavorful beef stew that’s full of tender beef, savory broth, and perfectly cooked vegetables. It’s a comforting dish that’s sure to become a favorite in your recipe repertoire.
Grilled Sirloin Steak with Chimichurri – Bursting with Flavor
Grilled sirloin steak is a simple yet delicious way to enjoy beef, especially when paired with a zesty chimichurri sauce. This Argentinean-style sauce is known for its fresh, vibrant flavors, which perfectly complement the smoky, charred richness of the grilled steak. Whether you’re a seasoned griller or a novice, this combination will take your steak experience to the next level. Here’s how to make a grilled sirloin steak with chimichurri that bursts with flavor every time.
Choosing the Perfect Sirloin for Grilling
While sirloin steak is known for being both affordable and flavorful, choosing the right cut is essential for the best grilling experience. Here’s what to look for when picking your sirloin:
- Top Sirloin vs. Bottom Sirloin: Top sirloin is the better option for grilling. It’s tender, juicy, and perfect for high-heat cooking methods like grilling. Bottom sirloin tends to be less tender and better suited for slow cooking methods.
- Marbling: Look for a steak with visible marbling, which refers to the thin veins of fat running through the meat. This marbling will render during grilling, making the steak more flavorful and juicy. A sirloin with some fat cap along the edge can also enhance the richness of the meat.
- Thickness: For optimal grilling, choose a sirloin that’s about 1 to 1.5 inches thick. Thicker steaks allow you to achieve a perfect crust while maintaining a juicy, medium-rare interior.
Preparing the Sirloin for Grilling
Proper preparation ensures your steak will be flavorful and cooked to perfection. Here’s how to prepare the sirloin before it hits the grill:
- Season Generously: Keep the seasoning simple to let the natural beef flavor shine. Coat the steak with olive oil and season generously with kosher salt and freshly ground black pepper. You can also add garlic powder, onion powder, or paprika for additional depth of flavor.
- Let it Rest at Room Temperature: Take the steak out of the refrigerator about 30 minutes before grilling. Allowing the steak to come to room temperature ensures even cooking, preventing the outside from overcooking while the inside remains cold.
- Optional Marinade: While sirloin steaks are naturally flavorful, you can marinate them briefly for an added layer of taste. A simple marinade with olive oil, lemon juice, garlic, and herbs like thyme or rosemary can help tenderize the steak and infuse it with additional flavor.
Grilling the Sirloin to Perfection
Grilling sirloin steak requires attention to detail to achieve that perfect sear while keeping the inside tender and juicy. Here’s how to grill your steak for the best results:
- Preheat the Grill: Preheat your grill to high heat, aiming for around 450°F to 500°F. A hot grill is crucial for creating a delicious sear on the outside of the steak.
- Sear the Steak: Place the steak on the grill and let it sear without moving it for 3-4 minutes on each side. You should hear a satisfying sizzle when the meat hits the grill. This searing process creates a flavorful crust that locks in juices.
- Flip Once: Avoid flipping the steak repeatedly. Flip it only once, as this helps retain juices and allows the steak to cook evenly.
- Check for Desired Doneness: Use a meat thermometer to check the steak’s internal temperature. For medium-rare, aim for 130°F to 135°F; for medium, 140°F to 145°F; and for medium-well, 150°F to 155°F. Remember, the steak will continue to cook slightly after you remove it from the grill.
Chimichurri – The Perfect Flavor Companion
Chimichurri is an Argentinean herb-based sauce made from fresh ingredients like parsley, garlic, oregano, and vinegar. Its bright, tangy flavor cuts through the richness of the grilled steak and adds a delightful complexity to the dish. Here’s how to make your chimichurri:
- Fresh Ingredients: Start with a generous bunch of fresh parsley, which is the primary herb in chimichurri. Add a few cloves of garlic, a teaspoon of dried oregano, and a pinch of red pepper flakes for heat.
- Vinegar and Olive Oil: Add red wine vinegar for acidity and balance, then stir in olive oil to bring everything together. The oil adds richness to the sauce and helps coat the steak.
- Lemon Zest: Adding a little lemon zest can brighten the chimichurri and add a citrusy zing that enhances the overall freshness of the sauce.
- Let it Marinate: Allow the chimichurri to sit for at least 30 minutes before serving to let the flavors meld together. You can make it ahead of time and refrigerate it for up to 24 hours.
Serving Your Grilled Sirloin with Chimichurri
Once your steak is grilled to perfection and the chimichurri is ready, it’s time to serve up this mouthwatering dish:
- Slice Against the Grain: Let the grilled sirloin rest for 5-10 minutes before slicing. This allows the juices to redistribute throughout the meat. When slicing, cut against the grain to ensure each bite is tender and easy to chew.
- Drizzle the Chimichurri: Generously drizzle the chimichurri sauce over the sliced steak or serve it on the side for dipping. The freshness and acidity of the chimichurri perfectly balance the richness of the beef.
- Pairing Suggestions: Grilled sirloin with chimichurri pairs well with simple sides like roasted potatoes, grilled vegetables, or a fresh salad with a tangy vinaigrette. For an extra special touch, serve it with a glass of full-bodied red wine, like Malbec or Cabernet Sauvignon.
Tips for the Best Grilled Sirloin with Chimichurri
- Rest the Meat: Let the grilled steak rest for a few minutes before slicing. This helps maintain the juiciness of the beef.
- Adjust the Chimichurri: Feel free to tweak the chimichurri by adding more red pepper flakes for heat or extra garlic for a bolder flavor. You can even substitute cilantro for parsley for a slightly different twist.
- Experiment with Grilling Methods: If you’re cooking indoors, you can use a cast-iron skillet or a stovetop grill pan. The key is to ensure the pan is hot enough to sear the steak and create a nice crust.
By following these steps, you’ll create a juicy, flavorful sirloin steak that is elevated with a burst of tangy, fresh chimichurri sauce. It’s a winning combination that will impress at any BBQ or dinner table.
Conclusion
Cooking beef that’s consistently juicy and flavorful comes down to a few key techniques that make all the difference. Start with selecting the right cut for your cooking method—whether it’s a marbled ribeye, a tender brisket, or a flavorful chuck roast. Pay attention to the quality of the beef, choosing cuts with good marbling for added flavor and moisture. Seasoning is just as crucial—don’t be shy with your spices, herbs, and marinades to enhance the natural taste of the beef.
Proper cooking techniques, such as marinating, searing, and resting the beef, play an equally important role in achieving that perfect texture. Avoid overcooking by monitoring the beef’s internal temperature and allowing it to rest before serving. These small but powerful steps will result in a juicy, tender steak, roast, or stew every time.
Now that you have all the tools to make the best beef dishes, we invite you to try one of these tips or recipes and experience the difference for yourself. Don’t forget to leave a comment with your thoughts, feedback, or any of your own beef cooking tips. Let’s keep the conversation going!