
Introduction
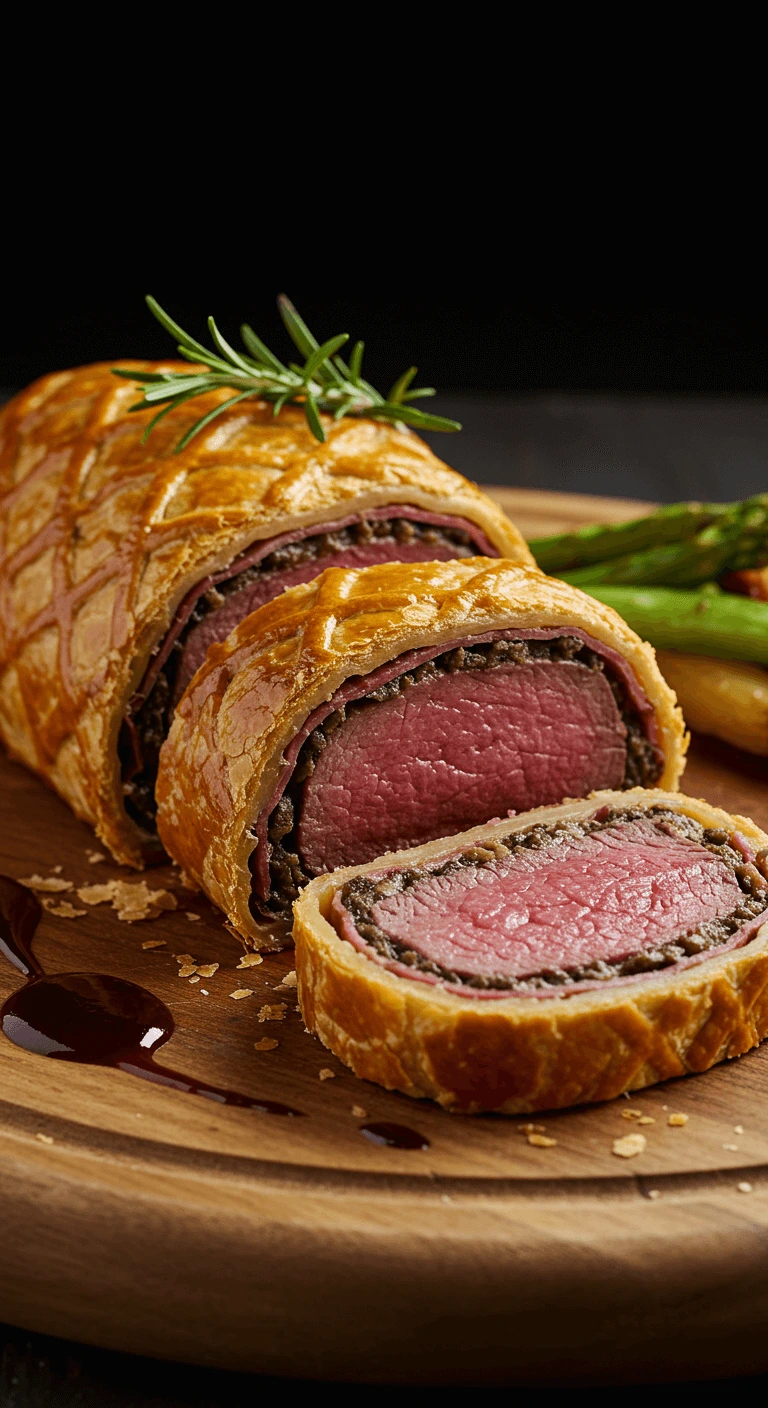
Beef Wellington is an iconic dish known for its luxurious combination of beef tenderloin, mushroom duxelles, prosciutto, and puff pastry. Creating the perfect Beef Wellington requires high-quality ingredients, careful technique, and attention to detail. In this article, we’ll guide you through every step to make the perfect Beef Wellington, from choosing the right beef cut to avoiding common mistakes and serving it beautifully. Whether you’re preparing it for a holiday feast or a special dinner, this dish is sure to impress your guests.
Key Ingredients for the Best Beef Wellington Recipe
Discover the essential ingredients that form the foundation of this luxurious dish, ensuring your Beef Wellington is unforgettable.
Choosing the Right Beef Cut: Filet Mignon or Tenderloin
When it comes to making the perfect Beef Wellington, the cut of beef you choose can make or break the entire dish. The most traditional and widely recommended cut is beef tenderloin, specifically the center-cut portion, often referred to as filet mignon when sliced into steaks. This cut is prized for its incredible tenderness, mild flavor, and lean texture, which pairs beautifully with the rich mushroom duxelles and buttery puff pastry.
🥩 Why Tenderloin Works Best
Beef tenderloin comes from the loin of the cow and is one of the least worked muscles. As a result, it’s exceptionally tender and cooks evenly—two essential qualities for a dish like Beef Wellington, where texture and timing are everything. Because the cut is so lean, it also benefits from the added richness of the duxelles and prosciutto layers, which balance its subtle flavor.
🔪 Center-Cut Filet for Uniform Cooking
For the best results, look for a center-cut tenderloin—a portion that is even in diameter from end to end. This ensures that the beef cooks uniformly, which is especially important when you want a perfect medium-rare interior. Avoid using the tail or butt end of the tenderloin, as their irregular shapes can lead to uneven cooking.
🛒 What to Ask Your Butcher
When buying beef for your Wellington, ask your butcher for a trimmed, center-cut piece of beef tenderloin—around 2 to 2.5 pounds (900g to 1.1kg) is usually ideal for 4–6 servings. You can also request the “Chateaubriand” cut, which is the thickest, most even part of the tenderloin and ideal for roasting whole.
💡 Pro Tip
If you’re on a budget, don’t be tempted to substitute a cheaper cut like sirloin. While flavorful, tougher cuts won’t provide the same melt-in-your-mouth experience and may compromise the integrity of the dish.
Mushroom Duxelles: The Flavorful Filling That Makes It Special
If the beef tenderloin is the heart of Beef Wellington, then mushroom duxelles is undoubtedly the soul. This finely chopped, deeply savory mushroom mixture plays a crucial role in both flavor and function, bringing earthy depth to the dish while helping protect the puff pastry from moisture.
🍄 What Is Mushroom Duxelles?
Duxelles (pronounced “duhk-SELL”) is a classic French preparation made from finely chopped mushrooms, shallots, garlic, and herbs, all sautéed in butter or olive oil until the mixture is dry, concentrated, and bursting with umami. Some variations include a splash of white wine, Madeira, or cream, but the key is cooking out the liquid completely to avoid a soggy Wellington.
🔥 Why It’s Essential to the Recipe
Beyond adding bold, rich flavor, duxelles acts as a moisture barrier between the beef and the puff pastry. Without it, the pastry can become soggy from the beef’s juices during baking. The duxelles absorbs that moisture and enhances the dish with its complex, almost meaty taste—despite being meat-free.
🧑🍳 Tips for the Best Duxelles
- Use a combination of mushrooms like cremini, shiitake, or portobello for deeper flavor.
- Pulse the mushrooms in a food processor until they resemble coarse crumbs—don’t puree them.
- Cook the mixture low and slow in a wide pan to ensure all moisture evaporates.
- Season with salt, pepper, thyme, and a hint of Dijon mustard or soy sauce for added depth.
- Let the duxelles cool completely before layering it on the prosciutto or pastry.
💡 Pro Tip
Make the duxelles a day in advance and refrigerate it. The flavors will intensify overnight, and it’ll be easier to handle when assembling your Beef Wellington.
Why Prosciutto Helps Create the Ultimate Beef Wellington
While some traditional versions of Beef Wellington skip it, prosciutto is now considered a key component in creating the ultimate version of this classic dish. It’s not just there for flavor—it plays several important roles that improve both the texture and structure of your Beef Wellington.
🧂 Flavor Booster and Texture Enhancer
Prosciutto adds a salty, savory layer that beautifully complements the mildness of the beef tenderloin and the earthy depth of the mushroom duxelles. Its umami-rich profile enhances the overall taste of the dish, making every bite more satisfying. Unlike bacon or ham, prosciutto is very thin and doesn’t release as much fat, so it adds flavor without making the dish greasy.
🧽 Moisture Barrier Between Filling and Pastry
One of the biggest challenges when making Beef Wellington is preventing the puff pastry from becoming soggy. The prosciutto acts as a protective shield, helping to wick away any excess moisture from the mushroom duxelles and the beef. This keeps the puff pastry crisp and flaky—even on the bottom.
🧑🍳 How to Use It Correctly
To create this barrier, lay the prosciutto slices slightly overlapping on a sheet of plastic wrap. Then spread the duxelles evenly over the top. Place the seared beef on the mushroom layer and use the plastic wrap to roll it tightly into a log. This method not only holds the shape but also ensures a consistent, even layer of prosciutto around the meat.
💡 Pro Tip
Use high-quality, thinly sliced Italian prosciutto di Parma or San Daniele for the best results. Avoid thick or overly fatty slices, as they may not wrap well or could interfere with the final texture.
Puff Pastry Tips for a Flaky, Golden Crust
A beautifully golden, flaky puff pastry crust is one of the most iconic elements of a perfect Beef Wellington. It creates a stunning visual presentation and adds a light, buttery crunch that contrasts beautifully with the tender beef and savory filling. But getting it just right takes a few pro techniques.
🧈 Use All-Butter Puff Pastry for Best Flavor
For the flakiest, most flavorful results, opt for all-butter puff pastry rather than versions made with shortening or margarine. All-butter pastry delivers superior flavor, crispness, and a beautiful golden finish. If you’re buying it frozen, make sure to thaw it in the refrigerator overnight to prevent cracking or tearing.
❄️ Keep It Cold at All Times
Temperature control is key when working with puff pastry. Always keep it cold while assembling your Beef Wellington to prevent the layers of butter from melting too early. If the pastry becomes too warm, it can become sticky and hard to handle, resulting in a less flaky crust.
Tip: Chill the entire assembled Wellington in the fridge for at least 30 minutes before baking. This helps the pastry hold its shape and puff up properly in the oven.
🥚 Seal and Glaze for Maximum Appeal
Make sure to seal the edges tightly to keep all the juices inside. You can use a fork or your fingers to crimp the seams. Before baking, brush the surface generously with an egg wash (one beaten egg with a splash of water or milk). This gives your Wellington that signature golden sheen and helps enhance browning.
For extra flair, score the top of the pastry lightly with a knife in a decorative pattern—but be careful not to cut all the way through.
💡 Pro Tip
Bake your Beef Wellington on a preheated baking sheet or roasting tray. This ensures the bottom cooks evenly and stays crisp, avoiding that dreaded soggy bottom.
Step-by-Step Instructions to Make Perfect Beef Wellington
How to Sear Beef Tenderloin for Maximum Flavor
Searing the beef tenderloin before wrapping it in mushroom duxelles and puff pastry is an essential step in creating a perfect Beef Wellington. It not only enhances the flavor but also ensures the meat stays juicy and tender throughout the cooking process. A properly seared exterior adds a delicious, caramelized crust that complements the tenderness of the beef inside.
🥩 Why Searing Matters
Searing the beef is not just about adding color—it’s a crucial step that locks in the juices and natural flavors of the tenderloin. The high heat forms a rich, golden crust through a process called Maillard reaction, which creates complex flavors and deepens the meat’s taste. This crust also helps to seal in the beef’s natural moisture, preventing it from drying out during the baking process.
🔥 Choosing the Right Pan
To get the best sear, use a heavy-bottomed cast-iron skillet or a stainless-steel pan. These types of pans retain heat well and allow you to achieve a high, even temperature that’s essential for browning. Preheat the pan over medium-high heat for several minutes before adding oil.
🧂 Seasoning for the Perfect Crust
Season the beef tenderloin generously with salt and pepper just before searing. The seasoning will form a flavorful crust on the meat’s surface. Some chefs recommend adding a touch of garlic powder or herbs like thyme or rosemary to enhance the aroma and flavor. However, avoid overcrowding the pan to ensure that the beef sears evenly.
🧑🍳 The Searing Process
- Preheat the pan: Heat your pan until it’s smoking hot—this is crucial for achieving the perfect sear.
- Add oil: Use a high smoke-point oil like vegetable oil or canola oil. Avoid olive oil for searing, as it burns at high temperatures.
- Sear the beef: Place the tenderloin in the pan and sear for 2-3 minutes on each side. Use tongs to turn the meat and get a uniform crust on all sides. Don’t move the beef around too much; just let it sit in the pan to form the crust.
- Rest the meat: Once seared, remove the beef from the pan and set it aside to rest. This ensures the juices redistribute inside the meat, making it more flavorful and tender.
💡 Pro Tip
For an even more intense flavor, after searing, deglaze the pan with a splash of red wine, broth, or even brandy. Scrape up any caramelized bits from the bottom of the pan (called “fond”), and pour this flavorful liquid over the seared beef before continuing with the recipe.
Preparing the Mushroom Duxelles for Beef Wellington
Mushroom duxelles is one of the key ingredients that makes Beef Wellington truly special. This finely chopped mushroom mixture, often combined with shallots, garlic, and herbs, brings depth, moisture, and an earthy richness to the dish. Preparing the duxelles properly is essential for the perfect Beef Wellington, as it helps to prevent the pastry from becoming soggy while enhancing the overall flavor profile.
🍄 What Goes into Mushroom Duxelles?
The classic recipe for duxelles involves mushrooms, shallots, garlic, butter, and herbs like thyme or parsley. The mushrooms should be finely chopped, creating a paste-like consistency once cooked down. This creates a smooth, concentrated filling that complements the tender beef and crisp pastry.
🥄 Choosing the Right Mushrooms
For the best flavor, it’s important to select the right types of mushrooms. Cremini, shiitake, portobello, and button mushrooms are all excellent choices. Mixing different varieties can add complexity, but the mushrooms should be firm and fresh to avoid excess water. When finely chopped, they will cook down beautifully to a concentrated paste without losing too much moisture.
🍳 Cooking the Duxelles: Low and Slow
To make the duxelles, you need to cook the mushrooms slowly to draw out their moisture and develop their rich, earthy flavor. Here’s how:
- Finely chop the mushrooms: Use a food processor for uniform texture, but avoid pureeing them. The mixture should resemble coarse crumbs, not a paste.
- Sauté the shallots and garlic: In a large pan, melt butter over medium heat. Add finely chopped shallots and garlic, cooking them until soft and aromatic. This provides a flavorful base for the duxelles.
- Cook the mushrooms: Add the chopped mushrooms to the pan and stir. Cook them down for 10-15 minutes, until they release their moisture and most of the liquid evaporates. You want the mixture to become thick and paste-like, with no excess liquid remaining.
- Season and finish: Once the mixture is thickened, season it with salt, pepper, and fresh thyme or other herbs to taste. A splash of white wine or white balsamic vinegar can add brightness, and a small spoonful of Dijon mustard can enhance the flavor with a hint of tang.
🧊 Cool the Duxelles Completely
Allow the mushroom duxelles to cool completely before applying it to the beef. This is important because any warmth left in the duxelles will soften the prosciutto and make it harder to handle. A cool duxelles mixture helps keep the structure intact and prevents the puff pastry from becoming soggy.
💡 Pro Tip
For an even more intense flavor, some chefs add a bit of cream to the duxelles mixture once it’s cooked down. A splash of cream adds a rich, velvety texture and enhances the overall depth of the filling. However, keep in mind that if you do this, it’s even more critical to ensure the mixture is fully cooked and dry before using it in your Beef Wellington.
Wrapping the Beef with Prosciutto and Puff Pastry
The process of wrapping the beef tenderloin with prosciutto and puff pastry is a critical step in assembling the perfect Beef Wellington. This step ensures that all the layers—beef, mushroom duxelles, and prosciutto—are securely encased in a beautiful, golden crust, which will bake to perfection in the oven. The wrapping also serves to maintain the shape of the Wellington and lock in the moisture, ensuring the beef stays tender and juicy.
🥩 Step 1: Lay Out the Prosciutto
The prosciutto layer is essential for two reasons: it adds flavor and creates a moisture barrier between the beef and the puff pastry. To get the best results, lay out the slices of prosciutto on a sheet of plastic wrap or parchment paper in a slightly overlapping fashion. This ensures that the prosciutto forms an even layer that will hold together when wrapped around the beef.
- Tip: Use thin slices of prosciutto for the best texture. Thick slices can be too fatty and may make it difficult to wrap the beef neatly.
🍄 Step 2: Spread the Mushroom Duxelles
Once the prosciutto is laid out, the next step is to spread the mushroom duxelles evenly over the prosciutto layer. Be sure to spread it all the way to the edges but leave a small border around the prosciutto. The duxelles layer should be relatively thin, but generous enough to impart its rich, earthy flavor throughout the dish. The duxelles will also help hold the prosciutto and beef in place.
- Pro Tip: Make sure the mushroom duxelles has cooled completely before spreading it. If the duxelles is too warm, it can melt the prosciutto or make the pastry soggy.
🥩 Step 3: Wrap the Beef Tenderloin
Now, take your seared beef tenderloin (which should be cooled slightly after searing) and place it in the center of the prosciutto and duxelles layer. Using the plastic wrap or parchment paper, carefully lift the prosciutto up and wrap it tightly around the beef, ensuring that all sides are covered. The prosciutto should form a snug, secure wrapping around the meat. If any pieces of prosciutto overlap, trim them to ensure an even, tight wrap.
- Tip: Chill the wrapped beef for at least 30 minutes in the refrigerator. This step helps the layers set and makes the next steps much easier.
🥐 Step 4: Prepare the Puff Pastry
Roll out your chilled puff pastry on a floured surface. It’s important to roll the pastry to a size that’s large enough to encase the beef and prosciutto entirely. Make sure to roll the pastry evenly to avoid any tears or thin spots that might lead to leaks during baking.
- Tip: The puff pastry should be cold when handling. If it starts to warm up, it may become too soft and difficult to manage. Keep it chilled in the refrigerator if needed.
🍴 Step 5: Wrap the Beef in Puff Pastry
Place the wrapped beef (with the prosciutto and duxelles) in the center of the rolled-out puff pastry. Using your hands, fold the edges of the puff pastry over the beef, ensuring it’s completely sealed. The seams should meet at the bottom, but make sure to pinch the edges together tightly to prevent any leaks.
- Tip: If the pastry is too large, trim the excess to avoid excess dough that could prevent the pastry from puffing up properly during baking.
🥚 Step 6: Seal and Glaze
Once the beef is wrapped in the puff pastry, brush the entire surface with an egg wash (a mixture of beaten egg and water or milk). This helps the pastry achieve that beautiful, golden color when baked. Use a fork or knife to score the top of the pastry lightly with a decorative pattern, but avoid cutting through the pastry entirely.
- Tip: Don’t overwork the puff pastry, as this could cause it to lose some of its flaky texture.
💡 Pro Tip
For a more intricate presentation, you can use additional puff pastry to create decorative shapes on top of the Wellington. For example, small leaves, lattice designs, or even the word “Wellington” can be cut out of extra pastry and placed on top before applying the egg wash. This adds a touch of elegance and makes the Wellington even more impressive when served.
Chilling and Baking the Wellington to Golden Perfection
Chilling and baking are the final steps in achieving a perfect Beef Wellington. These steps ensure that the puff pastry bakes to a golden, flaky perfection, and that the beef retains its tenderness and juiciness. The key is managing time and temperature to create a Wellington that’s visually stunning, with a perfectly cooked center and a crisp, golden crust.
❄️ Step 1: Chill the Assembled Wellington
Before baking, it’s essential to chill the assembled Beef Wellington in the refrigerator for at least 30 minutes to 1 hour. This step helps set the shape and ensures the pastry maintains its form while baking. Chilling also allows the prosciutto, mushroom duxelles, and beef to meld together, preventing them from shifting or separating during cooking.
- Why This Step Matters: The cold temperature firms up the puff pastry and makes it easier to handle when transferring it to the oven. Additionally, the cold meat helps maintain its moisture during the baking process.
🔥 Step 2: Preheat the Oven
While the Wellington is chilling, preheat your oven to 400°F (200°C). This high temperature is necessary to achieve a crispy golden crust. A preheated oven ensures that the puff pastry puffs up beautifully and evenly without becoming soggy or overly greasy.
- Tip: Use an oven thermometer to ensure your oven is at the correct temperature, as ovens can sometimes vary.
🍞 Step 3: Bake the Wellington
After chilling, remove the Beef Wellington from the fridge and place it on a baking sheet lined with parchment paper or a lightly greased rack. This will prevent the bottom of the pastry from sticking and allow air to circulate around the Wellington for even cooking.
- Baking Time: Bake the Wellington for about 30-40 minutes, or until the puff pastry has turned a deep golden brown. The exact time will vary depending on the size of your Wellington and your oven’s performance, but it’s essential to check the pastry regularly after the first 20 minutes.
- Tip: Don’t open the oven door during the first 20 minutes of baking to prevent heat loss. This ensures that the puff pastry bakes properly and puffs up evenly.
🌡️ Step 4: Check for Doneness
For the best results, you’ll need to monitor the internal temperature of the beef. Use an instant-read meat thermometer to check the temperature of the beef inside the Wellington:
- Rare: 120°F (49°C)
- Medium-Rare: 125°F (52°C)
- Medium: 130°F (54°C)
- Medium-Well: 140°F (60°C)
- Well-Done: 150°F (66°C)
Since the Beef Wellington will continue to cook after it’s removed from the oven, it’s best to take it out just before it reaches your desired temperature, allowing it to rest and reach the perfect doneness.
- Pro Tip: If you prefer your beef more rare or medium-rare, remove the Wellington from the oven when it reaches an internal temperature of about 120°F (49°C) for rare or 125°F (52°C) for medium-rare. The residual heat will continue to cook the beef to your preferred level.
⏲️ Step 5: Rest Before Slicing
Once the Beef Wellington is golden and fully baked, let it rest for 10-15 minutes before slicing. This step is crucial, as it allows the juices inside the beef to redistribute, ensuring a moist and tender bite. Slicing it immediately after baking could cause the juices to escape, leading to a dry interior.
- Tip: Rest the Wellington on a cutting board and cover it loosely with foil to retain heat while it rests.
💡 Pro Tip
To create an extra-crisp crust, consider brushing the Wellington with a final layer of egg wash before placing it in the oven. This will enhance the golden color and give your Beef Wellington an even more elegant, glossy finish.
Expert Tips and Tricks for Cooking Beef Wellington Like a Pro
Before diving into expert tips, it’s important to first understand the essential ingredients and how to choose them wisely in Classic Beef Wellington Ingredients and How to Choose the Best.
Using a Meat Thermometer for Perfect Doneness
Achieving the perfect doneness in Beef Wellington is a delicate balance between the crispy, golden puff pastry and the tender, juicy beef. The key to mastering this balance is using a meat thermometer. This tool allows you to monitor the internal temperature of the beef precisely, ensuring that it reaches your desired level of doneness without overcooking. Whether you prefer your beef rare, medium, or well-done, a meat thermometer takes the guesswork out of the equation.
🌡️ Why You Should Use a Meat Thermometer
Beef Wellington is a luxurious dish that’s often prepared for special occasions, and no one wants to risk serving undercooked or overcooked beef. The challenge with Beef Wellington is that the pastry can easily brown before the beef reaches the desired temperature. Using a meat thermometer ensures that the beef is cooked to perfection without sacrificing the texture of the puff pastry.
Without a thermometer, it can be difficult to tell if the beef is done to your liking. Overcooking can lead to a dry, tough interior, while undercooking can leave the beef raw in the center. The thermometer provides the precision needed to nail the doneness every time.
📏 How to Use a Meat Thermometer
To get the most accurate reading, follow these simple steps:
- Insert the Thermometer: Insert the probe of the instant-read thermometer into the thickest part of the beef tenderloin. Be sure to avoid any bone or fat, as these can give inaccurate readings.
- Avoid Touching the Pastry: Ensure that the thermometer is not touching the puff pastry, as this could affect the temperature reading and give you an inaccurate result.
- Check the Temperature: Wait for the thermometer to give a stable reading. Don’t rely on the oven’s temperature gauge—always trust your thermometer for an accurate reading of the beef’s internal temperature.
- Remove the Wellington at the Right Temperature: Once the beef reaches your desired level of doneness, remove the Wellington from the oven. Remember, the temperature will rise slightly during resting, so aim for a few degrees lower than your target.
🍖 Temperature Guidelines for Beef Wellington
Here are the temperature ranges for various doneness levels of beef:
- Rare: 120°F (49°C) – The beef will be cool in the center, with a deep red, almost raw interior.
- Medium-Rare: 125°F (52°C) – The beef will have a warm, red center with some pink surrounding it. This is a popular choice for Beef Wellington.
- Medium: 130°F (54°C) – The beef will have a warm, pink center. This level of doneness is great if you want the beef cooked more through without losing its tenderness.
- Medium-Well: 140°F (60°C) – The beef will be mostly brown with just a hint of pink in the center.
- Well-Done: 150°F (66°C) and higher – The beef will be fully cooked, with no pink remaining, though it may become less juicy.
For a truly tender and flavorful Beef Wellington, medium-rare or medium are ideal, as they preserve the beef’s natural juiciness and tenderness.
⏲️ Resting the Wellington After Baking
Even with a meat thermometer, it’s important to let the Wellington rest for 10-15 minutes after removing it from the oven. The internal temperature will continue to rise a few degrees during this time, which is referred to as carryover cooking. Resting allows the beef’s juices to redistribute, making each slice more succulent and tender.
- Pro Tip: If you’re aiming for medium-rare (125°F/52°C), you can remove the Wellington from the oven at 120°F (49°C), allowing it to reach the perfect doneness while resting.
💡 Why Not Just Guess?
Some home cooks may rely on cooking times or visual cues to determine the doneness of Beef Wellington. However, this approach can lead to mistakes, especially when the pastry can bake much faster than the beef cooks through. A meat thermometer eliminates the guesswork, giving you confidence that your Wellington is cooked to perfection.
🔍 Thermometer Types to Consider
There are different types of meat thermometers to choose from, depending on your preferences:
- Instant-Read Thermometers: These provide a quick, accurate temperature reading in just a few seconds and are perfect for checking the doneness of Beef Wellington.
- Probe Thermometers: Some chefs use a probe thermometer that stays in the meat while it cooks. This can be convenient if you want to monitor the temperature without opening the oven.
Choose the thermometer that best suits your cooking style, but always make sure it’s reliable and easy to read.
Avoiding a Soggy Beef Wellington Crust: Smart Layering Tips
One of the biggest challenges when preparing Beef Wellington is ensuring the puff pastry remains crispy and flaky rather than turning soggy. The combination of juicy beef, mushroom duxelles, and prosciutto can release moisture during baking, which might seep into the pastry, leading to a mushy, unappealing crust. However, with the right technique and a few smart layering tips, you can prevent this common issue and create a crispy, golden crust every time.
🧑🍳 Tip 1: Use a Layer of Prosciutto to Protect the Pastry
The prosciutto doesn’t just add flavor to the Beef Wellington, it also acts as a moisture barrier between the mushroom duxelles and the puff pastry. When you wrap the beef in prosciutto, it helps shield the pastry from the moisture released by the beef and mushrooms during cooking.
- How It Works: Prosciutto is thin and slightly salty, and because it’s cured, it won’t release as much moisture as fresh ingredients. This makes it the perfect layer to keep the puff pastry crisp.
- Tip: Make sure the prosciutto is tightly wrapped around the beef to prevent any moisture from seeping through. You can overlap the slices slightly to ensure full coverage.
🍄 Tip 2: Drain Excess Moisture from the Mushroom Duxelles
Mushroom duxelles are an essential component of Beef Wellington, providing a rich, earthy flavor. However, mushrooms are known for releasing a lot of moisture during cooking, which can cause the pastry to become soggy. To avoid this, it’s crucial to drain excess moisture from the duxelles.
- How to Drain: After sautéing the mushrooms, let them cook for several more minutes until the moisture has evaporated. You can also place the duxelles in a fine-mesh sieve and gently press out any excess liquid. The less moisture you have in the duxelles, the less likely the pastry will absorb it and become soggy.
- Pro Tip: After draining, let the mushroom mixture cool completely before adding it to the beef to prevent any warmth from transferring to the pastry.
🥖 Tip 3: Use a Thin Layer of Duxelles
While the mushroom duxelles add fantastic flavor, you don’t want to overdo it by using too much. A thin layer is all you need to avoid excess moisture buildup. Spread the duxelles evenly over the prosciutto and beef, ensuring that you don’t create a thick paste that could lead to sogginess.
- How to Apply: Use a spatula to evenly distribute the duxelles, pressing it lightly so it sticks but doesn’t become too thick. A thin, even layer will ensure that the pastry stays crisp, while still allowing the duxelles to infuse the beef with flavor.
🧈 Tip 4: Brush the Pastry with Egg Wash
Brushing the puff pastry with egg wash before baking is another smart way to prevent sogginess. The egg wash creates a protective seal on the surface of the pastry, helping it to crisp up and retain its golden color during baking.
- How to Apply: Beat an egg with a tablespoon of water and brush the egg wash evenly over the entire surface of the puff pastry. This will create a beautiful, shiny finish and help lock out moisture. It also gives the Wellington its signature golden color.
- Pro Tip: For an extra crispy finish, you can brush the pastry with egg wash before and halfway through baking to ensure an even crust.
🔪 Tip 5: Don’t Overfill the Wellington
While it may be tempting to add a lot of filling, too much duxelles, prosciutto, or other layers can increase the risk of excess moisture seeping into the pastry. Avoid overstuffing the Wellington to maintain an ideal ratio of meat to filling.
- What to Look For: The Wellington should have a nice balance between the layers of beef, prosciutto, mushroom duxelles, and pastry. If the filling overflows, it will increase the chances of the crust becoming soggy as the moisture from the filling will have nowhere to go.
🌬️ Tip 6: Use a Baking Rack to Elevate the Wellington
For even better results, bake your Beef Wellington on a baking rack rather than directly on a sheet pan. A rack allows air to circulate around the Wellington, preventing moisture from collecting underneath the pastry. This will help the bottom of the crust remain crisp.
- How to Set Up: Place a piece of parchment paper on a baking sheet and place a cooling rack on top. Then, position the Wellington on the rack. This setup ensures that the pastry can bake evenly and that the bottom doesn’t get soggy.
⏱️ Tip 7: Don’t Open the Oven Door Too Early
Opening the oven door early in the baking process can cause the temperature to fluctuate and result in a soggy crust. Keep the oven door closed for the first 20-30 minutes of baking to ensure that the pastry cooks properly and puffs up beautifully.
- Why This Matters: The initial high heat causes the puff pastry to puff up quickly. Opening the oven door can cause a temperature drop, which might hinder the puffing process and lead to sogginess.
💡 Pro Tip: Bake at High Heat
Bake your Beef Wellington at a high temperature of 400°F (200°C) to ensure that the pastry bakes quickly and crisps up before the beef has a chance to overcook. High heat also helps the butter in the puff pastry melt quickly, which creates those desirable flaky layers.
By using these smart layering tips, you can keep the puff pastry crispy and golden, creating a Beef Wellington that’s as visually impressive as it is delicious. These tips help prevent moisture from seeping into the pastry, ensuring that each bite is perfectly balanced with flaky pastry, juicy beef, and flavorful filling.
Make-Ahead Tips for Stress-Free Holiday Preparation
Preparing Beef Wellington can be overwhelming, especially for a holiday dinner. With a few make-ahead strategies, you can reduce the stress and ensure a perfect dish. These tips will help you prepare the key components in advance, leaving only assembly, baking, and serving for the day.
🗓️ Tip 1: Prepare the Beef and Duxelles the Day Before
You can save time by preparing the beef and mushroom duxelles a day or two ahead.
- Beef: Sear the beef tenderloin, then let it cool. Wrap it tightly in plastic wrap or butcher’s twine. Store it in the refrigerator for up to 24 hours. It will be easier to handle when assembling the Wellington.
- Mushroom Duxelles: Cook the mushrooms, then let the moisture evaporate. Store the cooled duxelles in a storage container in the refrigerator. You can also freeze them for up to one month.
🥩 Tip 2: Wrap the Beef with Prosciutto and Refrigerate
Wrap the seared beef in prosciutto and duxelles ahead of time. You can do this up to 24 hours before assembly.
- How to Wrap: Lay prosciutto slices on plastic wrap, spread the cooled duxelles, then add the beef. Roll tightly and refrigerate. This step infuses the beef with additional flavor.
- Why It Helps: Wrapping the beef ahead saves time during the final assembly. The beef will stay juicy and flavorful.
🥐 Tip 3: Assemble the Wellington in Advance
Assemble the Wellington the day before, up to the point of baking.
- How to Assemble: Roll out the puff pastry, add the wrapped beef, and seal the pastry around it. Brush with egg wash and refrigerate for at least one hour, or overnight.
- Why This Matters: Chilling the Wellington helps the pastry hold its shape. It also prevents the pastry from becoming soggy during baking.
⏳ Tip 4: Freeze the Assembled Wellington for Long-Term Storage
You can freeze the fully assembled Wellington for up to a month.
- How to Freeze: After assembling, wrap the Wellington in plastic wrap and aluminum foil. Store it in a freezer bag or airtight container. When ready to bake, no need to thaw—just bake directly from the freezer.
- Why It’s Helpful: Freezing the Wellington lets you prepare it well in advance. You can focus on other aspects of the meal.
🍽️ Tip 5: Bake the Wellington Just Before Serving
Bake your Beef Wellington just before serving for the best results.
- Why Baking Matters: Baking it at the right time ensures the pastry turns golden and puffy. The beef stays juicy while the pastry crisps up perfectly.
- Reheat Option: If you’ve frozen the Wellington, bake it directly from the freezer. It will take longer to cook but will yield a beautifully crisp pastry.
⏰ Tip 6: Reheat Leftovers with Care
Reheat leftovers without drying them out.
- How to Reheat: Wrap leftover slices in foil and bake at 300°F (150°C) for 10-15 minutes. This will help keep the pastry crispy.
- Pro Tip: Reheat individual slices instead of the entire Wellington. This helps preserve the puff pastry.
With these make-ahead tips, you’ll have a stress-free holiday meal. Preparing the key components in advance lets you enjoy your time with guests. Bake the Wellington just before serving for a perfect, golden result.
Resting the Wellington Before Slicing: Why It Matters
Resting your Beef Wellington before slicing is one of the most important steps to ensure it turns out perfect. It’s a step that often gets overlooked in the hustle and bustle of preparing such a grand dish, but skipping it can result in a less-than-ideal presentation and texture. Here’s why letting your Wellington rest is crucial, and how it contributes to the dish’s overall success.
🕰️ Resting Allows the Juices to Settle
When you first take the Wellington out of the oven, the meat inside is hot and filled with juices. Slicing it immediately after baking can cause those juices to spill out, leaving the beef dry and less flavorful.
- Why It Matters: Resting the Wellington allows the juices inside the beef to redistribute evenly. This ensures that when you slice into the Wellington, the juices stay within the meat, creating a tender, juicy cut. If you skip this step, the beef will lose moisture, resulting in a drier texture and less flavorful bite.
- How Long to Rest: Let the Wellington rest for at least 10-15 minutes before slicing. During this time, the meat’s internal temperature will stabilize, and the juices will redistribute. If you’re serving a large Wellington, you can allow it to rest for up to 20 minutes.
🌡️ It Helps Maintain the Shape of the Wellington
Another important reason to rest your Beef Wellington is to help it hold its shape.
- Why It Matters: The puff pastry around the beef and duxelles needs a moment to settle after coming out of the oven. When hot, the pastry is delicate and might collapse or lose its crispness if disturbed too soon. Resting the Wellington allows the pastry to firm up slightly, keeping its structure intact and ensuring it remains crispy when sliced.
- How Long to Rest: As the beef rests, the pastry becomes less vulnerable to breaking, and the layers of puff pastry settle into a perfect, golden crisp. This step ensures that when you slice the Wellington, it maintains a clean, attractive appearance with the beautiful layers of pastry visible.
🍽️ Resting Enhances the Flavor
Resting the Beef Wellington allows the flavors to meld together. When the dish is first removed from the oven, all the components—the beef, prosciutto, duxelles, and pastry—are at different temperatures and textures. Resting them allows the flavors to blend harmoniously.
- Why It Matters: The beef tenderloin, for example, will have a more pronounced flavor after resting, as the searing process has caramelized the meat, but it needs time to cool slightly for the flavors to come through fully. The mushroom duxelles and prosciutto will also have a chance to set, ensuring their flavors blend well with the beef. If you cut into it too soon, you risk disrupting the delicate balance of flavors.
- How Long to Rest: A good resting time is anywhere between 10-20 minutes. If you wait too long, the beef may cool too much, but if you cut it too soon, you’ll miss the opportunity for the flavors to fully develop.
🍴 Achieving a Clean Slice
A proper rest also allows you to slice the Beef Wellington neatly and with precision.
- Why It Matters: When the Wellington rests, the meat firms up slightly, which makes it easier to slice evenly. This is especially important for presentation, as you want to showcase those beautiful, perfect layers—especially the tender beef, duxelles, and golden puff pastry. Cutting the Wellington too early can result in a messy slice, with juices spilling out and the pastry losing its crispness.
- How Long to Rest: Allowing the Wellington to rest for about 15 minutes gives the beef a chance to set, making it easier to slice through without crushing or tearing the pastry.
By resting your Beef Wellington before slicing, you’ll ensure a juicy, flavorful, and beautifully presented dish. The flavors will settle, the pastry will hold its shape, and the beef will stay tender and moist. Taking this extra step will make all the difference when it comes time to serve and impress your guests.
Common Mistakes That Can Ruin Your Beef Wellington (And How to Avoid Them)
Not Searing the Beef: A Common Beef Wellington Error
Searing the beef is one of the most crucial steps in making Beef Wellington, and yet, it’s an error many home cooks make when attempting this iconic dish. While it may seem tempting to skip this step to save time or simplify the process, failing to sear the beef can result in a less flavorful and less visually appealing Wellington. Let’s dive into why searing is essential and what can go wrong when it’s overlooked.
🔥 Why Searing the Beef is Crucial for Flavor
Searing the beef tenderloin is an essential step that enhances the overall flavor of your Beef Wellington. The Maillard reaction—a chemical reaction that occurs when meat is exposed to high heat—creates a deep, savory crust that adds a significant layer of flavor to the beef.
- The Flavor Boost: When the beef is seared, it develops a rich, caramelized exterior that contrasts beautifully with the tender, juicy interior. This outer crust adds depth and umami, which are crucial for balancing the richness of the mushroom duxelles and the buttery puff pastry.
- Searing Enhances the Meat’s Natural Flavors: Without searing, the beef won’t have that savory, slightly smoky taste that contributes to the richness of the dish. It would be plain and lack the intensity that makes Beef Wellington so special.
🥩 Searing Locks in Juices and Helps Retain Moisture
One of the key reasons to sear the beef is to lock in its natural juices. Beef tenderloin is a lean cut of meat, and while it’s incredibly tender, it can dry out easily if not cooked properly.
- Juice Retention: When the beef is seared, the high heat creates a barrier that seals the juices inside the meat. This ensures that when you cook the Wellington in the oven, the beef stays moist and flavorful. If you skip the searing process, the beef may lose more of its natural moisture during the baking phase, resulting in a drier texture.
- Not Searing Leads to Dry Beef: If you skip this step, the meat may end up overcooked by the time the pastry has baked. The texture will be less juicy and less tender, and you’ll miss out on the rich, concentrated flavors that only searing can provide.
🕰️ Searing Helps Create a Perfect Crust
The beef crust plays an important role in the texture and overall structure of the Wellington. Searing the beef first helps form a beautiful, flavorful crust that contrasts perfectly with the softness of the duxelles and the delicate layers of puff pastry.
- The Golden Brown Crust: When you sear the beef, it not only adds flavor but also creates a beautiful golden-brown crust on the outside. This acts as a protective barrier to prevent the beef from overcooking while it bakes in the puff pastry. Without this crust, the beef will cook too quickly, and you risk having it overdone by the time the pastry is finished baking.
- Aesthetic Appeal: Searing gives the beef a deep, attractive color that will help the finished Wellington look more appealing. A pale, undercooked beef center will make your Wellington look unfinished and less appetizing.
🥄 The Right Technique for Searing
It’s important to sear the beef properly to achieve the best results. Many home cooks think that simply cooking the beef in a pan for a few minutes will suffice, but the process is a bit more involved.
- Temperature Control: Start with a hot pan—preferably a heavy-bottomed skillet or cast iron—so that the beef can develop a good sear without sticking. Use high heat and a little oil (vegetable oil or clarified butter works best) to create the searing effect. This should only take 2-3 minutes per side, as the goal is to brown the outside, not cook the inside.
- Searing the Sides: Don’t forget to sear the sides of the beef as well. This ensures an even coating of the flavorful crust around the entire cut, which adds to the overall texture and flavor of the Wellington.
- Resting the Beef After Searing: After searing the beef, allow it to rest for a few minutes before wrapping it with prosciutto or duxelles. This helps the meat firm up slightly, making it easier to handle during the assembly process.
⚠️ The Consequences of Not Searing
Skipping the searing step can result in several issues that compromise the quality of your Beef Wellington:
- Bland Flavor: Without a seared crust, the beef will taste flat and lack the rich, savory depth that the Maillard reaction brings.
- Soggy Pastry: If the beef is too wet from not being seared, the pastry will absorb the moisture and become soggy during baking.
- Uneven Cooking: The lack of a protective crust can cause the beef to cook too quickly, leading to an overcooked interior before the puff pastry has time to bake properly.
In conclusion, searing the beef is a non-negotiable step in making Beef Wellington. It not only enhances the flavor, moisture, and texture of the beef but also helps ensure that the pastry remains crisp and golden. If you want to serve the perfect Wellington, never skip this essential step—it’s the foundation for creating a truly memorable dish.
Overstuffing with Mushrooms or Using Wet Ingredients: A Common Beef Wellington Mistake
Mushroom duxelles is a key component of Beef Wellington. It adds earthy flavor and moisture. However, overstuffing with mushrooms or using wet ingredients can ruin the dish. Excess moisture leads to a soggy pastry. Here’s why it’s important to get the mushroom mixture just right and how to avoid mistakes.
🍄 Why Mushroom Duxelles is Key to a Perfect Wellington
Mushroom duxelles enhances the flavor and texture of the Wellington. The mushrooms complement the beef, creating a savory contrast. However, if the duxelles is too wet, it can ruin the pastry’s texture.
- Flavor Balance: The mushrooms provide richness, but too much moisture disrupts the balance. Wet duxelles can make the pastry soggy and the flavors diluted.
- Moisture Control: Mushrooms have high water content. If not properly cooked, the liquid will soak into the pastry, ruining its crispness.
💧 The Danger of Wet Mushrooms and Ingredients
When preparing mushroom duxelles, moisture management is crucial. If you don’t cook the mushrooms long enough, they will release too much liquid.
- Too Much Liquid: If the liquid from the mushrooms isn’t evaporated, it makes the duxelles too runny. This will cause the pastry to absorb excess moisture and become soggy.
- Soggy Pastry: Excess liquid seeps into the layers of prosciutto and puff pastry. This will result in a soggy Wellington that lacks the desired texture and flavor.
🍽️ How to Properly Prepare Mushroom Duxelles
To avoid excess moisture, follow these tips:
- Cook the Mushrooms Long Enough: After chopping the mushrooms, cook them in a hot pan with butter. Let the mushrooms release their moisture and cook it off until the mixture is thick and glossy.
- Use a Dry Pan: Start by cooking the mushrooms without oil. Once they release their moisture, add butter or oil to sauté shallots and herbs.
- Strain Excess Liquid: If there’s too much liquid in the duxelles, strain it out. This ensures a thicker, drier mixture that won’t sog the pastry.
🍴 Don’t Overstuff the Wellington
Overstuffing the Wellington with duxelles can lead to sogginess. Too much duxelles disrupts the balance and texture of the dish.
- Layering Tips: Use just enough duxelles to cover the beef in an even layer. Too much will cause excess moisture to seep into the pastry.
- Even Distribution: Spread the duxelles evenly to prevent pooling. This helps maintain a uniform cooking process and prevents soggy spots.
⚖️ Achieving the Perfect Mushroom Duxelles Consistency
- Consistency is Key: The duxelles should be thick, like a paste, with no liquid. This consistency helps the mushrooms stay in place without affecting the pastry.
- Cool Before Assembling: Let the duxelles cool slightly before spreading it on the beef. This prevents it from becoming too runny and ensures it stays put.
By avoiding the common mistakes of overstuffing with mushrooms or using wet ingredients, you can preserve the texture of the Wellington. Properly prepared duxelles will enhance the dish and keep the pastry crispy, making your Beef Wellington a perfect success.
Skipping the Chilling Step Before Baking: Why It’s Crucial for a Perfect Beef Wellington
Chilling your Beef Wellington before baking may seem like an unnecessary step, but it is, in fact, essential to achieving the perfect outcome. Chilling the Wellington helps ensure that all the layers stay in place during baking, while also promoting an even cooking process. Neglecting this step can lead to several issues, such as unevenly cooked beef, a soggy crust, or even the disintegration of the pastry during baking. Here’s why chilling is so important and how it makes a significant difference in the final result.
❄️ Why Chilling is Important for Puff Pastry
Puff pastry is the star when it comes to the golden, flaky exterior of Beef Wellington. However, it’s very delicate and can be tricky to handle. After wrapping the beef in prosciutto and mushroom duxelles, the Wellington needs to be chilled thoroughly to set and firm up the pastry.
- Keeps the Pastry Firm: When the Wellington is chilled, the fat in the puff pastry becomes firm. This helps the pastry maintain its shape and crispness while baking. If you skip chilling, the pastry may melt or become soft during baking, leading to a less than desirable result.
- Prevents Sogginess: The chilling process allows the duxelles and prosciutto layers to set. Without this step, the moisture from the mushrooms can seep into the pastry, turning it soggy. Chilling the Wellington helps lock in the flavors and moisture while preventing the pastry from absorbing excess liquid.
- Ensures Even Baking: Puff pastry relies on the rapid release of steam during baking to create those signature flaky layers. Chilling helps to keep the pastry cold, giving it time to expand properly in the oven and form those beautiful layers. Without this, the puff pastry might not puff as expected, resulting in a dense, uneven crust.
⏳ How Long Should You Chill Beef Wellington?
The chilling time can vary depending on how long you have, but a minimum of 30 minutes in the refrigerator is recommended. Ideally, chilling for 1 to 2 hours or even overnight will yield the best results. Here’s why:
- Short Chill (30 minutes to 1 hour): If you’re short on time, at least 30 minutes in the fridge will help. This will allow the pastry to firm up and make the Wellington easier to handle. While this can work for smaller Wellingtons or when you’re in a rush, it doesn’t give as much time for the layers to set completely.
- Longer Chill (1 to 2 hours or overnight): If you have the time, it’s best to chill the Wellington for 1 to 2 hours. This allows the pastry to fully firm up, reducing the risk of sogginess and ensuring an even bake. Chilling overnight is also a great option for a stress-free holiday meal, as it allows you to prepare the Wellington in advance and bake it on the day of serving.
🍖 Why Chilling Helps with the Beef’s Texture
In addition to helping the pastry, chilling also benefits the beef inside the Wellington. When the beef is cold, it holds its shape better during baking, leading to a more consistent texture.
- Prevents Overcooking: Chilling the beef helps slow down the cooking process. When the Wellington goes into the oven, the cold beef will cook more evenly. If the beef is at room temperature, it can cook too quickly on the outside, potentially resulting in overcooking or uneven doneness.
- Preserves the Tenderness: Beef tenderloin, a common choice for Wellington, is known for its tenderness. Chilling the beef before baking helps maintain this tenderness, as it won’t lose moisture as quickly during cooking.
🧊 How to Properly Chill Your Wellington
To get the best results, make sure to chill the Wellington properly:
- Wrap the Wellington Well: After assembling the Wellington, wrap it tightly in plastic wrap. This will help preserve its shape and prevent any unwanted air exposure that could dry out the pastry.
- Chill on a Tray: Place the wrapped Wellington on a baking tray or sheet pan before chilling. This will make it easier to handle and transfer to the oven once it’s properly chilled.
- Refrigerate, Don’t Freeze: While it might be tempting to freeze the Wellington to speed up the chilling process, it’s important to refrigerate it. Freezing can affect the texture of the puff pastry and cause uneven baking.
🍞 Chilling in the Right Conditions
- Even Cooling: Make sure the Wellington chills evenly. Placing it on the center rack of your fridge will help maintain even cooling. Avoid placing it too close to the edges or in a place where the cold air can’t circulate properly.
- Avoid Overcrowding: If your fridge is too full, the Wellington may not chill properly. Make sure there’s enough space for the cold air to circulate around the Wellington to ensure consistent chilling.
🔥 What Happens If You Skip Chilling?
Skipping the chilling step can lead to several issues:
- Uneven Cooking: Without chilling, the pastry may bake unevenly, either undercooking or overcooking in certain areas.
- Soggy Crust: As mentioned, the moisture from the duxelles can seep into the pastry if it’s not chilled. This leads to a soggy, limp crust that won’t hold up.
- Collapsed Pastry: The puff pastry may collapse and fail to achieve the desired flaky layers, leaving you with a flat and dense crust.
In conclusion, chilling your Beef Wellington before baking is a crucial step to achieving a perfect dish. It ensures the puff pastry holds its shape, remains crispy, and cooks evenly. It also helps the beef retain its tenderness and prevents any unwanted moisture from ruining the crust. Don’t skip this important step for the best Beef Wellington experience.
Not Letting the Wellington Rest Before Slicing: Why It’s Essential for Perfect Results
After spending time carefully assembling and baking a Beef Wellington, the temptation to slice it immediately is strong. However, skipping the resting step before slicing can result in a less-than-perfect presentation and texture. Resting your Wellington is a crucial part of the process, as it allows the beef to settle, the juices to redistribute, and the pastry to firm up. Here’s why resting is so important, and how it contributes to the overall success of your Beef Wellington.
🕰️ Why Resting is Key for Beef Wellington
Resting is an essential step in the cooking process, particularly for meats like beef tenderloin. Beef Wellington often has a rare to medium-rare roast inside, surrounded by a layer of mushroom duxelles, prosciutto, and puff pastry. If you cut into it right away, all the juices will spill out, making the beef dry and the pastry soggy.
- Redistribution of Juices: As the beef cooks, the juices are forced towards the center of the meat. Resting the Wellington allows the juices to redistribute evenly, which keeps the beef tender, juicy, and flavorful. If you slice it too early, the juices will spill out, leaving the meat dry and the pastry soggy.
- Preventing Dry Meat: Letting the Wellington rest helps lock in the moisture. Without this step, the meat’s interior will continue to cook slightly after removing it from the oven, leading to overcooking. Resting ensures the beef retains its moisture, making each bite tender and succulent.
⏳ How Long Should You Let Beef Wellington Rest?
The ideal resting time for Beef Wellington is usually 10 to 15 minutes. This brief period allows the juices to settle and prevents them from running out when you cut into the meat.
- Short Rest (10 minutes): For a relatively quick rest, 10 minutes is sufficient to allow the juices to redistribute without losing too much heat. The Wellington will stay warm and retain its integrity.
- Longer Rest (15 minutes): If you’re serving a larger Wellington or preparing for a crowd, you can rest it a bit longer (up to 15 minutes). This gives the internal juices more time to settle, ensuring the beef is tender and flavorful. Just make sure not to rest it for too long, as the Wellington may cool down too much.
🍖 What Happens If You Skip the Resting Step?
If you don’t let the Wellington rest before slicing, several issues can arise that impact both the texture and presentation:
- Juices Spill Out: As you slice the Wellington, the meat’s juices will run out, leaving the beef dry and the pastry soggy. The filling may also spill out, resulting in a mess instead of the clean, professional presentation that you’re aiming for.
- Overcooked Meat: The beef inside the Wellington continues to cook slightly as it rests, even after being removed from the oven. Without resting, the internal temperature will continue to rise, leading to overcooked beef, especially if you prefer your Wellington rare or medium-rare.
- Soggy Pastry: The juices from the beef and mushroom duxelles can seep into the pastry if it’s sliced immediately. This results in a soggy, limp crust, ruining the crispy, flaky texture that makes Beef Wellington so special.
🥩 The Science Behind Resting Meat
Resting meat is important not just for flavor, but for texture. The muscle fibers in beef tighten and release juices during cooking. When you rest the meat, the fibers relax, allowing the juices to redistribute throughout the meat instead of staying concentrated in the center.
- Maintains Tenderness: Resting helps keep the beef tender, as the muscle fibers have a chance to return to their natural state. Slicing immediately can cause the fibers to tighten, making the meat tougher.
- Even Temperature: Resting also ensures the temperature of the beef is more even throughout. Without this step, the outer layers of the beef will be hotter than the center, leading to uneven cooking.
🥄 How to Rest Beef Wellington Properly
To ensure you get the best results from your Beef Wellington, follow these steps for resting:
- Remove from Oven: As soon as the Wellington reaches your desired doneness, remove it from the oven. Place it on a cutting board or a serving tray to rest.
- Cover Loosely with Foil: To retain heat while allowing the meat to rest, cover the Wellington loosely with a piece of aluminum foil. This prevents the crust from cooling too quickly while ensuring the beef continues to rest.
- Let It Rest in a Warm Spot: Place the Wellington in a warm area of your kitchen. Avoid placing it on a cold surface, as this can cause it to cool too quickly. Rest it in a warm, draft-free zone to maintain its temperature.
🍽️ Serving the Beef Wellington
After resting, you’re ready to slice and serve your Beef Wellington. Make sure to use a sharp knife to ensure clean, even slices that showcase the layers of the Wellington.
- Slice Carefully: When you cut the Wellington, do so gently to avoid squishing the pastry. A serrated knife works best to ensure a clean cut through the puff pastry without disturbing the delicate layers.
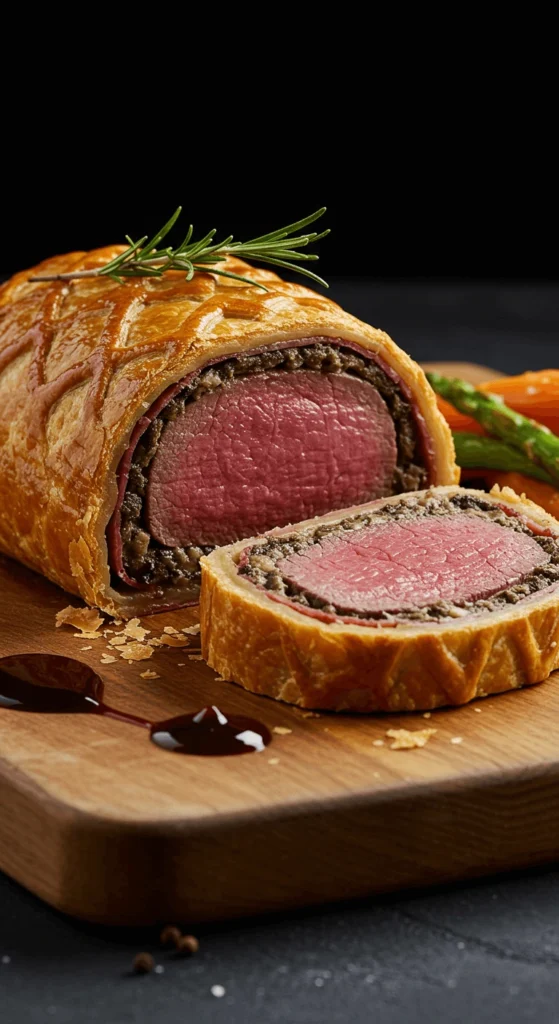
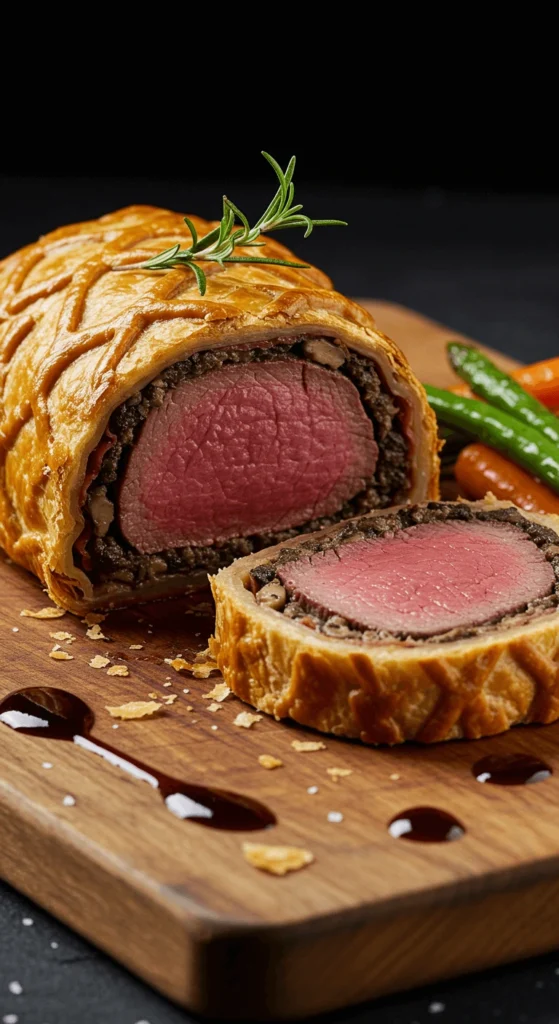
- Presentation: For the best presentation, serve the Wellington in thick slices that highlight the beautiful layers of beef, mushroom duxelles, prosciutto, and golden puff pastry.
In conclusion, resting the Beef Wellington is a simple yet vital step that makes a huge difference in the final result. It helps preserve the moisture in the beef, prevents the pastry from becoming soggy, and ensures that the Wellington is perfectly tender and juicy. Make sure to allow it to rest before slicing to achieve the best texture and presentation.
Serving Beef Wellington for Holidays and Special Occasions

Best Occasions to Serve Beef Wellington: Christmas, New Year’s & More
Beef Wellington is a luxurious and show-stopping dish, making it a perfect choice for special occasions. Its rich flavors and elegant presentation elevate any meal, making it ideal for holiday celebrations, gatherings, and milestone events. Whether you’re hosting a festive dinner or celebrating a personal achievement, Beef Wellington is sure to impress your guests. Here are some of the best occasions to serve this iconic dish, along with tips for making your event even more memorable.
🎄 Christmas Dinner: The Ultimate Festive Feast
Christmas is one of the most popular occasions for serving Beef Wellington. The rich, tender beef paired with a golden, flaky pastry fits perfectly with the grandeur of the holiday meal.
- Impressive Centerpiece: Beef Wellington makes for a spectacular centerpiece, adding a touch of sophistication to your Christmas dinner table. The layers of prosciutto, mushroom duxelles, and puff pastry offer a festive, indulgent combination that’s sure to impress.
- Perfect for a Family or Friends Feast: Since Beef Wellington is typically made to serve a crowd, it’s an excellent choice for a large family gathering or dinner with friends. The dish can be customized to feed your guests without sacrificing flavor or quality.
- Pairing with Traditional Sides: Pair your Beef Wellington with traditional Christmas sides like roast potatoes, brussels sprouts, gravy, and cranberry sauce. These classic dishes complement the richness of the Wellington and make for a well-rounded holiday feast.
🎆 New Year’s Eve: Ring in the New Year with Style
New Year’s Eve is another fantastic occasion to serve Beef Wellington. Whether you’re celebrating a quiet evening at home or hosting a lively party, this dish adds an air of sophistication and festivity to your celebration.
- A Dish to Celebrate Success: What better way to mark the end of a year and welcome in the new one than with a celebratory meal like Beef Wellington? It symbolizes luxury and success, making it the perfect choice for ringing in the new year with friends and family.
- A Great Dish for Sharing: New Year’s Eve is often about enjoying good company, and Beef Wellington is ideal for this. Its size allows for easy slicing, and everyone can enjoy a hearty portion of this incredible dish.
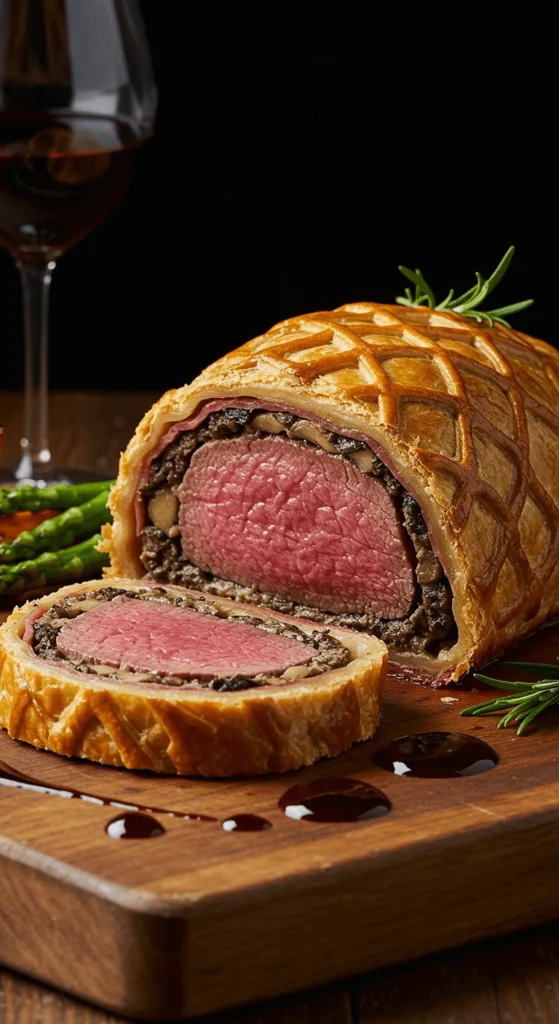
- Serve with Sparkling Wine or Champagne: Pair Beef Wellington with a glass of sparkling wine or Champagne to match the festive atmosphere. The richness of the beef pairs beautifully with the crisp acidity and bubbles of Champagne, enhancing the dining experience.
🥂 Anniversaries and Special Milestones
Beef Wellington is also perfect for celebrating anniversaries, birthdays, and other significant milestones. Its sophisticated presentation and decadent flavors make it ideal for marking a special day with your loved ones.
- Romantic Dinners: For an intimate and romantic anniversary celebration, Beef Wellington offers the ultimate indulgence. Serve it with your favorite bottle of wine, and you’ll create an unforgettable dining experience.
- Celebrating Milestones: Whether it’s a promotion, retirement, or graduation, Beef Wellington makes a statement. This dish adds an air of luxury to any celebration, helping you mark the occasion with style and flair.
- A Dish for Fine Dining at Home: If you’re planning a milestone event at home, serving Beef Wellington allows you to recreate the fine dining experience without leaving the comfort of your own kitchen. It’s a great way to impress your guests while making them feel special.
🧑🤝🧑 Special Gatherings: Hosting Elegant Dinner Parties
Beef Wellington is an excellent choice for dinner parties and intimate gatherings. Whether you’re hosting a holiday dinner, birthday celebration, or simply a casual get-together with friends, this dish adds a level of elegance to any occasion.
- Impress Your Guests: As one of the most renowned dishes in gourmet cuisine, Beef Wellington is guaranteed to impress your guests. Its bold flavors and elegant presentation will be the talk of the evening, making your gathering truly memorable.
- Perfect for Intimate Parties: Beef Wellington is ideal for smaller dinner parties where you want to show off your cooking skills and serve something extraordinary. Its complexity and visual appeal will captivate your guests, sparking conversation and admiration.
- Pairs Well with Wine: For a dinner party, pair Beef Wellington with a full-bodied red wine such as Cabernet Sauvignon or Merlot. The rich flavors of the beef and wine create a harmonious experience that guests will appreciate.
🏆 Celebrating Achievements: A Dish for Success
Beef Wellington is the perfect way to celebrate big achievements, whether it’s a promotion, successful project completion, or a new venture. Its luxurious and impressive nature makes it a fitting dish for recognizing hard work and accomplishments.
- A Luxurious Celebration Meal: If you’ve recently accomplished something significant, Beef Wellington offers the right amount of luxury and flavor to commemorate your success. It symbolizes achievement and will help you celebrate in style.
- A Milestone Meal for Friends and Family: Share your success with those who have supported you by serving a Beef Wellington dinner. This is an excellent opportunity to bring people together and celebrate the momentous occasion.
🍽️ How to Make Your Beef Wellington Occasion Extra Special
To make your Beef Wellington even more memorable, consider pairing it with:
- Creative Side Dishes: Consider adding unique sides like roasted garlic mashed potatoes, roasted root vegetables, or a fresh green salad with a tangy vinaigrette. These sides will complement the richness of the Wellington and add variety to your meal.
- Elegant Presentation: The presentation of Beef Wellington is just as important as the taste. Consider garnishing with fresh herbs or adding a drizzle of red wine sauce or mushroom demi-glace to elevate the dish visually and enhance the flavor.
- Dessert to End the Meal: Finish your special meal with a decadent dessert like chocolate fondant, tiramisu, or a classic lemon sorbet to cleanse the palate. Pair the dessert with an after-dinner drink such as port wine or espresso for a complete, satisfying meal.
In conclusion, Beef Wellington is an exceptional choice for celebrating a variety of occasions. Whether it’s Christmas, New Year’s, a milestone achievement, or an elegant dinner party, this dish makes any event feel even more special. Its luxurious flavors, beautiful presentation, and versatility make it a perfect centerpiece for your next celebration. So, if you’re looking to impress your guests and create unforgettable memories, Beef Wellington is the way to go!
Top Side Dishes to Serve with Beef Wellington
Beef Wellington is a rich and indulgent dish that deserves side dishes that complement its luxurious flavors while balancing its richness. Whether you’re looking for something traditional or a bit more modern, the right sides can elevate your meal to new heights. Here are some top side dishes that pair perfectly with Beef Wellington, enhancing the overall dining experience.
🥔 Classic Roasted Potatoes: A Crispy, Golden Side
Roasted potatoes are a classic side dish for any elegant meal, and they work particularly well with Beef Wellington. The crispy exterior and tender interior of roasted potatoes complement the juicy, tender beef and flaky pastry of the Wellington.
- Herb-Infused Roasted Potatoes: For added flavor, infuse your potatoes with fresh herbs like rosemary, thyme, and garlic. These herbs add aromatic notes that tie in perfectly with the richness of the Wellington.
- Crispy Edges: To get the perfect texture, be sure to roast your potatoes at a high temperature. This ensures a crispy, golden crust on the outside, while keeping the inside soft and fluffy. Pairing this with the crispiness of the Wellington’s pastry makes for a delightful contrast.
- Different Variations: You can also try roasted fingerling potatoes or baby potatoes for a more elegant touch. Their small size and creamy texture make them ideal for pairing with a luxurious dish like Beef Wellington.
🥦 Garlic Roasted Brussels Sprouts: A Healthy and Flavorful Contrast
Brussels sprouts, when roasted to perfection, are a wonderful side dish for Beef Wellington. Their slightly bitter taste contrasts nicely with the rich flavors of the beef and the umami-packed mushroom duxelles.
- Caramelized Brussels Sprouts: Roasting Brussels sprouts brings out their natural sweetness and caramelizes the outer layers, balancing the savory richness of the Wellington.
- Add Garlic and Balsamic: Toss the Brussels sprouts with minced garlic and a drizzle of balsamic vinegar before roasting for added depth of flavor. The garlicky aroma and slight tang from the vinegar complement the Wellington beautifully.
- Make It a Seasonal Favorite: If you’re serving Beef Wellington during the fall or winter months, roasted Brussels sprouts are a perfect seasonal choice. They pair well with the hearty and comforting nature of the dish, adding both flavor and nutrition to the meal.
🥗 Fresh Green Salad with Vinaigrette: A Light, Crisp Finish
After the richness of Beef Wellington, a fresh, crisp salad is a great way to balance the heaviness of the main dish. The lightness of a green salad provides a refreshing contrast to the dense, savory flavors of the Wellington.
- Mixed Greens with Citrus: A salad made with mixed greens, arugula, or baby spinach tossed with a lemon vinaigrette or a balsamic dressing brings a burst of freshness that will cut through the richness of the Beef Wellington.
- Add Texture with Nuts or Seeds: Consider adding toasted almonds, walnuts, or poppy seeds to your salad for a crunchy texture. The slight bitterness of the greens paired with the nutty crunch creates a delightful contrast to the smooth, creamy texture of the Wellington’s mushroom duxelles.
- Incorporate Seasonal Ingredients: During the colder months, you can add roasted beets or pear slices to the salad for seasonal flair. These ingredients add natural sweetness and depth to the salad, enhancing the overall flavor profile of the meal.
🧀 Creamy Mashed Potatoes: A Comforting Side with Velvety Texture
Mashed potatoes are a comfort food classic, and their smooth, creamy texture complements the richness of Beef Wellington beautifully. The creaminess of the potatoes helps balance the robust flavors of the beef while providing a soft contrast to the crispness of the pastry.
- Garlic Mashed Potatoes: Elevate your mashed potatoes by infusing them with garlic or cream cheese for added flavor. The garlic gives a savory depth that pairs wonderfully with the rich beef, and the cream cheese adds a tangy richness that enhances the dish’s overall creaminess.
- Truffle Mashed Potatoes: For a more luxurious twist, add a drizzle of truffle oil or shaved truffles to your mashed potatoes. The earthy, aromatic flavor of truffle adds sophistication to the meal and enhances the overall dining experience.
- Parmesan Mashed Potatoes: Another option is to stir in some freshly grated Parmesan cheese for an added layer of richness. The sharp, nutty flavor of the Parmesan complements the beef and pastry, bringing a savory balance to the meal.
🍄 Sautéed Wild Mushrooms: A Natural Pairing with the Mushroom Duxelles
Since Beef Wellington features a mushroom duxelles filling, serving sautéed mushrooms as a side dish is a great way to enhance the mushroom flavors in the dish. The earthy taste of wild mushrooms complements the beef while offering additional texture and flavor.
- Seasoned with Herbs: Sauté mushrooms in butter with a touch of garlic, thyme, and shallots. This adds depth to the natural umami of the mushrooms and brings out their rich, savory flavors.
- Use Different Varieties: Opt for a mix of wild mushrooms, such as shiitake, cremini, or oyster mushrooms, to create a more complex and nuanced flavor. The combination of different textures and tastes brings a new level of sophistication to the side dish.
- Add a Splash of Wine: For added flavor, deglaze the pan with a splash of white wine or sherry after sautéing the mushrooms. This creates a savory sauce that complements both the mushrooms and the Beef Wellington.
🍷 Red Wine Sauce: A Rich, Savory Addition
A red wine sauce or demi-glace can be an excellent accompaniment to Beef Wellington, adding depth of flavor and moisture to the dish. The robust flavor of red wine pairs beautifully with the beef, enhancing its richness without overwhelming it.
- Simple Red Wine Reduction: To make the sauce, simmer red wine, beef stock, and shallots until it reduces to a rich, velvety sauce. Drizzle it over the Beef Wellington for added flavor and a glossy finish.
- Pair with Root Vegetables: A rich red wine sauce is also an ideal accompaniment for roasted root vegetables like carrots, parsnips, and turnips. Their natural sweetness balances the acidity of the wine and adds complexity to the overall meal.
- Make Ahead and Serve: Red wine sauces can be made ahead of time and stored in the refrigerator until you’re ready to serve. This makes it easy to prepare in advance and frees up time for you to focus on the main dish and other sides.
In conclusion, when serving Beef Wellington, it’s important to choose side dishes that complement the richness of the main course without overpowering it. Roasted potatoes, garlic Brussels sprouts, creamy mashed potatoes, and wild mushrooms are all great options that will enhance the flavors of the Wellington. Pair these sides with a refreshing green salad and a luxurious red wine sauce, and you’ll have a memorable, well-rounded meal that will leave your guests in awe. Whether you’re celebrating a special occasion or hosting an elegant dinner, these sides will perfectly complement your Beef Wellington and make for an unforgettable dining experience.
Wine Pairings That Complement Beef Wellington Perfectly
Pairing wine with Beef Wellington enhances the dining experience. The dish’s rich, savory flavors of beef, mushrooms, and flaky pastry need a wine that balances and complements those elements. Here are some great wine options to serve with Beef Wellington, ensuring a perfect match.
🍷 Red Wines: Bold and Full-Bodied Choices
Red wines are perfect for Beef Wellington. They need to be full-bodied to match the richness of the dish.
- Cabernet Sauvignon: This wine has bold tannins and deep fruit flavors like blackberry and plum. It cuts through the richness of the beef and pastry, making it a classic pairing. The tannins also work well with the beef’s texture.
- Bordeaux: A Bordeaux blend, especially from the Left Bank, is another excellent choice. With cedar, tobacco, and earthy notes, it complements both the beef and the mushroom duxelles. Bordeaux wines are complex, much like Beef Wellington.
- Syrah/Shiraz: Syrah’s spicy, smoky character works well with Beef Wellington. The wine’s dark fruit and herbal notes enhance the beef and mushrooms.
- Zinfandel: For a fruit-forward option, Zinfandel brings jammy flavors like blackberry and raspberry. It balances the dish without overpowering it, adding a touch of spice.
🍷 Pinot Noir: A Softer, Elegant Option
For a lighter wine, Pinot Noir is a great choice. Its delicate flavors pair well with Beef Wellington, especially if the beef is more tender or if the flavors are lighter.
- Burgundy Pinot Noir: A Pinot Noir from Burgundy has earthy and floral notes. These flavors complement the mushrooms in the Wellington and add depth. The wine’s acidity balances the richness of the dish.
- Oregon Pinot Noir: With its red berry flavors and higher acidity, Oregon Pinot Noir works well with Beef Wellington. Its brightness cuts through the richness, creating balance.
- New World Pinot Noir: Wines from regions like California or New Zealand offer a juicy, fruit-forward profile. These wines are softer, with cherry and strawberry notes that complement the beef.
🍷 Wines with Earthy Tones to Match the Mushrooms
The mushroom duxelles in Beef Wellington calls for wines with earthy flavors.
- Chianti Classico: Made from Sangiovese, Chianti Classico has herbal and earthy notes. It complements the mushrooms and adds balance with its cherry flavors.
- Tempranillo: Spanish Tempranillo offers a combination of fruit and earthiness. The leather and oak notes complement the dish’s flavors and provide a medium tannin structure.
- Barolo: From Italy’s Piedmont region, Barolo adds complexity with earthy, floral, and tar-like flavors. This wine’s strong tannic structure pairs well with the richness of Beef Wellington.
🍷 White Wine Options for a Lighter Pairing
Full-bodied whites can also pair beautifully with Beef Wellington, especially if you’re looking for a lighter match.
- Chardonnay (Full-bodied): An oak-aged Chardonnay has a buttery, creamy texture that complements both the beef and the puff pastry. Its toasty notes balance the richness of the dish.
- Viognier: Viognier brings aromatic and floral qualities with apricot and honeysuckle flavors. This wine adds elegance, balancing the richness of the Wellington with its crisp acidity.
- White Burgundy: A White Burgundy made from Chardonnay has a mineral note and subtle buttery richness. It pairs beautifully with Beef Wellington, providing a light contrast to the beef and pastry.
🍷 Fortified Wines for a Luxurious Touch
For a unique touch, fortified wines like Port or Sherry can provide a luxurious pairing.
- Tawny Port: A Tawny Port has nutty and caramelized flavors that enhance the mushroom duxelles and beef. Its sweetness balances the savory richness of the Wellington.
- Oloroso Sherry: Oloroso Sherry offers nutty and toasty notes. It pairs well with the Beef Wellington, providing a smooth contrast to the rich flavors.
In conclusion, choosing the right wine to pair with Beef Wellington is essential. Red wines like Cabernet Sauvignon or Bordeaux provide boldness, while Pinot Noir offers elegance. Earthy wines like Chianti and Tempranillo work well with the mushrooms. Full-bodied whites, such as Chardonnay, and fortified wines like Port, bring added luxury. Whatever you choose, the right wine will elevate your Beef Wellington experience.
Presentation Tips: How to Plate and Slice Beef Wellington Beautifully
Beef Wellington is a dish that demands attention and deserves a beautiful presentation to match its luxurious taste. The right plating and slicing techniques will not only enhance the overall dining experience but will also showcase the craftsmanship that went into creating this show-stopping dish. Here’s how you can present your Beef Wellington in a way that wows your guests and elevates the meal.
1. Choosing the Right Plate
The first step in creating a stunning presentation starts with the plate. Opt for a large, clean, and preferably white plate. White plates serve as a neutral backdrop, allowing the rich, golden crust of the Beef Wellington to shine. If you prefer to add a touch of elegance, choose plates with subtle accents or a thin metallic rim. These design choices won’t distract from the dish but will add a layer of sophistication. Make sure the plate has enough space to display the Wellington and any side dishes without crowding.
2. Center the Wellington for Maximum Impact
Position the Wellington at the center of the plate for the best visual impact. The golden, flaky pastry will immediately grab attention, so placing it in the middle ensures that it remains the star of the show. If serving individual portions, cut neat slices about 1 to 1.5 inches thick, and arrange them symmetrically for a visually appealing effect. For a more elegant, rustic touch, consider serving a whole Wellington at the center of a large platter. This allows guests to admire its golden crust before slicing it at the table. The table presentation should make your guests feel like they’re about to enjoy something truly special.
3. Add Decorative Garnishes for a Fresh Touch
A well-chosen garnish adds beauty and freshness to your Beef Wellington. Opt for simple options that won’t overshadow the dish but will enhance its overall look. Fresh herbs like rosemary, thyme, or parsley work beautifully, adding vibrant color and a light herbal aroma that complements the rich flavors of the Wellington. Place a few sprigs or small leaves next to the Wellington, or scatter them delicately around the plate.
Consider using microgreens or edible flowers for a more modern touch. These garnishes bring a pop of color and elevate the dish’s appearance with a gourmet flair. Remember, the garnish should provide contrast without overpowering the main attraction.
4. Serve with Sauce, but Keep It Elegant
Pair your Beef Wellington with a rich sauce, like a red wine reduction or mushroom sauce. When adding sauce, avoid overpouring, as it can mask the pastry’s crispy texture and overwhelm the dish’s delicate flavors. Instead, drizzle the sauce carefully around the plate. A swirl of sauce under the Wellington creates a visually appealing presentation, while still allowing the dish to stand out. Alternatively, serve the sauce in a small sauceboat on the side so guests can add it according to their taste.
5. Side Dishes: How to Complement Without Overcrowding
Side dishes should enhance the Beef Wellington, not compete with it. Consider offering roasted vegetables like carrots, parsnips, or asparagus, arranged neatly on the plate. You can also serve mashed potatoes, buttery green beans, or a garden salad—all of which pair beautifully with the Wellington.
Avoid overcrowding the plate. The Wellington should remain the focal point of the presentation. A small scoop of mashed potatoes or a few vegetables placed artfully beside the Wellington will keep the visual balance intact. Arrange the sides with a light touch, ensuring each component has room to shine.
6. Perfectly Slice the Wellington for Beautiful Layers
Slicing the Wellington is just as important as plating it. Use a sharp, non-serrated knife to prevent crushing the layers of puff pastry. After baking, let the Wellington rest for 10 to 15 minutes. This allows the juices to redistribute within the meat and prevents the pastry from becoming soggy.
As you slice, aim for portions about 1 to 1.5 inches thick. Make sure the knife is steady as you cut through both the pastry and the tenderloin. Each slice should display the layers of golden pastry, mushroom duxelles, prosciutto, and tender beef. When serving, arrange the slices artfully to showcase these beautiful layers.
7. Consider Plating for Different Occasions
Plating can vary depending on the event. For formal gatherings, serve the Wellington on large, elegant platters, adorned with simple garnishes. If it’s a more casual or intimate dinner, smaller, individual plates may work best, focusing on clean lines and minimalistic garnishes.
For special occasions like Christmas or New Year’s, you may want to add extra flair. Consider using festive decorations or themed tableware. A well-set table enhances the overall experience, making the meal even more memorable.
8. Final Flourishes for a Luxurious Finish
Before serving, take a moment to add finishing touches that can elevate the dish. A light dusting of sea salt or a sprinkle of black pepper on top of the Wellington can provide contrast in both flavor and appearance. For an elegant finish, try using a microplane to add a bit of grated lemon peel or truffle salt.
Ensure the plate is neat, with no smudges or spills around the edges. A beautifully plated Beef Wellington is the perfect way to end a gourmet meal. Your attention to detail will impress your guests, making every bite even more special.
Conclusion: Serve with Confidence and Style
With these presentation tips, your Beef Wellington will be as visually stunning as it is delicious. By focusing on plating, garnishing, and slicing with care, you’ll enhance the entire dining experience. Each bite of the Wellington will feel like a luxurious indulgence, and your guests will surely appreciate the effort you put into creating a beautiful and memorable meal.
Conclusion: Why Beef Wellington is the Ultimate Dish
Beef Wellington is the epitome of an impressive and luxurious meal. Achieving perfection requires a combination of high-quality ingredients, a solid cooking technique, and an unwavering attention to detail. The rich beef tenderloin, flavorful mushroom duxelles, savory prosciutto, and flaky puff pastry all come together to create a dish that’s both visually stunning and delicious.
By following the expert tips shared in this post—whether it’s choosing the right beef cut, perfecting the puff pastry, or mastering the searing technique—you can craft a Beef Wellington that’s sure to impress. Timing and patience are key, and when done right, the result is a dish that’s truly worth celebrating.
We encourage you to give this recipe a try and share your experience with us! Leave a comment below to let us know how it turned out or if you have any tips of your own. And if you know anyone who loves gourmet meals, feel free to share this post with them—let’s spread the love for Beef Wellington!