
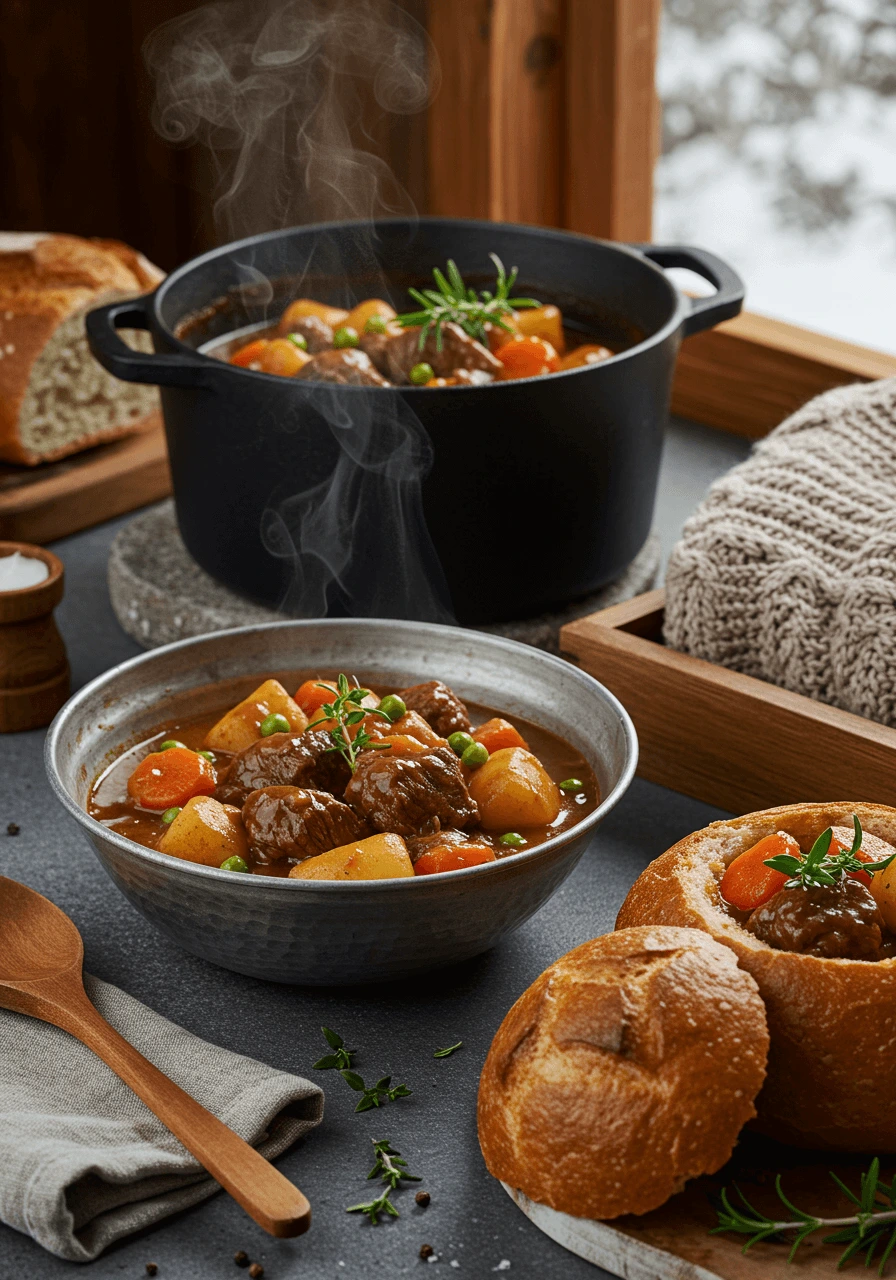
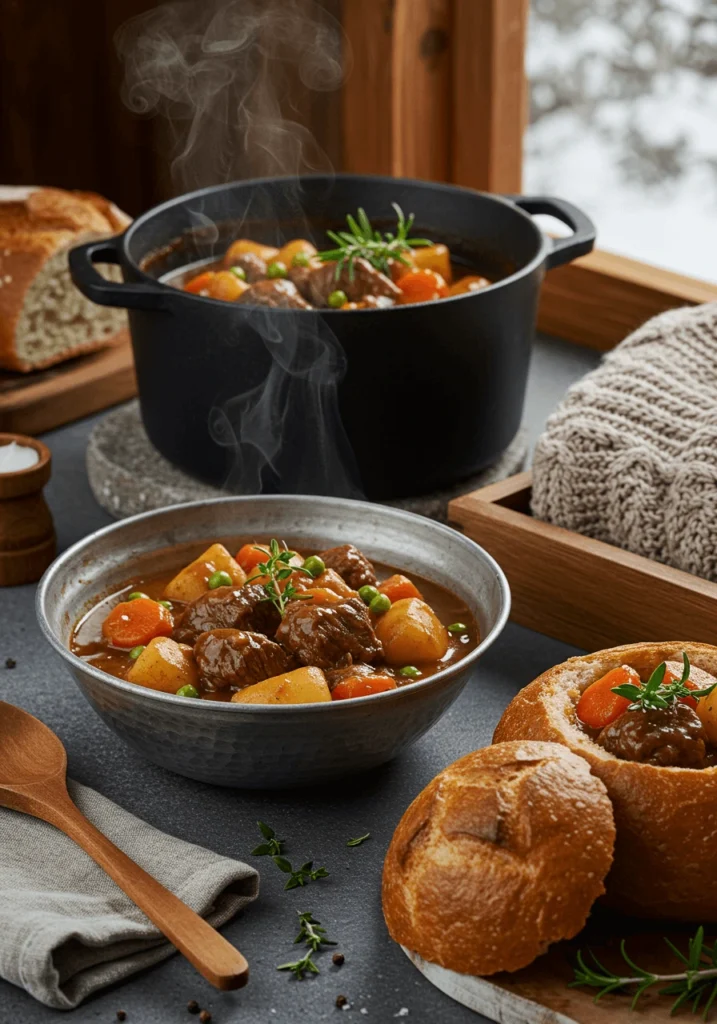
Introduction
Tender and rich beef stew is the ultimate comfort food, but achieving the perfect texture can be tricky. If you’ve ever struggled with tough or bland stew, don’t worry! In this post, I’ll reveal the secrets to creating a tender and rich beef stew every time, from choosing the right cuts of meat to mastering the cooking techniques that unlock full flavor and melt-in-your-mouth tenderness.
Best Cuts of Beef for a Tender and Flavorful Stew
To discover the secret to the perfect texture and rich flavor of beef stew, we recommend checking out this comprehensive guide.
Why Chuck Roast Makes the Most Tender Beef Stew
If you want a beef stew that melts in your mouth, chuck roast should be your go-to cut. It comes from the shoulder area of the cow—a part that gets a lot of use. That means it has plenty of connective tissue, which is exactly what you want for a stew.
At first glance, chuck may seem too tough or fatty. But when it’s cooked low and slow, all that collagen breaks down into gelatin, giving the stew a silky, luxurious texture and deep flavor. The result? Meat that’s not only tender, but also juicy and rich.
Unlike leaner cuts like sirloin or round, which dry out during long cooking, chuck becomes incredibly succulent. It’s also affordable and easy to find, making it the perfect balance of flavor, texture, and value.
When preparing chuck roast, don’t forget to:
- Trim off only the thick, hard fat (leave the marbling).
- Cut it into evenly sized chunks for consistent cooking.
- Sear the meat well before stewing to add rich flavor from the browning.
Chuck roast is truly the secret weapon behind a great beef stew—and once you try it, you’ll never go back to leaner cuts.
How Collagen Breaks Down for Juicy, Fall-Apart Meat
The real magic of beef stew happens when collagen turns into gelatin—and that’s the secret behind meat that’s juicy, silky, and so tender it falls apart with a spoon.
Collagen is a tough, fibrous protein found in connective tissues, especially in cuts like chuck roast or brisket. When you first start cooking, this collagen is firm and rubbery, which is why the meat feels tough early on. But give it time, and something amazing happens.
As the stew slowly simmers over low heat, the collagen begins to break down. This process usually starts after about 160°F (70°C) and continues as long as you keep the temperature low and steady. After a few hours, the collagen turns into gelatin, a natural thickener that gives your broth that rich, velvety texture.
Not only does gelatin improve the stew’s body, but it also keeps the meat moist from the inside out. Instead of drying out like lean cuts do, the meat becomes buttery soft—full of flavor and mouthwatering tenderness.
So, if you’ve ever wondered why stew meat needs hours of gentle cooking, now you know: it’s all about giving collagen the time it needs to work its magic. No shortcuts—just science and patience.
Avoid These Lean Cuts That Ruin Stew Texture
When it comes to beef stew, not all cuts are ideal. In fact, using lean cuts can destroy the texture of your stew, no matter how well you cook it.
Cuts like sirloin, eye of round, top round, or tenderloin might look tempting because they’re labeled as “tender” or “premium,” but they’re actually too lean for the slow, low cooking needed in stews. These cuts don’t have the connective tissue or fat that give stew its richness and tender texture.
What happens when you cook lean beef in a stew?
- The meat dries out and becomes chewy.
- It shrinks and loses moisture during cooking.
- It contributes little to the flavor of the broth.
- It lacks collagen, so it won’t thicken or enrich the stew.
Tender cuts like sirloin are better for quick cooking, like stir-fries or grilling. They don’t stand up well to the long cooking process required for a stew.
If you want a stew that’s rich and hearty, opt for marbled cuts like chuck roast, brisket, short ribs, or oxtail. These cuts have the fat and connective tissue that break down during cooking, delivering tender meat and a savory broth.
Bonus Cuts for Richness: Brisket, Short Ribs & More
If you’re looking to elevate your beef stew beyond the classic chuck roast, these bonus cuts bring extra richness, depth, and texture. Each offers unique qualities that can make your stew stand out.
Brisket: Deep, Beefy Flavor
Brisket is packed with collagen and fat, perfect for slow cooking. As it simmers, it breaks down into buttery-soft meat that enriches the broth with bold, smoky undertones—especially if seared first.
Short Ribs: Bone-In Richness
Short ribs bring both tender meat and flavor from the bone. The marrow enhances the stew’s taste and gives it a silky mouthfeel. They’re perfect if you want fall-off-the-bone meat with an intensely savory broth.
Oxtail: Gelatin-Rich and Unique
Oxtail is a collagen powerhouse. As it cooks, it releases gelatin that naturally thickens your stew. Though less common, oxtail adds deep, almost luxurious flavor and a velvety texture to the sauce.
Shank: Flavor-Packed with Marrow
The shank is cut from the leg and is rich in connective tissue and bone marrow. It needs long cooking to soften, but rewards you with incredibly tender meat and a nutrient-rich, flavorful broth.
Round or Flank: Leaner Alternatives
If you prefer something leaner, round or flank cuts can work—just know they won’t give the same richness. With the right technique, though, they can still turn out tender in a well-balanced stew.
How Low and Slow Cooking Creates a Rich Beef Stew
Gentle Heat Unlocks Tender Texture in Beef
If you’ve ever ended up with tough, chewy beef in your stew, chances are the cooking temperature was too high. The secret to melt-in-your-mouth meat isn’t just the cut of beef you choose—it’s how you cook it. And when it comes to stew, gentle, consistent heat is your best friend.
Why Low and Slow Wins
Beef contains collagen, a connective tissue that needs time and moisture to break down into gelatin. This process is what makes stew meat succulent, moist, and tender. If you cook beef too quickly at high heat, the muscle fibers contract rapidly, squeezing out moisture and leaving you with dry, rubbery chunks.
Instead, low and slow cooking—usually at simmering temperatures around 180°F to 200°F (82°C to 93°C)—allows the beef to gradually break down without drying out. This gives the collagen time to dissolve and the fat time to render, turning even the toughest cuts into fall-apart, flavorful bites.
Best Methods for Gentle Cooking
- Stovetop Simmering: A heavy pot like a Dutch oven helps maintain even heat and moisture. Keep the lid partially open and avoid boiling.
- Slow Cooker: One of the best tools for stew, it keeps a consistent low temperature over several hours with minimal effort.
- Oven Braising: Cooking stew in the oven at a low temperature (around 300°F/150°C) allows for even heating from all sides, which helps prevent scorching or drying.
- Pressure Cooker (with caution): While not as gentle, pressure cookers can tenderize meat quickly. Just be careful not to overcook, and allow natural pressure release to avoid shocking the meat fibers.
Don’t Rush It
Even if you’re tempted to crank up the heat to finish dinner faster, resist! Real tenderness takes time. Plan for at least 2.5 to 3 hours of cooking time for most stew recipes. You’ll be rewarded with meat that’s not just cooked, but truly transformed—juicy, rich, and full of flavor.
Simmering vs. Boiling: The Secret to Soft Meat
If you’ve ever wondered why your beef stew turns out tough instead of tender, the answer may lie in one simple detail: how hot your stew is cooking. There’s a big difference between simmering and boiling, and choosing the right method can make or break your stew.
What’s the Difference?
- Simmering means keeping the liquid at a temperature just below boiling—typically between 185°F and 205°F (85°C to 96°C). You’ll see small bubbles gently rising to the surface, but the liquid won’t be in full rolling motion.
- Boiling, on the other hand, occurs at 212°F (100°C). The surface of the stew is constantly moving, bubbling vigorously.
While boiling may seem like it would cook things faster (and it does), it’s too aggressive for tougher cuts of meat. Boiling actually causes the proteins in beef to seize up and shrink rapidly, squeezing out moisture and making the meat dry, chewy, and tough.
Why Simmering is Ideal for Stew
Simmering gives the collagen and connective tissue in tougher cuts like chuck, brisket, or shank time to gently break down into gelatin, without forcing the meat to tighten up. The result? Moist, tender, and juicy beef that practically melts in your mouth.
This gentle method also keeps your stew broth clear and rich, rather than cloudy or greasy—an added bonus if you’re aiming for visual appeal and a balanced texture.
How to Keep It at a Simmer
- Use a heavy-bottomed pot to distribute heat evenly.
- Start by bringing your stew to a light boil, then immediately reduce the heat to low or medium-low.
- Watch for small, steady bubbles, especially around the edges of the pot.
- Resist the urge to stir constantly—this can break down ingredients and cool the liquid, disrupting the simmer.
Pro Tip: Use a Lid Correctly
Keeping the lid slightly ajar lets some steam escape, helping maintain a gentle simmer without building up too much heat. This method also helps reduce the stew slightly, intensifying its flavor.
By learning to simmer—not boil—your stew, you’re unlocking the real secret to a soft, succulent dish every time. It’s a small detail, but it makes a huge difference in the final texture and taste of your beef.
How Long to Cook Beef Stew for Ultimate Tenderness
Timing is everything when it comes to crafting the perfect beef stew. Too little time, and your meat stays tough and chewy. Too much, and you risk breaking down the ingredients too far, losing texture and structure. So how long should you cook beef stew to strike that perfect balance?
The Magic Number: 2.5 to 3 Hours
For most traditional beef stews using cuts like chuck, brisket, or short ribs, the sweet spot is usually between 2.5 to 3 hours of cooking time at a gentle simmer. This gives the connective tissue and collagen in the meat enough time to dissolve, creating a stew that’s tender, rich, and deeply flavorful.
During this period:
- The collagen melts into gelatin, thickening the sauce naturally.
- The meat fibers relax, becoming soft and juicy instead of tough.
- The flavors meld, turning your broth into a complex, savory base.
Check for Doneness, Not Just the Clock
Rather than relying solely on time, use texture as your guide. Your beef should be fork-tender—meaning you can easily pierce it and it breaks apart with light pressure. If it still offers resistance, give it more time. Trust the process.
Cooking Methods and Time Variations
- Stovetop or oven braising: Aim for 2.5 to 3 hours at a low simmer or oven temp around 300°F (150°C).
- Slow cooker: 7–8 hours on low or 4–5 hours on high works well. Avoid opening the lid too often, as it drops the temperature.
- Pressure cooker: You can reduce the time to 35–45 minutes, but allow natural pressure release to avoid shocking the meat and drying it out.
Don’t Forget the Resting Time
After cooking, let your stew rest for 10 to 15 minutes before serving. This helps the juices redistribute in the meat and allows the flavors to settle, making the final result even more satisfying and well-rounded.
By understanding how long to cook beef stew—and why time and technique matter—you’ll ensure every spoonful is packed with tender meat, deep flavor, and hearty comfort. Your stew won’t just be good—it’ll be unforgettable.
Best Cookware for Slow-Cooked Beef Stews
The cookware you choose plays a major role in how your beef stew turns out. While the ingredients and technique are critical, the right pot ensures even cooking, steady heat retention, and the perfect environment for meat to become fork-tender. Here’s a breakdown of the best options for making rich, slow-cooked stews.
Dutch Oven: The Gold Standard
A cast-iron Dutch oven is a classic choice for good reason. Its heavy base and thick walls distribute heat evenly and retain it exceptionally well, which helps maintain the low and steady temperature your stew needs.
- Perfect for stovetop-to-oven cooking.
- Comes with a tight-fitting lid to keep moisture in.
- Great for browning meat, then slow-simmering for hours.
- Often enamel-coated, making cleanup easy.
Why it’s ideal: The Dutch oven creates a sealed environment that locks in flavor while slowly tenderizing even the toughest cuts of meat.
Slow Cooker: Set It and Forget It
For ultimate convenience, the slow cooker (crockpot) is a winner. It gently simmers your stew over several hours without needing constant monitoring.
- Ideal for busy days or overnight cooking.
- Maintains a consistent low temperature.
- Excellent for breaking down collagen over long cook times.
Tip: Sear your meat and veggies in a separate pan before adding them to the slow cooker for a richer, deeper flavor.
Instant Pot or Pressure Cooker: Fast and Flavorful
Need beef stew in under an hour? A pressure cooker or Instant Pot uses high pressure to break down tough meat quickly.
- Great for weeknights or last-minute meals.
- Locks in flavor and moisture under pressure.
- Cuts cooking time to about 35–45 minutes.
Note: Use the natural pressure release to avoid shocking the meat fibers and making them tough.
Heavy-Bottomed Stock Pot: A Solid Everyday Option
If you don’t have a Dutch oven, a high-quality stock pot with a thick base can do the job well. Just make sure it holds heat evenly and has a lid that fits snugly.
- Works well for stovetop simmering.
- Needs regular attention to ensure low, even heat.
- May require a heat diffuser if your stove runs hot.
Choosing the right cookware for your beef stew means more than just convenience—it directly affects texture, flavor, and overall success. Whether you’re team Dutch oven or loyal to your slow cooker, investing in the proper pot helps turn simple ingredients into comfort food perfection.
Building Bold Flavor Layers in Your Stew
Before diving into flavor-enhancing techniques, check out this detailed recipe for making a hearty and flavorful beef stew, step by step.
Browning Beef for Deep, Savory Flavor
If you want to take your beef stew from good to truly exceptional, don’t skip the browning step. Browning the meat before simmering isn’t just a fancy extra—it’s one of the most important steps for building deep, savory flavor that lingers in every bite.
What Happens When You Brown Meat?
When beef hits a hot pan, it undergoes the Maillard reaction, a chemical process where amino acids and natural sugars in the meat react under high heat. This creates complex layers of flavor, a rich brown crust, and those irresistible browned bits (fond) at the bottom of your pot that add incredible depth to your stew.
In short: browning = umami bomb.
How to Brown Beef the Right Way
Here’s how to do it properly and maximize that rich, hearty flavor:
- Pat the beef dry with paper towels before browning—excess moisture prevents a good sear.
- Use a heavy-bottomed pot (like a Dutch oven) over medium-high heat.
- Add a neutral oil with a high smoke point, such as canola or vegetable oil.
- Don’t overcrowd the pan. Brown the beef in batches to avoid steaming.
- Let the beef develop a deep golden crust on each side—don’t rush it. This step should take about 2–3 minutes per side.
Deglaze and Don’t Waste the Flavor
After browning, you’ll see flavorful bits stuck to the bottom of the pan. These are gold. Pour in a bit of wine, broth, or water to deglaze the pot and scrape them up with a wooden spoon. This adds depth to the stew base and enhances the sauce with rich, beefy undertones.
Bonus Tip: Season Early but Lightly
Lightly season your meat with salt and pepper before browning to help enhance the flavor, but avoid over-seasoning. The stew will reduce and concentrate as it cooks, and you can always adjust the seasoning at the end.
Browning your beef isn’t just about color—it’s about developing flavor at the very foundation of your stew. Take the extra 10–15 minutes to do it right, and you’ll taste the results in every hearty, mouthwatering spoonful.
Essential Aromatics for Flavorful Beef Stew
While beef and broth form the heart of any good stew, it’s the aromatics that bring it to life. These flavor-building ingredients create the rich, savory base that transforms simple stew into a comforting, full-bodied masterpiece. Used properly, they balance the richness of the meat and add complexity to every bite.
The Classic Trio: Onion, Garlic, and Celery
Start with the essential mirepoix—a classic French flavor base made of:
- Onions: Add natural sweetness and depth as they caramelize during cooking.
- Garlic: Infuses the stew with bold, earthy aroma and a slightly spicy undertone.
- Celery: Brings a mild bitterness that cuts through the richness and adds balance.
Tip: Sauté these aromatics in the same pot after browning your meat to soak up all those flavorful brown bits.
Carrots: Sweetness and Color
Carrots not only add natural sweetness and a pop of color, but they also soften beautifully into the stew over time. Their sugars balance the umami of the beef and the acidity of the broth or wine.
Use chunky pieces to ensure they don’t turn mushy during the long simmer.
Herbs: Layers of Fragrance
Fresh or dried herbs bring warmth, fragrance, and a touch of elegance to your stew. Consider these go-to choices:
- Bay leaves: Add subtle floral notes that round out the stew’s base.
- Thyme: Earthy and slightly minty, thyme enhances both meat and vegetables.
- Rosemary: Powerful and woodsy—use sparingly or remove after simmering.
- Parsley (as a garnish): Adds a fresh, bright contrast just before serving.
Pro tip: Tie fresh herbs in a bundle (bouquet garni) or use a spice bag to make removal easy before serving.
Tomato Paste or Diced Tomatoes (Optional)
For stews with a deeper, more robust flavor, a spoonful of tomato paste or some diced tomatoes can add acidity and umami. They pair beautifully with wine or broth and create a more velvety, flavorful sauce.
Using the right aromatics in the right way transforms your beef stew from a simple meat-and-veg dish into a layered, aromatic experience. These ingredients do more than smell good—they’re the building blocks of bold, mouthwatering flavor.
Boosting Richness with Tomato Paste and Worcestershire Sauce
Creating a stew that’s truly rich and full-bodied means going beyond just meat and broth. Two powerful ingredients that can dramatically enhance the depth and complexity of your beef stew are tomato paste and Worcestershire sauce. When used correctly, these umami-packed additions work behind the scenes to tie everything together and amplify flavor in a way that’s subtle but unforgettable.
Tomato Paste: Depth, Color, and Umami
Tomato paste isn’t just for pasta sauce—it’s a powerhouse when it comes to building savory richness in stews. It adds:
- Concentrated tomato flavor without too much acidity.
- A deep, reddish-brown hue to the sauce.
- Natural umami compounds that enhance meaty flavors.
How to use it effectively:
- Add 1–2 tablespoons of tomato paste after you’ve sautéed your aromatics (onions, garlic, etc.).
- Let it cook for a minute or two, stirring constantly. This step caramelizes the paste slightly, removing any tinny flavor and adding a rich base note to your stew.
Worcestershire Sauce: The Umami Secret Weapon
Worcestershire sauce is often underestimated in stew recipes, but it brings a savory, slightly tangy complexity that really rounds out the flavor profile.
Made from ingredients like vinegar, molasses, anchovies, tamarind, garlic, and spices, Worcestershire offers:
- A unique blend of sweet, sour, and umami flavors.
- A way to boost meatiness without adding more meat.
- A subtle tang that brightens up the broth.
Best practice: Stir in 1–2 teaspoons of Worcestershire sauce while adding your liquids (broth or wine). It blends seamlessly into the sauce and enhances flavor without overwhelming the dish.
Why They Work Together
Tomato paste adds thickness and richness, while Worcestershire sauce adds complexity and depth. Used together, they:
- Elevate the sauce from flat to flavorful.
- Balance sweetness, acidity, and saltiness.
- Help meld all the stew ingredients into one cohesive, savory bite.
Whether you’re simmering your stew on the stove or letting it slowly cook in the oven, these two pantry staples are key players in achieving a luxuriously rich and flavorful result. Don’t skip them—they might just be the secret ingredients your stew has been missing.
Choosing the Right Liquid for Maximum Stew Flavor
The liquid you use in your beef stew doesn’t just determine how much sauce you’ll end up with—it’s a key factor in the overall depth, richness, and complexity of the dish. Choosing the right combination of liquids can elevate your stew from average to unforgettable, as it infuses the meat and vegetables with bold, savory flavor during every moment of the long, slow cook.
Beef Broth: The Go-To Base
For most traditional beef stews, beef broth or stock is the liquid of choice. It adds a natural meatiness and sets a solid savory foundation. Opt for:
- Low-sodium broth so you can control the salt level.
- Homemade stock for the richest, most gelatinous texture.
- Bone broth for an extra boost of collagen and body.
The key here is quality—a richer broth means a richer stew.
Red Wine: Depth and Boldness
Adding red wine introduces acidity, tannins, and fruitiness, all of which complement beef beautifully. It also helps to:
- Break down tough fibers in the meat.
- Add an earthy undertone to the sauce.
- Enrich the overall flavor profile with subtle complexity.
Use a dry, full-bodied red like Cabernet Sauvignon, Merlot, or Pinot Noir—and always choose wine you’d enjoy drinking.
Tip: Let the wine reduce slightly before adding broth to concentrate its flavor and cook off the alcohol.
Tomato-Based Liquids: Acidity and Umami
If you’re going for a slightly bolder, rustic stew, consider using:
- Crushed or diced tomatoes
- Tomato juice
- Or a spoonful of tomato paste mixed with water
These add umami, color, and acidity, which help balance the richness of the meat and fat.
Water: Only If You Must
While water can be used in a pinch, it brings no flavor to the table. If you do use it, be sure to:
- Add extra herbs and seasoning.
- Use browned meat and well-cooked aromatics to carry the flavor.
- Consider enhancing it with bouillon cubes or concentrate.
The Perfect Liquid Ratio
For a well-balanced stew, aim for:
- About 2 to 3 cups of liquid per 1.5 to 2 pounds of beef
- Enough to just cover the ingredients—not drown them
- A mix of broth + wine or broth + tomato for complexity
Ultimately, the right liquid is a powerful tool. It stews with your ingredients for hours, becoming richer and more flavorful as it reduces. By choosing a flavorful combination from the start—like beef broth and wine, or broth with a touch of tomato—you’ll ensure your beef stew is hearty, balanced, and absolutely unforgettable.
Pro Tips for Making the Most Tender and Hearty Stew
Easy Ways to Thicken Beef Stew Without Ruining Texture
A great beef stew isn’t just about flavor—it’s also about texture. That comforting, velvety richness you expect in every bite comes from a properly thickened stew. But it’s easy to overdo it and end up with a gluey or grainy mess. Luckily, there are several simple, foolproof ways to thicken beef stew while keeping the texture silky and satisfying.
1. Reduce the Liquid Slowly
One of the most natural and flavor-concentrated methods is to let the stew simmer uncovered for the last 20–30 minutes of cooking. This reduces the liquid and allows it to thicken naturally as:
- Collagen breaks down and mixes into the broth
- Ingredients like potatoes or carrots release starch
- Flavors become more concentrated
Pro tip: Stir occasionally to prevent sticking, and taste as you go.
2. Use a Flour or Cornstarch Slurry
For a quick fix, a slurry is your best friend:
- Flour Slurry: Mix 1–2 tablespoons of flour with cold water, then stir it into the stew. Let it simmer for at least 10 minutes to cook off the raw flour taste.
- Cornstarch Slurry: Mix 1 tablespoon of cornstarch with 2 tablespoons of cold water. Stir in and simmer for 3–5 minutes until thickened.
Reminder: Add slowly and in small amounts. Too much can create a gummy texture.
3. Mash a Few Potatoes or Veggies
A more rustic, natural approach is to mash a few chunks of cooked potatoes or carrots directly into the stew. Their natural starches will:
- Thicken the broth gently
- Add body and creaminess
- Enhance the flavor without adding anything artificial
This method is ideal for stews that already include root vegetables.
4. Add a Beurre Manié (Butter + Flour Paste)
This French technique involves mashing equal parts soft butter and flour into a paste, then stirring it into the hot stew. The fat coats the flour particles, helping to:
- Thicken the stew gradually
- Add a slight glossy sheen
- Avoid clumping
Use this method near the end of cooking for a smooth finish.
5. Don’t Overdo It!
Whatever thickening method you choose, aim for spoon-coating consistency—thick enough to cling to a spoon, but not heavy or sticky. Too much thickener can mask flavors and ruin that cozy, stew-like texture.
By using these gentle thickening techniques, you’ll keep your beef stew hearty and luscious without compromising its taste or feel. Whether you prefer a rustic, veggie-forward thickener or a more refined slurry or reduction, the goal is the same: a perfectly balanced stew with depth, body, and irresistible texture.
Resting Your Stew to Enhance Tenderness
It might be tempting to dig in the moment your beef stew finishes simmering, but giving it time to rest is one of the most overlooked secrets to achieving tender, flavorful results. Just like a good roast or steak, stew benefits immensely from a short period of rest after cooking—and the payoff is well worth the wait.
Why Resting Matters
When you allow your stew to sit off the heat for 10 to 15 minutes, several important things happen:
- Juices redistribute: Just like with cooked meat, resting helps the juices settle back into the meat chunks instead of spilling out onto your plate.
- Flavors meld together: The pause gives all the components—meat, broth, vegetables, and aromatics—time to come together harmoniously.
- Sauce thickens naturally: As the temperature drops slightly, the stew’s broth thickens to a more luscious, spoon-coating consistency.
Carryover Cooking
Another benefit of resting is carryover cooking. Even after you turn off the heat, the stew’s internal temperature remains high enough to continue gently cooking:
- This helps finish softening any remaining connective tissue in the beef.
- It prevents overcooking, since you’re no longer applying direct heat.
This is particularly important if you’re using cuts like chuck or brisket, which release their full tenderness only after slow, sustained cooking followed by a rest.
Best Practices for Resting Stew
Here’s how to do it right:
- After turning off the heat, cover the pot loosely with the lid or a piece of foil to retain warmth while allowing some steam to escape.
- Let the stew sit undisturbed for 10 to 15 minutes on the stovetop or a heat-safe surface.
- Stir gently before serving to redistribute everything evenly.
If you’ve added thickening agents like a flour slurry or tomato paste, resting will also give those ingredients time to fully integrate, enhancing texture and taste.
Bonus Tip: Make It Ahead
For even better results, make your stew a day ahead and store it in the fridge overnight. The flavors deepen and develop beautifully, and reheating it slowly the next day actually enhances both tenderness and richness.
So while resting may seem like a minor step, it’s the final touch that transforms your stew from good to exceptional. It allows the full depth of flavor and tenderness to emerge, ensuring every bite is warm, savory perfection.
Why Beef Stew Tastes Better the Next Day
While it’s tempting to dig into your freshly made beef stew right after it’s done cooking, there’s a reason why leftover beef stew is often considered even better the next day. The magic happens as the stew sits and the flavors have more time to meld together. The process of resting and developing is what turns a good stew into a great one. Here’s why waiting can elevate the taste of your beef stew:
1. Flavors Have Time to Marry
When a stew simmers, all the ingredients—beef, vegetables, herbs, spices, and liquids—each impart their unique flavors into the broth. However, it’s only after sitting for a while that these flavors begin to truly blend and harmonize. Just like a stew has a peak moment while it’s cooking, it often reaches an even better peak after a few hours or a full day of resting. The longer the stew sits, the more:
- The savory notes from the meat infuse into the broth.
- The herbs and spices fully dissolve into the liquid, enriching the overall flavor.
- Any added seasonings have time to mellow, allowing a more balanced taste.
2. The Meat Becomes Even More Tender
Beef stew benefits from the slow, gradual breakdown of collagen in tougher cuts of meat like chuck or brisket. When you rest the stew overnight, the meat continues to absorb the surrounding broth, becoming even more tender and juicy. The muscle fibers and connective tissues have had additional time to break down, creating a more melt-in-your-mouth texture that only improves with time.
3. The Broth Thickens and Gains Depth
As the stew cools and then reheats, the broth naturally thickens due to the release of starches from the vegetables and the collagen from the meat. The flavors also concentrate and deepen as the stew cools overnight. This makes the overall flavor profile more complex and full-bodied, with a richer, more velvety texture that simply can’t be achieved from a fresh pot.
4. The Stew Reaches Ideal Flavor Balance
Overnight, the acidic components, such as tomatoes or wine, soften and become more integrated with the stew’s richness. This results in a stew that has a much more rounded, cohesive taste. The stew may even taste a little more savory and balanced, as the components have had time to mellow and harmonize, balancing out any sharp or overly intense flavors that might have been present immediately after cooking.
5. Reheating Enhances the Flavor
The process of reheating the stew helps redistribute the fats and flavors throughout the dish. As the stew reheats gently on the stove, the liquid will become even richer and thicker, while the flavors continue to meld together. If you’re reheating on the stovetop, be sure to heat it slowly over low heat, stirring occasionally to keep everything well-integrated. A slight reduction in the broth during reheating will only concentrate the flavors further.
In short, beef stew benefits from resting and aging because it allows the ingredients to fully integrate, the meat to become even more tender, and the broth to thicken into a luxurious sauce. While it’s hard to resist the allure of fresh stew, giving it a day or two to sit is truly worth the wait. The extra time gives you an end result that’s fuller, richer, and far more flavorful, making leftover beef stew a delicious treat all on its own.
Common Mistakes That Make Beef Tough
When preparing a hearty beef stew, one of the biggest concerns is making sure the meat is tender and juicy, not tough or chewy. While beef stew should be meltingly tender, it’s all too easy to make certain mistakes that lead to a tough, rubbery texture. Knowing what these mistakes are—and how to avoid them—can help ensure you get a perfect stew every time. Here are some of the most common errors to avoid:
1. Using Lean Cuts of Beef
The leaner the cut, the tougher it will be in a stew. While lean cuts like sirloin or round are great for grilling or pan-searing, they’re not ideal for slow-cooking in stews. These cuts lack the necessary connective tissues and fat, which are key to achieving tenderness. Instead, opt for cuts like:
- Chuck roast: Rich in marbling, it breaks down beautifully during slow cooking.
- Brisket: Another cut that benefits from long cooking, becoming tender and flavorful.
- Short ribs: Full of rich flavor and tenderness when braised.
2. Cooking at Too High a Temperature
Cooking your stew at too high a heat can cause the muscle fibers in the beef to seize up and become tough. When you cook beef too quickly, you also risk:
- The exterior of the meat becoming overcooked and dry, while the interior remains tough.
- The connective tissues in the meat not breaking down properly, leaving you with chewy, rubbery chunks.
The key is to cook your stew low and slow, keeping the temperature steady at a simmer rather than a boil. This gentle cooking method allows the beef to become tender and the flavors to develop.
3. Not Giving It Enough Time to Cook
Stews require patience. If you try to rush the cooking process, the meat won’t have time to fully break down and absorb the flavors. A minimum of 2–3 hours of slow simmering is typically necessary for tougher cuts of beef to become tender. The longer you cook, the more time the collagen in the meat has to convert to gelatin, which gives your stew that rich, luxurious texture.
4. Not Letting the Meat Rest After Browning
While browning the beef before adding it to the stew is essential for developing deep, savory flavor, many cooks skip the crucial step of letting the meat rest after it’s been seared. Allowing the browned beef to rest:
- Helps the juices redistribute, keeping the meat moist and tender.
- Prevents the meat from becoming overcooked or dry when it’s added to the stew.
After browning the beef, let it sit for a few minutes before adding it to the pot to lock in those juices.
5. Skipping the Deglaze Step
When you brown beef, you’ll notice flavorful brown bits sticking to the bottom of the pan. These caramelized bits, known as fond, are packed with intense flavor. Skipping the deglaze step, where you use a small amount of liquid (such as wine, broth, or water) to loosen these bits, means you miss out on a depth of flavor that can make your stew truly special.
Be sure to scrape up the fond before adding the beef and other ingredients to your pot. This ensures that no flavor goes to waste.
6. Adding Too Much Liquid Too Early
It’s important to avoid adding too much liquid at the start of the cooking process. While it’s necessary for braising, if you drown the beef too early, the meat won’t have a chance to brown properly or develop its full flavor. Instead, add the liquid in stages, allowing it to reduce slightly during cooking. This process will concentrate the flavors of the broth and help achieve a more robust taste.
7. Overcrowding the Pot
Adding too much beef to the pot at once can lead to overcrowding, which can prevent the meat from browning evenly and cause it to steam instead of sear. When beef stews, it’s essential to:
- Brown the meat in batches to ensure each piece is properly seared.
- Allow room for the meat to cook evenly and develop its flavor.
If the pot is too crowded, the beef will not achieve that golden-brown crust that enhances the stew’s depth of flavor.
8. Cutting the Meat Into Pieces That Are Too Small
When cutting your beef into cubes for stew, don’t make them too small. Smaller pieces cook too quickly and can become tough before they’ve had time to fully break down. Aim for 1 to 1.5-inch chunks so they can hold up during long cooking times and become properly tender.
By avoiding these common mistakes, you can ensure your beef stew will turn out tender, juicy, and full of flavor every time. Remember, slow cooking, the right cuts of beef, and a little patience are key to achieving the perfect texture. With these tips, you’ll be able to enjoy a stew that’s everything it should be—rich, tender, and absolutely mouthwatering.
FAQ: Secrets to Making a Truly Tender Beef Stew
Why Is My Beef Stew Meat Still Tough?
If you’ve followed a recipe and cooked your beef stew for hours, only to find that the meat is still tough and chewy, you’re probably wondering, “What went wrong?” There are several reasons why your beef stew meat may remain tough, even after a long cooking time. Understanding these common issues can help you troubleshoot and prevent this problem in the future, ensuring that you achieve the tender, melt-in-your-mouth beef stew you’ve been craving.
1. Using the Wrong Cut of Beef
The cut of meat you use plays a crucial role in the texture of your stew. Tough cuts of beef, like chuck roast, brisket, and short ribs, are ideal for stews because they contain more connective tissue and fat, which break down during the slow cooking process, making the meat tender. On the other hand, lean cuts such as sirloin, round, or tenderloin are not suitable for stews. These cuts lack the necessary collagen and fat that break down and melt into the stew’s liquid, contributing to the tender texture.
If your beef stew meat is still tough, you may have accidentally used a cut that doesn’t have enough marbling or connective tissue to become tender during the slow cooking process.
2. Not Cooking Long Enough
One of the biggest mistakes you can make when making beef stew is not cooking it long enough. Stews require slow, sustained cooking to break down the tough fibers in the meat. If the stew is cooked at too high a heat or for not enough time, the collagen in the meat will not have the opportunity to break down into gelatin, which is what gives the stew its rich texture.
To achieve a tender result, your beef stew should cook for at least 2 to 3 hours on a low simmer. This will give the collagen in the tougher cuts of meat the time it needs to break down and create that melt-in-your-mouth texture. If the meat is still tough, try cooking it longer at a lower temperature.
3. Cooking at Too High a Temperature
If you cook your stew at too high a temperature, the meat will cook too quickly, causing the muscle fibers to contract and become tough. High heat can also cause the meat to lose its juices, making it dry and chewy. The key to a tender beef stew is to simmer the stew gently over low to medium heat. This will allow the meat to cook evenly without becoming tough.
4. Not Letting the Meat Rest After Browning
Browning the beef before adding it to the stew pot is essential for developing rich, savory flavor. However, many cooks skip the crucial step of letting the meat rest after browning. If you don’t allow the meat to rest, the juices inside will be forced out when you add it to the stew, leading to dry, tough meat.
Allow the beef to rest for a few minutes after browning to let the juices redistribute. This step helps retain moisture in the meat, ensuring that it stays tender during cooking.
5. Not Using Enough Liquid
Stew meat needs to cook in enough liquid to remain tender. If you don’t add sufficient broth, stock, or water to the pot, the meat will dry out as it cooks. The liquid helps break down the collagen in the meat and keeps it moist and tender. When making beef stew, make sure that the liquid covers the meat and vegetables entirely, allowing everything to simmer gently for the best results.
If your stew is too dry, add a little more liquid as it cooks to keep it moist and flavorful.
6. Cutting the Meat Into Too Small Pieces
If the beef is cut into too small pieces, they can overcook too quickly, becoming dry and tough. Small pieces of meat will also have less of a chance to absorb the flavorful broth and become tender. To avoid this, cut your beef into larger chunks, about 1 to 1.5 inches. This allows the beef to cook at a slower pace and absorb more flavor from the broth, ensuring a tender texture.
7. Adding Acid Too Early
Acidic ingredients like tomatoes, vinegar, or wine are often added to stews to balance out the richness and enhance flavor. However, adding too much acid too early in the cooking process can have a negative effect on the meat’s tenderness. Acid can toughen proteins if introduced too early, making the meat harder to break down. It’s best to add acidic ingredients towards the end of cooking, allowing the meat to fully tenderize before introducing the acidity.
8. Overcrowding the Pot
Overcrowding the pot with too much meat or vegetables can prevent the beef from browning properly, causing it to steam rather than sear. Browning the beef before adding it to the stew enhances the flavor and texture, but overcrowding the pot can prevent proper caramelization, which affects the overall taste. To avoid this, brown the beef in batches and ensure that the pieces have enough room to cook evenly.
9. Not Resting the Stew After Cooking
Just like when cooking meat, allowing the stew to rest after cooking can improve the texture. Once you remove the pot from the heat, let it sit for 10 to 15 minutes before serving. This resting period allows the juices to redistribute and the flavors to continue melding, which results in a more tender, flavorful dish. Reheating the stew also helps to continue tenderizing the meat and ensures the stew is at its full flavor potential.
In summary, there are several factors that can contribute to tough beef stew meat, from the cut of beef used to cooking temperature and time. By ensuring you’re using the right cut, cooking at a low temperature, and following other key tips, you can avoid these common mistakes and achieve a tender, flavorful stew every time. If your beef stew is still tough, take a look at these common issues and make adjustments in your cooking process for perfect results.
Should I Use Homemade or Store-Bought Broth for Richer Flavor?
When making beef stew, one of the most important ingredients for enhancing the depth of flavor is the broth. The choice between homemade and store-bought broth can significantly impact the final taste of your stew. While both options have their merits, understanding the differences between them can help you decide which one will best suit your recipe. Let’s break down the pros and cons of homemade broth and store-bought broth to help you achieve a rich, flavorful beef stew.
Homemade Broth: The Ultimate in Richness and Depth
Homemade broth, especially if made from beef bones, offers an incredible level of richness and depth that is difficult to match with store-bought alternatives. The process of simmering bones with vegetables, herbs, and spices allows the flavors to develop slowly over hours, creating a deeply flavorful and nourishing base. Here’s why homemade broth is often the preferred choice for a stew:
- Customization: One of the biggest advantages of homemade broth is that you have full control over the flavor profile. You can adjust the seasonings, herbs, and vegetables to suit your personal taste, and you can easily control the level of salt and fat in the broth. This is particularly beneficial if you’re trying to achieve a more complex flavor for your stew.
- Collagen-Rich and Gelatinous: If you make your broth from beef bones, particularly marrow or oxtail, it will be naturally rich in collagen. This gives your stew a velvety, luxurious texture as the gelatin released during the cooking process adds body to the broth and tenderizes the meat. Homemade broth enhances the mouthfeel of your stew in a way that store-bought versions can’t replicate.
- Health Benefits: Homemade broth, especially one made from bones and joints, contains nutrients like gelatin, collagen, and amino acids that promote gut health, improve skin elasticity, and support joint function. For those looking to add extra nutritional value to their stew, homemade broth is a great choice.
- Quality Control: By making your own broth, you can ensure there are no artificial additives, preservatives, or excess sodium, which is common in many store-bought varieties. Homemade broth is cleaner and can be healthier than commercial alternatives.
Store-Bought Broth: Convenience and Consistency
While homemade broth may be the gold standard for flavor and richness, store-bought broth offers undeniable convenience, especially when you’re short on time or don’t want to go through the lengthy process of simmering bones for hours. Here are the benefits and drawbacks of using store-bought broth in your stew:
- Convenience and Speed: The most obvious benefit of store-bought broth is its convenience. It’s ready to use, meaning you can skip the long process of making broth from scratch. This is perfect for busy cooks or those who need a quick solution without sacrificing too much flavor. Many store-bought broths also come in cartons or cans, which are easy to store and have a long shelf life, making them a practical option for last-minute stews.
- Consistency: Store-bought broths offer consistent flavor and quality from batch to batch. If you’re looking for a quick, reliable option that won’t vary in taste, store-bought is a solid choice. Brands like Swanson, College Inn, and others ensure that you get a similar flavor each time, eliminating any guesswork that can come with homemade broth.
- Varieties for Every Diet: Many store-bought broths are available in a variety of types, including low-sodium, gluten-free, or organic options, making them a flexible choice for different dietary needs. You can easily find broths that fit specific health goals or preferences.
- Cost-Effective: If you’re cooking in large quantities or don’t want to invest time and money in making your own broth, store-bought broth can be a budget-friendly option. You won’t need to purchase a large number of bones or ingredients, and you can still achieve a flavorful stew.
How to Make Store-Bought Broth Taste More Like Homemade
If you opt for store-bought broth but want to elevate its flavor, there are a few ways to boost its richness and make it more like homemade:
- Simmer the Broth with Aromatics: Add fresh herbs like thyme, rosemary, or bay leaves, along with onions, garlic, and carrots. Simmer these ingredients in the broth for 30 to 60 minutes to allow the flavors to meld together.
- Roast the Bones: If you’re using store-bought broth as a base, consider adding roasted beef bones or vegetables to intensify the flavor. Roasting brings out a caramelized depth of flavor that will make the broth taste more like homemade.
- Add Tomato Paste or Worcestershire Sauce: For an extra layer of flavor, you can stir in a spoonful of tomato paste or a dash of Worcestershire sauce. These ingredients provide a savory, umami-packed depth that will enhance the overall richness of the broth.
- Season Well: Store-bought broth often lacks the depth and seasoning of homemade varieties. Taste the broth and adjust the salt and pepper, or add a splash of soy sauce for more complexity. Don’t forget a pinch of sugar or a splash of vinegar to balance the acidity and sweetness.
Which One Is Best for Your Beef Stew?
The choice between homemade and store-bought broth ultimately depends on your needs:
- For the best flavor and richness, homemade broth is hard to beat. If you have the time and want to create the most flavorful, gelatin-rich beef stew, homemade broth is the way to go. It gives you control over the flavors and provides the best texture and depth.
- For convenience and consistency, store-bought broth is a great option. It’s quick, reliable, and works well for those who need to save time. With a few tweaks, such as adding aromatics or seasoning, you can still create a hearty stew.
In conclusion, while homemade broth is often the superior choice for creating a rich, tender beef stew, store-bought broth can still provide a solid foundation with the right adjustments. Choose based on your time, budget, and flavor preferences, and don’t hesitate to experiment with both options to find what works best for you.
How Can I Fix a Stew That Tastes Bland?
It’s a frustrating moment when you’ve spent hours cooking a hearty stew, only to taste it and find it lacking in flavor. A bland stew can feel like all the effort you put into choosing the right cuts of meat, vegetables, and seasonings was for nothing. Fortunately, there are several ways to salvage a bland beef stew and elevate its flavor without starting from scratch. Here are some key strategies to turn a bland stew into a rich, flavorful masterpiece.
1. Season Generously with Salt and Pepper
One of the most common reasons a stew might taste bland is simply that it hasn’t been seasoned properly. Salt is the key to unlocking the flavors of the ingredients in your stew. Without enough salt, even the best cuts of meat and vegetables won’t shine. Similarly, pepper adds an essential touch of spice and complexity.
- Tip: Taste your stew and add salt in small increments, stirring it in and allowing it to dissolve. Pepper can be added in similar amounts, or you can even use a freshly ground peppercorn to enhance the aroma. A dash of sea salt or kosher salt can help amplify flavors, especially if your stew was simmered for a long period.
2. Add More Aromatics
Aromatics like onions, garlic, celery, carrots, and leeks form the base of a great stew. If your stew tastes flat, it might be missing the depth these ingredients bring. Adding more freshly sautéed aromatics can immediately enhance the stew’s flavor profile.
- Tip: If you haven’t already, consider sautéing some additional onions and garlic in butter or oil until they’re caramelized before adding them to the stew. The natural sweetness from caramelizing onions brings out a wonderful flavor that can enrich a bland base.
3. Boost the Umami with Tomato Paste and Soy Sauce
Umami is the fifth taste, often described as savory, and it plays a critical role in creating a balanced, flavorful stew. Sometimes, a stew may lack this depth, making it taste one-dimensional. Tomato paste and soy sauce are great additions for boosting the umami profile in your stew.
- Tomato paste: Adds a rich, savory flavor and a bit of sweetness. Stir in a tablespoon or two while your stew is simmering to give it a deeper, more complex taste.
- Soy sauce: A splash of soy sauce (or even Worcestershire sauce) can enhance the umami factor, adding a savory and slightly tangy richness that will elevate the overall flavor of your stew.
- Tip: Be careful with how much soy sauce you add, as it is salty. Start with a small amount and taste as you go, adjusting it to your liking.
4. Add Herbs and Spices for Extra Flavor
Herbs and spices are essential for creating a stew with layers of flavor. If your stew is missing that complexity, experiment with adding fresh herbs like thyme, rosemary, bay leaves, or parsley. Alternatively, dried spices such as paprika, cumin, or garam masala can introduce a warmth and depth that transforms a bland stew into something more exciting.
- Tip: Fresh herbs should be added toward the end of the cooking process to preserve their vibrant flavors, while dried herbs can be added earlier to allow the flavors to infuse throughout the stew. If you’re using dried spices, be cautious not to overpower the stew with too many strong flavors.
5. Add a Splash of Acid to Brighten the Flavor
Sometimes, a stew feels flat simply because it lacks brightness or balance. Acidic ingredients, such as vinegar or lemon juice, can cut through the richness of the meat and bring a more dynamic taste to the dish. A splash of red wine vinegar, apple cider vinegar, or even a squeeze of lemon juice can do wonders.
- Tip: Add vinegar or lemon juice just before serving to maintain their fresh flavor. Taste the stew before adding acid and adjust to ensure you don’t go overboard. A small amount can work wonders, but too much can make the stew overly tart.
6. Consider Adding Stock or Broth
If your stew tastes bland due to a lack of liquid flavor, consider replacing or supplementing the water with a richer broth or stock. While water dilutes the overall flavor, using a high-quality beef stock or bone broth can infuse your stew with an added richness.
- Tip: You can also make a quick broth by combining some beef bouillon cubes or beef concentrate with water. This adds depth without having to create a stock from scratch. Just be sure to adjust the salt as some store-bought broths can be quite salty.
7. Sweeten It Slightly
A subtle touch of sweetness can balance the other flavors in a stew. A pinch of sugar, honey, or maple syrup can help mellow out any bitterness and bring a well-rounded flavor to the dish. This works particularly well if your stew contains tomatoes or has a slight acidic bite.
- Tip: Start with just a small amount and taste as you go. A little sweetness can make a big difference, but it’s easy to overdo, so proceed with caution.
8. Simmer Longer to Develop Flavors
If the stew still feels a little bland after adjusting the seasonings and adding more aromatics or liquids, consider letting it simmer for a little longer. The slow simmering process allows the flavors to meld together and intensify. Even if your stew seems almost done, giving it another 30-60 minutes on low heat can bring out deeper flavors.
- Tip: When simmering for longer periods, check the stew occasionally to ensure it doesn’t reduce too much. Add a bit of liquid if necessary to maintain the consistency you want.
9. Add a Touch of Fat for a Richer Flavor
Sometimes a stew can taste bland because it’s missing that rich mouthfeel that fat provides. Adding a knob of butter, a glug of olive oil, or even a spoonful of cream at the end of cooking can give your stew the richness it needs. This extra fat will coat the palate and provide a fuller, more satisfying flavor.
- Tip: Stir in the fat just before serving to keep the stew from becoming greasy. You can also add a drizzle of extra virgin olive oil or a dollop of sour cream as a garnish for added creaminess.
In conclusion, fixing a bland beef stew is often a matter of layering and balancing flavors. With the right additions of salt, acid, sweetness, and seasoning, you can quickly transform a disappointing dish into a comforting, flavorful meal. By using the tips above, you’ll be able to rescue any bland stew and ensure that your next one is packed with the rich flavors you desire.
What’s the Best Way to Store and Reheat Tender Stew?
Proper storage and reheating are essential to preserving the tenderness and flavor of your beef stew. If not done correctly, reheating can result in tough meat and loss of moisture, which would undo all the care you put into making your stew tender and flavorful. Here’s how to store and reheat your stew so it remains just as delicious as when it was first made.
1. Storing Beef Stew for Optimal Freshness
The key to storing stew properly is to ensure it stays fresh, while also maintaining its texture and flavor. Here’s how to store your stew the right way:
- Cool it down quickly: After you finish cooking your stew, it’s crucial to let it cool to room temperature before storing it. However, don’t leave it out for more than 2 hours to avoid bacterial growth. To speed up the cooling process, you can place the pot in a sink of cold water, making sure no water gets inside the pot.
- Store in airtight containers: Once your stew has cooled, transfer it into airtight containers or a resealable plastic bag. If you’re using containers, make sure they are deep enough to allow some space for liquid expansion during freezing.
- Divide into portions: If you don’t plan on eating all of your stew at once, consider dividing it into smaller portions. This makes it easier to reheat only what you need, while preventing unnecessary exposure to heat that can degrade the flavor and texture.
- Refrigerating vs. Freezing: If you’re planning to eat the stew within a few days, store it in the refrigerator. However, if you want to keep it for a longer period, freezing is your best option. Beef stew can be safely frozen for up to 3 months, though it’s best eaten within the first 2 months for optimal flavor and texture.
2. Reheating Beef Stew Without Losing Tenderness
Reheating beef stew requires careful attention to ensure that the meat stays tender and doesn’t become overcooked or tough. Here are some methods for reheating your stew properly:
- Stovetop Method:
- Low and slow: The best way to reheat stew is to do it slowly. Place the stew in a pot on the stove over low heat. Stir occasionally to ensure it heats evenly. This method is great because it prevents the stew from becoming too hot too quickly, which could cause the meat to become tough.
- Add liquid if necessary: During reheating, the stew may thicken. If it seems too thick, add a small amount of broth, water, or even wine to loosen it up. Be sure to taste and adjust seasonings as needed after adding liquid.
- Oven Method:
- Covered baking dish: If you want to reheat a larger batch of stew, the oven is another good option. Place your stew in an oven-safe dish and cover it with foil to prevent it from drying out. Set the oven to low heat (about 300°F or 150°C) and heat for 20-30 minutes, or until it’s heated through. This method evenly warms the stew without compromising its texture.
- Microwave Method:
- Quick reheating: If you’re in a hurry, you can use the microwave, but this method can sometimes lead to uneven heating, so proceed carefully. Place the stew in a microwave-safe container and cover it with a microwave-safe lid or plastic wrap. Heat on medium power in 1-minute intervals, stirring after each interval to ensure even reheating.
- Avoid Overheating: Regardless of the method you choose, be careful not to overheat the stew, as this can result in the meat becoming tough and the flavors breaking down. Reheat only until it’s hot, and don’t bring it to a boil.
3. How to Keep Your Stew Moist When Reheating
One of the biggest challenges in reheating stew is preventing it from drying out, especially if it has already been cooked for a long time. Here’s how you can retain moisture:
- Add moisture during reheating: As mentioned above, adding a little bit of liquid can help maintain the stew’s consistency. Adding a splash of beef broth or water will prevent the stew from becoming too dry and ensure the flavors remain intact.
- Stir frequently: Stirring the stew as it reheats helps to redistribute the liquids, ensuring that the meat and vegetables stay moist. Stirring also prevents the stew from scorching on the bottom of the pot or dish, which can affect both the texture and flavor.
- Use a slow cooker for gentle reheating: If you want a method that combines convenience and tenderness, using a slow cooker or crockpot can be ideal. Set the slow cooker on the low heat setting, and let it warm up slowly over a couple of hours. Add a little extra broth or stock to keep the stew moist.
4. Freezing and Reheating Beef Stew
Freezing leftover beef stew is a great way to enjoy it later, but proper thawing and reheating are crucial for preserving its flavor and texture. Here’s how to do it right:
- Thawing: For the best results, thaw your stew overnight in the refrigerator. Avoid thawing at room temperature, as this can promote bacterial growth. If you’re short on time, you can thaw the stew in the microwave using the defrost setting, but it’s not ideal for maintaining texture.
- Reheating frozen stew: Once thawed, reheat the stew using the stovetop or oven method mentioned above. If reheating directly from frozen, the slow cooker method can be helpful. Set the cooker on low and let the stew thaw and heat gradually over several hours.
- Avoid refreezing: Once the stew has been reheated, do not refreeze it, as this can lead to a significant deterioration in both texture and flavor.
5. Final Touches When Reheating
After reheating your beef stew, consider adding a final touch to enhance its flavor before serving:
- Garnish: Fresh herbs like parsley or rosemary can revive the freshness of the dish, making it feel like it was just made. A dash of fresh ground pepper or a small spoonful of sour cream can elevate the flavor even further.
- Taste and adjust: After reheating, always taste your stew and adjust seasoning if necessary. Sometimes, the flavor can mellow out after refrigeration or freezing, so you may need to add a pinch of salt, a squeeze of lemon juice, or a dash of Worcestershire sauce to bring the flavors back to life.
In conclusion, knowing the best way to store and reheat your tender beef stew is key to enjoying it later without sacrificing quality. By following the tips above, you can ensure that your stew stays tender, moist, and as flavorful as the day you made it.
Conclusion
Making the perfect, tender and rich beef stew isn’t about a single magic ingredient—it’s about mastering the right technique and choosing the best cuts of beef. From selecting marbled chuck roast to ensuring the stew simmers at a gentle heat, each step plays a role in achieving a stew that’s packed with flavor and incredibly tender. Don’t forget the importance of seasoning and the right liquid base to enhance richness.
By avoiding lean cuts, embracing slow cooking, and following the tips for resting and reheating, you can enjoy a stew that only gets better with time. Whether you’re a seasoned cook or a beginner, these secrets will take your beef stew to the next level.
Now it’s your turn! Give this method a try, and feel free to share your results or any personal tweaks in the comments below. We’d love to hear about your own experiences and favorite ways to create a delicious, melt-in-your-mouth beef stew.