
Introduction
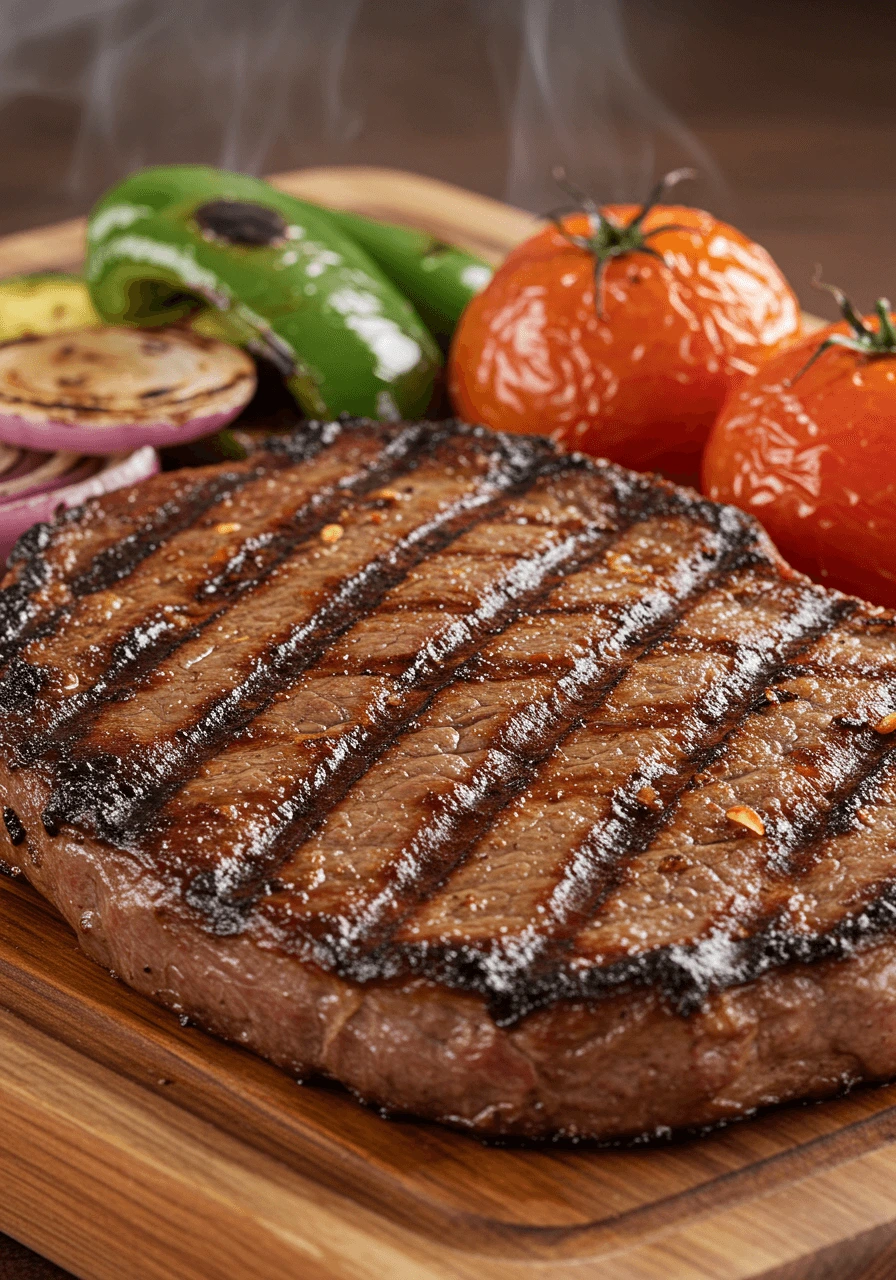
Asada meat is all about bold flavor, smoky edges, and tender bites—and mastering it is easier than you think. Whether you’re grilling over an open flame or searing on a cast iron skillet, learning how to achieve that perfectly charred crust can transform your cooking game. In this guide, we’ll break down everything you need to know to cook asada meat like a pro, from choosing the right cut to locking in that irresistible flavor.
Why Charred Flavor Matters in Grilled Asada Meat
Want to learn how to prepare asada meat with the perfect grilled flavor? Discover the secrets to achieving that ideal charred taste.
What Makes That Smoky Char Flavor So Addictive in Asada?
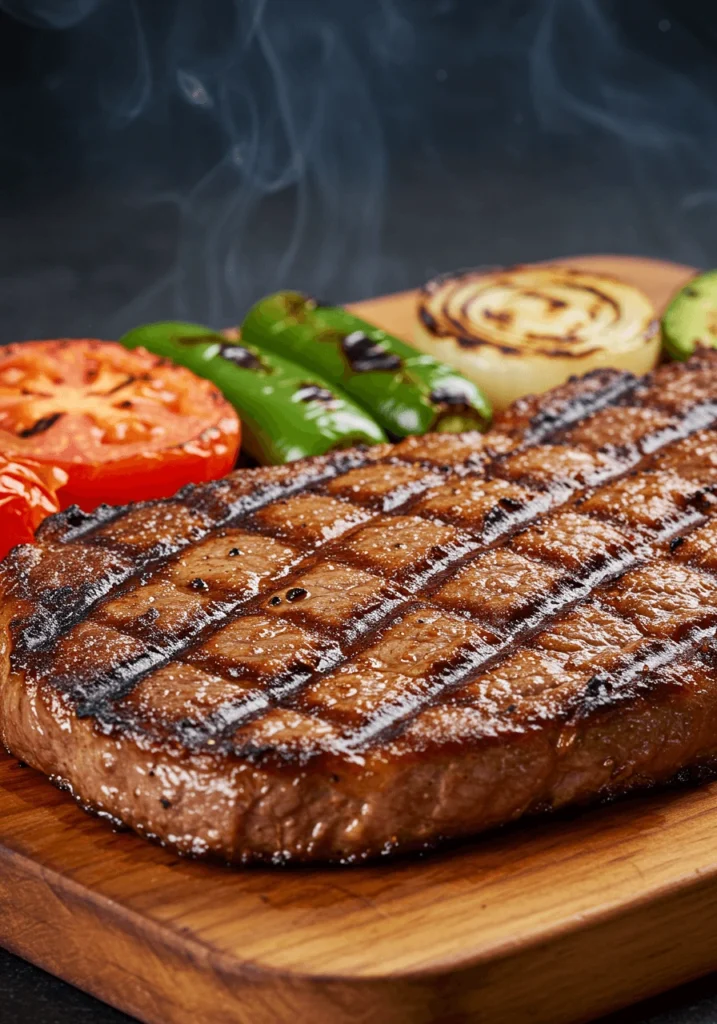
That mouthwatering smoky char on asada meat isn’t just a sign of great grilling — it’s a flavor bomb. When meat hits high heat, especially over open flame or in a cast iron skillet, it starts to caramelize and sear. This is where the magic happens.
The charred edges bring out deep, complex flavors — a combination of smokiness, subtle bitterness, and a slightly sweet crust that enhances the meat’s natural juices. It’s not just about taste either. That dark crust adds a satisfying texture that contrasts with the juicy interior, making each bite more dynamic.
Part of the addictive flavor also comes from the fats and sugars in the marinade reacting to heat. When combined with spices like paprika, cumin, garlic, and the acidity of lime juice, the char intensifies these flavors rather than dulling them.
Plus, let’s be honest — charred meat triggers nostalgia. It reminds us of backyard barbecues, street food vendors, or weekend cookouts. That emotional link makes it even more satisfying.
So why is it addictive? Because it delivers bold flavor, crispy texture, and a rush of smoky satisfaction — all in one bite.
The Maillard Reaction: Science Behind the Perfect Sear
If you’ve ever wondered what gives asada meat that rich, savory, slightly crispy crust, it all comes down to a powerful bit of kitchen science called the Maillard reaction. This isn’t just fancy food talk — it’s the key to unlocking deep, irresistible flavor.
The Maillard reaction happens when amino acids (from the protein in meat) react with natural sugars under high heat. This chemical process creates hundreds of new flavor compounds and aromas — the kind that make you say, “Wow, this smells amazing!” the moment that meat hits a hot grill or skillet.
It’s the reason seared steak, toasted bread, and roasted coffee all share that rich, brown color and deeply satisfying taste. For asada meat, it’s what turns a simple piece of beef into something smoky, crispy, and complex.
But here’s the catch — the Maillard reaction needs the right conditions. Too much moisture (like wet meat) or too low a temperature will prevent it from happening properly. That’s why drying the meat with a paper towel and preheating your grill or pan until it’s screaming hot is so important.
In short: no Maillard reaction, no flavor crust. Master this one reaction, and you’re well on your way to grilling like a pro.
Charred Texture and Grilled Aroma: Flavor Boosters Explained
When you take a bite of asada meat, the charred texture and grilled aroma aren’t just things you notice — they’re part of what makes this dish so mouthwatering. Let’s break down how these elements work together to create an unforgettable flavor experience.
First, the charred texture. The crispy, slightly crunchy exterior of asada meat comes from the intense heat of the grill or pan. When meat is exposed to high heat, the outer layer undergoes a process called caramelization. This is where the sugars in the meat’s natural fats start to brown, creating a crispy, savory crust. The combination of a juicy, tender interior with that crunchy exterior adds layers of texture, making each bite both satisfying and flavorful.
But texture alone doesn’t cut it. The grilled aroma — that smoky scent that fills the air as the asada cooks — plays a huge role in how we experience flavor. When meat cooks over an open flame, the fats drip onto the hot coals or pan, creating smoke. That smoke infuses the meat with an unmistakable smoky flavor that we associate with barbecue and grilled food.
But it’s not just any smoke. The way the fat burns and the grill marks form adds depth to the aroma, making it more intense. This aroma combines with the sight of the sizzling meat to heighten our anticipation, signaling to our brains that something delicious is cooking.
Together, the charred texture and grilled aroma do more than just make asada meat taste amazing — they engage all of our senses. The crunch, the smokiness, and the sizzle all come together to create a rich flavor experience that can’t be matched by just cooking meat on a stove or in an oven.
Best Cuts of Meat and Prep Tips for Perfectly Charred Asada
If you want to learn how to cook asada meat like a pro, here’s a step-by-step guide to help you achieve that perfect result.
Flank Steak vs. Skirt Steak: Top Choices for Grilled Asada
When it comes to making grilled asada, choosing the right cut is crucial. Two popular options are flank steak and skirt steak. Both are flavorful and great for grilling, but they differ in texture and fat content.
Flank Steak: Lean and Tender with Rich Flavor
Flank steak comes from the cow’s lower abdominal muscles. It’s a leaner cut, wider, and flatter than skirt steak, which makes it easier to slice.
- Flavor: Flank steak has a rich taste but is less fatty than skirt steak. It’s a great option if you want a lean cut that still delivers on flavor.
- Texture: This cut is firmer and chewier. To ensure tenderness, always cut against the grain. Flank steak can be just as tender as skirt steak with the right prep.
- Best For: Flank steak is perfect for tacos, fajitas, or as a standalone steak. Marinating it will enhance its flavor.
Skirt Steak: Rich, Fatty, and Full of Flavor
Skirt steak comes from the diaphragm muscles and has long muscle fibers. It’s more marbled with fat than flank steak, which makes it juicy and tender.
- Flavor: Skirt steak is more flavorful due to its higher fat content. The fat renders during cooking, adding richness and tenderness.
- Texture: The meat is more tender, with a melt-in-your-mouth quality. Be sure to slice against the grain for the best texture.
- Best For: If you want rich, juicy asada meat, skirt steak is the way to go. It works well in tacos, burritos, or as a main dish.
Which Is Better for Grilled Asada?
It depends on what you prefer. If you want a leaner cut, go with flank steak. If you want richer, juicier meat, choose skirt steak. Skirt steak is the traditional choice for asada meat due to its flavor and tenderness.
Both cuts can give you great charred flavor, but skirt steak is often favored for its juiciness. Either way, both cuts will make delicious asada meat for your grill.
How to Marinate Asada Meat for Deep, Smoky Flavor
Marinating asada meat isn’t just about adding flavor; it’s about transforming the meat into something special. The right marinade can infuse the meat with rich, smoky, and savory flavors that elevate every bite. Here’s how to marinate your asada meat to achieve the perfect balance of smokiness and tenderness.
Key Ingredients for the Perfect Marinade
A great marinade combines several elements: acid, oil, herbs, and spices. These work together to tenderize the meat and create a deep, smoky flavor. Here’s what you’ll need:
- Acid: Citrus juice (lime or orange) is a classic choice for asada meat. The acidity helps break down muscle fibers, making the meat more tender. It also adds a zesty brightness that complements the smoky flavor from grilling.
- Oil: Olive oil or vegetable oil helps distribute the marinade evenly and keeps the meat moist during grilling. It also helps carry the flavors of the herbs and spices into the meat.
- Garlic & Onions: Freshly minced garlic and onions give your marinade a savory base. These aromatic ingredients add depth to the flavor and enhance the overall taste of the asada.
- Herbs & Spices: A blend of cumin, paprika, oregano, and a pinch of cayenne pepper (if you like a little heat) will create the signature flavor profile of asada meat. Don’t forget a generous amount of black pepper and salt to season.
- Soy Sauce or Vinegar: Adding a bit of soy sauce or vinegar can introduce umami, which adds richness to the flavor. Vinegar, in particular, helps tenderize the meat further.
Steps for Marinating Asada Meat
Now that you know the essential ingredients, follow these steps to marinate your asada meat for maximum flavor.
- Mix the Marinade: In a bowl, combine lime juice, olive oil, garlic, onion, and your spices. Add the soy sauce or vinegar for a boost of umami. Taste the marinade and adjust seasoning as necessary — it should be tangy, savory, and slightly spicy.
- Prep the Meat: Before marinating, make sure your asada meat is trimmed and pounded to an even thickness. This ensures the marinade penetrates evenly and the meat cooks consistently.
- Marinate: Place the meat in a resealable plastic bag or shallow dish and pour the marinade over it. Seal the bag or cover the dish, then refrigerate for at least 2 to 4 hours (overnight is ideal for deeper flavor). The longer it marinates, the more intense the flavors will be.
- Massage the Meat: During the marinating process, gently massage the bag or turn the meat in the dish to help the marinade infuse throughout.
Extra Flavor Tips
- Smoky Touch: For an extra layer of smokiness, consider adding a small amount of liquid smoke to the marinade. This will mimic the flavor of meat cooked over an open flame, even if you’re grilling indoors.
- Herb Variations: Feel free to experiment with fresh herbs like cilantro or thyme. Just remember that herbs like cilantro can become overpowering if left for too long in the marinade, so add them towards the end or right before grilling.
How to Know When It’s Ready
The marinade should soak in, but don’t leave the meat in for too long, especially if it contains acidic ingredients like lime or vinegar. If left too long, the acid can break down the meat too much, turning it mushy. For flank steak or skirt steak, marinate for 2-4 hours — they’re tender enough to absorb the flavors quickly.
Preparing Asada for the Grill: Patting Dry, Room Temp, and More
Before you even think about throwing your asada meat onto the grill, preparation is key. Properly preparing the meat ensures it cooks evenly, locks in flavor, and gets that perfect sear. Here’s how you can get your asada meat ready for the grill like a pro:
1. Patting the Meat Dry: Ensuring the Perfect Sear
Once your asada meat has marinated and is ready to hit the grill, the first step is to pat it dry with paper towels. While the marinade has added flavor, excess moisture can hinder the grilling process.
- Why Drying Matters: When there’s too much moisture on the surface of the meat, it can steam instead of searing. A sear creates that delicious, crispy, charred exterior, which locks in the juices and enhances the flavor. Removing any excess liquid from the surface is essential for achieving that beautiful, caramelized crust.
- How to Dry It: Gently pat the meat with paper towels until the surface is dry. Be sure not to press down too hard, as you don’t want to squeeze out the juices that have marinated inside the meat. Just focus on removing any liquid on the surface.
2. Bringing the Meat to Room Temperature
Before you throw your asada meat onto the grill, let it come to room temperature. This is an important step to ensure even cooking.
- Why Room Temperature Matters: Cold meat placed directly on a hot grill can cause the outer layers to cook too quickly while the inside remains undercooked. Allowing the meat to rest at room temperature for about 20-30 minutes ensures that it cooks more evenly, with the inside and outside heating up at the same rate.
- How to Do It: Simply take the asada meat out of the refrigerator and let it rest on a plate or cutting board at room temperature. Do not leave it out for too long, though — the goal is just to remove the chill from the fridge, not to let it sit out for hours.
3. Preheating the Grill: The Key to Perfectly Charred Asada
While your meat is coming to room temperature, don’t forget to preheat your grill. A hot grill is essential for getting that perfect sear.
- Gas vs. Charcoal Grills: If you’re using a gas grill, set it to high heat. For a charcoal grill, allow the coals to burn down to a glowing, white-hot state. A high temperature is critical to ensure that the asada meat gets a beautiful, crispy exterior while locking in the juices.
- The Right Grill Temperature: Aim for a grill temperature of about 450-500°F (232-260°C). This will give you the perfect searing heat without overcooking the meat.
4. Oil the Grill Grates
Before placing the asada meat on the grill, it’s a good idea to oil the grill grates lightly. This prevents the meat from sticking and helps with even cooking.
- How to Oil the Grates: Take a paper towel or cloth, dip it in oil, and use tongs to rub it over the grates. Don’t use too much oil, as this can cause flare-ups. A thin coat will do the trick.
- Why It’s Important: Oiling the grill grates ensures the meat doesn’t stick, making it easier to flip and turn. It also contributes to a more even sear, which results in better overall flavor and texture.
5. Optional: Scoring the Meat for Extra Flavor
While not always necessary, some cooks like to score the surface of their asada meat before grilling. Scoring means making shallow cuts in the meat, usually in a crisscross pattern, which can help in a few ways.
- Why Score the Meat?: Scoring helps the marinade penetrate deeper into the meat, especially if the cuts are thick. It also creates more surface area for that caramelized, crispy texture. Plus, scoring adds a nice visual touch to the final presentation.
- How to Do It: Use a sharp knife to make shallow cuts about 1/4 inch deep, following the natural grain of the meat. Make sure not to cut all the way through.
6. Seasoning the Meat (Optional)
While marinating gives the asada meat great flavor, adding a final layer of seasoning before grilling can take it to the next level.
- What to Use: A simple seasoning of salt, pepper, and cumin can enhance the existing flavors. Some prefer a bit of garlic powder or onion powder for extra depth.
- How to Season: Lightly sprinkle the seasoning on both sides of the meat just before placing it on the grill. Be careful not to over-season — you don’t want to overpower the marinade’s flavors.
In Conclusion: Preparation Sets the Stage for a Perfect Asada
The key to achieving that perfect grilled asada is in the preparation. By patting the meat dry, allowing it to come to room temperature, preheating the grill, and using the right techniques for oiling the grill and scoring the meat, you ensure that the asada meat will have that irresistible smoky flavor, crispy exterior, and juicy interior.
Grilling Tools and High-Heat Techniques for Charring Asada
Outdoor Grill vs. Cast Iron Skillet: Which Is Better for Asada?
When it comes to cooking asada meat, there are two main methods that often come to mind: grilling on an outdoor barbecue or using a cast iron skillet on the stovetop. Each method has its advantages, and the choice largely depends on the flavor you’re after, the texture you prefer, and the tools you have available. Let’s break down both options so you can choose the best one for your next asada cookout.
1. The Outdoor Grill: For That Classic Smoky Flavor
Grilling asada meat on an outdoor grill is often considered the gold standard for this type of dish. Here’s why grilling gives you that perfect charred flavor and smoky aroma.
- Smoky and Charred Flavor: An outdoor grill adds a distinctive smoky flavor to asada meat. The high heat from the grill, combined with the open flame or charcoal, allows the meat to caramelize on the surface, creating a delicious charred texture that enhances the flavor. This flavor profile is often what people associate with traditional asada.
- Direct Heat for a Quick Sear: The grill’s open flames provide intense direct heat, which is essential for creating a nice sear on the asada meat. This sear locks in the juices and flavors, ensuring a tender and flavorful bite.
- Grilling vs. Skillet: Unlike a skillet, grilling over an open flame allows the meat to cook more evenly on both sides, while maintaining a crispy exterior. The smoke from the grill adds layers of flavor that a cast iron skillet cannot replicate. Plus, grilling large cuts of meat at once makes it an ideal choice for outdoor barbecues with friends or family.
- Perfect for Large Batches: If you’re cooking for a group, the grill is the way to go. You can cook large quantities of asada meat at once, all while getting that perfect smoky flavor.
2. The Cast Iron Skillet: Crispy Sear and Controlled Cooking
If you don’t have access to an outdoor grill, or you prefer to cook indoors, a cast iron skillet is an excellent alternative. It can still give you a flavorful sear and a juicy, tender asada. Here’s why a cast iron skillet might be the best choice for you:
- Even Heat Distribution: A cast iron skillet retains heat extremely well, providing consistent, even cooking. This is especially useful for getting a perfect sear on the meat. While it may not provide the same smoky flavor as the grill, the cast iron skillet’s ability to hold heat allows for excellent browning, which enhances the flavor and texture.
- Ideal for Smaller Portions: If you’re cooking just a few pieces of asada meat, a cast iron skillet can be more efficient. It allows you to control the temperature better than a grill, preventing overcooking and helping you achieve the perfect level of doneness. For smaller batches, this method can often be quicker and more precise.
- A Crispy, Caramelized Exterior: Because of its heat retention, the cast iron skillet creates a beautifully crispy, golden crust on asada meat. This is perfect if you like a bit of extra texture on your asada, though you won’t get the smoky flavor you would on a grill. However, with the right seasoning and the addition of butter or oil, you can get a similar caramelized effect.
- Control Over Cooking Temperature: A cast iron skillet gives you the ability to regulate the heat easily, allowing for a slower, more controlled cook. If you’re looking for a tender asada with a balanced crust, this can be ideal, especially if you’re cooking indoors or in a limited space.
3. Comparison of Grill vs. Skillet: Pros and Cons
| Method | Pros | Cons |
|---|---|---|
| Outdoor Grill | – Smoky, charred flavor – Perfect for large portions – High heat for searing | – Requires outdoor space – Harder to control temperature – Not ideal for small batches |
| Cast Iron Skillet | – Excellent sear and caramelization – Great for small portions – Controlled cooking | – No smoky flavor – Limited in batch size – Can be messier with splatters |
4. The Best Option for Your Asada Meat
- Outdoor Grill: If you’re aiming for the traditional smoky flavor and charred texture that comes from grilling asada meat, then the outdoor grill is the better option. It offers that distinctive grilled aroma and crispy sear that is difficult to replicate indoors. It’s also great for large batches, making it perfect for cookouts, BBQs, or family gatherings.
- Cast Iron Skillet: If you’re cooking indoors, or only preparing a small amount of asada meat, the cast iron skillet can be a fantastic choice. It allows for precise temperature control and delivers a wonderful sear. While you won’t get the smoky flavor from the grill, you can still achieve a rich, delicious crust. It’s also perfect if you prefer to cook your asada meat in smaller portions.
5. Hybrid Method: Grill and Skillet Combo
If you’re craving the best of both worlds, consider using a hybrid method. Grill your asada meat on the outdoor grill for that perfect smoky flavor and sear, then finish it off in the cast iron skillet to crisp up the edges and lock in moisture. This technique combines the benefits of both methods and allows you to control the texture while still getting the iconic grilled asada flavor.
How to Control Grill Temperature for That Charred Crust
The key to achieving that perfect charred crust on asada meat is controlling the temperature of your grill. Whether you’re using a gas grill or a charcoal grill, temperature plays a crucial role in ensuring that the meat gets that crispy, caramelized exterior while locking in moisture and flavor. Here’s how to control your grill temperature and get that charred crust every time:
1. The Importance of Temperature Control for a Perfect Char
Before we dive into the details, it’s essential to understand why temperature control is crucial for getting that ideal charred crust.
- The Maillard Reaction: This chemical reaction, which occurs when proteins and sugars in meat are exposed to high heat, is what creates that delicious charred crust. If the heat is too low, the meat won’t sear properly, and you’ll miss out on that flavor. If the heat is too high, the exterior may burn while the interior remains undercooked. Achieving the right balance is key.
- Locking in Juices: A properly controlled grill temperature allows the asada meat to sear on the outside, sealing in the juices, which results in a tender, flavorful interior. Without a good sear, the meat can become dry and lose flavor.
2. Understanding the Ideal Grill Temperature for Searing
The ideal temperature for grilling asada meat is high heat, typically between 450°F and 500°F (232°C and 260°C). This temperature range is perfect for searing the meat and creating that crispy, charred exterior. Here’s how you can achieve it on both types of grills:
- Gas Grill: For a gas grill, preheat the grill with all burners set to high. Once it reaches the target temperature, you can adjust the burners to create direct and indirect heat zones. The direct heat zone should be where the asada meat is placed for the sear, while the indirect zone can be used for cooking through or keeping the meat warm after searing.
- Charcoal Grill: For charcoal grills, you’ll need to create a two-zone fire. Place the charcoal on one side of the grill, and leave the other side empty for indirect heat. Once the charcoal is burning hot and glowing, spread it evenly for a high, direct heat zone. This allows you to sear the asada meat quickly and then move it to the cooler side if necessary for finishing.
3. Using the Two-Zone Method for Even Cooking
While achieving a high temperature for searing is critical, you’ll also want to be able to control the cooking process as the meat cooks through. The two-zone method is the perfect way to achieve both a crispy exterior and a fully cooked interior.
- Direct Heat Zone: This is where you’ll place the asada meat for the initial sear. The high heat will sear the outside and create that charred crust. Keep the meat on the direct heat for a few minutes per side, depending on thickness and desired doneness.
- Indirect Heat Zone: After searing, move the meat to the cooler side of the grill, away from direct heat, to finish cooking more slowly. This helps prevent overcooking the outside while ensuring that the inside reaches your desired level of doneness.
- How to Set It Up: On a gas grill, simply turn off one of the burners to create the indirect heat zone. On a charcoal grill, make sure the charcoal is concentrated on one side of the grill, leaving the other side without coals. This creates a hot, direct side for searing and a cooler, indirect side for slower cooking.
4. How to Adjust Temperature When It’s Too High or Too Low
Temperature control can sometimes be tricky, especially if you’re working with a charcoal grill. Here’s how you can adjust if the temperature is too high or too low:
- If the Temperature Is Too High: If the grill is getting too hot and you notice the meat is burning too quickly on the outside, reduce the heat by adjusting the vents (for charcoal grills) or lowering the burners (for gas grills). You can also move the asada meat to the indirect heat zone to allow it to cook more slowly without burning.
- If the Temperature Is Too Low: If your grill is not hot enough, your asada meat won’t sear properly and will likely become dry and flavorless. For a gas grill, simply turn up the heat on all burners and allow the grill to preheat for a few more minutes. For charcoal grills, you may need to add more coals or spread them out to increase the heat.
- Checking the Temperature: For accurate temperature control, especially with a charcoal grill, it’s a good idea to use a grill thermometer. Many gas grills come with built-in thermometers, but you can always purchase a separate one to monitor the heat. For charcoal grills, using a temperature gauge or the “hand test” (holding your hand over the grill for a few seconds to judge the heat) can help ensure the correct temperature.
5. The Role of Lid Position in Temperature Control
The position of your grill lid can also affect temperature control, especially when cooking with a charcoal grill. Here’s how lid positioning can impact your asada meat:
- Closed Lid: Keeping the lid closed traps heat, creating an oven-like environment that cooks the meat evenly. This is especially helpful for larger cuts of asada that need to cook through. A closed lid helps maintain consistent temperature and moisture inside the grill, ensuring the meat cooks evenly while retaining its juiciness.
- Open Lid: If you’re just looking to sear the meat and create that initial charred crust, leaving the lid open is a good option. This allows you to control the direct heat better and ensures a crispy exterior. However, be mindful of the heat, as it can cause the meat to burn quickly.
6. Tips for Maintaining the Right Grill Temperature Throughout Cooking
- Preheat the Grill Properly: Always give your grill time to fully heat up before placing the asada meat on it. This ensures you have consistent, high heat when the meat hits the grill.
- Monitor the Meat Closely: Don’t just rely on the grill temperature; keep an eye on the asada meat. If you notice it’s starting to char too quickly, adjust the heat accordingly.
- Use a Meat Thermometer: While the perfect charred crust is important, you don’t want to overcook the meat. A meat thermometer can help ensure your asada reaches the right internal temperature (typically 135°F to 145°F for medium-rare to medium).
By understanding and controlling your grill temperature, you can create that perfect charred crust on your asada meat, ensuring that it’s crispy on the outside and tender and juicy on the inside. Whether you’re using a gas or charcoal grill, following these temperature control tips will help you achieve flawless results every time.
When to Flip Your Asada Meat for the Perfect Sear
One of the most important aspects of grilling asada meat is knowing when to flip it. The timing of flipping directly affects the charred crust and overall texture of the meat. Flip it too early, and you risk not getting the perfect sear. Flip it too late, and the exterior might burn while the inside remains undercooked. Understanding the right moment to flip your asada meat ensures that you lock in those mouthwatering juices while achieving the charred crust that makes this dish so irresistible.
1. The Ideal Searing Time: The Rule of Thumb
The general rule of thumb for flipping asada meat is to only flip it once during the grilling process. Flipping the meat multiple times can interrupt the searing process and lead to uneven cooking. Typically, asada should be flipped once halfway through the cooking time to ensure a nice charred crust and even cooking.
However, the timing of when to flip depends on a few factors like the thickness of the meat, the heat of the grill, and how intense you want the sear. Here’s a guideline for different thicknesses:
- Thin Cuts (about 1 inch thick): These cuts will only need about 3-4 minutes per side over high heat. You’ll want to flip them once the meat has developed a golden-brown sear on the first side.
- Thicker Cuts (over 1 inch thick): For thicker pieces, such as flank or skirt steak, it’s essential to allow the meat to sear longer on the first side. Typically, this will take 4-5 minutes. Once a good sear has formed, flip the meat to the other side to cook through while preserving that sear.
2. How to Know When to Flip: Look for the Signs
Knowing when to flip asada meat requires more than just watching the clock—it’s about paying attention to the visual cues on the meat. Here are some signs that your meat is ready to be flipped:
- Golden-Brown Crust Formation: After placing the meat on the grill, the first sign that it’s ready to flip is when a golden-brown crust has formed on the underside. If you gently lift the meat with tongs and it comes off the grill with ease (without sticking), that’s an indicator that it’s ready to be flipped. The surface should also have deep grill marks, showing that a good sear has developed.
- Juices Rising to the Surface: As the meat cooks, juices will start to rise to the surface of the meat. This is a good sign that the first side has been cooked enough, and it’s time to flip. When the juices start appearing on the top of the meat, you’ll know that the interior is starting to cook through and the sear on the first side has been achieved.
- Visual Texture Changes: Pay attention to the change in the texture of the meat. As the asada meat sears, the surface will appear slightly more opaque and will change in texture from raw to cooked. Once this transformation starts, it’s time to flip.
3. The Flip: Techniques for Best Results
When it comes to flipping asada meat, the technique can also make a difference in the final outcome. Here’s how to do it for the best results:
- Use Tongs, Not a Fork: Never use a fork to flip your asada because piercing the meat will release valuable juices, which could result in a dry piece of meat. Instead, use tongs or a spatula to handle the meat carefully, keeping the juices locked in.
- Avoid Pressing the Meat: Some people press down on the meat with a spatula to increase the sear, but this can squeeze out the juices and dry out the meat. Let the asada meat cook on its own, and don’t press it while it’s grilling.
- Flip Once, and Don’t Overflip: As mentioned earlier, flipping your asada only once allows the surface to sear properly and avoids disturbing the Maillard reaction. Overflipping leads to uneven cooking and can hinder the development of a flavorful crust.
4. Factors to Consider When Flipping
The perfect flip also depends on the heat and grill setup. Here’s how to adjust your flipping based on various grilling conditions:
- Hotter Grills: On grills with very high heat, such as a well-preheated charcoal grill, the sear happens more quickly, and you might need to flip the meat earlier—within 3-4 minutes per side.
- Cooler Grills: If your grill temperature is lower, it may take longer for the sear to form. In this case, give the asada meat more time on each side, closer to 5 minutes, before flipping.
- Thickness of the Meat: As mentioned, thicker pieces of asada meat (like flank steak or skirt steak) will need to cook longer on the first side to get that deep char. Be patient and resist flipping too early.
5. Using the Two-Zone Method for Flipping Strategy
If you’re using a two-zone grilling method (with direct and indirect heat zones), flipping your asada meat becomes more strategic. Here’s how to incorporate it:
- Sear First, Then Finish on Indirect Heat: For a thicker cut of asada, you can sear the meat on the direct heat side of the grill, flipping once halfway through. Once a good sear is achieved, move the meat to the cooler side of the grill to finish cooking through, ensuring the interior is cooked to your preferred level without overcooking the exterior.
- Flip to Create Grill Marks: When flipping on the direct heat side, rotate the meat slightly (about 45 degrees) to create crosshatch grill marks for extra flavor and visual appeal. This will also help sear the edges more evenly.
6. Resting After Flipping
Once you’ve flipped your asada meat and reached your desired level of doneness, remove it from the grill and allow it to rest for a few minutes before serving. Resting is crucial because it gives the juices time to redistribute throughout the meat, ensuring each bite is tender and full of flavor.
Final Thoughts on Flipping Your Asada Meat
Flipping your asada meat at the right time is critical for achieving the perfect sear and enhancing the overall flavor. By paying attention to the visual cues and understanding the best techniques for flipping, you can ensure that your asada meat is cooked to perfection every time. Keep these tips in mind, and you’ll consistently enjoy that delicious, charred crust with a juicy and tender interior.
Avoiding Mistakes That Burn Instead of Char Your Steak
While achieving that perfect charred crust is a key element of cooking asada steak, it can be a fine line between a flavorful sear and a burnt exterior. Overcooking or improperly grilling your asada meat can result in a bitter, blackened surface with an unpleasant burnt flavor. The goal is to avoid common mistakes that cause your steak to burn, allowing you to instead develop a beautiful, even char while keeping the meat tender and juicy on the inside.
1. Too Much Direct Heat: How to Avoid Over-Searing
One of the biggest mistakes when grilling asada meat is placing it directly over high, intense heat for too long. While high heat is necessary for developing that beautiful charred crust, too much of it can cause the meat’s exterior to burn before the inside is fully cooked. This can result in a bitter, carbonized layer on the surface of the steak.
To avoid this mistake:
- Monitor Your Grill Temperature: Use a thermometer to ensure your grill is preheated to the right temperature. Direct heat grilling should be done over a medium-high flame, which allows for searing without overcooking the meat. If the grill is too hot, move the steak to a cooler part of the grill to avoid burning it.
- Two-Zone Grilling Method: One way to manage this is by using the two-zone grilling method. This involves setting up your grill with one side over high heat for searing and the other side over lower, indirect heat for finishing the cooking process. Start by searing the steak on the hot side for a few minutes per side to develop the charred crust, then move it to the cooler side to finish cooking through without burning.
2. Leaving the Meat on the Grill Too Long: The Waiting Game
Overcooking is another frequent mistake that leads to burning. While it might seem tempting to leave your asada meat on the grill until it’s “done,” doing so can cause the exterior to char too much. The key is knowing when to flip and when to take it off the grill.
- Don’t Overstay Your Welcome: The ideal cooking time for asada usually ranges between 3 to 5 minutes per side, depending on the thickness of the steak and the temperature of the grill. Thin cuts like flank steak or skirt steak will need less time compared to thicker cuts. As a general rule, keep an eye on the color and texture of the surface and avoid letting it cook past the desired sear.
- The Resting Period: Once you’ve reached your perfect sear and desired internal temperature, don’t forget to rest the meat for a few minutes. This helps the juices redistribute throughout the steak, ensuring it remains tender and juicy. It also prevents overcooking from residual heat.
3. Moving the Meat Too Much: Let It Develop the Crust
Another common mistake is moving the asada meat around too much while it’s cooking. Constantly flipping or shifting the steak on the grill prevents it from forming that signature charred crust. Additionally, constantly turning the meat leads to uneven cooking and can make it harder to get that perfect balance of char and juiciness.
- Flip Once, and Only Once: Let the steak sear undisturbed on one side for a few minutes. You’ll know it’s time to flip when the meat easily releases from the grill and has developed grill marks or a brown crust. Flipping the steak too soon can result in a less defined sear, and flipping it too much can dry out the meat.
- Allow the Steak to Rest: After flipping, resist the urge to move it around the grill. Let it rest in place long enough to achieve the desired crust. Only move it to a different part of the grill if you’re using the two-zone grilling method for indirect heat.
4. Not Drying the Meat Before Grilling: Avoiding Excess Moisture
Excess moisture on the surface of the asada meat can be another reason for uneven or excessive charring. If the meat is too wet when placed on the grill, it will steam rather than sear, leading to a pale and unevenly cooked exterior. Furthermore, moisture can cause flare-ups, which might burn the outside of the meat before it’s fully cooked.
To avoid this mistake:
- Pat the Meat Dry: Before seasoning or marinating, pat the meat dry with paper towels to remove any excess moisture. This allows the steak to develop that perfect, even char while cooking, as it will no longer steam when placed on the grill.
- Use a Minimal Amount of Marinade: While marinating asada meat adds flavor, it’s essential not to overdo it. Excess marinade on the surface can lead to uneven charring. Always shake off the excess marinade before placing the meat on the grill to prevent flare-ups.
5. Ignoring the Importance of a Clean Grill
A dirty grill can lead to a host of problems, including sticking meat, uneven cooking, and a burnt flavor. Grates that haven’t been cleaned properly can transfer leftover food particles or charcoal to your asada, creating an unpleasant burnt taste.
- Clean the Grill Grates Before Use: Scrub the grill grates with a wire brush to remove any leftover food, grease, or ash. This ensures the asada meat has an unobstructed surface for searing and helps avoid any burnt residues from affecting the flavor.
- Oil the Grates: After cleaning, brush the grill grates lightly with oil to prevent sticking. This makes flipping the meat easier and ensures that the asada gets that even, consistent char.
6. Skipping the Rest Period After Grilling
After your asada meat is perfectly seared and cooked, one final mistake to avoid is cutting into it too soon. If you cut the meat right after grilling, the juices will pour out, leaving the steak dry and less flavorful.
- Allow the Meat to Rest: Resting is crucial. Let the asada sit for 5 to 10 minutes after removing it from the grill. This resting time lets the juices redistribute inside the meat, keeping it moist and tender while also ensuring that it doesn’t burn or dry out from overcooking.
Final Thoughts on Avoiding Mistakes That Burn Instead of Char Your Steak
By avoiding common mistakes like overcooking, excessive moisture, and improper flipping, you can ensure that your asada steak is perfectly charred, juicy, and flavorful every time. The key to achieving that perfect sear without burning lies in understanding how heat, timing, and technique work together. By following these tips and techniques, you’ll avoid the common pitfalls that lead to burnt meat and enjoy a beautifully charred, tender piece of asada.
How to Char Asada Meat Indoors Without a Grill
Cast Iron Searing: How to Get Grill Marks on the Stove
Grilling outdoors is great for achieving charred flavor and grill marks. However, cast iron searing can give you the same result indoors. Cast iron skillets heat evenly and retain heat well, making them perfect for creating that sought-after sear on asada meat. If you don’t have an outdoor grill, mastering cast iron searing is the key to getting perfect grill marks on your steak.
1. Why Cast Iron Is Perfect for Searing Asada Meat
Cast iron skillets are ideal for searing asada because they retain heat and distribute it evenly. This allows you to achieve a deep, caramelized crust on your meat. The rough surface of a cast iron pan also helps create grill marks. When you sear asada steak in a cast iron skillet, the meat makes direct contact with the hot surface, forming perfect charred lines.
2. Preheat the Cast Iron Skillet for Maximum Heat
For the best results, you must preheat your cast iron skillet before cooking. This ensures that the skillet gets hot enough to sear the asada steak properly.
- Heat the Skillet: Place the skillet over medium-high heat for about 5-10 minutes. The pan should be smoking lightly when it’s ready. To check, drop a few water droplets onto the skillet. If they evaporate quickly, it’s hot enough.
- Use Oil with a High Smoke Point: Choose an oil with a high smoke point, like vegetable or canola oil. Swirl it in the pan and let it heat until it shimmers. This will help you achieve a crisp, flavorful crust on the steak.
3. Don’t Overcrowd the Skillet: Give Each Steak Room to Sear
Overcrowding the pan can lower the skillet’s temperature. This results in steamed, not seared, asada meat. To prevent this, cook the meat in batches, ensuring each piece has enough space.
- Cook in Batches: Depending on the size of your skillet, cook one or two pieces of asada steak at a time. This allows each piece to sear properly and get those distinct grill marks.
- Don’t Move the Meat: Once the asada steak is in the skillet, don’t move it around. Let it sit undisturbed for 3-4 minutes so it can sear and form a crust. This is essential for achieving that beautiful, charred exterior.
4. The Secret to Getting Perfect Grill Marks
Getting those signature grill marks in a cast iron skillet is all about technique and timing. Follow these steps for perfect results:
- Place the Meat at an Angle: When placing the asada steak in the pan, angle it at 45 degrees. This allows the meat to sear in a way that creates a crosshatch pattern. After 3-4 minutes, rotate the steak 90 degrees to form the opposite direction of grill marks. Repeat for the other side.
- Press Down Gently: If you want deeper grill marks, press the steak down gently with a spatula or tongs. Be careful not to press too hard, as this can cause juices to escape and dry out the steak.
- Timing is Key: Don’t rush the process. Let each side of the steak cook for 3-4 minutes. If you’re using thicker cuts, you may need to lower the heat and cook for longer. Flip every few minutes to ensure even cooking.
5. After Searing: How to Finish Your Asada on the Stove
Once your asada steak has that perfect sear, it’s time to finish cooking it to your desired doneness. For thicker cuts, you may need a little extra time.
- Lower the Heat: After searing, reduce the heat to medium and cook the steak until it reaches the desired temperature. A meat thermometer can help—aim for 130-135°F for medium-rare, 140°F for medium, and 145°F for medium-well.
- Rest the Meat: Once your asada steak is cooked, remove it from the skillet and let it rest for 5-10 minutes. This allows the juices to redistribute, making the meat tender and juicy.
6. The Advantage of Cast Iron for Indoor Grill Marks
A cast iron skillet gives you the advantage of perfect grill marks indoors, without the need for an outdoor grill. The high heat of cast iron helps you get that desirable charred flavor and texture, while also giving you full control over the cooking process.
Using Your Oven Broiler for Smoky, Crisp Asada Edges
While grilling is often associated with creating those mouthwatering smoky edges on asada meat, your oven broiler can deliver similar results without needing an outdoor grill. The broiler works by exposing your meat to high, direct heat from above, mimicking the effect of a grill and giving your asada steak those crisp, charred edges. It’s a fantastic method for achieving the perfect smoky flavor and crispy texture, especially when you don’t have access to a grill or prefer to cook indoors.
1. Why Use the Broiler for Asada Meat?
The broiler offers a great way to add smoky flavors and a crisp exterior to your asada meat. It produces high, direct heat from above, similar to an open flame, but with more control over the process. This method is especially useful for asada steaks or thinner cuts of meat, which benefit from that quick, intense heat to seal in juices and create a flavorful, caramelized crust.
- Quick Cooking: Because the broiler uses intense heat, it’s a fast method that can give you perfectly charred asada edges in just a few minutes. It’s ideal for people who want a quick, delicious result without having to wait for a grill to heat up.
- Even Heat Distribution: The broiler’s overhead heat provides even cooking, so every part of your asada meat gets that crisp, smoky edge without the risk of uneven cooking.
2. Preparing Your Asada Meat for Broiling
Before you begin broiling your asada steak, it’s important to properly prepare both your meat and your oven to get the best results.
- Choose the Right Cut: While the broiler works well for thinner cuts of asada meat, such as flank steak or skirt steak, thicker cuts can also benefit from broiling with a bit more time under the heat. If you’re working with a thicker cut, you may need to finish cooking it after broiling.
- Preheat the Broiler: Just like preheating a grill, it’s essential to preheat your oven’s broiler. Place the oven rack in the top position to ensure the asada steak is close to the heating element. Preheat the broiler for 5-10 minutes to ensure it’s hot and ready for cooking.
- Pat the Meat Dry: Before broiling, make sure to pat your asada steak dry with paper towels. Excess moisture can cause the meat to steam instead of searing, which can result in a less crispy, flavorful crust. Drying the steak helps promote better browning and caramelization.
- Season Your Asada: Apply your seasoning or marinade to the meat before placing it under the broiler. The sugars in marinades can help with caramelization and give the asada a deeper, richer flavor. Make sure the seasoning is evenly distributed for consistent flavor.
3. Broiling Your Asada Meat for Perfect Crispy Edges
Now that your oven is preheated and your asada steak is prepared, it’s time to broil the meat to perfection.
- Position the Steak: Place the asada meat on a broiler pan or a wire rack set on a baking sheet. This allows heat to circulate around the meat and helps the fat drip off, preventing the steak from becoming greasy. Make sure the steak is positioned 3-4 inches below the broiler element for an optimal sear.
- Broil the Meat: Place the prepared steak under the broiler and cook for about 4-6 minutes per side, depending on the thickness of the meat and the desired level of doneness. The goal is to sear the outside of the asada while keeping the inside juicy and tender. Flip the meat halfway through the cooking process to ensure an even char on both sides.
- Watch Closely: Keep an eye on your asada steak while it’s under the broiler. The high heat can quickly go from perfectly seared to burned if you’re not careful. Check the edges for the characteristic crispy, charred appearance you want, and adjust the time accordingly.
4. Resting the Meat After Broiling
Once your asada meat has been broiled to perfection, it’s important to let it rest before cutting into it. This allows the juices to redistribute within the steak, ensuring that each bite is tender and flavorful.
- Rest for 5-10 Minutes: After removing the steak from the oven, let it rest on a cutting board or plate. This resting period is essential to avoid losing juices when slicing the meat. The steak will continue to cook slightly during this time due to residual heat.
- Slicing the Asada: After resting, slice the asada steak against the grain to ensure the meat is tender and easy to chew. This will also help keep the steak juicy and flavorful.
5. Benefits of Using the Broiler for Asada
The broiler method for cooking asada meat offers several benefits:
- Charred, Crispy Edges: The intense heat from the broiler creates a crispy, smoky crust on the meat, replicating the effect of a grill. This adds depth and flavor to the asada steak, enhancing its overall appeal.
- Indoor Convenience: For those who don’t have access to an outdoor grill, the broiler is an excellent indoor alternative. It’s easy to use and can produce great results with minimal effort.
- Efficient and Fast: Broiling is a quick method, ideal for busy weeknights or when you want to cook a flavorful steak without spending a lot of time on prep.
Conclusion: The Broiler as Your Secret Weapon for Asada
Using the oven broiler is a great way to achieve crispy, smoky edges on your asada meat without the need for an outdoor grill. With the right preparation, broiling gives you a fast, flavorful way to cook asada steak, delivering delicious results every time. Whether you’re cooking flank steak or skirt steak, the broiler can enhance the texture and flavor of your meat, creating that perfect charred edge that makes asada so irresistible.
Smoke Flavor Without a Grill: Liquid Smoke, Wood Chips, and More
While nothing beats the natural smoky flavor of asada meat cooked over a grill, there are ways to infuse that same rich, smoky taste even if you don’t have access to an outdoor grill. Whether you’re cooking indoors on a stovetop or using your oven, there are several techniques and ingredients that can help you achieve the signature smoky flavor of grilled asada. Here, we’ll explore some effective methods to replicate that irresistible smoke flavor using common kitchen tools and ingredients like liquid smoke and wood chips.
1. Liquid Smoke: A Convenient and Powerful Flavor Enhancer
Liquid smoke is one of the easiest and most effective ways to add a smoky flavor to your asada meat without a grill. It’s a concentrated liquid made from condensed smoke that’s been captured and distilled. Just a few drops can completely transform the flavor profile of your asada steak, giving it that deep, smoky aroma that’s typically associated with grilling.
- How to Use Liquid Smoke: A little goes a long way when it comes to liquid smoke. Add just a few drops to your asada marinade or mix it directly with your seasoning. Be cautious not to overdo it—too much liquid smoke can overpower the meat and leave it with a harsh, artificial flavor. A few drops per pound of meat is usually enough to get that authentic smoky taste.
- Marinate with Liquid Smoke: For best results, let your asada meat marinate for several hours or overnight after adding liquid smoke. This allows the meat to absorb the flavor, giving you a more balanced and rich smoky profile.
- Choose Quality Liquid Smoke: There are many brands of liquid smoke available, and the quality can vary. Look for natural versions without added artificial flavors or preservatives for the most authentic taste.
2. Using Wood Chips for Smoked Flavor in the Oven
If you’re looking for a more traditional smoking method indoors, wood chips are an excellent option. Wood chips are small pieces of wood that are used to generate smoke, which imparts a smoky flavor to the meat. While wood chips are often associated with outdoor smoking, they can be used effectively in the oven or on the stovetop to add that grilled asada flavor.
- How to Use Wood Chips in the Oven: To use wood chips in the oven, start by soaking them in water for about 30 minutes to an hour. This prevents them from burning too quickly. Then, place them in a small oven-safe dish or a foil packet and place them on the oven’s bottom rack. Preheat your oven and cook the asada meat on the top rack, allowing the smoke from the wood chips to infuse the meat during the cooking process.
- Stovetop Smoker: For those who prefer stovetop cooking, a stovetop smoker is a great option. It works by placing wood chips at the bottom of the smoker and using a vented lid to trap the smoke. Simply heat it on the stovetop and place your asada meat inside to smoke. This method allows you to control the amount of smoke and can be done indoors without a grill.
- Choosing the Right Wood: The type of wood used can significantly affect the flavor. For asada meat, choose woods like mesquite, hickory, or oak. Mesquite offers a bold, intense flavor, while hickory gives a more balanced smoke. Fruitwoods like apple or cherry can provide a milder, slightly sweet smoke.
3. Smoked Paprika: A Spice with a Smoky Punch
If you want a quick and easy way to add smokiness to your asada steak, smoked paprika is an excellent spice to incorporate. Made by drying and smoking chili peppers over wood, smoked paprika can give your asada that smoky essence without the need for any special equipment. It’s a perfect ingredient for seasoning and marinades.
- Using Smoked Paprika: Add smoked paprika to your seasoning mix for your asada meat or incorporate it into your marinade. This spice adds both color and flavor, creating a rich, smoky profile that enhances the taste of your meat. Combine it with garlic, cumin, chili powder, and other traditional spices for a bold flavor mix.
- Balance the Flavor: Since smoked paprika is milder than other smoking methods, you can use it more liberally without worrying about overpowering the meat. However, it’s best to pair it with other smoky ingredients (like liquid smoke or wood chips) to create a more layered, authentic smoky flavor.
4. Smoke in a Pan with a Lid: A Stovetop Smoking Trick
If you don’t have access to a stovetop smoker, you can use a regular pot or pan to create a smoky effect on your asada meat. This method involves using wood chips and a tightly sealed pan to trap the smoke, creating an indoor smoking environment that’s perfect for adding that grilled flavor.
- How to Smoke in a Pan: To start, place a small handful of soaked wood chips at the bottom of a large, heavy-bottomed pan. Add a rack or steaming basket on top, where you’ll place the seasoned asada meat. Cover the pan with a tight-fitting lid and heat it over medium heat. The wood chips will begin to smolder and generate smoke, which will flavor the meat.
- Control the Smoke: Be sure to monitor the heat closely to avoid burning the wood chips. Keep the pan covered as much as possible to trap the smoke inside, and check periodically to ensure the meat is cooking evenly.
5. Infuse Smoke Using Tea Leaves: A Unique Twist
For a more unconventional approach, tea leaves can be used to impart a smoky flavor to your asada steak. Certain types of tea, like Lapsang Souchong (a smoked black tea), contain a rich smoky flavor that can be infused into your meat during cooking.
- How to Use Tea Leaves: Place a small amount of Lapsang Souchong tea leaves in a pan or on a baking sheet. Heat the tea leaves until they begin to release their aroma. Then, place the asada meat above the tea leaves (using a rack or foil) so the smoke can infuse the meat. This method is subtle and won’t overpower the natural flavor of the asada, but it adds a unique twist.
Conclusion: Achieving Smoky Asada Flavor Without a Grill
Infusing that perfect smoky flavor into your asada meat is achievable even without a traditional grill. By using methods like liquid smoke, wood chips, and smoked paprika, you can bring the depth and complexity of grilled asada right into your kitchen. Whether you use the oven broiler, stovetop techniques, or simple pantry ingredients, these methods ensure that you can still enjoy that irresistible smoky, charred edge on your asada steak.
Serving, Slicing, and Finishing Your Charred Asada Meat
Resting Asada Meat Before Slicing: Why It Matters
After spending time perfecting your asada meat, whether on the grill, in a cast iron skillet, or under the broiler, the final step is just as crucial as the cooking itself: resting the meat before slicing. It’s tempting to dive right into the juicy, smoky goodness, but allowing your asada to rest for a few minutes is a vital step in ensuring a flavorful and tender result. Here’s why it matters and how it can elevate your dish to perfection.
1. Let the Juices Redistribute
The main reason for resting asada meat is to allow the juices inside the meat to redistribute. When you cook meat, the heat causes the muscle fibers to contract, forcing the juices towards the center. If you cut the meat immediately after cooking, the juices will spill out onto your cutting board, leaving the meat dry and less flavorful.
- How Resting Helps: During the resting period, the muscle fibers loosen, and the juices that were pushed toward the center of the meat are able to redistribute evenly throughout. This results in a juicier, more flavorful asada. The longer the meat rests, the more the juices can settle, making each bite more succulent.
- Optimal Resting Time: For asada steak, allow the meat to rest for at least 5 to 10 minutes. Larger cuts of meat may need up to 15 minutes of rest. This ensures that the meat has time to cool slightly, allowing the juices to redistribute without becoming too hot or difficult to handle when sliced.
2. Preserve the Tenderness
Resting not only helps with juiciness but also contributes to the tenderness of your asada. When you slice into hot, freshly cooked meat, you risk cutting through muscle fibers that haven’t had the chance to relax. As a result, the meat might end up being tougher and less enjoyable to eat.
- Relaxing the Meat: Giving your asada a few minutes to rest allows the muscle fibers to relax and become more tender. The proteins in the meat have time to reabsorb the moisture that was lost during cooking, which helps the meat maintain its softness and juiciness.
- Avoiding Tough Meat: Skipping the resting step can result in chewy and tough pieces of asada that are not as pleasant to eat. By allowing it to rest, you’re ensuring that the texture of the meat remains tender and easy to slice.
3. Enhanced Flavor and Overall Experience
Resting asada helps the meat hold onto its natural flavors and enhances the overall eating experience. When the meat is cut too soon, the flavors can feel more concentrated in certain areas and less balanced overall. The juices that remain inside the meat, after resting, continue to marinate the meat’s internal fibers, deepening the overall flavor.
- Flavor Development: Allowing your asada to rest gives the spices, seasoning, and marinade a chance to penetrate the meat further, intensifying the flavors. This results in a more well-rounded and savory bite with every slice.
- Balanced Seasoning: During resting, the seasoning and charred flavors are also allowed to meld more effectively. The meat absorbs more of the smokiness, spices, and other seasonings used in the marinade or rub, leading to a more uniform flavor profile.
4. Avoid Overcooking
Another important reason to rest your asada meat is to prevent overcooking. When you remove meat from direct heat, it continues to cook slightly due to residual heat. If you slice the meat too early, it might appear more well-done than intended.
- Carryover Cooking: As asada meat rests, it continues to cook from the inside out due to carryover heat. By giving the meat time to rest, you help avoid the risk of overcooking, ensuring that your asada stays juicy and perfectly seared.
- Retaining the Ideal Doneness: If you’re aiming for a particular level of doneness (like medium-rare or medium), resting the meat allows it to cool slightly while maintaining its optimal texture and juiciness. This is especially important for cuts like flank or skirt steak, where the perfect balance of char and tenderness is key.
5. Resting Time for Different Cuts of Asada Meat
Not all cuts of asada meat need the same resting time. Depending on the thickness and type of meat, you might adjust the time to suit the cut. Generally, thinner cuts like flank steak might require a shorter resting period, while thicker cuts like skirt steak or tri-tip might benefit from a longer resting time.
- Thin Cuts: For thinner cuts of meat, around 5 to 8 minutes should suffice. These cuts don’t retain as much heat after cooking, so shorter resting times will prevent the meat from cooling too quickly.
- Thicker Cuts: Larger, thicker cuts of asada, such as tri-tip, will require 10 to 15 minutes of resting to ensure the juices stay inside and the meat is tender throughout.
6. How to Rest Your Asada Properly
To rest your asada properly, follow these simple steps:
- Remove the Meat from Heat: After cooking your asada, remove it from the grill or stovetop and place it on a clean cutting board or plate.
- Tent with Foil: Cover the meat loosely with aluminum foil. This will keep the heat in while allowing it to breathe, preventing the meat from becoming soggy.
- Avoid Cutting Immediately: Let it rest undisturbed. Don’t rush to cut the asada—waiting for the resting period will significantly enhance the flavor and texture.
Conclusion
Resting your asada meat before slicing it is a crucial step that shouldn’t be overlooked. By allowing the meat to rest for a few minutes, you can retain its juiciness, improve its tenderness, and enhance the flavor, making for a more enjoyable and delicious eating experience. The time you spend resting is just as important as the time you spend cooking, so don’t skip it for the best results!
How to Cut Grilled Asada Against the Grain for Tender Bites
When it comes to achieving the most tender, melt-in-your-mouth grilled asada, the way you slice the meat is just as important as how you cook it. Cutting asada against the grain is a key technique that will help you avoid chewy, tough bites and instead enjoy a juicy, tender steak with every mouthful. Understanding the grain of the meat and how to cut it properly can make all the difference in the final texture of your dish.
1. Understanding the Grain of the Meat
Before diving into the cutting technique, it’s important to understand what the “grain” of the meat refers to. The grain is the direction in which the muscle fibers in the meat run. These long, fibrous strands play a significant role in the texture of your asada.
- Visualizing the Grain: When looking at the surface of your asada, you’ll notice lines running in one direction. These lines are the muscle fibers, and that’s the grain. If you slice asada parallel to these fibers, you’re cutting with the grain. However, to ensure tender bites, you want to slice against the grain, or perpendicular to those lines.
- Effect of Grain on Texture: Cutting with the grain leaves the muscle fibers intact, making each bite tougher and chewier. On the other hand, slicing against the grain breaks the muscle fibers into shorter segments, which makes the meat easier to chew and much more tender.
2. The Right Angle for Slicing
Now that you know what the grain is, it’s time to focus on the technique. To get the best results, always cut against the grain at a 45-degree angle to the fibers. This helps further break down the fibers, ensuring each piece is as tender as possible.
- Avoiding Long Strands: Slicing at an angle prevents you from cutting along long muscle fibers. Long fibers make for tougher bites, whereas shorter fiber segments lead to more tender meat.
- Precision Matters: Aim for slices that are about 1/4 inch thick (or slightly thinner if you prefer). The thinner you slice, the easier it will be to break up the fibers and enhance tenderness.
3. Using a Sharp Knife for Clean Cuts
To properly slice grilled asada against the grain, you’ll need a sharp knife. A sharp knife allows you to make clean cuts without tearing the meat, which is especially important when cutting through the muscle fibers.
- Why Sharp Knives Matter: A dull knife can shred the meat rather than slicing through the fibers smoothly. This can result in a less appealing texture, with jagged cuts and even tougher bites. Invest in a high-quality chef’s knife or carving knife to ensure smooth, precise cuts.
- Proper Knife Technique: Use a steady, sawing motion as you cut, keeping your hand steady and guiding the knife along the grain’s opposite direction. Let the sharp edge do the work for you, ensuring that each slice is clean and consistent.
4. How Cutting Affects the Eating Experience
When you cut asada against the grain, the result is not just visually appealing but also much more enjoyable to eat. Each bite is easier to chew and more flavorful, since the muscle fibers are broken down into smaller, more manageable pieces. This is especially important for tougher cuts like skirt steak and flank steak, which are commonly used for asada.
- Improved Tenderness: With each cut made against the grain, the muscle fibers are shortened, making the asada noticeably more tender. This means you can enjoy the full flavor and texture of your grilled meat without the struggle of trying to chew through long muscle fibers.
- Juicy, Flavorful Bites: When you slice against the grain, you’re also allowing the juices in the meat to remain intact. The tender cuts help maintain a juicier bite, while cutting with the grain can lead to the loss of some of those delicious juices.
5. Cutting Tips for Different Asada Cuts
Different cuts of meat might have varying grain directions, so it’s important to adjust your cutting technique accordingly.
- Flank Steak: The grain runs in one direction across the entire piece of flank steak, making it relatively easy to identify and cut against. Slice thin, diagonal cuts to achieve a tender result.
- Skirt Steak: Skirt steak has a more pronounced grain and often requires more attention when cutting. Again, cutting at an angle and against the grain is key to tenderizing the meat.
- Tri-Tip: Tri-tip is another popular cut used for asada. It has a distinct grain that can shift slightly depending on the portion of the meat. Be sure to slice across the grain at a diagonal to ensure maximum tenderness.
6. Common Mistakes to Avoid
While cutting asada against the grain is crucial, there are a few common mistakes to avoid that can result in tough or unappetizing bites:
- Cutting Too Thin: While you want thin slices, cutting too thin can cause the meat to become dry or stringy. Aim for slices that are around 1/4 inch thick for the best balance of tenderness and juiciness.
- Cutting in the Wrong Direction: Ensure you’re cutting in the opposite direction of the grain. It’s easy to make this mistake, especially with tougher cuts. Always double-check the direction of the fibers before slicing.
- Rushing the Process: Take your time when cutting the asada. Rushing the process can lead to uneven slices and, in some cases, can result in cutting the meat with the grain instead of against it.
Conclusion
Cutting your grilled asada against the grain is one of the simplest but most important steps to ensure you get the most tender and flavorful bites. By understanding the direction of the grain, slicing at an angle, and using a sharp knife, you can achieve perfect, melt-in-your-mouth asada every time. Whether you’re grilling up a skirt steak, flank steak, or any other cut, following this technique guarantees that your asada will be a hit at your next meal.
The Best Sides for Asada Meat: From Tacos to Grilled Veggies
When you’ve perfected your asada meat, the right side dishes are essential to elevate the meal. These sides should complement the smoky, savory flavors of the asada while adding freshness and balance. Whether you’re hosting a casual BBQ or an authentic Mexican dinner, the sides can transform the meal into something unforgettable.
1. Classic Tacos: A Perfect Match
Tacos are one of the most popular ways to enjoy asada. The combination of tender grilled meat and fresh, crunchy toppings creates a balanced and flavorful bite.
- Taco Shells: Soft corn tortillas are ideal for this dish, allowing the asada to shine. For a crunchy alternative, crispy taco shells work well too, though they might slightly overpower the meat’s natural flavors.
- Toppings: Essential toppings include cilantro, onions, and a squeeze of lime juice. For extra flavor, you can also add salsa, avocado, or jalapeños for a bit of heat.
- Refried Beans: Serve these alongside your tacos for a creamy, flavorful contrast. Refried beans balance out the smoky flavors of the asada and add richness to the meal.
2. Grilled Veggies: Light, Colorful, and Flavorful
Grilled vegetables pair beautifully with asada, providing texture and a smoky flavor. Their slight char complements the richness of the meat, while adding brightness and color to the plate.
- Vegetable Options: Good choices include bell peppers, zucchini, onions, and corn on the cob. These vegetables hold up well on the grill, gaining a lovely char and natural sweetness.
- Seasoning: Toss the veggies in olive oil, salt, and pepper for simple flavor. A bit of lime zest or fresh garlic will elevate the taste further.
- Serving Ideas: Serve the grilled veggies as a side or incorporate them into a salad for a refreshing addition to your meal.
3. Mexican Rice: Light, Flavorful, and Complementary
Mexican rice (or arroz rojo) is a staple side that works wonderfully with asada. Its mild, slightly tangy flavor creates a perfect balance with the smoky meat.
- Preparation: Sauté the rice in oil until golden, then simmer with tomato paste, chicken broth, and seasonings like garlic and onion. Finish with a squeeze of lime and fresh cilantro.
- Why It Works: The mildness of Mexican rice balances the richness of asada, adding substance without overpowering the meat.
4. Grilled Street Corn (Elote): Sweet, Smoky, and Irresistible
Elote (Mexican street corn) is a popular choice and makes for an amazing pairing with asada. The smoky flavor of the corn complements the meat’s char, while the creamy, tangy sauce adds an irresistible richness.
- How to Make Elote: Grill corn until charred, then coat it with a mix of mayo, lime, chili powder, and cotija cheese. A sprinkle of garlic powder and cilantro enhances the flavor even further.
- Why It Works: The sweetness of the corn, combined with the creamy sauce and chili powder, pairs beautifully with the smoky asada, creating a perfect contrast in texture and flavor.
5. Fresh Salads: A Crisp, Refreshing Contrast
A fresh salad is a light option that contrasts well with the richness of asada. It brings brightness, crunch, and a touch of acidity to balance the grilled meat.
- Cabbage Slaw: A tangy slaw made with lime, cumin, and cilantro offers a fresh and crunchy contrast. This can be served on its own or added as a topping to asada tacos.
- Cucumber Salad: A refreshing mix of cucumbers, red onion, and a drizzle of lime creates a light side that cuts through the richness of the meat.
- Tomato & Avocado Salad: A simple salad of tomatoes, avocados, and cilantro adds freshness and creaminess to balance out the smoky flavors of asada.
Conclusion
The right side dishes can truly enhance your asada meat experience. Whether it’s tacos, grilled veggies, or a tangy cabbage slaw, these sides bring complementary textures and flavors to the table. With the perfect balance of fresh, smoky, and creamy elements, these sides will ensure that your asada meal is a hit every time.
Final Flavor Touches: Lime Juice, Garlic, and Sea Salt
After grilling your asada meat to perfection, the final touches play a crucial role in elevating the flavor profile. Simple ingredients like lime juice, garlic, and sea salt can transform an already delicious dish into something extraordinary. These flavor boosters not only enhance the meat but also add a refreshing balance and depth to the overall taste.
1. The Zest of Lime Juice
The addition of lime juice is one of the most important steps when finishing your asada. The acidity in lime cuts through the richness of the meat, balancing the smoky flavors and creating a more refreshing bite.
- How It Enhances the Flavor: The citrus tang of the lime brightens up the smoky, savory profile of the asada. It provides a clean contrast that helps highlight the caramelized outer crust while complementing the tender interior. A squeeze of fresh lime just before serving adds an extra pop of flavor.
- Where to Apply It: Drizzle lime juice directly over the cooked meat, or for a more intense citrus kick, serve lime wedges on the side for your guests to add to their taste. This small, yet essential step is the key to achieving that perfect balance of flavors.
2. The Richness of Garlic
Fresh garlic is another powerful ingredient to finish off your asada. Garlic imparts a savory, slightly pungent flavor that adds depth to the overall taste profile, and its natural sweetness can bring out the subtle flavors in the grilled meat.
- How to Use Garlic: Finely minced or pressed garlic can be rubbed onto the asada before grilling for an extra layer of flavor, or it can be added after cooking. For a more intense flavor, consider using roasted garlic, which becomes sweet and mellow with heat, perfect for drizzling over the grilled meat.
- Why It Works: Garlic complements the smokiness of asada without overwhelming it. It’s a flavor that lingers just enough to leave you wanting more, and when paired with the lime juice, it creates a harmonious balance between heat and acidity.
3. The Final Touch: Sea Salt
Adding a sprinkle of sea salt right before serving is one of the simplest ways to elevate the flavors of your asada. The crunch of sea salt crystals and their burst of salinity perfectly accentuate the natural flavors of the meat, making each bite even more satisfying.
- Why Sea Salt Works Best: Sea salt is coarser than regular salt, so it adds a subtle texture that enhances the grilled crust. Its briny notes help to round out the flavors of the meat, and it’s particularly effective at amplifying the savory elements of asada.
- How to Apply It: Sprinkle a small amount of sea salt over the grilled asada just before serving. Be mindful not to over-salt, as the seasoning will intensify as it rests. If you want to take it a step further, consider adding a flavored sea salt, such as smoked sea salt, for an even richer flavor.
4. Optional Additions for Extra Flavor
- Chili Powder or Crushed Red Pepper: For those who enjoy a bit of heat, adding a sprinkle of chili powder or crushed red pepper alongside the lime, garlic, and sea salt can provide an exciting fiery kick that pairs beautifully with the smoky flavor of the asada.
- Fresh Cilantro: Adding a handful of freshly chopped cilantro right before serving can bring a burst of herbal freshness that balances out the richness of the grilled meat. Its mild flavor enhances the overall experience, bringing a touch of brightness to every bite.
Why These Simple Touches Matter
The lime juice, garlic, and sea salt come together in a harmonious way, enhancing the asada without overpowering it. They complement the natural flavors of the meat while offering that extra burst of freshness, savoriness, and zest. These final flavor touches are the key to bringing your asada from great to extraordinary, turning a simple grilled meal into a flavorful celebration.
Conclusion
Grilling the perfect asada meat isn’t just about tossing steak on high heat—it’s an art that balances science, technique, and a few simple yet powerful ingredients. From understanding the Maillard reaction and choosing the right cut, to mastering grill temperature and finishing with lime, garlic, and sea salt, every step plays a role in achieving that smoky, charred flavor we all crave.
Now that you know the secrets behind mastering asada, it’s time to fire up your grill (or skillet) and put your skills to the test. Experiment with different cuts, try a few marinating tricks, and see how those final flavor touches make all the difference.
💬 We want to hear from you – Have a favorite asada technique or side dish? Leave a comment below and share your tips or questions. And if you found this guide helpful, don’t forget to spread the flavor by sharing it!