
Introduction
Are you searching for the best flourless chocolate cake recipe? This rich, fudgy, and decadent chocolate cake delivers intense chocolate flavor without using flour, making it naturally gluten-free.
With just five simple ingredients, you can create a delicious homemade dessert that’s both easy to make and incredibly satisfying. Whether you’re celebrating a special occasion or indulging in a chocolate craving, this cake will impress every time.
Get ready to bake the ultimate gluten-free chocolate cake—let’s dive in!
Why This Is the Best Flourless Chocolate Cake Recipe
Indulge in a rich, effortless dessert—this flourless chocolate cake with just five ingredients will steal your heart and have you coming back for more.
Rich, Fudgy, and Decadent Chocolate Cake Texture
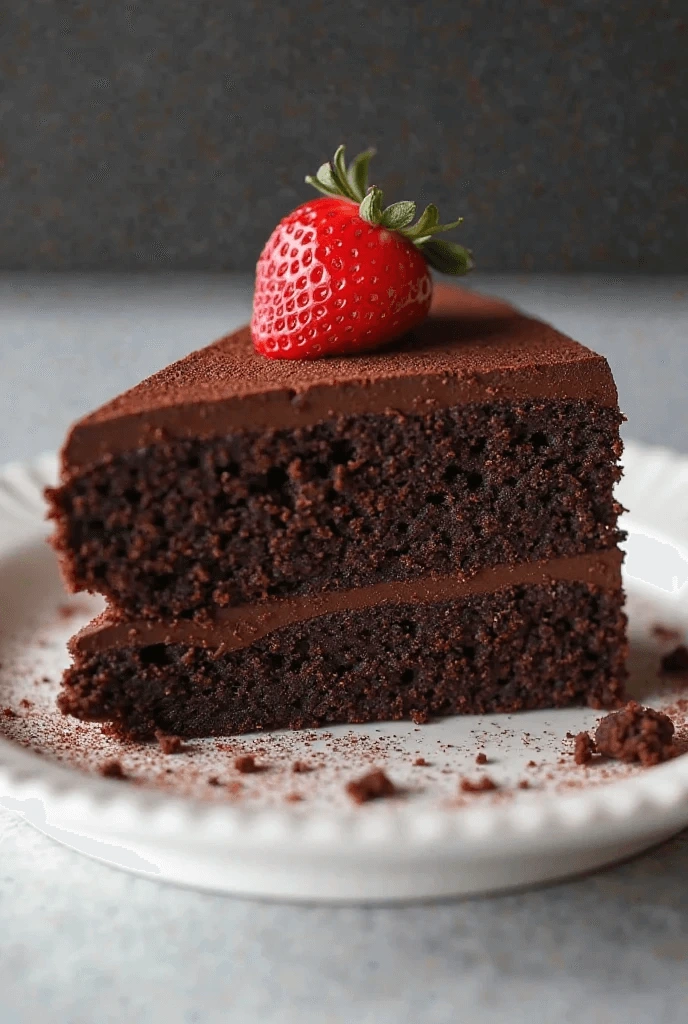
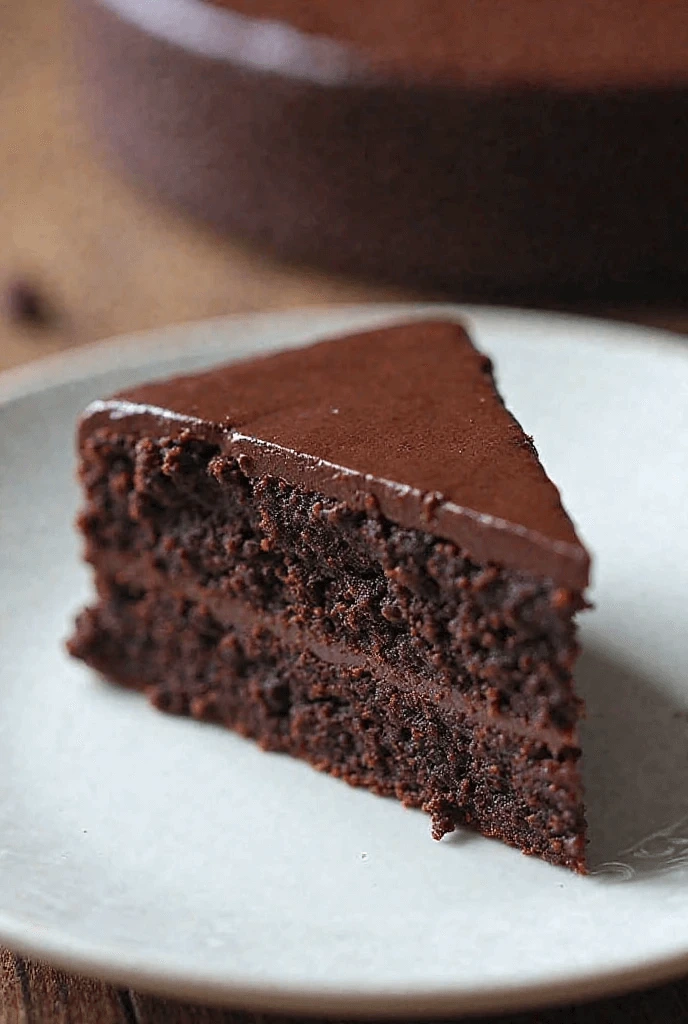
One of the best features of this flourless chocolate cake is its exceptional texture. Unlike traditional cakes, it doesn’t rely on flour. Instead, it uses dark chocolate, butter, and eggs to create a dense, fudgy consistency. This texture makes each bite melt in your mouth.
The dark chocolate is key to the rich flavor and moistness of the cake. When melted with butter, it forms a smooth, silky batter. The eggs bind everything together and add to the cake’s moist, dense texture.
Once baked, the cake has a crackly, slightly crisp top and a soft, gooey interior. This combination makes it a perfect indulgence for chocolate lovers.
The high fat content from the butter and chocolate helps the cake stay moist even after it cools. It’s ideal for making ahead and storing.
The cake’s rich, fudgy texture will surely make it a crowd favorite!
Naturally Gluten-Free Chocolate Dessert – No Flour Needed!
This flourless chocolate cake is a dream come true for anyone following a gluten-free diet or anyone simply looking to enjoy a rich chocolate dessert without the use of flour. Traditional cakes typically rely on flour to provide structure and rise, but this recipe takes a different approach by using dark chocolate, butter, and eggs as the main ingredients, allowing the cake to rise naturally as it bakes.
The absence of flour gives the cake its moist, dense texture, which is part of what makes it so decadent. The dark chocolate not only adds an intense chocolate flavor but also helps bind the cake together, providing structure in place of flour. The eggs play a crucial role as well. They add lift to the batter while keeping the cake’s consistency dense yet tender.
This flourless recipe is not only gluten-free but also perfect for special dietary needs. If you’re hosting a party or gathering and need a dessert that everyone can enjoy, this cake is a great choice. It caters to gluten-sensitive guests without sacrificing taste or texture.
For those who may be concerned about a dry or crumbly result, rest assured! The combination of high-quality dark chocolate and butter ensures the cake remains rich and moist, while the eggs provide the perfect balance for a smooth, velvety finish. The result is a cake that will impress even those who aren’t necessarily following a gluten-free diet.
Whether you’re gluten-free by necessity or simply prefer a lighter dessert, this flourless chocolate cake is a wonderful option that will never disappoint.
Perfect for Special Occasions and Chocolate Lovers
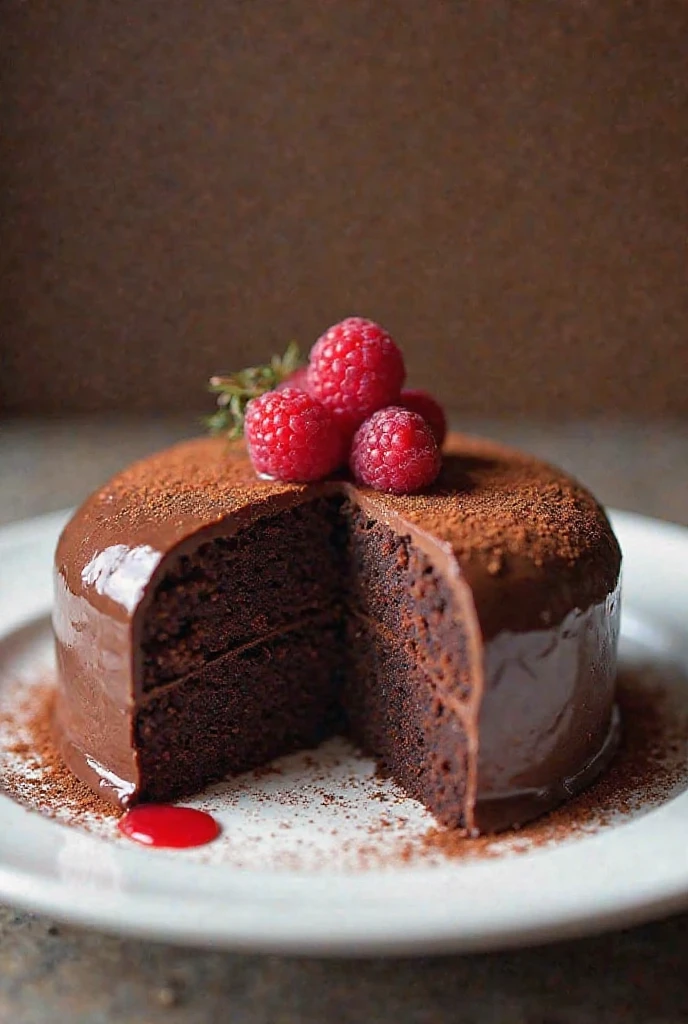
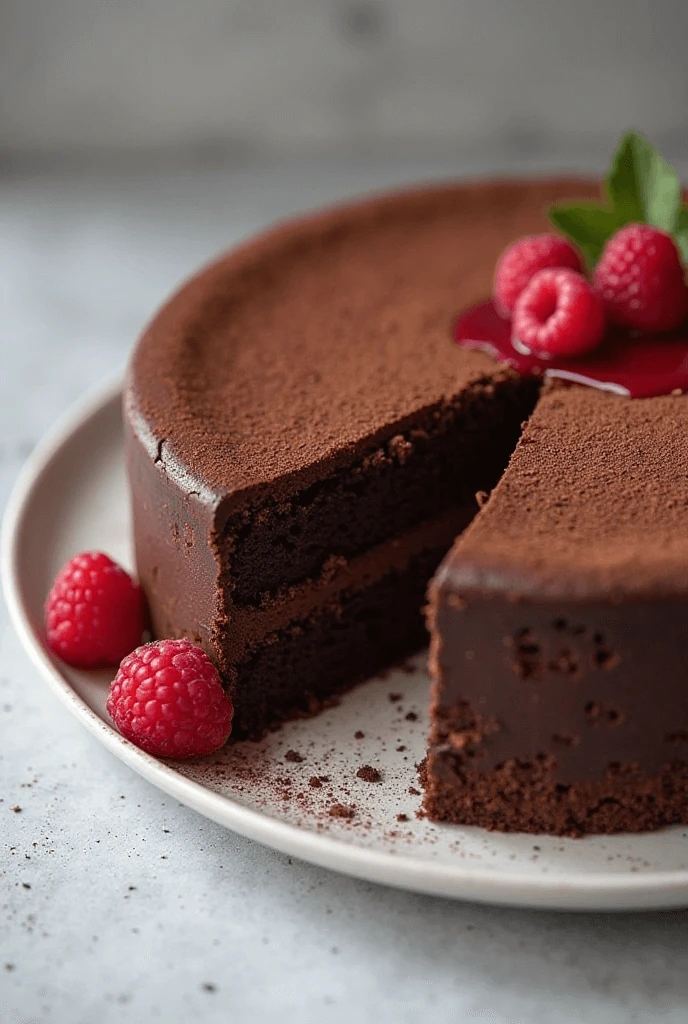
This flourless chocolate cake is the perfect choice for special occasions and will delight any chocolate lover. Whether it’s a birthday, holiday gathering, or a simple celebration, this decadent dessert stands out for its rich flavor and luxurious texture. The dense, fudgy layers paired with the glossy top create an impressive dessert that looks as amazing as it tastes.
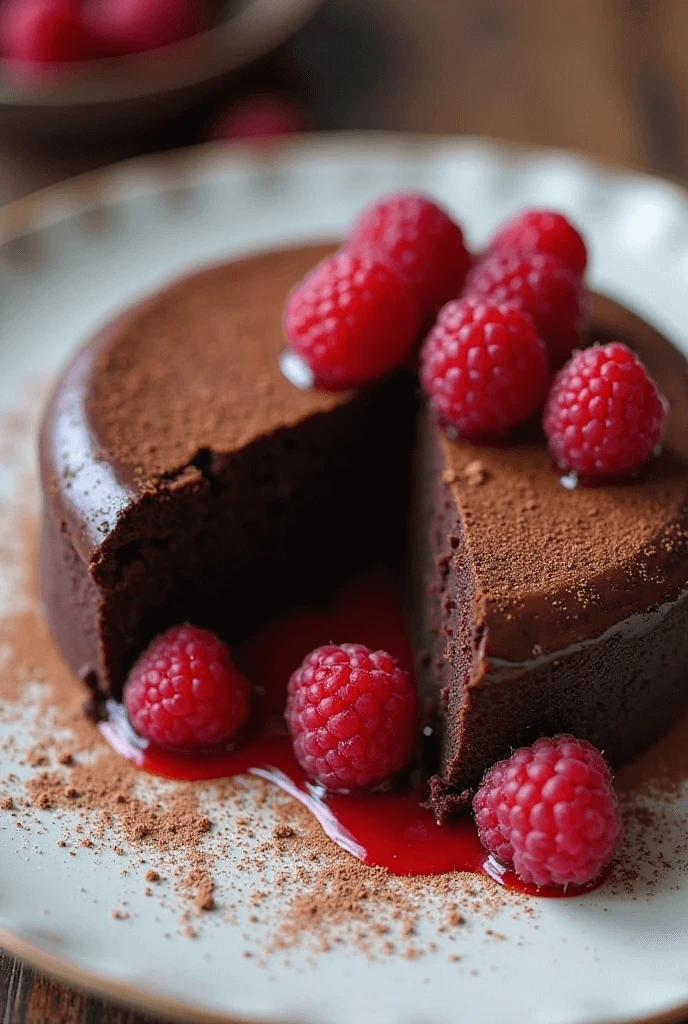
For special occasions, this cake can serve as a centerpiece that elevates the entire meal. Its elegant presentation, often topped with a dusting of powdered sugar, chocolate ganache, or a few fresh berries, makes it perfect for impressing guests. The cake’s intense chocolate flavor makes it a showstopper at celebrations, ensuring that your dessert is the highlight of the event.
For chocolate lovers, this cake is an absolute dream. Every bite is packed with deep, rich chocolate taste that is sure to satisfy even the most discerning chocolate enthusiast. The absence of flour allows the chocolate to truly shine, creating a dessert that is both decadent and indulgent. Its fudgy texture adds to the appeal, offering a melt-in-your-mouth experience that chocolate lovers will cherish.
Beyond just special events, this cake is an excellent choice when you want to enjoy a luxurious dessert at home. Whether paired with a cup of coffee, a glass of wine, or a scoop of vanilla ice cream, this cake makes any moment feel like a special treat. It’s a chocolate lover’s dream, and anyone who appreciates a rich, indulgent dessert will find it hard to resist.
This flourless chocolate cake is more than just a dessert; it’s a celebration of chocolate that brings people together, making every occasion feel a little more special.
Only 5 Ingredients – Simple Yet Delicious!
One of the best features of this flourless chocolate cake is its simplicity. With just five ingredients, you can create an incredibly delicious dessert. Despite its minimalism, it delivers on taste and texture. This recipe proves that a simple dessert can still be impressive.
The Five Essential Ingredients
To make this cake, you’ll need just dark chocolate, butter, eggs, sugar, and a pinch of salt. These five pantry staples come together to create a rich, decadent cake. Each ingredient plays a vital role in the final result. The dark chocolate provides the cake with its intense, rich flavor, while the butter adds a smooth, velvety richness.
The eggs are key for binding the ingredients together and providing structure. They also give the cake a soft, fudgy texture. A small amount of sugar enhances the sweetness without overpowering the chocolate. Finally, the salt balances the sweetness and brings out the chocolate’s deep flavor.
Simplicity with No Compromise on Flavor
Even though this cake uses only five ingredients, it doesn’t lack in flavor. The dark chocolate is the star of the show, offering a deep and luxurious taste. The butter adds richness without being too heavy, creating a perfect balance. The eggs contribute to the texture, giving the cake its dense yet moist quality. The result is a dessert that is both indulgent and satisfying.
Quick and Easy to Make
One of the best things about this recipe is how quick and easy it is to make. There’s no need for complex techniques or long ingredient lists. You simply melt the chocolate and butter, then mix in the remaining ingredients. Pop it into the oven, and in no time, you’ll have a delicious cake ready to enjoy.
Perfect for Any Occasion
Whether it’s a casual treat or a special celebration, this cake works for any occasion. Its simple nature makes it great for last-minute gatherings or weeknight indulgences. Despite its ease of preparation, it will impress anyone who loves rich chocolate desserts.
Essential Ingredients for the Perfect Flourless Chocolate Cake
Dark Chocolate – The Key to Intense, Rich Flavor
The secret to this flourless chocolate cake’s irresistible taste lies in the dark chocolate. It is the star ingredient that drives the richness and depth of flavor in every bite. Unlike milk chocolate, which is sweeter and creamier, dark chocolate offers a more intense cocoa flavor that creates a decadent dessert without being overly sweet. This makes it the perfect choice for a flourless cake, where the chocolate truly shines.
Complex Flavor Profile of Dark Chocolate
Dark chocolate is made from a higher percentage of cocoa solids and cocoa butter, giving it a more complex flavor profile. The natural bitterness of dark chocolate is balanced by the sweetness from the sugar in the recipe. This creates a perfect harmony of flavors, allowing the chocolate to shine without being overwhelming. The combination of rich, bold chocolate and sweetness is what makes this cake so special.
The Role of Dark Chocolate in Texture
When you melt the dark chocolate, it becomes smooth and silky, infusing the batter with its luxurious texture. This is what gives the cake its dense and fudgy consistency, almost like a chocolate truffle. The chocolate’s velvety texture is crucial in creating that rich and indulgent mouthfeel, which is characteristic of flourless cakes. The melted chocolate helps the cake stay moist and rich without needing any flour.
Health Benefits of Dark Chocolate
In addition to its superior flavor, dark chocolate offers some health benefits, especially when chosen with a high percentage of cocoa (70% or higher). It’s rich in antioxidants, which are known to boost heart health, improve brain function, and even elevate mood. So, when you indulge in this dessert, you’re not just treating your taste buds—you’re adding a touch of health-conscious luxury to your experience.
Choosing the Right Dark Chocolate
For the best results, opt for high-quality dark chocolate with a cocoa percentage of at least 60-70%. The higher the cocoa content, the more intense the flavor, which will lead to a richer and more complex chocolate experience. Using quality chocolate makes all the difference in the final taste and texture of your flourless cake.
Butter – Adds Moisture and a Velvety Texture
In this flourless chocolate cake, butter is not just an ingredient; it plays a pivotal role in achieving the cake’s signature moistness and velvety texture. When combined with the other ingredients, butter melts seamlessly, helping to create a cake that’s dense yet soft, with a smooth, melt-in-your-mouth quality.
The Role of Butter in Moisture
One of the most important functions of butter in this recipe is to provide moisture. Without flour to act as a binding agent, the cake relies on butter to keep it tender and prevent it from becoming dry. The fat content in butter helps the batter stay rich and soft, ensuring that each bite of the cake remains moist even after it’s baked. This creates a delightful fudgy texture, which is one of the defining characteristics of flourless cakes.
As the butter melts into the batter, it helps to form a smooth, silky consistency. This is essential for giving the cake that luxurious, creamy texture that contrasts with its dense, chocolatey interior. The resulting cake is indulgent and satisfying, but not overly heavy—thanks to the right balance of butter.
Butter’s Role in Texture and Richness
Besides providing moisture, butter also plays a critical part in the cake’s velvety texture. When beaten into the batter, butter creates an airy, smooth base that ensures the cake has a fine crumb, rather than a heavy, dense consistency. The creaminess of the butter contributes to the cake’s melt-in-your-mouth experience, making each bite feel smooth and indulgent.
This richness is what sets the cake apart from regular chocolate desserts. The combination of butter and dark chocolate creates a balanced harmony, where the richness of the chocolate is complemented by the silky smoothness of the butter. It also helps to enhance the chocolate’s flavor, making the cake taste even more luxurious.
Choosing the Right Butter
For the best results, it’s recommended to use unsalted butter in your flourless chocolate cake. Unsalted butter allows you to have full control over the amount of salt in the recipe, ensuring that the flavors remain well-balanced. When using high-quality butter, you’re also ensuring that the final product has the best possible texture and flavor.
Opt for room temperature butter for easy mixing and smoother incorporation into the batter. This helps prevent any lumps and ensures an even distribution of fat throughout the cake, which ultimately contributes to the cake’s flawless texture.
Butter vs. Alternatives
While butter is an essential ingredient in this cake for achieving its signature texture, some people may choose to substitute it with alternatives for dietary reasons. Options like margarine or coconut oil can work as substitutes, but they may slightly alter the flavor and texture. Butter remains the best option for getting that authentic, velvety, and indulgent experience.
Eggs – The Secret to a Light Yet Fudgy Cake
In a flourless chocolate cake, eggs are the crucial ingredient that provides both structure and texture. While many cakes rely on flour for structure, this flourless version uses eggs to bind the ingredients together and create a cake that is both light and fudgy. The result is a dessert that has a dense, moist interior while still being surprisingly airy.
The Role of Eggs in Texture
Eggs work by providing structure to the cake as they bind the butter and chocolate together. The proteins in eggs help the batter hold its shape during baking, preventing it from falling apart or becoming too fragile. This creates a cohesive texture that supports the rich, dense chocolate without feeling heavy.
The egg whites are particularly important for the cake’s lightness. When they are beaten, they incorporate air into the batter, creating a slight lift during baking. This helps the cake to rise and gives it a slight fluffiness, even though it is a dense and fudgy cake. The egg yolks, on the other hand, provide richness and moisture, contributing to the silky texture that makes this cake so indulgent.
Creating the Perfect Balance
The challenge in making a flourless chocolate cake is finding the right balance between a rich, dense texture and a light, moist crumb. Eggs play a key role in achieving this balance. Too few eggs, and the cake may be overly dense or crumbly. Too many eggs, and the cake may become too airy and lose its desired fudgy consistency. The five-egg combination used in this recipe strikes the perfect balance, creating a cake that’s dense but still light in texture.
Eggs Help Retain Moisture
In addition to adding structure and texture, eggs help to retain moisture in the cake. They work together with the butter to keep the cake from drying out during baking. This is particularly important in a flourless recipe, where the absence of flour means there is less structure to hold the moisture in. The result is a cake that stays soft and fudgy even after cooling.
Choosing the Best Eggs
For the best flavor and texture, it’s important to use high-quality eggs in your flourless chocolate cake. Fresh, large eggs are typically preferred because they offer the best structure and moisture balance. If possible, opt for organic eggs or free-range eggs to ensure you’re getting the best quality possible. Fresh eggs have more stable proteins, which helps with creating the perfect cake texture and consistent results.
How to Incorporate Eggs Into the Batter
When adding eggs to the batter, it’s important to incorporate them gently. Beat them well to ensure that they are fully combined with the chocolate and butter mixture. Over-beating can cause the cake to become too fluffy, which would detract from its dense and fudgy texture. Mixing the eggs in at room temperature helps them combine more smoothly with the other ingredients, resulting in an even batter with no lumps.
Sugar – Enhancing Sweetness and Structure
In a flourless chocolate cake, sugar is more than just a sweetener—it’s an essential ingredient that plays a significant role in shaping the cake’s flavor, texture, and structure. While dark chocolate contributes to the richness and bitterness of the cake, sugar helps to balance the flavors, ensuring the dessert isn’t overly bitter. It also helps to create the moist, dense texture that is characteristic of a flourless cake.
The Role of Sugar in Flavor Balance
One of the primary functions of sugar in this recipe is to provide sweetness and balance the bitterness of the dark chocolate. Dark chocolate has a more intense, bittersweet flavor that can be overpowering if not paired with the right amount of sweetness. Sugar softens this bitterness, creating a more harmonious and well-rounded flavor profile. This allows the chocolate to be the star of the show, while the sugar enhances its richness without competing with it.
The amount of sugar used in this cake recipe is carefully measured to achieve that perfect level of sweetness—enough to make the cake indulgent, but not too sweet to overshadow the intense chocolate flavor. This balance of rich chocolate and moderate sweetness creates a sophisticated dessert that appeals to chocolate lovers and those seeking a more complex flavor.
Sugar and Cake Structure
In addition to flavor, sugar plays a critical role in the structure of the flourless chocolate cake. When sugar is combined with butter and eggs, it helps to create a stable batter that will bake into a consistent, cohesive texture. The sugar crystals dissolve during the baking process, creating a smooth, velvety crumb in the finished cake.
Sugar also helps to retain moisture in the cake, preventing it from becoming dry. As it melts during baking, it traps moisture, resulting in a rich, fudgy texture that holds together beautifully. The moisture retention also allows the cake to stay soft and moist even after cooling, making it ideal for both immediate enjoyment and storing for later.
Sugar’s Role in Browning and Caramelization
Sugar plays a significant part in the browning and caramelization of the cake’s exterior. During the baking process, the sugar begins to melt and undergoes a chemical reaction known as the Maillard reaction—this gives the cake a subtle caramelized flavor and rich golden color. This not only enhances the cake’s appearance but also adds a layer of flavor complexity.
Choosing the Right Sugar for Your Cake
For this flourless chocolate cake recipe, granulated white sugar is typically the best option. It dissolves easily in the batter, creating the smooth, uniform texture that is desired in this dessert. You can experiment with other types of sugar, such as brown sugar, for a slight variation in flavor, but it may alter the texture and sweetness balance of the cake.
If you prefer a slightly healthier version, you could opt for natural sweeteners like coconut sugar or maple sugar, though these alternatives may impart a different flavor profile. It’s important to keep in mind that any substitutions could slightly change the cake’s final texture, so if you’re looking for the traditional fudgy outcome, it’s best to stick with classic white sugar.
Sugar and the Cake’s Crust
In a flourless chocolate cake, the sugar can also help form a thin, delicate crust on top of the cake. This adds a bit of texture and gives the cake a finished look that contrasts beautifully with its soft, rich interior. This crust helps the cake maintain its shape while also adding an extra layer of flavor and texture that enhances the overall eating experience.
Optional Additions: Vanilla, Cocoa Powder, or Almond Flour for Extra Depth
While the classic 5-ingredient flourless chocolate cake is already rich and indulgent, a few optional additions can enhance the flavor and texture. These ingredients help elevate the cake, adding extra complexity. Let’s take a look at vanilla, cocoa powder, and almond flour.
Vanilla – A Flavor Enhancer
A teaspoon of vanilla extract can make a noticeable difference in the cake’s flavor. It enhances the richness of the chocolate, creating a more balanced and harmonious taste. Vanilla also brings a subtle warmth that complements the chocolate’s bitterness.
While the cake is primarily chocolate-flavored, the vanilla helps amplify the sweetness without overpowering it. It brings a touch of elegance to the overall flavor profile. This simple addition makes the cake more sophisticated and enjoyable for those who love nuanced flavors.
Cocoa Powder – For Extra Chocolatey Goodness
Adding unsweetened cocoa powder intensifies the chocolate flavor. It boosts the richness and gives the cake a deeper cocoa taste. Cocoa powder also helps create a richer color and adds to the velvety smoothness of the cake.
This ingredient makes the cake extra chocolatey. It blends well with the other ingredients, enhancing the dense, fudgy texture. If you’re a chocolate lover, cocoa powder is a great way to take the flavor to the next level.
Almond Flour – A Nutty Twist for Texture and Flavor
For a slightly different texture and flavor, try adding almond flour. It will add a moist, dense texture and a subtle nutty flavor. The almond flour works to retain moisture, ensuring the cake remains rich and fudgy.
Almond flour also brings nutritional benefits. It’s packed with healthy fats and protein. While optional, it gives the cake a unique twist that chocolate lovers will appreciate.
Other Potential Additions
You can also experiment with other ingredients. Espresso powder can amplify the chocolate flavor. A pinch of salt balances the sweetness and intensifies the richness. If you want some crunch, try adding chopped nuts like hazelnuts or walnuts.
For a unique twist, consider adding orange zest or a dash of Kahlua or Grand Marnier. These additions will give your cake a special flavor profile and make it stand out.
Step-by-Step Guide to Making the Best Flourless Chocolate Cake
Prepping Ingredients and Greasing the Baking Pan
Before you start mixing your ingredients, it’s important to properly prep everything to ensure the best results for your flourless chocolate cake. Proper preparation sets the stage for a smooth baking process and a perfect finished cake. This section will cover how to prep your ingredients and the essential step of greasing the baking pan.
Prepping the Ingredients
Start by gathering all the necessary ingredients: dark chocolate, butter, eggs, sugar, and any optional additions like vanilla extract or cocoa powder. Be sure to measure everything out in advance to ensure accuracy. This step will save time when you’re ready to start mixing the batter and will help you stay organized.
Chop the chocolate into small pieces to help it melt evenly. If you’re using a bar of dark chocolate, this is especially important. You can either chop it with a sharp knife or break it into smaller pieces by hand. Smaller pieces melt faster and more evenly, reducing the risk of overheating the chocolate and causing it to seize up.
Melt the butter and chocolate together. You can do this in a heatproof bowl over a double boiler, which will gently melt the chocolate and butter without burning them. Alternatively, you can melt them in the microwave. Be sure to do this in short intervals, stirring frequently to prevent overheating.
Once the butter and chocolate are fully melted and combined, set the bowl aside to cool slightly. This step prevents the mixture from being too hot when added to the eggs, which could cause them to cook prematurely.
Greasing the Baking Pan
Greasing your baking pan is a crucial step that ensures the cake comes out of the pan smoothly. This step is especially important for flourless cakes since they tend to be denser and stickier than regular cakes. If the pan isn’t properly greased, you risk the cake getting stuck, making it harder to remove and potentially ruining its texture.
Start by selecting the right size baking pan. For this recipe, a 9-inch round cake pan is ideal, but you can also use an 8-inch pan if you want a thicker cake. The size of the pan will affect the baking time, so keep an eye on the cake as it bakes.
Grease the pan with butter or cooking spray. You can either use unsalted butter or a non-stick cooking spray. For an extra layer of protection, you can also line the pan with parchment paper. To do this, cut a round piece of parchment paper to fit the bottom of the pan. Then, grease the sides of the pan and place the parchment paper at the bottom. This ensures easy removal of the cake once it’s baked.
Another option is to use cocoa powder instead of flour for dusting the pan. This helps keep the cake’s flavor consistent and ensures that it won’t stick. After greasing the pan, lightly dust it with cocoa powder, tapping out any excess before pouring in the batter.
For an extra precaution, you can also grease and line the sides of the pan with parchment paper, especially if you want to create a taller or thicker cake. The parchment paper will prevent the cake from sticking to the sides and help it rise more evenly during baking.
Preparation Tips for Success
- Room temperature ingredients: Make sure your eggs and butter are at room temperature before starting. Cold eggs can cause the batter to seize up, while cold butter may not mix as easily with the melted chocolate. Let your eggs sit out for about 30 minutes before starting to bake.
- Use a whisk or mixer: When beating the eggs and sugar, use a whisk or an electric mixer to achieve the light, airy texture needed for this cake. This will help the cake rise properly, creating the ideal fudgy texture once baked.
By following these prep and greasing steps, you set yourself up for a smooth baking process and ensure the cake comes out of the pan with minimal hassle. Preparing your ingredients carefully and taking the time to grease the pan properly can make all the difference when baking this delicious, flourless chocolate cake.
Melting Chocolate and Butter Using a Double Boiler for a Smooth Batter
The process of melting chocolate and butter is a critical step in creating a smooth and glossy batter for your flourless chocolate cake. When done correctly, it ensures that the chocolate and butter combine seamlessly, creating a silky texture that will contribute to the cake’s rich, fudgy consistency. One of the best methods for achieving this is using a double boiler, a gentle and controlled way to melt these ingredients without the risk of burning or seizing. Let’s explore how to melt chocolate and butter using this technique for the perfect cake batter.
What is a Double Boiler?
A double boiler is a two-part setup that allows you to melt ingredients slowly by using indirect heat. It consists of two pans: one larger pan that holds simmering water, and a smaller pan or bowl that sits on top, holding the chocolate and butter. The steam from the simmering water in the bottom pan gently heats the ingredients in the top pan without direct contact with heat. This method prevents overheating, which can cause chocolate to burn, become gritty, or seize up.
Step-by-Step Guide for Melting Chocolate and Butter
- Prepare the Double Boiler:
Start by filling a medium-sized pan with about 1-2 inches of water. The water should not touch the bottom of the smaller pan or bowl, which will hold the chocolate and butter. Bring the water to a simmer over medium heat. Make sure the water is just simmering, not boiling. The steam from the water will provide the heat needed to melt the ingredients slowly and evenly. - Add the Chocolate and Butter:
Cut the butter into smaller chunks and place it into a heatproof bowl (preferably glass or stainless steel). Add the chopped chocolate pieces to the bowl as well. Ensure the bowl fits comfortably on top of the pan without touching the water. If you don’t have a double boiler, you can create a makeshift one by placing a heatproof bowl over a regular saucepan. - Melt the Ingredients:
Gently stir the chocolate and butter with a spatula as they begin to melt. The steam will gradually melt the chocolate and butter. Keep the heat low to prevent the chocolate from getting too hot too quickly. Stir occasionally to ensure that the butter and chocolate blend together smoothly. This should take about 3-5 minutes, depending on the amount of chocolate and butter. - Check Consistency:
Once the butter and chocolate are completely melted and smooth, remove the bowl from the double boiler. Stir the mixture one last time to ensure it is completely smooth and lump-free. You should now have a glossy, silky chocolate-butter mixture that is perfect for adding to the batter.
Why Use a Double Boiler?
Using a double boiler to melt chocolate and butter is ideal because it helps maintain control over the temperature. Chocolate is sensitive to heat and can burn easily, so this method ensures the chocolate melts gently, preserving its smooth texture. The butter, when melted slowly, also blends more evenly with the chocolate, creating a consistent, velvety batter.
This indirect heat prevents the chocolate from separating or becoming grainy, which can happen if you try to melt it directly on the stove or in the microwave. The double boiler method also reduces the chance of scorching the butter, which can affect the overall flavor and texture of the cake.
Alternatives to the Double Boiler Method
While a double boiler is the best method for melting chocolate and butter, there are other options if you don’t have one on hand:
- Microwave Method: Place the chocolate and butter in a microwave-safe bowl. Heat in short intervals (20-30 seconds), stirring after each interval until the mixture is completely melted. Be cautious with this method, as microwaves can heat unevenly, so stir frequently to ensure a smooth result.
- Direct Heat Method: You can also melt chocolate and butter directly in a saucepan over low heat. This requires close attention and constant stirring to prevent the chocolate from burning. This method is faster but less forgiving than using a double boiler.
Tips for Success
- Chop the Chocolate: Before starting, make sure the chocolate is chopped into small, uniform pieces. This helps it melt more evenly and quickly, reducing the risk of overheating or burning.
- Avoid Water Contact: When using the double boiler method, ensure no water splashes into the chocolate or butter. Even a small amount of water can cause the chocolate to seize up and become grainy.
- Stir Gently: As the chocolate and butter melt, stir gently to avoid creating air bubbles. Stirring too vigorously can cause the mixture to cool unevenly, leaving lumps or an inconsistent texture.
By melting the chocolate and butter using a double boiler, you ensure that your batter has a smooth, silky texture, free from any unwanted lumps or graininess. This step is essential for achieving the rich, fudgy consistency that makes your flourless chocolate cake so indulgent and irresistible.
Mixing the Batter Properly for the Best Cake Consistency
Mixing the batter is one of the most crucial steps in making a flourless chocolate cake. It may seem like a simple task, but how you combine the ingredients can significantly impact the final texture and consistency of your cake. The goal is to achieve a smooth, velvety batter that will result in a rich, fudgy cake with the perfect crumb. Here’s how to mix the batter properly to ensure the best cake consistency.
1. Combining the Chocolate-Butter Mixture with Eggs and Sugar
Start by melting the chocolate and butter together, using a double boiler method as described earlier. Let the mixture cool slightly before adding it to the eggs and sugar. In a separate bowl, beat the eggs and sugar together until they become light and slightly frothy. This process is crucial because it helps incorporate air into the batter, which balances the richness of the chocolate.
Once the egg-sugar mixture is ready, slowly pour the warm chocolate-butter mixture into the beaten eggs while continuously stirring. This ensures the chocolate doesn’t cook the eggs or cause them to curdle. It’s best to use a whisk to gently fold the chocolate into the eggs, which helps preserve the smooth texture of the chocolate without overworking the batter.
2. Adding Optional Ingredients (Vanilla, Cocoa Powder, Almond Flour)
At this point, if you plan to include vanilla extract, cocoa powder, or almond flour, it’s time to add them. Cocoa powder will enhance the chocolate flavor, making the cake even richer, while vanilla extract adds a pleasant balance to the chocolate’s intensity.
If you’re using almond flour, this is the moment to fold it in gently. Almond flour adds a subtle nutty flavor and contributes to the cake’s moist texture. Make sure to fold it in lightly to avoid overmixing the batter.
3. Gently Mixing Until Just Combined
It’s essential not to overmix the batter at this stage. Overmixing can lead to a dense, tough texture that defeats the purpose of a flourless chocolate cake. Stir the batter just until the ingredients are fully combined. The batter should be smooth and glossy, with no visible streaks of eggs, sugar, or chocolate. You want a thick, yet pourable consistency that will bake up perfectly, providing a dense, fudgy result.
4. Avoiding Overmixing to Keep the Texture Light
The key to a successful flourless chocolate cake is to handle the batter delicately. Unlike traditional cake batters, flourless cakes require a gentle touch to preserve the rich and moist texture. Stirring too vigorously or for too long can lead to a dense cake that’s lacking the soft, tender crumb you want.
If you feel resistance when stirring, it’s a sign that the batter is mixed enough. It should be evenly combined and thick, but smooth, with no lumps or unmixed ingredients.
Why Proper Mixing Matters
Achieving the Right Texture
The texture of your flourless chocolate cake depends largely on how you mix the batter. If you overmix it, the cake may become heavy and dry, but if you mix it just right, the cake will have the perfect balance of richness and moisture.
Ensuring Even Distribution of Ingredients
Proper mixing ensures that the chocolate and butter are evenly distributed throughout the cake, helping to maintain a smooth consistency. This also ensures that any optional ingredients, such as vanilla or almond flour, are incorporated smoothly into the batter.
Incorporating Air for Lightness
Beating the eggs and sugar before adding them to the chocolate helps incorporate air into the batter, which is essential for creating a light yet dense cake. This air helps the cake rise slightly while maintaining that fudgy, dense texture that is the hallmark of a perfect flourless chocolate cake.
Tips for Perfectly Mixed Cake Batter
- Room Temperature Ingredients: Ensure the eggs and butter are at room temperature. Cold eggs can cause the chocolate to seize when mixed, while cold butter may be harder to incorporate into the batter.
- Use the Right Tools: A whisk or spatula is ideal for mixing the flourless cake batter. Avoid using a hand mixer, as it can incorporate too much air and alter the cake’s consistency.
- Consistency Check: The batter should be thick but still pourable. It should hold its shape when poured into the cake pan but spread easily to fill the pan evenly.
By following these steps and tips for gently mixing your flourless chocolate cake batter, you’ll ensure a smooth, rich, and fudgy cake that’s sure to impress.
Baking Tips for a Moist and Fudgy Flourless Cake
Achieving the perfect moist and fudgy texture in your flourless chocolate cake isn’t just about the mixing process—it’s also about how you bake it. The right baking technique ensures that the cake retains its rich, dense texture without becoming too dry or crumbly. Here are some essential baking tips that will help you achieve that perfect, melt-in-your-mouth flourless chocolate cake.
1. Use the Right Pan for Baking
The choice of pan plays a crucial role in how the cake bakes and how its texture develops. A round cake pan is typically recommended, with an 8-inch or 9-inch diameter being the ideal size for most flourless chocolate cake recipes. This size allows the batter to bake evenly, giving you the desired moist and dense texture throughout.
If you’re worried about the cake sticking to the pan, line it with parchment paper or lightly grease and flour the sides and bottom of the pan. This ensures that your cake slides out effortlessly after baking and cooling.
2. Preheat Your Oven to the Correct Temperature
Ensure that your oven is properly preheated before placing your cake inside. The typical temperature for baking flourless chocolate cake is between 350°F (175°C) and 375°F (190°C), depending on the recipe. A preheated oven allows the cake to rise evenly and bake at the correct temperature from the start.
Use an oven thermometer if you suspect your oven’s temperature is inaccurate, as slight variations can impact the texture and baking time of the cake. The goal is to bake the cake at a moderate heat to avoid burning the outside while allowing the interior to remain moist and fudgy.
3. Bake Until Just Set in the Center
Baking a flourless chocolate cake can be tricky because it’s meant to be dense and slightly undercooked in the middle for that signature fudgy texture. However, you still want to ensure the cake is cooked through enough to hold its shape.
The best way to check for doneness is to use a toothpick or a cake tester. Insert it into the center of the cake, and if it comes out with a few moist crumbs stuck to it, the cake is ready. If the toothpick comes out clean, the cake may be overbaked and could turn out too dry. The cake should still have a bit of wiggle when you gently shake the pan.
4. Avoid Overbaking – Keep the Cake Moist and Dense
Overbaking is one of the main reasons for a dry, crumbly flourless chocolate cake. Remember that this type of cake is not supposed to rise and set like traditional cakes. It should remain dense, moist, and fudgy, which is why it’s important to keep a close eye on the baking process.
If you’re unsure about when the cake is done, it’s better to err on the side of slightly underbaking. As the cake cools, it will continue to set and firm up, and the center will settle into that signature fudgy texture.
5. Let the Cake Cool in the Pan Before Removing
Once your cake has finished baking, let it cool in the pan for about 15 to 20 minutes before attempting to remove it. This cooling period allows the cake to firm up slightly, which helps it hold together when you take it out of the pan. If you remove the cake too soon, it might collapse or fall apart due to its delicate, fudgy texture.
After cooling slightly, run a knife along the edges of the pan to loosen the cake. Then, gently invert the pan and let the cake slide out onto a cooling rack. Let the cake cool completely before serving, as this will help it maintain its shape and texture.
6. Optional: Create a Water Bath for Extra Moisture
For an even more moist result, you can bake your flourless chocolate cake in a water bath (also known as a bain-marie). This method helps regulate the temperature around the cake, ensuring a more even bake and preventing the cake from drying out.
To create a water bath, wrap the outside of your cake pan with aluminum foil to prevent water from seeping in. Place the pan in a larger baking dish or roasting pan, and fill it with hot water about halfway up the sides of the cake pan. The steam from the water will help keep the cake moist and create a smoother, more even bake.
7. Resting After Baking – Let the Cake Set
Once your cake has cooled slightly and been removed from the pan, allow it to rest for at least an hour or two before slicing into it. This resting time allows the flavors to deepen, and the texture to fully develop into that moist, rich, and fudgy consistency. It also makes it easier to slice without disturbing the delicate crumb.
8. Serving and Storing Your Cake
To maintain its moist and fudgy texture, store any leftovers in an airtight container in the fridge. This will help keep the cake from drying out. The flavor will actually improve after a day or two, as the cake has time to set and become even more dense and intense.
When serving, you can warm individual slices slightly in the microwave for a few seconds, which will make it even more indulgent, almost like a molten chocolate cake.
Conclusion: Perfectly Moist and Fudgy Every Time
By following these simple yet effective baking tips, you’ll be able to create a flourless chocolate cake with the perfect moist and fudgy texture every time. The key is to bake it with care, avoid overbaking, and allow the cake to rest before serving. With these steps, you’ll achieve a decadent dessert that’s sure to impress any chocolate lover.
Expert Tips for the Best Flourless Chocolate Cake Recipe
Choosing High-Quality Chocolate for a Richer Taste
The chocolate you choose for your flourless chocolate cake plays a significant role in the overall flavor, texture, and richness of the dessert. Since the cake relies so heavily on the chocolate for its taste, using high-quality chocolate can make all the difference. Whether you’re a chocolate lover or a baking novice, choosing the right chocolate will elevate your cake to a whole new level. Here’s why selecting top-notch chocolate matters and how to choose the best option for a richer, more decadent cake.
1. Dark Chocolate – The Ideal Choice for Richness
For a flourless chocolate cake, dark chocolate is typically the best choice. Dark chocolate has a higher percentage of cocoa, which gives it a more intense, complex flavor. The richness of dark chocolate creates the luxurious, fudgy texture that’s the hallmark of a perfect flourless cake. It also provides a slightly bitter note that balances the sweetness of the sugar, ensuring that the cake is not overly sweet.
Look for dark chocolate with a cocoa percentage of at least 60%. This range strikes a great balance between bitterness and sweetness. If you prefer a richer taste, opt for 70% or higher, but keep in mind that it may slightly alter the sweetness of your cake, so adjust sugar quantities if needed.
2. Look for Quality Ingredients – Avoid Low-Quality Chocolate Chips
While chocolate chips might seem convenient for baking, they are often made with lower-quality ingredients like wax or artificial flavors to help them hold their shape during baking. For the best flavor and smooth texture in your flourless chocolate cake, choose baking bars or chocolate blocks made with pure cocoa mass, cocoa butter, and sugar. These ingredients are far more likely to melt into a smooth, velvety batter, ensuring that your cake has a perfect texture.
Check the ingredient list on the packaging. Ideally, the chocolate should have cocoa mass or cocoa liquor as the first ingredient, not sugar or fillers like milk solids. The simpler and purer the ingredients, the better the result.
3. Consider the Type of Cocoa Butter in the Chocolate
Not all chocolate is created equal when it comes to the cocoa butter used in its formulation. Cocoa butter is the fat extracted from the cocoa beans, and it contributes to the smoothness, texture, and mouthfeel of the chocolate. High-quality chocolate uses pure cocoa butter, which helps create that irresistible silky texture in your flourless chocolate cake.
When selecting your chocolate, make sure the product uses real cocoa butter rather than substitutes like vegetable oils. These oils can interfere with the rich flavor and texture of the cake, giving it a greasy or waxy consistency. Pure cocoa butter ensures a smoother, more indulgent dessert.
4. Avoid Sweetened or Milk Chocolate for This Recipe
Although milk chocolate is beloved for its sweetness and creamy texture, it isn’t the best choice for a flourless chocolate cake. Milk chocolate contains a higher proportion of sugar and milk solids, which can lead to a cake that’s overly sweet and lacks the deep chocolate flavor that’s key to a flourless cake’s success. Moreover, the extra milk solids may interfere with the dense, fudgy texture you want in your cake.
For the most intense chocolate flavor, stick to dark chocolate or semi-sweet chocolate. If you do prefer the taste of milk chocolate, consider blending it with dark chocolate to maintain the rich, complex flavor while adding a touch of sweetness.
5. Consider Single-Origin or Bean-to-Bar Chocolate for an Enhanced Flavor Profile
For an even more sophisticated flavor, consider using single-origin or bean-to-bar chocolate. These types of chocolate are made from cocoa beans sourced from a specific region, and they offer a unique, nuanced flavor profile that can take your flourless chocolate cake to the next level. Single-origin chocolates tend to have distinctive flavor notes, such as fruity, nutty, or earthy undertones, which can enhance the cake’s overall depth.
When choosing bean-to-bar chocolate, you can be assured of a more authentic and artisan product. The chocolate is made from the raw cocoa beans through every stage of production, ensuring that the flavor is rich and the texture is perfectly smooth. These chocolates are often more expensive, but their quality and flavor are well worth the investment for a truly indulgent dessert.
6. Taste Test Before You Bake
If you want to ensure your flourless chocolate cake has the richest flavor possible, take the time to taste the chocolate before using it in your recipe. This will give you a better idea of the chocolate’s sweetness, bitterness, and overall flavor profile. A quick tasting will also help you adjust the other ingredients—like sugar—if the chocolate is particularly bitter or sweet.
When tasting the chocolate, be sure to melt a small piece and let it cool slightly. This will allow you to experience its full flavor and texture. You want a chocolate that tastes indulgent on its own, as it will shine through in your cake.
7. Store Your Chocolate Properly for Optimal Freshness
Properly storing your chocolate ensures that it retains its flavor and texture. Keep your chocolate in a cool, dry place, away from direct sunlight and strong odors, as chocolate can easily absorb other smells. A sealed container or original packaging will help preserve the chocolate’s taste and prevent it from becoming stale.
If you’re not using the chocolate immediately, storing it correctly will ensure that it stays fresh and flavorful for when you’re ready to bake your flourless chocolate cake.
Conclusion: Chocolate Makes All the Difference
Choosing high-quality chocolate is one of the most important steps in making a flourless chocolate cake. By opting for dark chocolate with a high cocoa content, using pure cocoa butter, and avoiding low-quality products, you can ensure your cake has the rich, fudgy, and decadent flavor that makes this dessert so special. Whether you’re using single-origin chocolate or tasting the chocolate before baking, the effort you put into selecting your ingredients will be evident in every bite. The right chocolate not only enhances the flavor but also helps you achieve that perfect cake texture.
Avoid Overbaking – Keep the Cake Fudgy and Moist
One of the most important factors in creating a perfect flourless chocolate cake is baking it just right. The goal is to create a rich, moist, and fudgy cake, and to do that, you need to avoid overbaking. While it can be tempting to bake the cake until it’s firm and set, the true beauty of a flourless chocolate cake lies in its dense, velvety texture, which requires careful attention to baking time and temperature. Here’s why overbaking can ruin the texture of your cake and how to prevent it from happening:
1. The Moisture and Fudgy Texture You Want
Flourless chocolate cake relies on the moisture from the eggs, butter, and chocolate to create its signature fudgy consistency. If the cake is overbaked, you risk losing that moisture, leading to a dry, crumbly texture instead of the rich, dense cake you desire. Overbaking can also cause the cake to lose its glossy, shiny top, which is one of the visual indicators of a well-baked flourless chocolate cake.
To keep the cake fudgy, it’s important to bake it just until the edges are set and the center is still slightly jiggly. The cake will continue to set as it cools, so it’s better to err on the side of slightly underbaking rather than overbaking.
2. Watch for the Signs of Doneness – The Toothpick Test
One of the best ways to avoid overbaking is to perform the toothpick test. Insert a toothpick into the center of the cake toward the end of the suggested baking time. If the toothpick comes out with a few moist crumbs attached, the cake is done. If the toothpick is clean, it means the cake has been overbaked, and you might have lost that perfect fudgy texture.
Keep in mind that unlike traditional cakes, a flourless chocolate cake shouldn’t come out dry. If it does, it’s an indication that it’s been in the oven too long. The cake should remain slightly moist in the center when done, which is crucial for the best flavor and texture.
3. Oven Temperature – Don’t Let It Get Too Hot
Another factor to consider when avoiding overbaking is your oven temperature. Even if your recipe calls for a specific temperature, oven temperatures can vary. It’s a good idea to use an oven thermometer to ensure your oven is running at the correct temperature. If the oven is too hot, the cake may set too quickly on the outside, leading to overbaking before the inside has a chance to properly set.
Consider lowering the oven temperature by 10 to 15 degrees Fahrenheit (around 5-8 degrees Celsius) to give the cake a bit more time to bake slowly and evenly. This allows the cake to bake more gently, preserving its moisture and fudgy texture.
4. Baking Time – Don’t Go by Just the Clock
While your recipe may suggest a certain baking time, every oven is different, and baking times can vary. Instead of relying solely on the clock, keep an eye on the cake as it bakes. Start checking the cake about 5-10 minutes before the suggested baking time is up, and check it frequently after that.
The edges of the cake should appear slightly puffed and set, but the center should still have a gentle jiggle when you tap the side of the pan. This indicates that the cake is done and ready to come out. Overbaking will result in a dry, dense texture, so it’s best to remove the cake while it’s still soft in the center.
5. Cooling the Cake – Patience Is Key
Once your cake is out of the oven, allow it to cool in the pan for at least 30 minutes before attempting to remove it. The cake will continue to firm up as it cools, so be patient. Cooling the cake slowly also helps prevent cracks from forming on the surface, which is a common sign of overbaking.
You can even refrigerate the cake for a few hours to let it set completely, which also helps to achieve that dense, moist texture. Once cooled, you can slice the cake easily and serve it without worrying about it falling apart or being too dry.
6. Don’t Rush the Baking Process
Flourless chocolate cake is a dessert that demands your attention and care. Rushing the process by overbaking or trying to speed up the cooling time can lead to disappointing results. If you want the best possible outcome, give the cake the time it needs to bake and set properly. When made with patience and care, the cake will retain its fudgy and moist consistency, creating a truly indulgent dessert that’s worth the effort.
7. Let the Cake Rest for Perfect Serving
After the cake has cooled, let it rest before serving to ensure the flavors meld and the cake has set to its perfect consistency. This will help maintain its moist, fudgy texture and make slicing easier. If you serve the cake too soon, the inside may still be too soft, resulting in a slightly messy, undercooked texture.
Conclusion: Timing Is Everything
Baking a flourless chocolate cake is all about achieving that perfect balance between moist and fudgy. Overbaking can quickly turn a rich, decadent dessert into a dry, crumbly disappointment. By watching the signs of doneness, using the toothpick test, and paying attention to your oven temperature, you can ensure that your cake stays soft, moist, and perfectly fudgy every time. Patience and careful timing are key to achieving the ultimate flourless chocolate cake.
How to Prevent Cracks and Achieve a Smooth, Glossy Top
A flourless chocolate cake should have a smooth, glossy finish. Cracks can ruin its appearance. Fortunately, with a few baking tricks, you can avoid them. Here’s how to get that perfect look:
1. Bake at the Right Temperature
Baking at a high temperature can cause cracks. It makes the cake rise too quickly. Bake your cake at a lower temperature, around 325°F (163°C). This gives the cake time to rise evenly. It will cook gently and keep the surface smooth.
2. Use a Water Bath (Bain-Marie)
A water bath helps bake the cake evenly. The hot water around the pan keeps the temperature steady. This prevents cracks from forming. To use a water bath, place your cake pan in a larger pan. Fill the larger pan with hot water halfway up the sides of the cake pan. This gentle heat will ensure your cake stays moist and smooth.
3. Don’t Overbake – Keep It Moist
Overbaking can cause cracks. If you bake the cake for too long, the edges get too firm. The center will pull away as it cools. To avoid this, bake the cake until the edges are set and the center is slightly jiggly. It will firm up as it cools.
4. Let the Cake Cool Gradually
Cooling the cake too quickly can cause cracks. Let the cake cool in the pan for 30 minutes. Then, transfer it to a cooler spot to finish cooling. Don’t put it in a cold place right away. Let it cool slowly to keep it smooth and avoid shrinkage.
5. Use a Pan with Straight Sides
The type of pan you use affects the cake’s shape. A round pan with straight sides ensures even baking. If the pan has sloped sides, the cake rises unevenly. This can lead to cracks. Grease the pan well and line it with parchment paper. This helps the cake come out without sticking, giving it a smooth top.
6. Tap the Cake Pan Before Baking
Air bubbles can cause cracks. To release these bubbles, tap the filled pan gently on the counter. This ensures the batter settles evenly. Fewer air bubbles mean fewer chances of cracks.
7. Remove the Cake Carefully
When removing the cake from the pan, be gentle. Rush it, and the cake may crack. If you used parchment paper, lift the cake by the edges. If not, run a sharp knife around the edges. This will loosen the cake without damaging its surface.
8. Add a Ganache Topping (Optional)
For a glossy finish, add a chocolate ganache on top. This enhances the rich flavor and hides small imperfections. The ganache gives your cake a shiny, luxurious appearance.
Conclusion: Perfect the Presentation
To get a smooth, glossy top on your flourless chocolate cake, pay attention to the baking process. Bake at the right temperature, use a water bath, and avoid overbaking. Let it cool slowly and handle it gently. With these steps, you’ll create a cake that’s as beautiful as it is delicious.
Letting the Cake Cool Before Serving for the Best Texture
Once your flourless chocolate cake is out of the oven, the temptation to dive in immediately can be strong. However, letting the cake cool before serving is essential for achieving the best texture and flavor. Here’s why patience really pays off when it comes to cooling your cake:
1. Settle the Cake’s Structure
Flourless chocolate cake has a dense and fudgy texture, which can be fragile right out of the oven. If you cut into it too soon, the cake can collapse or break apart. Allowing the cake to cool for at least 30 minutes in the pan helps it set and firm up. During this time, the structure stabilizes, making it easier to slice and enjoy without it falling apart.
The cooling process lets the ingredients fully set together, creating that perfect dense yet moist consistency. Cutting the cake too soon risks making it too soft and messy.
2. Prevent Overly Runny Center
When the cake is too hot, the center remains slightly undercooked. This means that when you slice into it, the center may ooze out, creating a runny mess. Cooling the cake allows the center to firm up properly. This way, you get that perfect fudgy consistency without the center being too loose.
Letting the cake cool also ensures that the flavors meld together. The chocolate flavor becomes richer and more pronounced once the cake has had a chance to rest.
3. Achieve a Clean, Neat Slice
If you’re aiming for neat, clean slices when serving, allowing the cake to cool is key. Hot cakes are often too soft, leading to jagged or uneven cuts. Cooling for about an hour, or until it reaches room temperature, ensures that the cake is firm enough to slice smoothly.
You can also chill the cake in the refrigerator for a few hours or overnight for an even firmer texture. This step will give you perfectly clean edges when you cut each slice, making the presentation even more impressive.
4. The Right Temperature Enhances the Cake’s Texture
While it might be tempting to serve the cake warm for extra gooeyness, serving it at the right temperature is crucial. A slightly cooled cake (not cold) gives you the best balance between richness and fudginess. A cake that’s too hot may feel overly soft, while one that’s too cold may be too firm. Allow the cake to cool to room temperature for the ideal texture.
A well-cooled cake will have that sought-after dense, fudgy interior while maintaining a smooth, glossy top. The flavors also continue to deepen as the cake rests, making every bite even more decadent.
5. The Cooling Process Prevents Cracks and Shrinking
If you cut into the cake right away, you risk causing cracks or distortion in its appearance. As the cake cools, it will settle naturally. If you cool the cake in the pan and allow it to rest gently, you avoid causing shrinkage or cracks. A slower cooling process keeps the cake intact and retains its elegant appearance.
Cooling also helps the cake hold its shape better when removing it from the pan. If it’s still too hot, it may stick to the sides or lose its form as it’s removed.
6. Add Finishing Touches After Cooling
Once your cake is cool, you can add finishing touches like a drizzle of chocolate ganache, a dusting of powdered sugar, or fresh berries. These additions not only enhance the flavor but also elevate the cake’s visual appeal. The cooled surface provides the perfect base for toppings that won’t melt or slide off, creating a beautifully finished dessert.
Conclusion: Cooling for Perfect Texture
While it may be tempting to skip the cooling process, taking the time to let your flourless chocolate cake cool is essential for achieving the best texture, flavor, and presentation. Cooling the cake allows the structure to set, prevents a runny center, and ensures clean, neat slices. Plus, it gives the flavors time to deepen. So, resist the urge to cut into it too soon—your patience will result in a perfect, indulgent slice every time!
How to Serve and Store Your Flourless Chocolate Cake
Best Toppings: Chocolate Ganache, Powdered Sugar, or Whipped Cream
While a flourless chocolate cake is already indulgent and decadent on its own, the right topping can elevate it to a whole new level. Whether you’re aiming for extra richness, a light dusting of sweetness, or a creamy contrast, these classic toppings are the perfect finishing touch to your cake. Here’s why each one works wonders:
1. Chocolate Ganache – Extra Richness and Glossy Finish
Chocolate ganache is a luxurious topping that pairs perfectly with the fudgy texture of a flourless chocolate cake. Made from dark chocolate and heavy cream, ganache is rich, glossy, and adds a layer of decadent chocolate flavor that enhances the cake’s already intense taste.
Why Choose Ganache?
- Smooth Texture: The silky texture of ganache complements the dense, fudgy cake, making each bite feel extra indulgent.
- Glossy, Shiny Appearance: A smooth layer of ganache gives the cake a shiny, professional finish that adds to its visual appeal.
- Flavor Depth: The richness of the ganache adds complexity to the cake’s flavor, intensifying the chocolatey goodness.
- How to Apply: Pour the ganache over the cooled cake and let it drip down the sides. If you prefer a thicker coating, spread it over the top evenly. To make ganache, heat heavy cream and pour it over chopped dark chocolate. Stir until smooth and pour over your cake once it cools slightly.
2. Powdered Sugar – Light and Elegant Sweetness
If you’re looking for something simple yet elegant, a dusting of powdered sugar is the perfect choice. It adds a subtle sweetness without overpowering the rich chocolate flavor. This classic topping is especially great for presenting a light contrast against the dense, fudgy cake.
Why Choose Powdered Sugar?
- Subtle Sweetness: Unlike a sugary frosting or glaze, powdered sugar adds a delicate sweetness that enhances rather than masks the cake’s flavor.
- Elegant Appearance: A light dusting creates a refined look, making the cake look even more professional and appealing.
- Easy to Apply: Simply use a fine sieve or sifter to lightly dust the surface of the cooled cake. For extra decoration, you can stencil patterns or designs with powdered sugar for a creative touch.
- Flavor Balance: The light sweetness complements the rich, dark chocolate without making the cake overly sweet.
3. Whipped Cream – Light, Airy, and Creamy Contrast
For a truly indulgent treat, you can’t go wrong with whipped cream. The light, airy texture of freshly whipped cream contrasts beautifully with the dense, fudgy cake. Whipped cream adds a creamy smoothness that balances the richness of the chocolate cake, creating a perfect harmony of flavors and textures.
Why Choose Whipped Cream?
- Creamy Texture: The soft, velvety texture of whipped cream complements the cake’s dense and fudgy interior, providing a contrast that makes each bite feel light and balanced.
- Neutral Flavor: Whipped cream has a mild flavor, which allows the chocolate cake’s taste to shine while adding just the right amount of creaminess.
- Customizable: You can flavor the whipped cream by adding a hint of vanilla extract or even a bit of chocolate for a richer experience. For a touch of elegance, you can also sweeten the whipped cream with a little sugar or vanilla bean paste.
- How to Apply: Whip the cream until stiff peaks form, then spoon or pipe it onto each slice of cake just before serving. This will add a beautiful, creamy dollop that contrasts nicely with the fudgy texture of the cake.
4. Optional Garnishes for Extra Flair
If you want to make your cake even more special, consider adding some garnishes that pair well with your topping. Here are some ideas:
- Fresh Berries: Raspberries, strawberries, or blackberries add a burst of freshness and a pop of color. Their tartness balances out the sweetness of the cake and toppings.
- Shaved Chocolate: For an extra touch of luxury, sprinkle shaved dark chocolate or chocolate curls over the whipped cream or ganache for a textured finish.
- Nuts: Toasted hazelnuts, almonds, or pecans provide a nice crunch that contrasts well with the soft, fudgy cake and creamy toppings.
- Edible Gold: For a truly indulgent dessert, garnish with a touch of edible gold flakes to make your cake look even more stunning.
Conclusion: A Perfectly Topped Flourless Chocolate Cake
The right topping can elevate your flourless chocolate cake from a simple dessert to an unforgettable indulgence. Whether you choose rich chocolate ganache, a delicate dusting of powdered sugar, or a creamy dollop of whipped cream, each topping brings something unique to the table. Add a few complementary garnishes for extra flair, and you’ll have a dessert that’s as beautiful as it is delicious.
Pairing Ideas: Coffee, Fresh Berries, or Vanilla Ice Cream
Flourless chocolate cake is a delicious, rich dessert on its own, but pairing it with complementary flavors can elevate the experience to a whole new level. Whether you’re serving it at a special occasion or enjoying it as a sweet treat, the right pairing can enhance the cake’s deep chocolate flavor and create a more well-rounded dessert. Here are some of the best pairing ideas to consider:
1. Coffee – A Bold and Flavorful Contrast
Coffee is an excellent pairing with flourless chocolate cake because of its bold, slightly bitter flavor, which provides a delightful contrast to the cake’s rich sweetness. The slight bitterness of coffee cuts through the dense chocolate, allowing you to fully appreciate the depth of the cake’s flavor without feeling overwhelmed by sweetness.
Why Choose Coffee?
- Flavor Contrast: Coffee’s bitterness perfectly balances the cake’s richness, creating a more complex taste experience.
- Enhances Chocolate Flavor: The coffee brings out the roasty, earthy notes in the chocolate, amplifying its flavor.
- Warmth: The warmth of a freshly brewed cup of coffee pairs beautifully with the moist, fudgy texture of the cake, making for a comforting treat.
How to Pair:
- Espresso or Brewed Coffee: A strong cup of espresso or dark-roast coffee is perfect for those who enjoy a bold contrast. If you prefer a milder taste, go for a smooth American coffee or cappuccino.
- Cold Brew: For a refreshing twist, try pairing the cake with cold brew coffee. The smooth, chilled coffee provides a cooler contrast to the warm, rich cake.
- Coffee Flavored Liquor: For an adults-only treat, serve your flourless chocolate cake with a splash of coffee-flavored liquor, like Kahlúa or Baileys Irish Cream.
2. Fresh Berries – A Refreshing, Fruity Balance
Fresh berries are an ideal pairing with flourless chocolate cake due to their tart, juicy sweetness. The natural acidity of berries contrasts beautifully with the rich, dense chocolate cake, helping to lighten the overall flavor and cleanse your palate between bites. Berries also bring vibrant color and texture, enhancing the presentation of the dessert.
Why Choose Fresh Berries?
- Tartness: The slight tang of berries (especially raspberries, blackberries, or strawberries) balances the cake’s sweetness and adds complexity to the flavor.
- Freshness: The juicy freshness of berries contrasts the dense, fudgy texture of the flourless cake, providing a delightful textural contrast.
- Natural Sweetness: Berries offer natural sweetness without overpowering the chocolate flavor, making them an excellent light and refreshing pairing.
- Healthier Option: Fresh berries add a nutritious component to the dessert, boosting its antioxidant content.
How to Pair:
- Raspberries or Blackberries: These berries are especially delicious with chocolate because their slight tartness enhances the sweetness of the cake.
- Strawberries: Freshly sliced strawberries provide a juicy, sweet bite that contrasts well with the cake’s rich flavor.
- Mixed Berries: A combination of berries—blueberries, strawberries, and blackberries—adds complexity and color to the plate. Serve them whole or gently mashed with a little bit of sugar to release their natural juices.
3. Vanilla Ice Cream – Creamy, Cold, and Sweet Contrast
Vanilla ice cream is a classic pairing with chocolate cake, and for good reason. The cold, creamy texture of ice cream creates a delightful contrast to the warm, fudgy richness of the flourless chocolate cake. The sweetness of the ice cream perfectly complements the chocolate’s richness without overpowering it, making it a well-loved combination.
Why Choose Vanilla Ice Cream?
- Creamy Texture: The smooth, creamy texture of vanilla ice cream provides a soft contrast to the dense, chewy texture of the cake.
- Flavor Pairing: Vanilla ice cream’s mild, sweet flavor allows the chocolate cake’s taste to shine, while still adding a creamy richness that enhances the dessert experience.
- Temperature Contrast: The coldness of ice cream pairs wonderfully with the warm cake, offering a temperature contrast that is enjoyable in every bite.
How to Pair:
- Classic Vanilla Ice Cream: A scoop of rich vanilla ice cream is all you need to complete this pairing. Its sweet, creamy flavor blends beautifully with the chocolatey goodness of the cake.
- French Vanilla Ice Cream: For an extra luxurious touch, opt for French vanilla ice cream, which has a richer, custard-like flavor that pairs wonderfully with the fudgy cake.
- Vanilla Bean Ice Cream: For a more textured and fragrant option, try vanilla bean ice cream, which has visible vanilla bean specks and an even deeper flavor profile.
4. Bonus Pairing Ideas
- Salted Caramel Sauce: Drizzling salted caramel sauce over the cake adds a perfect blend of sweetness and saltiness that enhances the chocolate cake’s richness.
- Whipped Cream: Pair your flourless chocolate cake with a dollop of freshly whipped cream for a light and creamy finish that balances out the cake’s dense texture.
- Hazelnut Praline: For an elegant touch, pair your cake with crushed hazelnuts or hazelnut praline for an extra layer of texture and nutty flavor that complements the deep chocolate taste.
Conclusion: Elevate Your Flourless Chocolate Cake with Perfect Pairings
Pairing your flourless chocolate cake with beverages or toppings like coffee, fresh berries, or vanilla ice cream can transform your dessert into a multi-dimensional experience. Whether you’re in the mood for a bold and rich contrast, a fresh and fruity bite, or a creamy indulgence, these pairings are sure to elevate the cake to new heights. Get creative with your pairings, and enjoy the ultimate chocolate dessert experience!
How to Store and Freeze This Gluten-Free Chocolate Cake
One of the best things about flourless chocolate cake is that it’s not only delicious when fresh, but it also stores and freezes beautifully for future enjoyment. Whether you want to enjoy the cake over several days or prepare it ahead of time for a special occasion, knowing how to store and freeze it properly will ensure that it maintains its rich, fudgy texture and intense chocolate flavor.
1. Storing Flourless Chocolate Cake at Room Temperature
If you plan to enjoy your flourless chocolate cake within a few days of making it, you can easily store it at room temperature. This is the best way to maintain its fudgy, moist texture without risking it drying out.
How to Store:
- Wrap the Cake: Once the cake has completely cooled, wrap it tightly in plastic wrap or cover it with a lid to prevent it from absorbing odors or drying out.
- Store in an Airtight Container: For added freshness, place the wrapped cake in an airtight container to preserve its moisture and ensure it stays fresh.
- Shelf Life: Flourless chocolate cake can typically stay at room temperature for up to 3 days. After that, it’s best to refrigerate it to prolong its freshness.
Best Storage Conditions:
- Cool, Dry Area: Store the cake in a cool, dry spot away from direct sunlight or heat sources.
- Avoid Humidity: Make sure the storage area isn’t too humid, as this could affect the texture of the cake and cause it to lose some of its moisture.
2. Refrigerating Flourless Chocolate Cake for Longer Freshness
If you’d like to store your flourless chocolate cake for a longer period, it’s best to keep it in the refrigerator. Refrigeration helps to preserve the cake’s texture and flavor, especially if you’re making the cake ahead of time for an event.
How to Store:
- Wrap Well: After the cake has cooled, wrap it tightly in plastic wrap or cover it in an airtight container to keep it from drying out and to avoid absorbing any odors from other items in the fridge.
- Refrigeration Duration: Flourless chocolate cake can be stored in the refrigerator for up to 1 week without compromising its texture or flavor.
Best Practices:
- Room Temperature Before Serving: When serving, allow the refrigerated cake to sit at room temperature for about 30 minutes to bring back its rich, fudgy texture.
- Avoid Over-Chilling: Do not leave the cake in the refrigerator for too long, as extended chilling may cause the cake to harden and lose its delicious softness.
3. Freezing Flourless Chocolate Cake for Long-Term Storage
If you want to extend the shelf life of your flourless chocolate cake even further, freezing it is a great option. Freezing the cake preserves its rich flavor and texture, so you can enjoy a slice of chocolate heaven months after baking it.
How to Freeze:
- Wrap the Cake Properly: Start by allowing the cake to cool completely. Once cooled, wrap it tightly in plastic wrap. For extra protection against freezer burn, wrap the cake in aluminum foil or place it in a freezer-safe airtight container.
- Slice Before Freezing (Optional): If you prefer to freeze individual slices for easier serving later, slice the cake first and wrap each piece separately. This will allow you to thaw just the amount you need without defrosting the whole cake.
- Label and Date: To keep track of your frozen cake, label the wrapping with the date you’re freezing it, so you know how long it has been stored.
Freezing Duration:
- Flourless chocolate cake can be frozen for up to 3 months without compromising its quality. However, for the best flavor and texture, it’s ideal to eat it within 1 to 2 months.
4. Thawing and Serving Frozen Flourless Chocolate Cake
Once you’re ready to enjoy your frozen flourless chocolate cake, it’s important to thaw it properly to bring back its rich, fudgy texture.
Thawing Process:
- Overnight in the Refrigerator: The best way to thaw the cake is by placing it in the refrigerator overnight. This gentle method ensures the cake remains moist and maintains its texture.
- Room Temperature Thawing: If you’re short on time, you can thaw the cake at room temperature for about 1-2 hours before serving. If you’ve frozen individual slices, you can remove them one by one and allow them to thaw quickly.
- Microwave (For Slices): If you prefer a quicker method, you can microwave individual slices for about 15-20 seconds on low power, which will help the cake soften and regain some of its moistness.
5. Reviving the Cake’s Texture After Freezing
When thawing your flourless chocolate cake, it may lose a little bit of its original texture. Here are some tips to help revive the fudgy, moist consistency after freezing:
- Reheat with a Warm Sauce: If the cake feels a little firmer after freezing, warm it up gently in the microwave or oven and serve it with a drizzle of chocolate ganache or a dollop of whipped cream for extra moisture.
- Serve with Fresh Toppings: Adding a few freshly whipped toppings like whipped cream or fresh berries can help enhance the texture and flavor.
Conclusion: Storing and Freezing Made Easy
With these simple storing and freezing methods, you can ensure that your flourless chocolate cake stays fresh and delicious for days or even months. Whether you’re keeping it for later enjoyment or preparing in advance for a special occasion, these techniques will help maintain its fudgy texture and intense chocolate flavor. Enjoy your cake at its best with proper storage, and don’t be afraid to indulge in a slice whenever the craving strikes!
Conclusion
This Best Flourless Chocolate Cake Recipe is the ultimate dessert for chocolate lovers! It’s easy to make with only 5 ingredients, and the result is a rich, decadent cake that will melt in your mouth. Whether you’re looking for a gluten-free option or simply craving something indulgent, this flourless chocolate cake delivers on flavor and texture. Its fudgy consistency and intense chocolate richness make it perfect for any occasion, from special celebrations to casual treats.
If you’re curious to learn why this flourless chocolate cake could become your new favorite dessert, be sure to check out our other post: [Why This Flourless Chocolate Cake Will Be Your New Favorite Dessert]
We hope you give this simple yet delicious recipe a try and let us know how it turns out. We’re sure it will become a new favorite in your baking repertoire!
Call to Action:
We’d love to hear your thoughts! Please leave a comment below and let us know how this cake turned out for you. Don’t forget to rate the recipe and share it with your friends. Let’s spread the joy of this indulgent, easy-to-make dessert!