
Introduction
If you’re looking for a quick and delicious treat, this Easy Chocolate Chip Banana Bread is the perfect recipe. With just 10 minutes of prep time, you’ll have a moist, flavorful loaf filled with melty chocolate chips. Whether for breakfast, dessert, or a snack, this simple recipe is sure to become a favorite in your kitchen!
Why This is the Best Chocolate Chip Banana Bread Recipe
If you’re looking for a quick and easy way to make chocolate chip banana bread, you’ve come to the right place! Learn how to make this delicious bread in just 10 minutes of prep time, and check out more helpful tips in this article.
Super Moist and Soft Texture Every Time
If you want your banana bread to turn out super moist and soft every time, you need to use the right ingredients and techniques. Fortunately, achieving the perfect texture is easier than you might think! Here’s how:
1. Use Overripe Bananas for Maximum Moisture
First and foremost, make sure to use overripe bananas. The darker and spottier the peels, the better! Overripe bananas not only add natural sweetness but also make the bread extra soft and moist. If your bananas aren’t ripe enough, don’t worry—you can speed up the ripening process by placing them in a paper bag for a day or two.
2. Balance Wet and Dry Ingredients Properly
Another key factor in achieving a soft texture is the proper balance between wet and dry ingredients. If you add too much flour, your banana bread will turn out dense and dry. To avoid this, always:
- Measure flour correctly using the spoon and level method. Simply spoon the flour into the measuring cup and level it off instead of scooping directly from the bag.
- Avoid over-mixing the batter. Over-mixing develops too much gluten, which results in a tougher loaf. Instead, stir gently just until the ingredients are combined.
3. Choose the Right Type of Fat for Extra Softness
When it comes to keeping your banana bread moist, the type of fat you use matters. Here’s a breakdown:
- Butter provides a rich flavor and gives the bread a slightly denser crumb.
- Oil (vegetable or coconut oil) retains more moisture, making the bread extra soft and tender.
- A combination of butter and oil offers the best of both worlds—flavor and moisture!
If you’re looking for an ultra-moist banana bread, consider replacing half the butter with oil for the perfect balance.
4. Don’t Skip the Moisture-Retaining Ingredients
In addition to using the right fats, adding moisture-retaining ingredients is essential. For instance:
- Eggs help bind everything together while keeping the texture soft.
- Sour cream, Greek yogurt, or buttermilk add a slight tang and extra creaminess, which prevents the bread from drying out.
If you don’t have these ingredients on hand, you can substitute with plain yogurt or even a bit of heavy cream.
5. Bake at the Right Temperature for Even Cooking
Even if you follow all the steps above, baking at the wrong temperature can ruin your results. That’s why it’s crucial to:
- Bake at 350°F (175°C) for an evenly cooked, perfectly moist loaf.
- If the temperature is too high, the outside will brown too quickly while the inside remains undercooked, leading to a dry and uneven texture.
For even better results, check the bread 5-10 minutes before the suggested baking time ends to prevent overbaking.
6. Let It Rest for Better Moisture Distribution
Finally, don’t slice into your banana bread right away! Instead, let it rest in the pan for 10-15 minutes before transferring it to a wire rack. This allows the moisture to redistribute, making the bread even softer and more flavorful when you take your first bite.
Final Thoughts
By following these simple yet effective tips, you’ll get a super moist and soft chocolate chip banana bread every single time. So, the next time you bake, keep these steps in mind—you’ll taste the difference!
Perfect for Breakfast, Dessert, or a Snack
One of the best things about chocolate chip banana bread is its versatility. Whether you need a quick breakfast, a satisfying dessert, or a midday snack, this delicious treat fits every occasion. Here’s why it’s a go-to choice for any time of the day:
1. A Quick and Energizing Breakfast Option
Mornings can be hectic, but a slice of chocolate chip banana bread makes a quick and nutritious start to your day. Because it’s made with bananas, it provides:
- Natural sweetness and fiber to keep you full longer.
- Healthy carbs for an instant energy boost.
- Chocolate chips for a little indulgence to brighten your morning.
For a balanced breakfast, pair your banana bread with:
- A spread of nut butter (like peanut or almond butter) for extra protein.
- A cup of Greek yogurt to add creaminess and probiotics.
- Fresh fruit on the side for added vitamins.
If you need an on-the-go breakfast, you can bake the batter as muffins for easy portioning and grab-and-go convenience.
2. A Satisfying Yet Light Dessert
When you’re craving something sweet but not overly rich, chocolate chip banana bread is the perfect dessert alternative. Unlike traditional cakes or pastries, it:
- Is naturally sweetened with ripe bananas, reducing the need for excess sugar.
- Has a soft, cake-like texture but isn’t too heavy.
- Pairs wonderfully with a drizzle of honey, caramel, or even a scoop of vanilla ice cream for a fancier treat.
If you love warm desserts, try toasting a slice and adding a bit of butter or cream cheese for a comforting, melt-in-your-mouth experience.
3. The Ultimate Snack for Any Time of Day
Need a quick bite between meals? Chocolate chip banana bread makes for an ideal snack because it’s:
- Filling but not too heavy, making it perfect for satisfying hunger.
- Easy to pack, so you can bring a slice to work, school, or the gym.
- Great with coffee or tea, making it a cozy afternoon pick-me-up.
For a protein-packed snack, try adding chopped nuts like walnuts or almonds into the batter. If you want to make it even healthier, you can reduce the sugar and swap out some flour for whole wheat flour without sacrificing flavor.
4. Kid-Friendly and Family-Approved
If you have kids, this banana bread is a great way to sneak in fruit without complaints! Since it contains bananas and chocolate chips, even picky eaters will love it. You can also:
- Make it into mini loaves or banana muffins for easy snacking.
- Let kids help with baking—it’s a fun way to get them involved in the kitchen.
- Experiment with mix-ins like cinnamon, shredded coconut, or mini chocolate chips for variety.
Final Thoughts
No matter the time of day, chocolate chip banana bread is always a good idea. Whether you enjoy it for breakfast, dessert, or a snack, it’s a delicious, easy-to-make treat that satisfies cravings while keeping things simple. So, why not bake a loaf today and enjoy it all day long?
One-Bowl Recipe – Easy and Beginner-Friendly
If you’re looking for a quick, mess-free baking experience, this one-bowl chocolate chip banana bread is the perfect choice! With minimal prep and cleanup, it’s ideal for both beginners and experienced bakers. Here’s why this recipe is so easy and hassle-free:
1. No Fancy Equipment Needed
One of the best things about this recipe is that you don’t need any special kitchen gadgets. Unlike some baked goods that require stand mixers or food processors, this banana bread only requires:
- A mixing bowl – Just one! No need for multiple bowls.
- A fork or potato masher – For mashing the bananas.
- A whisk or wooden spoon – To mix the ingredients effortlessly.
If you prefer an even smoother batter, you can use a hand mixer, but it’s completely optional.
2. Simple Step-by-Step Process
With just a handful of easy-to-follow steps, even first-time bakers can make this banana bread without stress:
- Mash the bananas directly in the mixing bowl. No need for a separate plate!
- Add the wet ingredients – eggs, oil (or butter), vanilla extract, and any dairy (like yogurt or milk). Stir until combined.
- Mix in the dry ingredients – flour, sugar, baking soda, and a pinch of salt. Gently fold everything together.
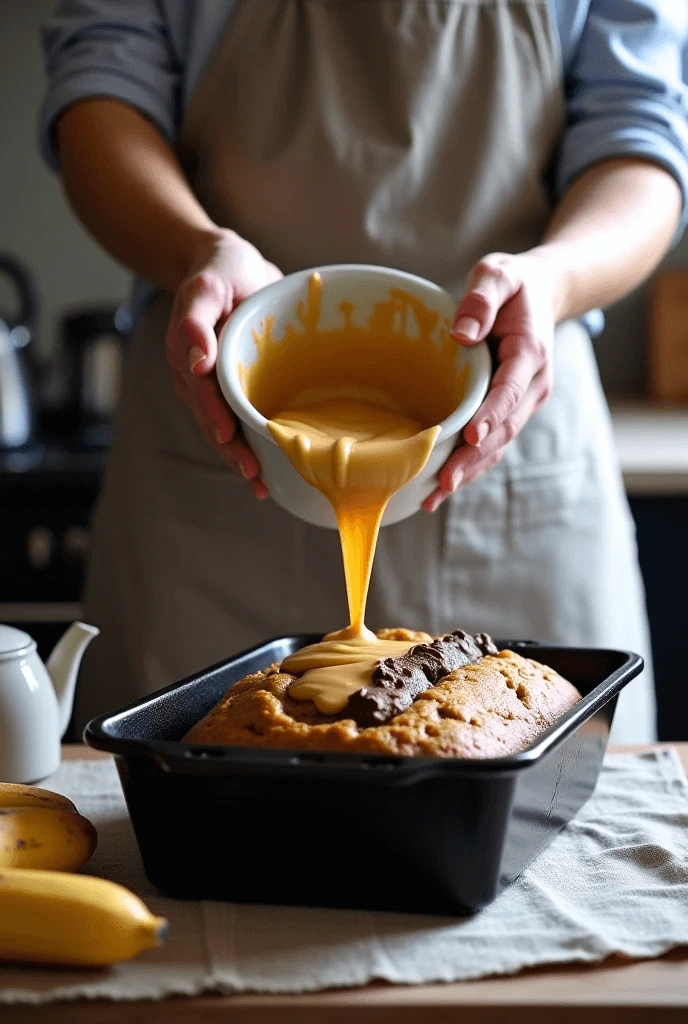
- Add the chocolate chips – Mix them in and pour the batter straight into the baking pan.
That’s it! No need to separately mix wet and dry ingredients in different bowls—just toss everything into one and stir.
3. Less Cleanup, More Enjoyment
Since you’re only using one bowl, cleanup is super quick. Unlike complex recipes that leave a pile of dishes behind, you only need to wash:
- One mixing bowl
- A whisk or spoon
- The loaf pan
This makes the recipe perfect for busy mornings, weeknight baking, or even last-minute desserts.
4. Perfect for Kids and Beginner Bakers
If you’re new to baking, this recipe is a great place to start! Since it’s so forgiving and simple, you don’t have to worry about:
- Over-mixing – Just stir until combined, and you’re good to go.
- Exact measurements – Unlike delicate pastries, banana bread isn’t as strict when it comes to slight measurement variations.
- Complicated techniques – No kneading, rolling, or shaping required—just mix and bake!
It’s also a fun baking project for kids! Since everything goes into one bowl, little hands can easily help with mashing bananas, stirring the batter, and adding chocolate chips.
5. Quick Prep Time – Just 10 Minutes!
Unlike other baked goods that take a long time to prepare, this chocolate chip banana bread only requires 10 minutes of prep before going into the oven. If you:
- Mash the bananas ahead of time, prep time becomes even shorter.
- Use a muffin pan instead of a loaf pan, you can cut down baking time and enjoy your banana bread even faster!
Final Thoughts
This one-bowl banana bread recipe is truly a stress-free, beginner-friendly treat. With minimal mess, easy steps, and quick prep, it’s perfect for busy bakers, families, or anyone craving a delicious homemade treat without the hassle. So grab a bowl, mash some bananas, and enjoy the easiest banana bread you’ll ever make!
Essential Ingredients for a Moist and Fluffy Banana Bread
Best Bananas for Banana Bread – How Ripe Should They Be?
Choosing the right bananas is crucial for making the best banana bread. The ripeness of the bananas directly impacts the flavor, texture, and moisture of the bread. Here’s everything you need to know about choosing the perfect bananas for your recipe:
1. Look for Overripe Bananas
To make the best banana bread, the bananas should be overripe, not just ripe. Ideally, you want to see dark spots and patches on the peel—the more spots, the better! Overripe bananas:
- Release more natural sugars, which makes the bread extra sweet and moist.
- Are easier to mash, creating a smoother batter.
- Provide the rich, caramelized banana flavor that makes banana bread so irresistible.
If your bananas are still mostly yellow with only a few spots, they may not be ripe enough. This can lead to a less flavorful and drier loaf.
2. Can You Use Completely Black Bananas?
Yes! In fact, bananas with black peels are perfect for banana bread. At this stage, the bananas are at their sweetest and have the maximum moisture content. While they might not look visually appealing, their flavor is unparalleled. If you have a bunch of black bananas sitting in your kitchen, don’t throw them away—they’re ideal for baking.
To make the most of overripe bananas, you can:
- Store them in the freezer until you’re ready to bake. Just peel and place the bananas in a sealed bag or container.
- Let them thaw when needed—they’ll be extra soft and easy to mash.
3. How to Speed Up the Ripening Process
If you don’t have overripe bananas on hand but you’re craving banana bread, don’t worry! There are ways to speed up the ripening process:
- Place bananas in a brown paper bag and fold the top closed. The ethylene gas released by the bananas will help them ripen faster.
- Use the oven: If you’re in a rush, place unripe bananas on a baking sheet and heat them at 300°F (150°C) for about 15-20 minutes, or until the skins turn black. While this method won’t provide the same level of natural sweetness as truly overripe bananas, it’s a quick solution when you’re in a pinch.
4. How Ripe Is Too Ripe?
While super ripe bananas are great for banana bread, extremely overripe bananas (with fully black, mushy peels) might not be the best choice. If the bananas are too mushy or have an unpleasant odor, they could negatively affect the flavor of your bread. Look for bananas that are:
- Dark but still intact—they should feel soft when gently pressed, but not mushy or leaking liquid.
- Sweet and fragrant, without any signs of fermentation or spoilage.
5. Texture and Flavor – Why Ripeness Matters
Bananas that are ripe enough will create the ideal texture and flavor for your banana bread. Overripe bananas:
- Provide extra moisture, which helps keep the banana bread soft and tender.
- Give the bread a stronger banana flavor, making each bite more banana-packed and flavorful.
- Help create a fluffy texture due to their natural breakdown of starches into sugars.
In contrast, bananas that are too green or not ripe enough won’t provide the same level of flavor or moisture, which can result in a denser, drier loaf.
Final Thoughts
The ripeness of the bananas plays a key role in making your banana bread both moist and flavorful. For the best results, aim for bananas that are overripe with plenty of dark spots—the darker, the better! If you’re in a rush, there are ways to speed up the ripening process, but using really ripe bananas is always your best bet for that perfect banana bread.
Choosing the Right Chocolate Chips for Baking
When it comes to making chocolate chip banana bread, the type of chocolate chips you choose can have a significant impact on both the flavor and texture of the finished loaf. With so many options available, it’s important to know how to pick the right one for the best results. Here’s everything you need to know:
1. Semi-Sweet Chocolate Chips – The Classic Choice
The most common and classic choice for banana bread is semi-sweet chocolate chips. These provide the perfect balance of sweetness and cocoa flavor. They are:
- Ideal for most recipes, as their slightly bitter flavor complements the natural sweetness of the bananas without being overpowering.
- Versatile – They melt well but don’t completely dissolve, giving your banana bread that satisfying bite of chocolate.
- Great for layering within the bread, creating pockets of chocolate throughout.
Semi-sweet chocolate chips are the most popular option for a reason, and if you’re unsure which to choose, you can’t go wrong with them.
2. Milk Chocolate Chips – For a Sweeter, Creamier Taste
If you prefer a sweeter, creamier flavor, milk chocolate chips are the way to go. These chips are:
- Softer and sweeter than semi-sweet chocolate, making them a good option for those who want a less intense chocolate flavor in their banana bread.
- Perfect if you’re making banana bread that’s on the sweeter side, as they help boost the overall sweetness of the loaf.
- Ideal for kids or chocolate lovers who enjoy a smoother, more indulgent chocolate experience.
Keep in mind that milk chocolate chips will melt a bit more than semi-sweet chips, so your banana bread may have more gooey pockets of melted chocolate. If you enjoy a rich, creamy texture, these will be a great addition.
3. Dark Chocolate Chips – For a Richer, More Intense Flavor
For those who prefer a richer, more intense chocolate flavor, dark chocolate chips are an excellent option. These chips are:
- Less sweet than semi-sweet or milk chocolate chips, which means they provide a more complex, bold taste that pairs beautifully with the sweetness of the bananas.
- Often used by chocolate connoisseurs or those who enjoy a more sophisticated flavor profile.
- Ideal if you’re looking to balance out the sweetness of your banana bread, especially if your bananas are extra ripe and sweet.
Dark chocolate chips also tend to hold their shape better than other varieties, so they’re great if you want distinct pieces of chocolate that don’t fully melt into the bread.
4. Mini Chocolate Chips – Perfect for Even Distribution
If you want to ensure that chocolate is evenly distributed throughout your banana bread, mini chocolate chips are a great choice. These chips are:
- Smaller in size, making it easier to incorporate them into the batter without overwhelming any bite with a chunk of chocolate.
- Perfect for getting chocolate in every bite, giving you a consistent flavor throughout the loaf.
- A great option if you want to make sure the chocolate doesn’t sink to the bottom or stick too much together.
Mini chocolate chips also melt faster, creating a more uniform texture in your banana bread, so you don’t get large pockets of chocolate but rather an even melted chocolate layer.
5. White Chocolate Chips – For a Sweet and Creamy Twist
If you’re looking for a more unique flavor, white chocolate chips can add an extra level of creaminess and sweetness to your banana bread. While not technically “chocolate,” they’re made with cocoa butter, which gives them a smooth, rich taste. These chips:
- Are ideal for those who love sweet, creamy flavors.
- Pair surprisingly well with bananas because of their smoothness, enhancing the sweetness without competing with it.
- Offer a different texture than traditional chocolate chips, adding a creamy texture when melted.
White chocolate chips also work wonderfully if you want to experiment with other flavor additions like coconut flakes, macadamia nuts, or cinnamon. The white chocolate will add richness and a slight vanilla flavor that complements these ingredients.
6. Vegan and Allergy-Friendly Chocolate Chips
If you or your guests have dietary restrictions such as dairy intolerance or vegan preferences, don’t worry—there are plenty of options for you! Many brands offer dairy-free or vegan chocolate chips that are just as delicious as their dairy counterparts. These chips:
- Are made with cocoa solids, cocoa butter, and sweeteners like cane sugar, making them suitable for vegan and dairy-free diets.
- Often come in a variety of flavors, from dark chocolate to white chocolate alternatives, so you don’t have to sacrifice taste for dietary preferences.
Additionally, there are also allergy-friendly chocolate chips that are free of nuts, gluten, or soy, making them safe for those with specific food allergies.
Final Thoughts
Choosing the right chocolate chips for your banana bread can make all the difference in the flavor and texture of the finished loaf. Whether you prefer semi-sweet, milk chocolate, dark chocolate, or even white chocolate, each variety offers something unique. Don’t be afraid to experiment with different kinds to find the perfect combination for your taste buds. With the right chocolate chips, you’ll create a loaf of banana bread that’s nothing short of irresistible!
Key Ingredients That Make the Bread Soft and Moist
Achieving that perfect balance of soft, moist banana bread requires a combination of carefully selected ingredients. The right ingredients don’t just enhance the flavor—they also play a crucial role in creating the light, tender crumb that makes banana bread irresistible. Let’s dive into the key ingredients that contribute to the moisture and softness of your banana bread:
1. Ripe Bananas – The Moisture Powerhouse
The most important ingredient for soft and moist banana bread is, of course, ripe bananas. Overripe bananas are naturally rich in moisture due to their breakdown of starches into sugars, which gives the bread its sweetness and soft texture. The riper the bananas, the more moisture they provide, making the bread:
- Tender with a delicate crumb.
- Sweet and flavorful without needing too much sugar.
- Full of that characteristic banana flavor that pairs so perfectly with chocolate chips or nuts.
If you don’t use overripe bananas, your banana bread may end up being drier and less flavorful, so always aim for bananas with plenty of dark spots and softness.
2. Oil or Butter – Fat for Moisture and Richness
Another key element to creating moist banana bread is the use of oil or butter. Both of these ingredients provide necessary fat, which contributes to:
- Richness and tenderness in every bite.
- Moisture retention during the baking process. Unlike water-based ingredients, fat helps the bread stay moist for longer.
- Flavor depth—oil gives the bread a neutral flavor, while butter adds a rich, creamy taste.
Vegetable oil, canola oil, or coconut oil are all excellent options for a soft texture. If you want extra flavor, unsalted butter will add a delicious richness. If you choose butter, make sure it’s softened to avoid lumpy batter.
3. Eggs – Binding and Moisture Retention
Eggs aren’t just for binding the ingredients together—they also play an important role in keeping your banana bread moist and fluffy. The proteins in eggs help to:
- Hold the ingredients together while also allowing the batter to rise during baking.
- Add structure to the bread without making it dense.
- Contribute to moisture retention by preventing the bread from becoming overly dry.
When using eggs, make sure they’re at room temperature to help them blend smoothly into the batter. This will ensure that your banana bread has a uniform texture throughout.
4. Sour Cream or Yogurt – Extra Moisture and Tenderness
Adding a dairy product like sour cream or Greek yogurt to your banana bread batter can significantly boost its moisture content. These ingredients:
- Add an extra layer of creaminess, making the bread feel rich and decadent.
- Help keep the bread moist even after it’s baked.
- Tenderize the bread, making it soft and velvety.
Greek yogurt also introduces a slight tanginess, which balances out the sweetness of the bananas and chocolate chips. Both sour cream and yogurt contain lactic acid, which helps break down proteins and create a more tender texture.
5. Brown Sugar – For Softness and Richness
Brown sugar is another secret weapon for making banana bread both moist and flavorful. The molasses in brown sugar:
- Adds moisture to the batter, helping to keep the bread soft.
- Enhances the depth of flavor, making the banana bread richer and more complex than using white sugar alone.
- Contributes to a slightly chewy texture that makes each slice indulgent.
While white sugar can be used, substituting a portion of it with brown sugar (or even using all brown sugar) will give the bread a softer, moister texture that stays fresh longer.
6. Buttermilk – An Extra Boost of Moisture and Flavor
Buttermilk is a fantastic addition for extra moist banana bread. The acidity in buttermilk reacts with the baking soda to:
- Create a lighter, fluffier texture by adding air to the batter.
- Keep the bread moist throughout baking, even if it sits for a few days.
- Help the bread rise better and develop a delicate crumb.
If you don’t have buttermilk on hand, you can easily make a substitute by adding a tablespoon of lemon juice or vinegar to a cup of milk, letting it sit for a few minutes. This will mimic the acidity of buttermilk, helping to achieve similar results in your banana bread.
7. Baking Soda – Leavening for a Soft Texture
While not directly contributing to moisture, baking soda is essential for the softness of banana bread. Baking soda:
- Reacts with acidic ingredients, like bananas, buttermilk, or yogurt, to help the bread rise and create a light, airy texture.
- Ensures the bread doesn’t turn out dense or heavy.
- Helps with the browning of the bread, giving it a nice, golden top.
Make sure you use fresh baking soda, as expired baking soda can lose its leavening power, leading to dense and heavy banana bread.
Final Thoughts
Creating the perfect soft and moist banana bread is all about using the right combination of ingredients that work together to create the ideal texture and flavor. Overripe bananas provide the necessary moisture, while butter or oil, eggs, and dairy products like yogurt or sour cream help keep the bread rich and tender. Don’t forget the key elements like brown sugar and baking soda to add flavor and softness. With these ingredients, your banana bread will turn out irresistibly moist and soft every time!
How to Make the Best Chocolate Chip Banana Bread (Step-by-Step Guide)
تحضير المكونات وصينية الخبز للخبز المتساوي
For your banana bread to bake evenly and achieve the perfect texture, proper preparation is key. Whether you’re a beginner or an experienced baker, following a few simple steps to prep your ingredients and loaf pan can make a huge difference in the final result. Let’s explore how you can ensure that your banana bread bakes to perfection, with a uniform texture and even rise.
1. Ensure All Ingredients Are Room Temperature
One of the most important steps in prepping your ingredients is ensuring that they are at room temperature before mixing. This includes ingredients like eggs, butter (or oil), and any dairy products like yogurt or buttermilk. Here’s why:
- Better Mixing: Room temperature ingredients blend together more easily, allowing for a smoother batter. Cold ingredients can create lumps or cause the batter to be unevenly mixed, which can lead to dense pockets or an uneven texture in the final loaf.
- Even Rise: Cold butter or eggs can disrupt the leavening process (when combined with baking soda), leading to an inconsistent rise. Room temperature ingredients help maintain a uniform batter consistency, ensuring the bread rises evenly during baking.
Take about 15-20 minutes to let your ingredients come to room temperature before starting. This simple step will make a noticeable difference in the texture and appearance of your banana bread.
2. Mash Bananas Evenly for Consistent Moisture
One of the key ingredients in banana bread is the banana itself, and how you mash it can significantly impact the texture of your loaf. To get an even consistency in every slice:
- Mash the bananas well: Make sure your bananas are fully mashed with no large chunks. This ensures that the moisture from the bananas is evenly distributed throughout the batter. You can use a fork, potato masher, or even a hand mixer to achieve a smooth, consistent mash.
- Avoid over-mashing: While you want the bananas to be soft, you don’t need to mash them into a puree. Leave a few small chunks of banana to add natural texture and flavor pockets to your bread.
- If you’re using bananas that are super ripe, they will mash more easily and distribute moisture more effectively.
Well-prepared mashed bananas help in achieving a uniform moisture level across the batter, ensuring your banana bread turns out soft and not too wet or too dry in certain areas.
3. Sift Dry Ingredients for a Light, Airy Batter
Sifting your dry ingredients—such as flour, baking soda, salt, and spices—before adding them to the wet ingredients is a crucial step that should never be skipped. Here’s why sifting helps:
- Even Distribution of Leavening Agents: Sifting ensures that baking soda or baking powder is evenly distributed throughout the flour, preventing clumps that could result in uneven rising.
- Prevents Over-Mixing: Sifting creates a lighter flour mix, which is easier to incorporate into the wet ingredients. This helps avoid over-mixing, which can cause the bread to turn out dense.
- Smoother Texture: Sifting eliminates any lumps in the flour or other dry ingredients, creating a smoother batter that bakes more evenly.
To sift your dry ingredients, you can use a fine-mesh sieve or a sifter, or simply whisk them together in a large bowl to break up any clumps. The goal is to ensure a light and airy texture before combining with the wet ingredients.
4. Grease or Line the Loaf Pan for Easy Removal and Even Baking
The next step in prepping for even baking is preparing the loaf pan. The way you prepare the pan ensures that your banana bread bakes evenly and doesn’t stick to the sides. Follow these tips:
- Grease the pan: Use butter, oil, or cooking spray to coat the sides and bottom of the loaf pan. This helps prevent the bread from sticking and ensures it releases easily once baked. For added insurance, you can line the pan with parchment paper—especially if you plan to remove the bread from the pan right after baking.
- Even Pan Size: Make sure you are using the correct pan size as specified in your recipe. A smaller or larger pan could cause uneven baking. For a typical banana bread recipe, a 9×5-inch loaf pan is the most common size.
- Use the Right Material: Dark-colored pans absorb more heat and may cause the bread to brown too quickly. If you use a dark pan, reduce the baking temperature by about 25°F. Light-colored or shiny pans promote even baking and allow the bread to rise more uniformly.
To ensure the best baking environment, check your pan before pouring in the batter to make sure it’s clean and prepared for even heat distribution.
5. Gently Fold in Chocolate Chips and Other Add-ins
If you’re adding chocolate chips or other mix-ins to your banana bread, be sure to fold them in gently at the very end. Here’s why:
- Avoid Overmixing: Overmixing after adding the chips can cause the batter to become too heavy, which may result in dense bread. It’s important to fold the ingredients in just until they’re evenly distributed.
- Even Distribution: Gently folding in your chocolate chips or nuts ensures that they are spread evenly throughout the batter, without sinking to the bottom during baking. If you sprinkle a small amount of flour over your mix-ins before folding them into the batter, it can help them stay suspended evenly.
- Consistency: This gentle folding ensures that the chocolate chips are spread evenly without disrupting the texture of the batter.
6. Use an Oven Thermometer for Accurate Baking Temperature
One often-overlooked step in ensuring even baking is using an oven thermometer. Many ovens don’t display an accurate internal temperature, which can cause inconsistencies in your baking. By using a thermometer:
- You’ll ensure your oven is at the exact temperature needed for your banana bread to bake evenly.
- Avoid under-baking or over-baking, which can result in an uneven rise and undesirable texture.
- Maintain a consistent temperature for the entire baking time to guarantee an even bake.
Final Thoughts
Properly prepping your ingredients and loaf pan is essential for achieving evenly baked banana bread. By ensuring your ingredients are at room temperature, mashing your bananas evenly, sifting your dry ingredients, and preparing your loaf pan correctly, you’ll help the bread rise uniformly and bake to a golden, tender perfection. These simple steps make a big difference in achieving a consistently moist and fluffy loaf every time!
Mixing the Banana Bread Batter – The One-Bowl Method
When it comes to banana bread, simplicity is key, and the one-bowl method is the perfect approach for quick and easy baking with minimal cleanup. This method involves mixing all your ingredients in a single bowl, which not only saves you time but also helps the batter come together in a smooth, uniform consistency. Here’s how you can master the one-bowl method to make the best banana bread, with perfectly mixed ingredients that result in a soft, moist loaf every time.
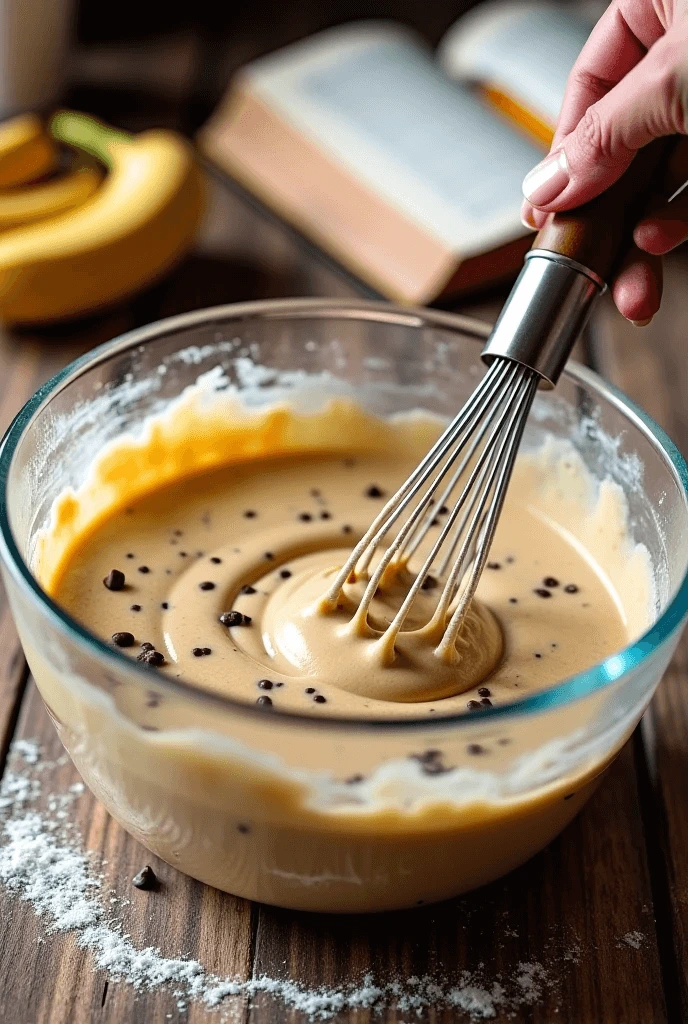
1. Start with Wet Ingredients First
To ensure the batter blends smoothly and doesn’t become lumpy, always start by mixing your wet ingredients first. This includes items like:
- Mashed bananas
- Eggs
- Butter or oil
- Yogurt or sour cream (if using)
Using a large mixing bowl, add the wet ingredients and whisk them together until everything is well-combined. Starting with these ingredients first helps create a smooth base for the dry ingredients to incorporate into without clumping. Make sure your bananas are mashed thoroughly before adding to the bowl, as any large chunks of banana can lead to uneven texture throughout the bread.
2. Add Sugar and Mix Until Smooth
Once your wet ingredients are fully blended, it’s time to add the sugar (or sugars, if you’re using both white and brown sugar). Incorporate the sugar thoroughly into the wet mixture by whisking or stirring well. The goal is to dissolve the sugar into the liquid, which helps create a smoother batter and ensures the sugar doesn’t clump or create uneven pockets of sweetness in your finished bread.
- For a smooth texture, don’t rush this step—take your time to ensure the sugar is fully combined with the wet ingredients before moving on to the dry ingredients.
3. Sift and Add Dry Ingredients
To maintain a light and airy texture, sift your dry ingredients (such as flour, baking soda, and salt) before adding them to the wet mixture. This step prevents clumping and ensures that your leavening agents (like baking soda) are evenly distributed throughout the flour. If you don’t have a sifter, simply whisk the dry ingredients together in a separate bowl before adding them to the wet ingredients.
When adding the dry ingredients to the wet mixture:
- Fold gently: Use a spatula or wooden spoon to fold the dry ingredients into the wet mixture. The goal is to combine everything without overworking the batter. Overmixing can result in dense bread, so stir just enough to incorporate the dry ingredients into the wet mixture.
- Don’t overdo it: If you see a few lumps or streaks of flour, don’t worry. These will dissolve as the batter rests, and stirring too much can make the bread heavy and tough.
4. Add Mix-ins Gently
If you’re adding chocolate chips, walnuts, or other mix-ins, do so after the dry and wet ingredients are combined. Gently fold them into the batter until they’re evenly distributed, but be careful not to overmix. Over-mixing at this stage can cause:
- The mix-ins to sink to the bottom of the batter, leading to uneven distribution.
- The batter to become dense, as the more you mix, the more air gets knocked out of the batter.
Lightly tossing your mix-ins in a little bit of flour before folding them in will help prevent them from sinking and ensure they stay evenly distributed throughout the loaf.
5. Check the Consistency of the Batter
As you mix, it’s important to check the consistency of the batter to ensure it’s just right. The batter should be thick but spoonable, with a smooth, slightly lumpy texture from the mashed bananas. If it feels too thick (like dough), add a small amount of milk, buttermilk, or water to loosen it up, just until it reaches the perfect batter consistency.
The key is to avoid adding too much liquid, which can make the banana bread overly moist and cause it to collapse in the middle while baking. On the other hand, if the batter is too thick, it may lead to an overly dense loaf.
6. Avoid Overmixing – The Secret to Light and Fluffy Banana Bread
The most important thing to remember when mixing banana bread batter is to avoid overmixing. Overmixing activates the gluten in the flour, which can lead to banana bread that is more like a brick than a soft, fluffy loaf. To keep your banana bread tender and light:
- Mix until just combined: Once you’ve added the dry ingredients to the wet, stir gently until the flour is fully incorporated. Small lumps are fine and won’t affect the texture of your banana bread.
- Don’t worry about perfection: If there are a few small streaks of flour or banana chunks, these will disappear during baking, and your banana bread will still turn out delicious.
7. Rest the Batter Before Baking (Optional)
If you have the time, you can let your mixed batter rest for about 5–10 minutes before pouring it into the loaf pan. This allows the flour to fully hydrate and can give the bread a slightly tighter crumb. Additionally, resting the batter can help prevent the bread from being too wet in the center and give it a more even texture once baked. However, this step is optional and can be skipped if you’re short on time.
Final Thoughts
The one-bowl method for banana bread is a simple yet effective technique that ensures your banana bread turns out moist, tender, and perfectly mixed every time. By starting with the wet ingredients, gently incorporating the dry ingredients, and carefully folding in mix-ins, you create a smooth batter that bakes evenly and results in a delicious loaf. Remember, gentle mixing is the key to avoiding dense bread, and by using this method, you’ll be able to enjoy the perfect banana bread with minimal effort and cleanup.
Baking at the Right Temperature for a Perfect Loaf
One of the most crucial aspects of baking banana bread (or any loaf, for that matter) is baking it at the correct temperature. While banana bread might seem like a simple recipe, the baking temperature plays a major role in achieving a loaf that is moist, fluffy, and golden brown without being undercooked or overly dry. Here’s how you can ensure that your banana bread bakes to perfection by understanding the importance of oven temperature, the correct rack position, and the proper baking time.
1. Preheat Your Oven for Consistent Results
Before you even begin preparing your banana bread batter, always preheat your oven. Preheating ensures that your oven reaches the desired temperature before you put your loaf inside, which promotes even baking.
- Avoid the temptation to skip preheating: Many novice bakers think they can skip this step, but it can cause the bread to bake unevenly, with the edges becoming too brown while the center remains raw.
- Set your oven to 350°F (175°C), which is typically the ideal temperature for banana bread. If your oven runs hotter, you may need to adjust the temperature slightly (lower it by 10–15°F) to prevent burning the edges before the bread is fully cooked in the center.
- Use an oven thermometer: Oven temperature can vary, and sometimes the oven’s display can be inaccurate. Using an oven thermometer ensures that you’re baking at the exact temperature, helping you avoid any issues with underbaking or overbaking.
2. Rack Position Matters: Center is Key
The rack position in your oven directly affects how your banana bread bakes. Baking your bread in the right spot will ensure it bakes evenly, rising nicely without becoming too dark on top or underdone in the middle.
- Bake in the center of the oven: Position your rack in the middle of the oven, which provides the best heat circulation around the bread. This ensures that the bread cooks evenly on all sides, avoiding overly dark crusts or a raw center.
- Avoid baking on the top rack: The top rack tends to get too much direct heat, causing the top of the loaf to brown too quickly while leaving the center underbaked.
- Don’t bake on the bottom rack either, as this can cause the bottom to overcook or burn before the rest of the loaf is done.
By placing your loaf in the center rack, you’ll achieve even heat distribution and help the bread rise uniformly.
3. The Ideal Temperature: 350°F (175°C)
The most common temperature for baking banana bread is 350°F (175°C), as it strikes the right balance between baking the bread through and giving it a beautiful golden-brown crust.
- Moderate Heat: Banana bread requires moderate heat to ensure it bakes slowly and evenly. Baking at too high a temperature can cause the bread to rise too quickly and then collapse, while too low a temperature can lead to a dense, undercooked center.
- Oven Types and Variations: If your oven runs cooler, it might be necessary to adjust the temperature slightly higher. Conversely, if your oven tends to get hotter, reduce the temperature by 10–15°F to prevent the bread from burning on the outside before the inside is fully cooked.
4. Baking Time: Don’t Rush the Process
While the baking time can vary depending on your oven and the size of the loaf pan, banana bread typically requires between 55 to 65 minutes to bake fully at 350°F. It’s important to not rush the process, as opening the oven door too frequently can lower the temperature and cause the bread to collapse. Here are some tips to monitor the baking process:
- Start checking the bread at 50 minutes: After about 50 minutes of baking, start checking for doneness. Insert a toothpick or cake tester into the center of the loaf. If it comes out clean or with just a few moist crumbs, the bread is done.
- Don’t overbake: While it’s tempting to leave the bread in for a few extra minutes, overbaking can lead to a dry loaf. A slight moist crumb is perfectly fine and often indicates a deliciously moist and tender banana bread.
- If the top is browning too fast: If the top of the bread begins to brown too quickly, you can cover it loosely with aluminum foil to prevent burning. This will allow the loaf to continue baking without getting too dark on top.
5. Let It Cool Properly
Once your banana bread is done baking, let it cool in the pan for 10 minutes. This short resting period allows the loaf to firm up a bit, making it easier to remove from the pan without falling apart. After 10 minutes, turn the pan over to gently release the bread, and then allow it to cool completely on a wire rack. Cooling on a wire rack is essential because it allows air to circulate around the loaf, preventing the bottom from becoming soggy.
6. Signs That the Loaf is Perfectly Baked
To know your banana bread is fully baked and not undercooked in the center, look out for these key signs:
- Golden-brown color: The top and edges should have a rich, golden-brown color, while the center should rise and hold its shape.
- Firm texture: The loaf should be firm to the touch and spring back slightly when you press the top gently.
- Clean toothpick test: When inserted into the center of the loaf, the toothpick should come out with no wet batter—just a few moist crumbs. This indicates the bread is cooked through.
Final Thoughts
Baking banana bread at the right temperature and for the appropriate amount of time is critical to getting that perfect loaf with a golden-brown crust and a moist, tender crumb. By preheating your oven, placing the loaf in the center rack, and keeping an eye on the temperature and baking time, you’ll be able to create a banana bread that’s baked evenly and beautifully every time. Remember, patience is key—don’t rush the baking process, and always check for doneness before removing the bread from the oven.
Pro Tips to Make Your Chocolate Chip Banana Bread Even Better
How to Keep Banana Bread Moist for Days
Banana bread is known for its moist and tender texture, but one of the challenges bakers often face is keeping it fresh and moist for several days after it’s baked. The good news is that with a few simple storage tips, you can preserve that delicious, soft texture and ensure your banana bread stays as fresh as possible for days. Here’s how to store your banana bread properly and prevent it from drying out.
1. Store in an Airtight Container
One of the most important steps in keeping banana bread moist is ensuring it is stored in an airtight container. Exposure to air causes moisture to evaporate from the bread, which can result in a dry, stale loaf.
- Use a plastic container or zip-top bag: A plastic container with a tight-fitting lid or a resealable plastic bag will create a moisture seal around the bread, keeping it soft for longer.
- Wrap it tightly: If you don’t have an airtight container, wrap the bread tightly in plastic wrap or aluminum foil. This helps seal in the moisture and prevent the bread from drying out.
2. Let It Cool Completely Before Storing
While it’s tempting to store banana bread as soon as it’s out of the oven, it’s important to let it cool completely before sealing it in a container. Storing warm bread can trap steam, which may cause the crust to become soggy and make the bread lose its texture.
- Allow it to cool on a wire rack for at least 30 minutes to an hour before storing. This ensures the bread cools evenly and prevents condensation from forming inside the container, which could make the bread soggy.
3. Store at Room Temperature (Short-Term Storage)
For short-term storage, banana bread should be kept at room temperature. When stored in an airtight container or tightly wrapped, it can stay fresh for up to 3–4 days.
- Avoid refrigerating banana bread unless necessary. While refrigeration can prolong the shelf life, it tends to dry out the bread and affect its flavor and texture.
- If you’re planning on eating the bread within a few days, keep it at room temperature in a cool, dry place away from direct sunlight and heat sources.
4. Freeze for Long-Term Storage
If you want to keep banana bread fresh for an extended period, freezing is the best option. Freezing helps preserve the bread’s moisture and texture for up to 3 months or even longer. Here’s how to properly freeze banana bread to maintain its freshness:
- Wrap it tightly: Before freezing, make sure your banana bread is wrapped tightly in plastic wrap and aluminum foil or placed in a freezer-safe zip-top bag. The goal is to eliminate as much air as possible to prevent freezer burn.
- Slice before freezing: For easier access, consider slicing the loaf before freezing it. This way, you can defrost individual slices rather than the whole loaf, allowing you to enjoy fresh banana bread without having to thaw the entire batch.
- Label the package: Don’t forget to label the bag or wrap with the date of freezing. This way, you’ll know exactly when it was frozen and can enjoy it at its best quality.
5. Thaw Properly for Optimal Moisture
When you’re ready to enjoy your frozen banana bread, it’s important to thaw it properly to ensure it stays moist and delicious.
- Thaw at room temperature: Remove the bread from the freezer and allow it to thaw at room temperature for several hours or overnight. This slow thawing process helps preserve the moisture and texture of the bread.
- Quick thawing option: If you’re in a hurry, you can microwave individual slices on low heat for 20–30 seconds to thaw them quickly. Be careful not to overheat, as this can dry the bread out.
- Reheating whole loaves: If you froze the entire loaf, you can also place it in the oven at 300°F (150°C) for about 10–15 minutes to warm it up while keeping the moisture intact.
6. Add Moisture-Retaining Ingredients
Certain ingredients in your banana bread recipe can naturally help retain moisture for longer periods. Here are some ingredients that contribute to the moist texture:
- Sour cream or yogurt: Both of these ingredients add moisture and help preserve the bread’s texture over time. You can add a small amount of sour cream or yogurt to your banana bread batter for extra softness.
- Buttermilk: Buttermilk can also help keep the bread moist, as it contributes to a rich and tender crumb.
- Oil instead of butter: While butter adds flavor, oil (such as vegetable or canola oil) can help retain moisture better, making it a great option for recipes designed to stay soft for longer.
7. Reapply a Moisture Seal for Extended Freshness
If you notice that the bread is starting to dry out after a few days of storage, you can give it a boost of moisture by wrapping it in a damp paper towel and microwaving it for a few seconds. This will reintroduce some moisture back into the bread, making it taste as if it were freshly baked.
Final Thoughts
With the right storage techniques, you can enjoy your banana bread for days without sacrificing its signature moist, soft texture. By storing it in an airtight container at room temperature or freezing it for longer storage, you’ll be able to maintain the freshness of the loaf. Additionally, incorporating moisture-retaining ingredients in your recipe can further ensure that your banana bread stays perfectly soft, tender, and delicious for an extended period. So go ahead—bake that loaf, store it properly, and enjoy your banana bread for days to come!
Avoiding Common Mistakes That Ruin Banana Bread
Making banana bread might seem like a straightforward process, but there are a few common mistakes that can easily derail your efforts, leading to a loaf that’s too dry, too dense, or lacking in flavor. Fortunately, most of these mistakes are preventable with just a little bit of awareness and care during the baking process. Here’s a guide to the most common banana bread mistakes and how to avoid them:
1. Using Under-Ripe or Over-Ripe Bananas
Bananas are the star ingredient of banana bread, and the ripeness of the bananas is crucial to the final texture and flavor of your loaf.
- Under-ripe bananas: If your bananas aren’t ripe enough, they may not provide enough sweetness or moisture for the bread. The bread will turn out denser and less flavorful. Avoid using firm, yellow bananas—they won’t release enough natural sugars and moisture to create a soft, fluffy loaf.
- Overripe bananas: While overripe bananas (with lots of brown spots) are typically preferred for banana bread, there is a point where they become too mushy. Bananas that are too soft can overwhelm the batter, making the bread too wet and leading to an overly dense loaf. Ideally, you want your bananas to be very ripe, with brown spots but still firm enough to mash easily without being too mushy.
Tip: If you find yourself with under-ripe bananas, you can speed up the ripening process by placing them in a brown paper bag with an apple for a couple of days. Alternatively, for overripe bananas, try freezing them until you’re ready to bake!
2. Overmixing the Batter
Overmixing banana bread batter is one of the most common mistakes that leads to a tough, dense loaf. The act of mixing activates the gluten in the flour, which helps structure the bread, but if you mix too vigorously or for too long, it can make the bread heavy and chewy instead of light and airy.
- Mix just until combined: Stir the ingredients until the flour is just incorporated into the wet ingredients. A few lumps are okay, as they will usually bake out.
- Use a gentle hand: After adding the dry ingredients to the wet ingredients, fold them together gently with a spatula. Overworking the batter creates an overly dense texture that’s not ideal for banana bread.
Tip: If you’re using an electric mixer, mix at low speed and stop as soon as the flour is incorporated.
3. Not Measuring Ingredients Properly
Baking is a science, and accurate measurements are crucial to ensuring the right balance of ingredients, especially in a delicate recipe like banana bread.
- Use a kitchen scale: If you want to be as precise as possible, using a kitchen scale to weigh your ingredients (especially flour) can make a huge difference. Fluff up the flour before measuring or scoop and level to avoid adding too much flour, which can make the bread dry.
- Don’t eyeball ingredients: For ingredients like baking soda or baking powder, precision is key. Too much or too little of these leavening agents can affect the rise and texture of the loaf.
Tip: Use measuring cups specifically designed for dry ingredients and wet ingredients to get the most accurate results.
4. Using the Wrong Type of Pan
The pan size and type you use for your banana bread can significantly affect the final result. If you use a pan that’s too small or too large, the bread may either overcook or undercook.
- Use a standard 9×5-inch loaf pan: This is the most common size for banana bread and ensures that the batter has enough room to rise evenly. If your pan is too small, the batter will overflow, and if it’s too large, the bread may bake too quickly or turn out dry.
- Avoid using non-stick pans: While non-stick pans are convenient, they can cause the bread to brown too quickly on the outside while leaving the center undercooked. Instead, opt for light-colored metal pans for even baking.
Tip: If you don’t have a 9×5-inch pan, you can adjust the recipe by using a smaller pan (but reduce baking time) or a larger one (and increase the baking time).
5. Not Preheating the Oven
Preheating your oven before placing the banana bread inside is crucial to ensure it bakes evenly and rises correctly. If you put the batter in before the oven is fully heated, the bread may rise unevenly or even collapse in the middle.
- Preheat to 350°F (175°C): Banana bread requires moderate heat, and ensuring your oven reaches the right temperature will give your bread the proper environment to bake through without burning on the outside.
- Avoid opening the oven door too early: If you open the door in the first 20-30 minutes of baking, the bread may collapse before it’s fully set. Wait until the bread has risen and begun to form a crust before checking.
Tip: Use an oven thermometer to ensure your oven is accurate, as temperature fluctuations can result in uneven baking.
6. Skipping the Resting Time
After removing the banana bread from the oven, it’s tempting to slice into it right away. However, cutting into the bread while it’s still hot can lead to moisture loss and a crumbly texture.
- Let the bread cool: Allow the bread to rest in the pan for about 10 minutes, then transfer it to a wire rack to cool completely. This resting period allows the bread to firm up, making it easier to slice and helping it retain moisture.
- Avoid rushing: Cutting into the bread too soon will not only cause it to lose moisture but can also lead to a mushy texture in the center.
Tip: If you can resist, letting your banana bread cool overnight will yield even better results for texture and flavor.
7. Not Checking for Doneness
Banana bread is often done baking when the top is golden brown, but appearances can be deceiving. If you don’t check for doneness properly, you might end up with a raw center or an overcooked exterior.
- Use a toothpick or cake tester: Insert a toothpick into the center of the loaf and check for wet batter. If it comes out clean or with just a few moist crumbs, the bread is done.
- Don’t rely solely on time: Baking times can vary depending on your oven and pan size, so checking with a toothpick is the most reliable method.
Tip: If you find the top of the bread is browning too quickly but the center is still raw, cover it loosely with aluminum foil and continue baking.
Final Thoughts
Banana bread is a comforting and delicious treat, but avoiding these common mistakes can make the difference between a perfect loaf and one that’s less than ideal. By ensuring you’re using the right bananas, mixing gently, measuring correctly, and baking at the right temperature, you’ll be able to create banana bread that’s moist, flavorful, and perfectly textured every time. So, avoid these pitfalls, and enjoy your delicious homemade banana bread!
Fun Variations – Add Nuts, Cinnamon, or a Swirl of Peanut Butter
Banana bread is a classic treat that can easily be customized to suit your tastes or to add a little extra flair. Whether you’re in the mood for something crunchy, spiced, or a bit indulgent, there are a variety of ways to make your banana bread stand out. Let’s explore some fun variations that will elevate your homemade loaf to the next level:
1. Add Nuts for Extra Crunch and Flavor
Nuts not only add a satisfying crunch but also bring a rich, earthy flavor to banana bread. They complement the softness of the banana and the sweetness of the batter, creating a delightful contrast in texture. Here are some popular nuts to add to your banana bread:
- Walnuts: A classic choice for banana bread. Their mild bitterness helps balance the sweetness of the bananas, and their chunky texture adds a lovely bite.
- Pecans: Slightly sweeter and softer than walnuts, pecans bring a rich, buttery flavor to your bread. Their delicate texture also makes them a perfect addition to banana bread.
- Almonds: Sliced or chopped almonds offer a slightly nutty and aromatic taste that pairs beautifully with bananas. They are lighter than walnuts or pecans, making them a great option if you don’t want the nuts to overpower the flavor.
- Hazelnuts: These nuts bring a roasted, slightly sweet taste, and their crunchy texture works wonderfully with the soft banana bread.
Tip: For best results, toast the nuts lightly in a dry skillet or in the oven before adding them to the batter. This will enhance their flavor and prevent them from becoming soggy in the bread. Typically, you can add about ½ to 1 cup of nuts to your batter, depending on how nutty you like your bread.
2. Sprinkle Cinnamon for Warm, Spicy Notes
Cinnamon is a simple yet powerful addition that brings warmth and depth to banana bread. It complements the natural sweetness of the bananas while adding a slightly spicy undertone that makes the bread even more aromatic. Here’s how you can use cinnamon in your banana bread:
- Cinnamon in the batter: Add 1 to 2 teaspoons of ground cinnamon directly into your dry ingredients. This will infuse the bread with a subtle spicy flavor throughout.
- Cinnamon swirl: For a visually striking effect, you can add a cinnamon swirl to the bread. Simply mix brown sugar and cinnamon together and sprinkle it over the batter in layers as you pour it into the pan. Use a knife or skewer to swirl it in, creating a marbled effect.
- Cinnamon sugar topping: For extra sweetness and crunch, sprinkle a bit of cinnamon sugar on top of the bread before baking. The sugar will form a crispy crust, and the cinnamon will infuse the top layer with extra flavor.
Tip: Pair cinnamon with other warm spices like nutmeg or ginger for a deeper spiced flavor profile.
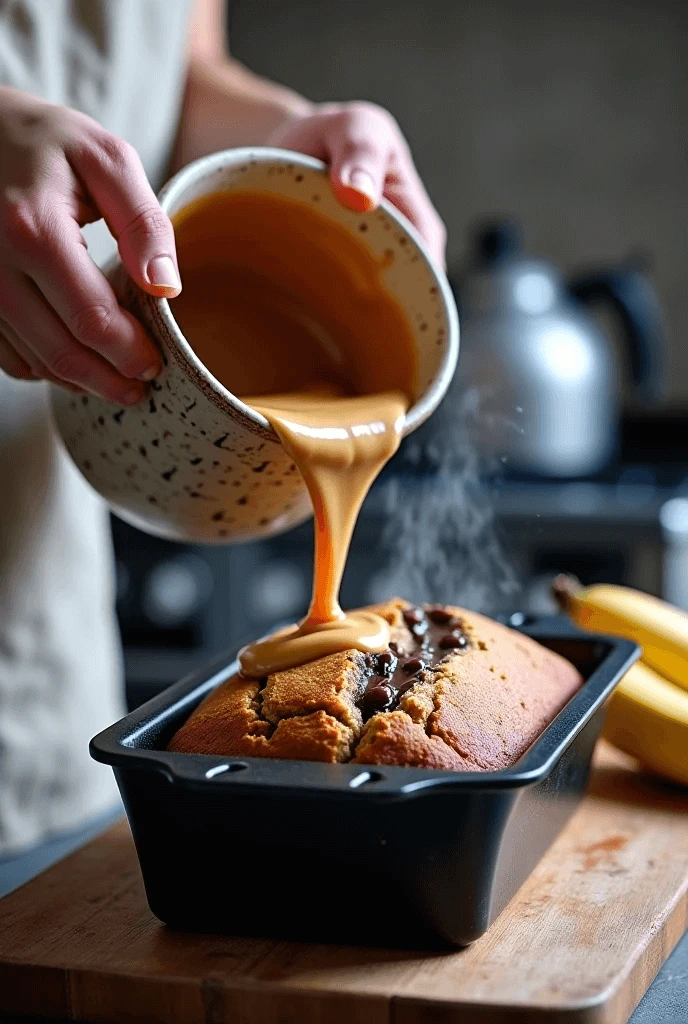
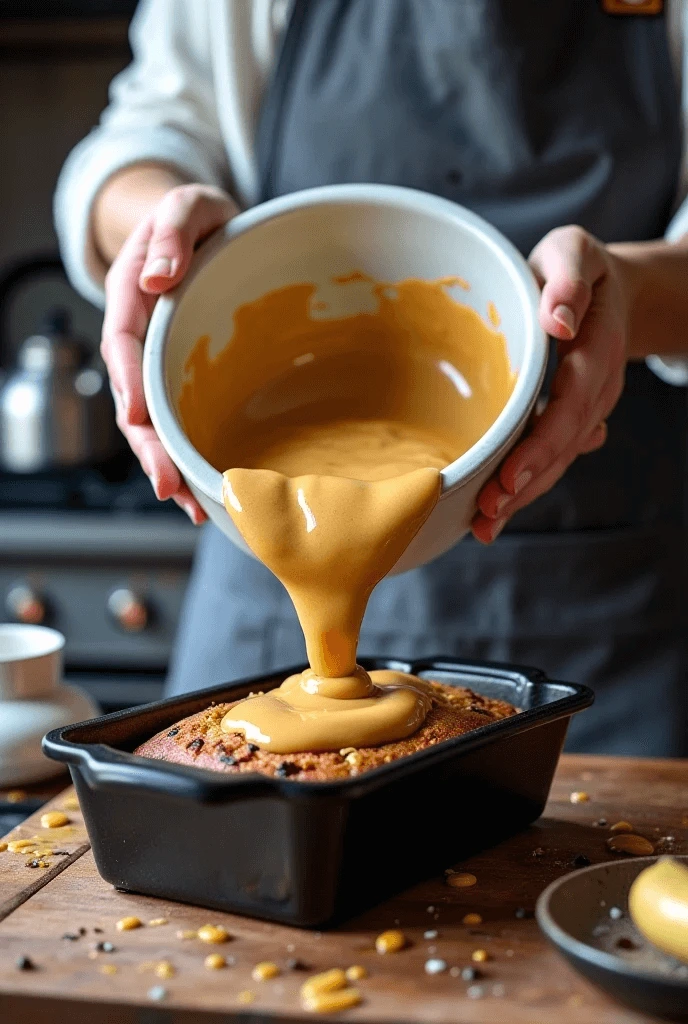
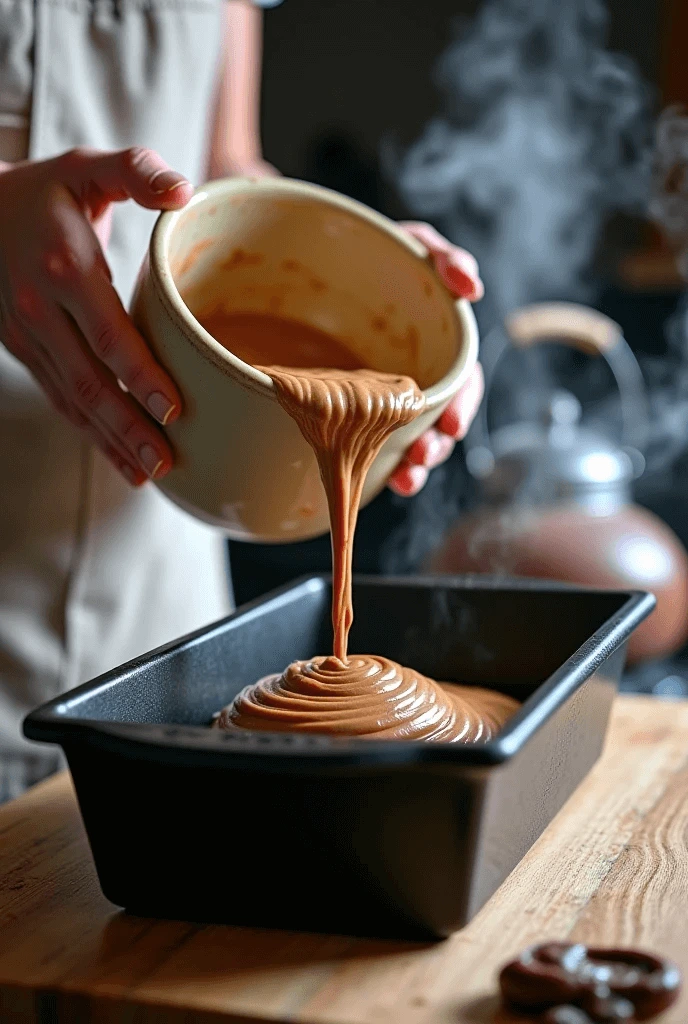
3. Swirl in Peanut Butter for a Creamy, Nutty Twist
Peanut butter adds a rich, creamy texture and a nutty flavor that pairs perfectly with bananas. The combination of peanut butter and banana is a classic, and it’s easy to incorporate into banana bread. Here’s how to add a swirl of peanut butter to your loaf:
- Swirl method: After preparing your batter, warm up peanut butter slightly so it’s easier to swirl. Drop spoonfuls of peanut butter into the batter and use a knife or skewer to swirl it gently. You can swirl it lightly for a subtle peanut butter flavor or swirl it more intensely for a stronger taste.
- Peanut butter layer: For an extra indulgent touch, you can spread a layer of peanut butter on top of the batter before baking. This will form a soft, creamy layer on top of your loaf, creating a deliciously peanut-buttery crust.
- Crunchy peanut butter: If you prefer a crunchier texture, use crunchy peanut butter instead of smooth. The little pieces of peanuts will add an extra dimension to the bread’s texture.
Tip: If you want to make the peanut butter flavor even more prominent, you can also add a tablespoon of honey or maple syrup to the batter. This will enhance the peanut butter’s sweetness and complement the banana flavor.
4. Add Chocolate Chips for an Extra Indulgence
Though you may already have chocolate chips in your basic recipe, adding extra chocolate chips or even chunks of chocolate will take your banana bread to the next level. The melted chocolate throughout the loaf creates pockets of gooey goodness that every bite will reveal.
- Chocolate chip variations: Mix semi-sweet, milk chocolate, or dark chocolate chips into the batter for different sweetness levels. You can even use a combination of different types of chocolate for a layered flavor.
- Chocolate swirl: Instead of just mixing in the chips, you can create a chocolate swirl by melting some chocolate and drizzling it on top of the batter. Use a knife or skewer to swirl the melted chocolate into the batter, creating beautiful marbled patterns and a rich chocolate flavor.
Tip: Add about 1 cup of chocolate chips to the batter and ensure they are well distributed. For extra chocolatey goodness, sprinkle some on top before baking for a crispy, sweet topping.
5. Get Creative with Other Add-ins
Beyond the basics, there are plenty of other creative ways to customize your banana bread. Here are some more ideas:
- Coconut flakes: Shredded coconut adds a tropical flair and chewy texture. You can fold it into the batter or sprinkle it on top.
- Berries: Blueberries, raspberries, or even strawberries work beautifully with banana bread. Just be sure to fold them in gently to avoid overmixing.
- Chopped dried fruit: Dried cranberries, apricots, or raisins add a chewy, sweet texture that contrasts with the softness of the banana bread.
- Apple slices: For an autumn twist, add thin slices of fresh apple to your batter. The apples will soften as the bread bakes, adding both flavor and moisture.
Tip: When adding extra ingredients, be sure not to overload the batter. A ½ to 1 cup of additional ingredients (such as nuts, berries, or coconut) should be sufficient for a well-balanced loaf.
Final Thoughts
These fun variations make it easy to customize your banana bread based on what you have in your pantry or your personal flavor preferences. Whether you want to go for something extra indulgent with a swirl of peanut butter or add a bit of crunch with nuts, there’s a version of banana bread for everyone. Have fun experimenting with these variations and make your banana bread uniquely your own!
How to Store, Freeze, and Serve Chocolate Chip Banana Bread
Best Ways to Store Banana Bread for Freshness
Banana bread is a beloved treat, but to truly enjoy it at its best, proper storage is essential to maintain its soft, moist texture and delicious flavor. Whether you’re planning to enjoy your banana bread within a few days or want to keep it fresh for a longer period, knowing the best storage methods can make all the difference. Here’s how you can store your banana bread to keep it fresh:
1. Store at Room Temperature for Short-Term Freshness
If you plan to consume your banana bread within 3 to 4 days, storing it at room temperature is a simple and effective option. Here’s how to do it:
- Wrap it properly: After your banana bread has cooled completely, wrap it tightly in plastic wrap or aluminum foil. This helps prevent it from drying out and keeps it soft.
- Place in a sealed container: For extra protection, place the wrapped loaf inside an airtight container or a resealable plastic bag. This will keep out any moisture from the air, preventing your bread from getting soggy.
- Avoid refrigeration: While it may seem like a good idea to refrigerate banana bread to extend its shelf life, the cool temperature can cause the bread to dry out faster. Instead, opt for room temperature storage.
Tip: Store your banana bread in a cool, dry place away from direct sunlight. A kitchen counter or pantry is an ideal spot for short-term storage.
2. Freeze for Longer-Term Storage
If you want to preserve your banana bread for a longer period, freezing it is the best option. Frozen banana bread can last for up to 3 months without losing its delicious taste or texture. Here’s how to freeze banana bread the right way:
- Cool the bread completely: Before freezing, ensure that your banana bread has cooled completely to avoid condensation forming inside the wrapping.
- Wrap tightly: Wrap the loaf or slices of banana bread tightly in plastic wrap or aluminum foil. Make sure there are no exposed areas where air could enter, as this can lead to freezer burn.
- Place in a freezer-safe bag: For added protection, place the wrapped banana bread in a freezer-safe zip-top bag. Squeeze out any excess air to prevent moisture buildup and keep your banana bread fresh.
- Label and date: To keep track of how long the bread has been frozen, label the package with the date you froze it.
Tip: If you’re freezing individual slices, you can wrap them separately. This allows you to take out just the amount you need without thawing the entire loaf.
3. Thawing Banana Bread
When you’re ready to enjoy your frozen banana bread, proper thawing is key to ensuring it tastes just as fresh as the day it was baked:
- Countertop thawing: Remove the plastic wrap or foil and place the loaf on the counter to thaw at room temperature. This usually takes about 2 to 4 hours depending on the size of the loaf.
- Quick thaw in the microwave: If you’re in a hurry, you can thaw individual slices in the microwave. Simply wrap the slice in a damp paper towel and microwave for about 20-30 seconds to soften it.
- Oven method: To restore the freshly-baked aroma and texture, wrap the loaf in aluminum foil and place it in the oven at 350°F (175°C) for about 10-15 minutes. This will warm it up without drying it out.
Tip: Once thawed, consume your banana bread within 3 to 4 days for the best taste and texture. You can also toast individual slices for a delightful warm snack.
4. Storing Sliced Banana Bread
If you’ve already sliced your banana bread and want to keep it fresh, you’ll need to take a few extra steps:
- Wrap each slice: Wrap each slice individually in plastic wrap or wax paper. This ensures that each piece stays moist and doesn’t dry out.
- Use an airtight container: Place the wrapped slices in an airtight container or resealable plastic bag to prevent air exposure.
- Refrigeration: While it’s better to store whole banana bread at room temperature, slices of banana bread can be stored in the fridge for up to 1 week. If you refrigerate it, make sure it’s well-wrapped and sealed to avoid drying out.
Tip: If you refrigerate slices, let them come to room temperature before eating, or gently heat them in the microwave for a soft, fresh taste.
5. Avoid Storing Banana Bread in a Damp Environment
While it’s tempting to wrap banana bread in a damp cloth to keep it moist, this can lead to the growth of mold. Always ensure the bread is completely cool before storing, and avoid any moisture buildup during storage. Keep your bread in a dry, sealed environment to maintain freshness and prevent spoilage.
Tip: If your banana bread has started to turn stale or dry out, you can revive it by wrapping it in foil and placing it in the oven for a few minutes to restore some moisture and texture.
Final Thoughts
By following these storage tips, you can keep your banana bread fresh for several days, or even freeze it for future enjoyment. Proper storage is key to preserving the bread’s moisture and flavor, ensuring that every slice tastes just as delicious as the first. Whether you’re storing it at room temperature for a few days, freezing it for later, or keeping individual slices fresh in the fridge, these methods will help you enjoy your banana bread for longer!
Freezing Banana Bread – Step-by-Step Guide
Freezing banana bread is an excellent way to extend its shelf life while maintaining its delicious flavor and moist texture. Whether you’ve baked too much or want to save some for later, freezing is a simple and effective solution. Here’s a step-by-step guide on how to freeze banana bread the right way:
1. Allow the Bread to Cool Completely
Before freezing, it’s essential that your banana bread has cooled completely. If you freeze the bread while it’s still warm, condensation will form inside the wrapping, which can lead to soggy bread and freezer burn. Here’s what to do:
- Cooling time: Let your banana bread sit at room temperature for about 1 to 2 hours until it’s fully cooled.
- Avoid quick cooling: Do not try to speed up the cooling process by placing the bread in the fridge or freezer. Rapid cooling can change the texture and lead to uneven freezing.
Tip: If you’re in a rush, you can speed up the cooling process by placing the bread on a cooling rack, which allows air to circulate around the loaf, helping it cool faster.
2. Wrap the Loaf or Slices Tightly
Proper wrapping is key to keeping your banana bread fresh during freezing. If your loaf or slices aren’t wrapped tightly, air can get in and cause freezer burn. Here’s how to wrap it for optimal freshness:
- Whole loaf: For an entire loaf, use plastic wrap to wrap the banana bread tightly. Ensure that there are no exposed edges where air can seep in. Follow up by wrapping the loaf in aluminum foil for extra protection.
- Sliced bread: If you’ve already sliced the banana bread, wrap each individual slice in plastic wrap, wax paper, or parchment paper. This makes it easier to thaw only the amount you need later.
- Double wrapping: For extra protection against freezer burn, wrap the loaf or slices in a freezer-safe plastic bag or vacuum-sealed bag after the initial wrap. This will keep out air and moisture, preserving the quality of the bread.
Tip: Use a vacuum sealer if you have one. It removes all the air and ensures the bread is sealed as tightly as possible, which is perfect for long-term freezing.
3. Label and Date the Package
To avoid confusion and ensure you’re using the banana bread within its best time frame, it’s important to label your package with the date. This will help you keep track of how long it’s been in the freezer.
- Label: Write the date and the type of banana bread on the wrapping or bag using a permanent marker. For example, “Banana Bread – Frozen on [Date]”.
- Expiry: Banana bread can typically be stored in the freezer for up to 3 months. For the best flavor and texture, try to use it within this time frame.
Tip: If you’re freezing multiple loaves or slices, labeling each one helps you know exactly which one to thaw first.
4. Store in the Freezer
Once your banana bread is wrapped and labeled, it’s time to store it in the freezer. Here are some tips for optimal storage:
- Flat storage: Lay the wrapped loaf or slices flat in the freezer to avoid any dents or misshaping of the bread.
- Avoid overpacking: Ensure there’s enough space around each loaf or slice for air to circulate. Avoid overcrowding in the freezer, as this can lead to uneven freezing.
Tip: If you’re freezing multiple loaves, you can place them on a baking sheet to keep them flat as they freeze. Once frozen, transfer them to a freezer-safe bag or container to save space.
5. Thawing Frozen Banana Bread
When you’re ready to enjoy your frozen banana bread, proper thawing is essential to maintain its freshness and texture:
- Room temperature thawing: Remove the banana bread from the freezer and let it thaw at room temperature for 2 to 4 hours. Unwrap the plastic wrap or foil once it has thawed to avoid condensation. For best results, leave the wrapping on until the bread has thawed completely.
- Microwave thawing: If you need to thaw individual slices quickly, place a slice of banana bread on a microwave-safe plate. Cover it with a damp paper towel and microwave for 20 to 30 seconds. This will soften it up without drying it out.
- Oven method: To thaw the entire loaf and restore its soft, freshly-baked texture, wrap the loaf in aluminum foil and place it in the oven at 350°F (175°C) for about 10 to 15 minutes. This will warm it up and make the crust slightly crispy.
Tip: After thawing, let the banana bread sit for a few minutes before slicing to ensure it’s fully warmed through and doesn’t fall apart.
6. Reheating and Refreshing Banana Bread
If your banana bread has been frozen for a while, it might lose a bit of its moisture and softness. Here’s how to refresh it:
- Oven refresh: If you want to get the crispy outer texture and restore the softness, wrap the bread in foil and bake it in the oven at 350°F (175°C) for 10 to 15 minutes.
- Microwave: If you’re reheating a slice, wrap it in a damp paper towel and microwave it for about 20 to 30 seconds to revive its softness.
Tip: Always check the bread while reheating to ensure it doesn’t overcook or dry out.
Final Thoughts
Freezing banana bread is a great way to preserve its freshness and ensure that you always have a delicious treat on hand when cravings strike. By following these simple steps for wrapping, labeling, and thawing, you can extend the shelf life of your banana bread while keeping its taste and texture as fresh as possible. Freezing individual slices also makes it easy to enjoy banana bread one slice at a time whenever you want.
Delicious Serving Ideas – Pairing with Coffee, Butter, or Ice Cream
Banana bread is a delightful treat on its own, but pairing it with other ingredients can elevate its flavor and make for a more satisfying experience. Whether you’re serving it for breakfast, dessert, or a snack, here are some delicious ways to serve your banana bread for the perfect indulgence:
1. Pairing Banana Bread with Coffee
The rich, comforting flavor of coffee is a perfect match for the moist, slightly sweet taste of banana bread. Whether you prefer a bold espresso or a creamy latte, the two complement each other wonderfully. Here’s how to make the most of this pairing:
- Morning Delight: Enjoy a slice of banana bread with your morning coffee for a quick, energizing breakfast. The sweetness of the banana bread balances out the bitterness of the coffee, creating a harmonious combination to start your day.
- Coffee Variations: Try different types of coffee to see which one enhances the banana bread’s flavors:
- Espresso: A strong espresso works wonderfully with banana bread, offering a rich contrast to its sweetness.
- Latte or Cappuccino: The creamy texture of a latte or cappuccino complements the soft texture of banana bread, creating a smooth and indulgent pairing.
- Iced Coffee: For a refreshing twist, pair chilled banana bread with iced coffee. The coolness of the iced coffee contrasts beautifully with the warm, spiced banana bread.
Tip: If you’re enjoying banana bread with coffee for a more luxurious experience, add a sprinkle of cinnamon or nutmeg to your coffee for a comforting, seasonal touch.
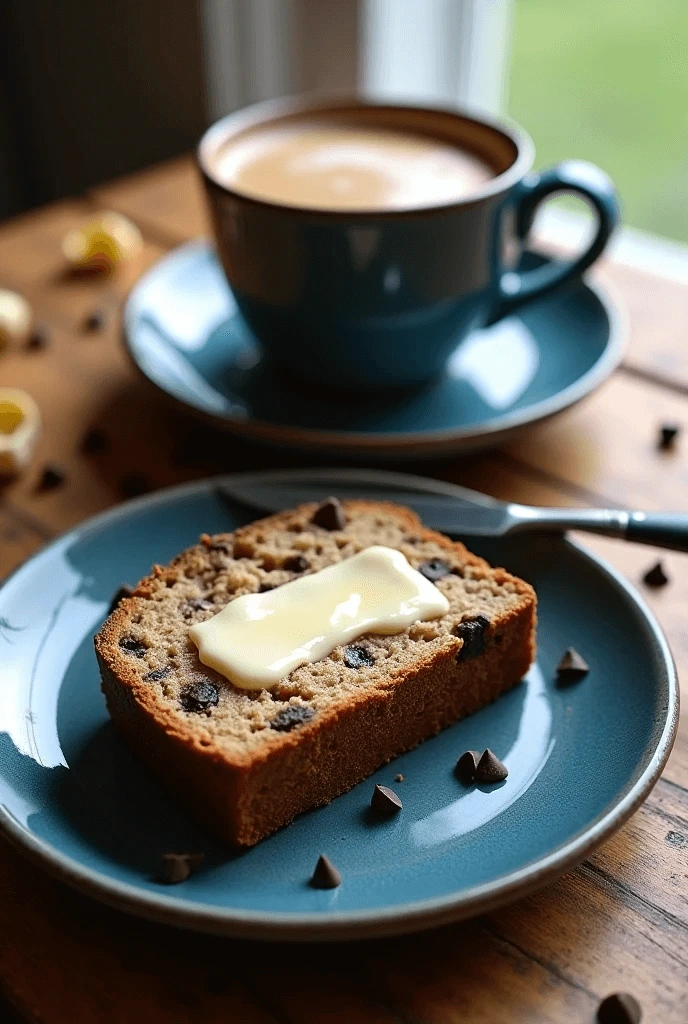
2. Spread with Butter for Extra Richness
Banana bread has a natural sweetness, but adding a bit of butter takes it to a whole new level of indulgence. The creamy richness of butter enhances the flavor of the bread and gives it an extra velvety texture. Here’s how to enjoy banana bread with butter:
- Softened Butter: For the best spreadability, use room temperature butter. Simply spread a thin or thick layer of butter over a warm slice of banana bread. The warmth of the bread will cause the butter to melt slightly, creating a wonderfully rich and smooth topping.
- Flavored Butter: If you want to get creative, try making flavored butters. A touch of cinnamon butter or honey butter adds a delightful twist and pairs perfectly with the banana flavor. For a savory variation, you could even make garlic butter for a unique combination of flavors.
- Butter with Toppings: If you like a little extra texture, consider topping your buttered banana bread with chopped nuts (like walnuts or pecans), chocolate chips, or a sprinkle of sea salt for contrast.
Tip: For an even richer treat, use brown butter. Simply melt butter in a pan until it turns golden brown, then spread it on your banana bread for a nutty, caramelized flavor that pairs beautifully with the banana.
3. Top with Ice Cream for an Irresistible Dessert
Turning banana bread into a dessert is as simple as adding a scoop of ice cream. The combination of warm, soft banana bread and cold, creamy ice cream creates a comforting dessert that’s perfect for any occasion. Here are some ideas for this decadent pairing:
- Vanilla Ice Cream: A classic choice, the smooth, rich taste of vanilla ice cream complements the banana flavor beautifully. The creaminess of the ice cream balances out the sweetness and moisture of the bread.
- Chocolate Ice Cream: If you love chocolate, try pairing your banana bread with a scoop of chocolate ice cream. The chocolate flavor adds a layer of richness that enhances the taste of the banana bread, especially if you’ve added chocolate chips to your loaf.
- Cinnamon or Caramel Ice Cream: For a more spiced pairing, serve your banana bread with cinnamon ice cream or caramel ice cream. The warming spices in the ice cream blend perfectly with the sweet banana bread for a deliciously comforting treat.
- Peanut Butter Ice Cream: For a fun, nutty twist, pair banana bread with a scoop of peanut butter ice cream. The rich, nutty flavor complements the banana and adds a decadent touch to your dessert.
Tip: For a bit of texture, drizzle a caramel sauce or chocolate syrup over the ice cream, or sprinkle crushed nuts or toffee bits for added crunch.
4. Serve with Whipped Cream and Fresh Fruit
If you’re looking to make banana bread feel like an elevated dessert, adding some whipped cream and fresh fruit is a fantastic way to do so. The light, airy whipped cream adds a sweet and creamy layer, while the fresh fruit adds a burst of brightness that contrasts with the richness of the banana bread.
- Berries: Fresh strawberries, blueberries, or raspberries are all great options. Their tartness balances out the sweetness of the banana bread and adds a refreshing element to the dish.
- Banana Slices: For a more banana-centric twist, top your banana bread with additional banana slices. This will amplify the banana flavor and give you a double dose of this delicious fruit.
- Citrus: Add a few orange slices or a drizzle of lemon juice for a zesty contrast that brightens up the whole dish.
Tip: To add an extra touch of sweetness, sprinkle a little bit of cinnamon sugar on top of the whipped cream for a warm, spiced finish.
5. Pair with Hot Chocolate for a Cozy Snack
If you’re enjoying banana bread on a chilly afternoon or evening, nothing complements it better than a warm mug of hot chocolate. The rich, velvety cocoa taste pairs wonderfully with the sweet, moist texture of banana bread. You can make the pairing even more indulgent by adding whipped cream, marshmallows, or a sprinkle of cinnamon to your hot chocolate.
Tip: For a fun twist, make a spiked hot chocolate with a splash of rum or Irish whiskey for an adult version of this cozy pairing.
Final Thoughts
Banana bread is a versatile treat that can be enjoyed in many ways. Whether you’re having it with a cup of coffee, slathered in butter, or as part of a decadent dessert with ice cream, there are countless ways to enhance the flavor and make it even more irresistible. These delicious serving ideas are perfect for any time of day and will elevate your banana bread experience to a whole new level!
Conclusion
In conclusion, this Quick & Easy Chocolate Chip Banana Bread is a must-try for anyone looking for a delicious and simple baking recipe. With just 10 minutes of prep time, you’ll have a moist, flavorful loaf that’s perfect for breakfast, dessert, or a snack. The addition of chocolate chips takes it to the next level, creating the perfect balance of sweetness and richness. The best part? It’s so versatile – you can customize it with your favorite add-ins or serve it in a variety of ways to suit your taste.
We encourage you to give this recipe a try and share your results with us! We’d love to know how your banana bread turned out and if you added any fun mix-ins to make it your own. Don’t forget to leave a comment below with your thoughts, and tell us what other ingredients you like to add to your banana bread. Let’s keep the conversation going and inspire each other with new ideas!
Looking for more ways to enjoy banana bread? Explore other exciting variations and baking tips in our collection of banana bread recipes here, and get ready to experiment with new flavors!
Happy baking! 😊