
Introduction
There’s nothing quite like sinking your teeth into a juicy homemade burger. Whether you’re a beginner or a seasoned cook, these best burger recipes will guide you to making the perfect patties at home. In this post, we’ll cover the essential ingredients, the step-by-step process, expert tips, and even some tasty side ideas to go along with your burgers. Keep reading to learn how to master the art of burger making and impress your family and friends with every bite!
Essential Ingredients for Juicy Homemade Burgers
Once you’ve gathered the best ingredients, follow this step-by-step guide to make the ultimate homemade burgers that are juicy and packed with flavor.
Choosing the Right Meat for Perfect Burger Patties
The foundation of a great burger starts with the meat. To begin with, choose ground beef with the right fat ratio for a juicy patty. Ideally, aim for 80/20 — 80% lean meat and 20% fat. This ratio ensures the burger stays moist and flavorful. On the other hand, a leaner mix, like 90/10, can leave your patties dry and tough.
For the best results, beef chuck is a classic cut, known for its balance of fat and flavor. Additionally, for an extra boost, try adding brisket or short rib. These cuts bring richness and a deep beefy taste. As a result, many top chefs combine these cuts to achieve the perfect burger texture and flavor.
Instead of using pre-packaged ground beef, whenever possible, try to find coarse-ground beef. It’s less compact, which leads to lighter, more tender patties. Moreover, grinding your own beef gives you complete control over the texture and fat ratio.
While seasoning, keep it simple. Kosher salt and black pepper are enough to enhance the meat’s natural flavor. However, avoid over-seasoning with fillers like breadcrumbs or chopped onions, as this can affect the texture of the patty. If desired, you can also mix in a splash of Worcestershire sauce for added depth.
By focusing on high-quality, well-balanced meat and simple seasoning, you’ll create burgers that are both juicy and flavorful every time.
Choosing the Right Meat for Perfect Burger Patties
A great burger begins with high-quality meat. The type of beef you choose will directly impact the flavor, texture, and juiciness of your patties. Therefore, it’s crucial to choose the right cut and fat ratio to create a burger that is both tender and flavorful.
1. Fat Content: The Key to Juiciness
To achieve the perfect burger, you must focus on the fat content of your ground beef. Typically, an 80/20 ratio (80% lean meat and 20% fat) is considered ideal for a juicy, flavorful patty. The fat adds moisture, helping the patty stay tender as it cooks. In contrast, using leaner cuts, like 90/10 or 95/5, often leads to dry, tough burgers. As a result, the fat helps lock in the flavor, creating a satisfying texture and mouthwatering taste.
However, it’s essential not to go overboard with fat. Too much fat, like in a 70/30 mix, can lead to greasy, overly rich burgers. Instead, focus on the right balance. Moreover, keep in mind that some fat will render out during cooking, so 80/20 is usually perfect for maintaining that juicy burger texture.
2. The Best Cuts of Beef
The next consideration is the cut of beef. Beef chuck is the most common and popular cut for burgers because it strikes the perfect balance of flavor and fat. Furthermore, chuck meat is usually well-marbled, meaning it has a good distribution of fat throughout the muscle fibers, resulting in a tender patty with great flavor.
For an even richer burger, you can mix brisket or short rib into your ground beef. These cuts add deep, beefy flavor and extra tenderness. Additionally, blending these cuts allows you to create a custom burger blend that suits your personal taste. In fact, many gourmet burger joints mix brisket and chuck to give their burgers a richer, more complex flavor profile.
Alternatively, you can try other cuts like sirloin or round if you prefer a leaner burger. However, these cuts won’t offer the same level of tenderness and juiciness as chuck, brisket, or short rib.
3. Grinding Your Own Beef
For ultimate control over the quality and fat ratio of your burger, consider grinding your own beef. By doing so, you can select the specific cuts you prefer and avoid the overly fine grind that often comes with pre-packaged meat. Grinding your own meat not only allows you to choose the cuts and fat content but also ensures that the beef is ground to the texture you desire. As a result, your patties will have a perfect bite and texture.
If you don’t want to grind beef yourself, always ask your butcher for coarsely ground beef. In addition, opt for freshly ground beef whenever possible, as it retains more moisture and flavor compared to pre-packaged meat that may have been sitting on the shelf for days. This small step can make a noticeable difference in the final quality of your burger.
4. Seasoning the Beef: Keep It Simple
Once you’ve chosen the right meat, seasoning is the next step. For the best results, it’s important to season your beef simply but generously. Kosher salt and freshly ground black pepper are the classic seasonings that will enhance the natural flavor of the beef. However, you can also add a dash of Worcestershire sauce, garlic powder, or onion powder for extra depth.
One key tip is to avoid overmixing the beef after adding the seasonings. When you overmix, the protein in the beef can bind too tightly, leading to a tough and dense patty. Instead, gently mix the seasoning into the meat, just until combined. This will help maintain the tender texture of the burger and ensure it cooks evenly.
5. Don’t Forget About the Burger’s Shape
Lastly, don’t overlook the importance of the shape and thickness of the patty. Using a burger press or your hands, shape the patties so they are uniform in size and thickness. This is important because unevenly shaped patties can cook at different rates, resulting in some parts being overcooked while others remain raw. As a general rule, aim for patties that are about ¾-inch thick, and make a small indentation in the center to help them cook evenly and prevent them from puffing up as they grill.
In Summary
When it comes to making perfect burgers, the meat is everything. Start with high-quality cuts like beef chuck, brisket, or short rib, and ensure the fat content is around 20% for the best juiciness. Grinding your own beef offers the ultimate control over texture and fat ratio, resulting in a burger that stands out. Finally, keep the seasoning simple and the patties uniform in size to create the most flavorful and perfectly cooked burgers.
Must-Have Burger Toppings and Condiments
The right toppings and condiments can elevate your burger to new heights, creating a perfect balance of textures, flavors, and freshness. Whether you prefer classic toppings or more adventurous choices, there are endless possibilities to customize your burger. Here’s a guide to the must-have toppings and condiments that will take your homemade burgers from good to great.
1. Classic Burger Toppings
First and foremost, some toppings are essential for a classic burger experience. Lettuce provides a crunchy, fresh contrast to the juicy patty, while tomato adds sweetness and acidity. Sliced onions, either raw or grilled, contribute a sharp bite and a bit of sweetness when caramelized. Pickles, whether dill or bread-and-butter, offer the perfect tangy kick that balances the richness of the beef.
Additionally, cheese is a fundamental component of many burgers. Cheddar is the go-to choice for many, but Swiss, American, provolone, or blue cheese can bring a unique flavor to your burger. Melted cheese adds a creamy, gooey texture that complements the savory beef patty. To make your cheese melt perfectly, place the patty under a lid for the final minute of cooking to trap the heat and help it melt evenly.
2. Creative and Gourmet Toppings
For those who love to experiment with flavors, there are countless creative toppings to consider. Caramelized onions, for example, are rich, sweet, and deeply flavorful, and pair beautifully with any cheese. Avocado is another popular choice, offering a creamy texture that contrasts wonderfully with the meat and adds a fresh, buttery taste. Fried egg has become a trendy topping that adds richness and a fun, gooey texture when bitten into.
Moreover, for a unique twist, consider adding bacon or crispy prosciutto for a salty crunch. Grilled mushrooms bring an earthy depth to the flavor profile, while jalapeños or banana peppers provide a spicy kick. Arugula or spinach can replace lettuce for a more sophisticated, peppery note.
Another exciting topping option is pineapple. Grilled pineapple slices add a touch of sweetness and acidity, making the burger taste like a tropical delight. Barbecue sauce and sriracha can also help spice things up, offering either a smoky or fiery flavor.
3. Essential Condiments: Balancing Flavors
Condiments play a crucial role in achieving a balanced burger flavor. Ketchup and mustard are classic choices that many enjoy for their tangy and slightly sweet notes. Mayonnaise, on the other hand, adds a creamy, smooth texture that complements the richness of the meat.
For those seeking something more adventurous, aioli (flavored mayonnaise), sriracha mayo, or chipotle sauce can add a burst of flavor. BBQ sauce is another popular condiment that pairs perfectly with bacon or caramelized onions for a smoky-sweet combination. Hot sauce can bring the heat, and pickled jalapeños offer a tangy, spicy crunch.
However, it’s important not to overdo it with condiments. While it’s tempting to load up your burger with as many toppings as possible, it’s best to maintain a balance between the condiments and the patty itself. Too much sauce can overwhelm the burger’s flavor, so always use condiments sparingly.
4. The Bun: Don’t Forget the Base
While not technically a topping, the burger bun is just as important as the toppings and condiments. A good bun should be sturdy enough to hold all the ingredients without falling apart but still soft enough to complement the juicy patty. Brioche buns are rich and slightly sweet, making them a favorite for many burger lovers. Potato buns are soft and pillowy, offering a delicate flavor that pairs well with a variety of toppings. Pretzel buns offer a more substantial, slightly salty option, which works wonderfully with savory ingredients.
If you want a lighter option, lettuce wraps can replace the bun entirely, offering a low-carb alternative while still giving your burger some structure. Gluten-free buns are also a great choice for those with dietary restrictions, ensuring that everyone can enjoy a delicious burger.
5. Pairing Toppings and Condiments
The key to a successful burger lies in how well the toppings and condiments complement each other. For instance, if you’re using rich, melted cheddar cheese, caramelized onions and crispy bacon can provide a savory depth, while pickles offer a bright, tangy contrast. For a spicy burger, try pairing jalapeños, sriracha mayo, and avocado for a creamy yet fiery combination.
Additionally, consider the texture of the toppings. Crunchy lettuce and pickles balance out creamy condiments like mayonnaise or aioli. Fried eggs or avocado add richness that complements the smoky flavor of grilled mushrooms or bacon.
Ultimately, the combination of toppings and condiments is all about personal preference. There’s no right or wrong choice—experiment with different ingredients until you find your perfect combination.
Conclusion: The Perfect Burger Combo
In conclusion, the toppings and condiments are essential to creating a delicious, balanced burger. Classic choices like lettuce, tomato, and pickles are always reliable, but gourmet options like fried eggs, avocado, and caramelized onions can take your burger to the next level. Don’t forget about the importance of balanced condiments, and choose a bun that complements your toppings. With a little creativity, you can build the perfect burger tailored to your taste.
The Best Buns for Burgers: What to Look For
The burger bun is just as important as the patty itself in creating the perfect burger. A bun serves as the base that holds everything together, and the right choice can enhance the overall taste, texture, and eating experience. When selecting the best buns for your burgers, there are a few key factors to keep in mind: texture, structure, and flavor. Here’s a comprehensive guide on what to look for when choosing the perfect burger bun.
1. Texture: Soft vs. Sturdy
Texture is perhaps the most important consideration when choosing a burger bun. Ideally, the bun should have a soft and pillowy interior to complement the juicy patty while being firm enough to hold all your toppings and condiments without falling apart.
Soft buns like brioche or potato buns are known for their delicate crumb and rich flavor. These buns soak up the juices from the patty and condiments without becoming soggy, offering a satisfying mouthfeel. On the other hand, heavier buns, such as pretzel buns or ciabatta, have a denser structure and provide a sturdier base that can support a larger, juicier patty and abundant toppings. These buns create a satisfying crunch when you bite into them, adding texture contrast to your burger.
Tip: When selecting your bun, consider how much juiciness your burger has. If you’re opting for a particularly juicy burger, you may want to go with a softer bun that won’t easily disintegrate, such as brioche or soft sesame seed buns. For larger, heartier burgers, a firmer, thicker bun like a pretzel bun can provide extra stability.
2. Size and Structure: Finding the Right Fit
The size of the bun is another crucial factor. You want a bun that is large enough to encase the patty and toppings, but not so large that it overwhelms the flavor of the burger itself. Too small a bun can lead to the burger spilling out with every bite, while too large a bun can result in a dry and unbalanced ratio of bread to filling.
Buns should be slightly larger than the patty, ensuring there’s enough room for all the toppings without the bun becoming overly thick or dry. A good rule of thumb is to choose a bun that is about 1 inch larger in diameter than the patty. This ensures that each bite has a nice balance of meat, toppings, and bread.
3. Flavor: Sweet, Savory, or Neutral?
When choosing your burger bun, consider the flavor profile. Traditional burger buns, like white sandwich buns or sesame seed buns, have a neutral flavor that lets the patty and toppings take center stage. These are great if you want to highlight the savory flavors of the burger itself.
However, if you’re looking to add a unique twist to your burger, you may opt for buns that offer a bit more flavor. Brioche buns are sweet and buttery, offering a rich, indulgent flavor that pairs wonderfully with savory ingredients like beef, bacon, and cheese. Potato buns have a slightly tangy taste and are super soft, making them a great choice for burgers with a lot of toppings or sauces.
For a heartier option, try pretzel buns. These buns have a slightly salty flavor and chewy texture that works well with smoky or spicy burgers. They create a great contrast when paired with rich condiments like barbecue sauce or cheddar cheese.
Tip: Consider the flavor of the burger itself. For example, if you’re making a spicy burger with jalapeños or sriracha mayo, a sweet brioche bun can provide a balancing contrast. Alternatively, a savory pretzel bun might be better suited to a barbecue bacon burger.
4. Freshness and Quality: Opt for Bakery-Fresh Buns
Freshness plays a huge role in the final quality of your burger. Freshly baked buns will have a light and airy texture and provide the perfect foundation for your burger, while day-old buns or pre-packaged buns may be overly dense, dry, or even a bit stale.
If possible, try to use bakery-fresh buns for your homemade burgers. These buns are typically softer, more flavorful, and more likely to hold their structure when loaded with toppings. Many bakeries offer artisan burger buns that are perfect for a gourmet burger experience, with unique textures and flavors to choose from.
If you can’t find freshly baked buns, look for buns with minimal preservatives and a soft, fluffy texture. Avoid buns with too many artificial ingredients, as they can compromise the flavor and texture of your burger.
5. Special Dietary Options: Gluten-Free and Low-Carb Buns
If you or your guests have dietary restrictions, there are plenty of alternative buns to choose from. Gluten-free buns are becoming increasingly popular and can be a great option for those with gluten sensitivities. Almond flour buns or rice flour buns are often used as gluten-free options and can provide a similar texture to traditional buns.
For those following a low-carb or keto lifestyle, you can opt for lettuce wraps or cloud bread as alternatives to traditional buns. Lettuce wraps provide a crunchy and fresh base, while cloud bread is a low-carb option made with eggs and cream cheese that mimics the texture of a soft bun.
Tip: Make sure to check the bun’s texture and flavor when choosing an alternative. Gluten-free buns, for example, can sometimes be denser than regular buns, but choosing a well-made option will help maintain the overall balance of your burger.
6. Toasting the Bun: The Finishing Touch
Once you’ve chosen your ideal bun, don’t forget to toast it. Toasting the bun adds an extra layer of flavor and texture. Lightly toasting the inside of the bun gives it a crispy, golden exterior, which helps the bun hold up against juicy patties and toppings. It also creates a slight barrier, preventing the bun from absorbing too much moisture and becoming soggy.
To toast the bun, simply place it on the grill or in a pan for a minute or two, or toast it in the oven. For an added touch, you can brush the bun with butter or garlic butter before toasting to enhance the flavor and make it extra indulgent.
Conclusion: Choosing the Perfect Burger Bun
In conclusion, the perfect burger bun should offer a combination of texture, flavor, and sturdiness to support the patty and toppings. Whether you prefer a soft brioche bun, a hearty pretzel bun, or a gluten-free option, the right choice will make a significant difference in the overall quality of your burger. Always consider the size, freshness, and structure of the bun, and don’t forget to toast it for added texture. With the right bun, you’ll have a burger that’s not only delicious but also satisfying in every bite.
Secret Ingredients That Boost Flavor
A great burger isn’t just about the meat. It’s the hidden ingredients that really elevate its flavor. These additions can add depth, richness, and complexity. Let’s take a look at the secret ingredients that make your burger unforgettable.
1. Worcestershire Sauce: A Savory Umami Kick
Worcestershire sauce is an underrated ingredient. A few dashes can bring out the umami in your patty. This sauce adds a savory and slightly sweet flavor that works with the natural beef taste.
Why it works: The sauce adds richness and enhances the patty’s moisture. It blends well with other condiments like mustard or ketchup.
Tip: For extra smokiness, try a smoky Worcestershire variant or add liquid smoke to the mix.
2. Garlic Powder: A Subtle Allium Flavor
Garlic powder is an essential burger ingredient. It provides a mild garlic flavor without overwhelming the meat. Unlike fresh garlic, it gives a concentrated, earthy taste.
Why it works: Garlic powder blends easily into the patty. It pairs well with onion powder and black pepper for a balanced flavor.
Tip: Try combining garlic powder with onion powder, paprika, and black pepper for a simple but delicious seasoning mix.
3. Dijon Mustard: A Tangy Zing
Dijon mustard adds tang and subtle heat. A small amount can brighten up your burger’s flavor without overpowering it. It also complements the richness of the beef.
Why it works: The acidity of Dijon mustard cuts through the fat of the beef. It pairs perfectly with cheeses like Swiss or brie.
Tip: Mix Dijon mustard with a bit of honey for a sweet-tangy glaze on top of your burger.
4. Parmesan Cheese: A Savory Umami Boost
Adding grated Parmesan cheese enhances your patty’s flavor. Parmesan is rich in umami and adds a nutty and salty taste to the meat.
Why it works: Parmesan infuses the burger with savory richness. It blends well with other ingredients and doesn’t overpower the patty’s natural flavor.
Tip: Combine Parmesan with oregano, garlic powder, and black pepper for a more complex flavor profile.
5. Soy Sauce: A Unique Umami Element
Soy sauce is a secret weapon for burgers. A splash of it enhances the umami of the beef and adds a savory richness. It’s a great alternative to salt.
Why it works: Soy sauce deepens the flavor of the meat without overpowering it. It adds a complex taste and pairs well with BBQ-style burgers.
Tip: Use low-sodium soy sauce if you’re watching your salt intake.
6. Fresh Herbs: A Burst of Brightness
Fresh herbs like parsley, basil, and oregano can transform your burger. These herbs provide a bright, aromatic flavor that adds freshness and balance.
Why it works: Fresh herbs lighten up the richness of the beef. They offer a herbaceous touch that makes the burger taste fresher.
Tip: Pair basil with mozzarella for an Italian-style burger, or oregano with feta for a Greek-inspired one.
7. Smoked Paprika: A Smoky Undertone
For a smoky flavor, smoked paprika is key. It adds a warm, deep smokiness that complements grilled beef perfectly. It enhances the BBQ flavor profile.
Why it works: Smoked paprika provides complexity and a subtle smokiness. It’s a perfect match for grilled burgers.
Tip: Mix smoked paprika with onion powder, garlic powder, and brown sugar for a sweet-smoky seasoning blend.
Conclusion: Flavorful Burgers with a Little Extra
These secret ingredients make your burgers shine. From Worcestershire sauce to smoked paprika, each one adds something special. Experiment with them to create burgers that are juicy, rich, and flavor-packed. A little extra effort will go a long way in transforming your homemade burgers into a memorable experience.
Step-by-Step Instructions to Make the Best Burgers Recipes
Preparing and Seasoning the Ground Beef Patties
The key to a perfect burger lies in the preparation and seasoning of the ground beef patties. A well-prepared patty should be juicy, flavorful, and perfectly shaped. Let’s break down how to prepare the beef, season it, and form patties that will stand out.
1. Start with the Right Ground Beef
The foundation of any great burger is the meat itself. For juicy, flavorful patties, always choose ground beef with a good fat content. A mixture of 80% lean meat and 20% fat is the perfect balance. This ratio gives you tenderness and flavor without making the patty too greasy.
- Why it works: Fat is essential for moisture retention during cooking. Without enough fat, your patties can turn out dry and bland.
- Tip: If you’re aiming for a leaner burger, consider using 85% lean beef with a small amount of ground pork or bacon fat to maintain flavor and moisture.
2. Seasoning the Meat Properly
Seasoning is everything when it comes to burgers. A simple seasoning blend of salt and black pepper is the most classic option, but you can get creative with additional seasonings for an elevated flavor.
- Salt is the first and most important seasoning. Add salt just before cooking, as it draws out moisture and can make the patties tough if added too early.
- Pepper provides a mild heat that complements the beef’s richness. Freshly ground black pepper is always a good choice for a bold kick.
For a more complex flavor, try adding:
- Garlic powder for a savory, slightly sweet flavor.
- Onion powder for a rich, umami taste.
- Paprika or smoked paprika for a mild smokiness.
- Dried herbs like oregano, basil, or thyme for an aromatic twist.
Why it works: Each seasoning brings out different aspects of the beef. Together, they create a harmonious balance of flavors that enhance the natural taste of the meat without overwhelming it.
- Tip: If you like a slightly tangy burger, you can mix a tablespoon of Dijon mustard or Worcestershire sauce directly into the ground beef. This adds umami depth and a subtle tanginess.
3. Avoid Overworking the Meat
When mixing the ground beef with seasonings, it’s crucial not to overwork the meat. Overmixing can cause the beef to become tough and dense, resulting in a chewy patty instead of a tender one.
- Why it works: The goal is to combine the seasonings evenly without pressing the meat together too much. This ensures the burger remains light and juicy.
- Tip: Gently mix the ground beef and seasonings by hand. Use cold hands to avoid warming up the meat too much, which can lead to a tougher texture.
4. Shaping the Patties: The Right Size and Thickness
Once your beef is seasoned, it’s time to form the patties. The size and thickness of the patty will affect the cooking time and texture.
- For standard-size burgers, aim for patties that are about ¾ inch thick and roughly 4-6 ounces. If you like larger burgers, feel free to use more meat, but keep the patty thickness consistent to ensure even cooking.
- Make an indention in the center of each patty with your thumb. This will help prevent the patties from puffing up in the middle as they cook, keeping them flat and ensuring they cook evenly.
Why it works: The indentation helps the patty maintain an even shape during grilling or frying. It also allows the meat to cook more uniformly, ensuring a juicy burger every time.
- Tip: When shaping the patties, use a burger press for uniformity, or shape them by hand, but don’t pack the meat too tightly. Loose, lightly packed patties allow for more juiciness when cooked.
5. Chilling the Patties Before Cooking
Once the patties are shaped, chill them in the refrigerator for at least 30 minutes before cooking. This helps the meat hold its shape and reduces the likelihood of the patties breaking apart while cooking.
- Why it works: Chilling the patties helps the fat set and reduces the chances of the burgers losing their shape on the grill or in the pan.
- Tip: If you’re in a hurry, even 10-15 minutes in the fridge will make a noticeable difference.
6. Don’t Press Down on the Patties While Cooking
While grilling or pan-frying your burgers, resist the urge to press down on the patties with a spatula. Pressing the patty removes valuable juices, which are essential for a tender and moist burger.
- Why it works: Pressing down on the patty forces out flavorful juices, leading to a dry, flavorless burger.
- Tip: Let the patty cook on one side until it forms a crisp, golden-brown crust. Flip it carefully to cook the other side.
Conclusion: Perfecting Your Patties
Preparing and seasoning your ground beef patties with care ensures that each burger you make is full of flavor and juicy. By choosing the right fat content, seasoning the meat just before cooking, and shaping the patties gently, you’re on your way to creating the ultimate burger. With these steps, you’ll master the art of burger making and enjoy delicious homemade burgers every time.
How to Shape Burger Patties Like a Pro
Shaping the perfect burger patty is an art that can elevate your burger from good to great. The way you shape your patties affects how they cook, how juicy they remain, and their overall texture. Here’s how to shape burger patties like a pro and ensure that every bite is delicious and perfectly cooked.
1. Measure the Right Amount of Meat
Before you begin shaping your patties, it’s essential to portion the meat correctly. Using too much or too little ground beef can lead to burgers that are either too thick and heavy or too thin and dry.
- Standard burger size: For classic 4-6 oz burgers, take about 1/4 to 1/3 cup of ground beef per patty.
- Bigger burgers: For a hefty, gourmet burger, use around 1/2 cup or 8 oz of ground beef.
Why it works: Proper portioning ensures uniform cooking times and consistency across all patties.
- Tip: If you don’t have a kitchen scale, you can use an ice cream scoop for an easy and consistent measurement. Scoop out the meat and gently roll it into a ball.
2. Forming a Loose Ball and Flattening It
Once you’ve portioned the beef, gently roll it into a loose ball. Avoid overworking the meat, as this can make the patty tough.
- Gently flatten: Once you have your meat ball, place it on a flat surface and gently press down to form a patty. Use your palms to press evenly, but don’t compress the meat too tightly.
- Ideal thickness: Aim for a patty that’s about ¾ inch thick. This thickness is perfect for even cooking while maintaining a juicy interior.
Why it works: Shaping the patty gently ensures that it stays moist and tender. Overworking the meat can result in a tough, dense patty.
- Tip: For a more uniform shape, you can use a burger press or an upside-down bowl to guide your shaping.
3. Creating an Indentation in the Center
One of the secrets to keeping your burger patties from puffing up is creating a small indentation in the center of each patty. Simply press your thumb into the middle of each patty to make a small, shallow dent.
- Why it works: As burgers cook, they tend to swell up in the center. The indentation prevents this, allowing the patty to stay flat and cook more evenly.
- Tip: Make the indentation about 1 inch wide and about ¼ inch deep. This small step can make a noticeable difference in how your burger cooks.
4. Avoid Overhandling the Patties
While it’s tempting to want to perfect every detail of the burger patty, avoid handling the meat too much. Overworking the beef can make it tough and dense, and the result will be a dry burger.
- Why it works: The more you handle the meat, the more the proteins in the beef are activated, which can result in a tougher texture. The goal is to keep the patties loose and light.
- Tip: Keep your hands cold when shaping the patties. Warm hands can melt the fat in the meat, making the burgers less juicy.
5. Chilling the Patties Before Cooking
After shaping the patties, it’s essential to let them rest in the refrigerator for at least 30 minutes before cooking. Chilling the patties helps them set and hold their shape better during cooking.
- Why it works: Chilling the patties makes them firmer and reduces the risk of them falling apart while cooking. It also helps the fat in the beef solidify, ensuring a moist and juicy burger.
- Tip: If you don’t have 30 minutes, even 10-15 minutes in the fridge will help, though longer chilling is ideal.
6. Perfecting Patty Size and Shape for Cooking
Once your patties are chilled, it’s time to cook them! Before placing them on the grill or in the pan, make sure they are the right size and shape for even cooking.
- Make sure they are flat and round: Use your fingers to gently even out any rough edges around the patty.
- Uniformity is key: Whether you’re grilling or frying, all patties should be of similar size and thickness for consistent cooking.
Why it works: Evenly shaped patties ensure that all of your burgers cook at the same rate, preventing some from being undercooked while others are overdone.
- Tip: If your patties are a little uneven after chilling, you can re-shape them gently with your hands just before cooking.
7. Cooking to Perfection
Now that your patties are shaped, it’s time to cook them to your desired doneness. Whether grilling or pan-frying, avoid pressing down on the patties with a spatula while cooking, as this will cause the juices to escape, making the patty dry.
- Cooking time: Grill or pan-fry your patties for about 3-5 minutes per side for medium doneness. If you like your burger well-done, extend the cooking time to 6-7 minutes per side.
- Tip: Use a meat thermometer to check for doneness. For medium, the internal temperature should be around 160°F (71°C).
Conclusion: Shaping Perfect Patties Every Time
Shaping burger patties like a pro is all about balance and technique. From proper portioning to making that key indentation in the center, these steps will help you achieve juicy, perfectly cooked burgers every time. With a little practice, you’ll be able to shape and cook burgers like a seasoned chef, impressing your friends and family with each bite.
Grilling vs. Pan-Frying: Which Cooking Method Is Best?
When it comes to cooking burgers, the method you choose can greatly affect the texture, flavor, and overall enjoyment of your burger. While both grilling and pan-frying are popular choices, each method has its unique advantages. Let’s dive deeper into grilling and pan-frying to help you decide which is best for your homemade burgers.
1. Grilling: The Classic Outdoor Experience
Grilling burgers is a time-honored tradition that brings a smoky, charred flavor to your patties. Many burger enthusiasts swear by the grill for its distinctive smoky taste and the crisp, caramelized crust it creates. Here’s why grilling is such a great option:
- Flavor Profile: Grilling imparts a smoky flavor to the beef, which comes from the open flames and the natural fat drippings that fall onto the hot coals, creating smoke. This adds an irresistible depth of flavor to the burgers that you simply can’t replicate with other methods.
- Texture and Caramelization: The direct heat from the grill creates a seared crust that locks in juices and gives the patty a crispy, flavorful exterior. The high heat also encourages Maillard reaction, which is the chemical process that leads to browning and enhances the flavor of the beef.
- Ideal for Outdoor Cooking: Grilling is perfect for outdoor summer BBQs and gatherings, where you can cook multiple burgers at once. It’s also ideal for those who enjoy the social aspect of cooking, as grilling tends to be a group activity.
- Best for: Grilling is great when you want that classic smoky flavor and charred crust. It’s especially good for larger gatherings or when you’re cooking a lot of burgers at once.
- Tip: Use a two-zone fire on your grill (direct and indirect heat). Start by searing the burgers over high heat to get a crust, then move them to the cooler side of the grill to cook them through without burning the outside.
2. Pan-Frying: The Convenient and Control-Friendly Method
If you don’t have access to a grill, pan-frying is a fantastic alternative that provides great control over the cooking process. It’s also ideal for smaller kitchens or when the weather isn’t suitable for outdoor grilling. Here’s why pan-frying might be the perfect method for you:
- Control Over Heat: One of the main benefits of pan-frying is the complete control it gives you over the cooking temperature. You can adjust the heat more precisely, ensuring that the burgers cook evenly without the risk of burning. This level of control is harder to achieve on a grill, where the heat can fluctuate.
- Juicier Burgers: Cooking burgers in a hot skillet allows the fat to render and stay within the patty, which can make the burger extra juicy. Because the burger is surrounded by the skillet, the fat doesn’t drip away like it does on the grill.
- Crispy, Golden Brown Crust: A cast-iron skillet, in particular, can produce a deeply golden brown crust that is crisp and flavorful. The pan’s even heat distribution creates a beautiful sear without losing moisture from the burger.
- Convenience: Pan-frying is ideal for smaller batches, and it’s quick and easy. You don’t need to worry about outdoor conditions or setting up a grill, and it’s a method you can use year-round.
- Best for: Pan-frying is perfect for those who want control over the cooking process or if you’re making fewer burgers and want them cooked to your exact preferences. It’s also great for achieving juicy burgers with a crisp crust in any season.
- Tip: Use butter or a little oil in your pan to help achieve that rich, golden crust. For an extra touch, add some garlic or herbs to the pan as the burger cooks to infuse more flavor.
3. Cooking Time and Burger Size Considerations
- Grilling: The time it takes to cook a burger on the grill can vary depending on the heat of the grill and the thickness of the patty. In general, burgers take about 4-5 minutes per side on a hot grill for medium doneness. Thicker patties may require additional cooking time. The grill also tends to cook burgers more quickly because of the high direct heat, so you can cook more burgers at once.
- Pan-Frying: Pan-frying allows for a slightly more even cook since you have full control over the heat. Typically, a medium-thick patty will take about 4-5 minutes per side in a hot skillet. If you like your burgers well done, you can lower the heat to allow for longer cooking time without overcooking the exterior.
- Tip: Thinner burgers cook faster on the grill, but thicker burgers may benefit from pan-frying, as you can easily adjust the temperature and check doneness.
4. Cleanup: Which Method Is Easier?
- Grilling: While grilling adds a great flavor, it can require a bit more cleanup. Charcoal grills, in particular, can leave behind ash, and the grates can get dirty with leftover grease and food debris. Cleaning a grill requires scrubbing the grates and disposing of ashes or grease, which can be a bit tedious.
- Pan-Frying: Pan-frying generally results in a simpler cleanup process. You’ll just need to clean the skillet or frying pan, which is usually faster and less labor-intensive than cleaning a grill.
- Tip: If you’re grilling, make sure to oil the grates before cooking to prevent sticking and ease cleanup afterward. For pan-frying, use a non-stick skillet for a quicker and easier cleanup.
5. Which Method Is Healthier?
When it comes to health, both grilling and pan-frying can have their pros and cons:
- Grilling: Because of the direct heat and the way the fat drips off the meat, grilling is often considered the healthier option. The fat from the burger drips away, which can result in a lower-fat burger.
- Pan-Frying: Pan-frying may keep more fat within the patty, which can enhance juiciness but also increases the calories. However, if you use less oil or butter, you can reduce the fat content in pan-fried burgers.
- Tip: To make your burger healthier, choose leaner beef cuts (such as 90% lean ground beef) or even turkey or chicken for a lighter option.
Conclusion: Grilling vs. Pan-Frying—Which Is Right for You?
Both grilling and pan-frying have their unique benefits, and the best method for you depends on your preferences, time, and equipment. If you love the smoky flavor and the social experience of cooking outdoors, grilling is the way to go. On the other hand, if you prefer more control over your cooking environment or need to cook indoors, pan-frying is a convenient and delicious option.
Ultimately, both methods can create mouthwatering burgers, so don’t hesitate to experiment with both and find the perfect method for your ideal burger.
How to Toast Buns and Melt Cheese Perfectly
The perfect burger isn’t just about the patty. The bun and cheese are just as important in creating a burger that will impress. Whether you prefer a lightly toasted bun with a crispy edge or melty, gooey cheese that hugs the patty, these small touches can transform your burger from good to amazing.
Toasting the Buns: Achieving the Perfect Crunch
Toasting the buns is more than just a decorative touch—it improves the texture and prevents sogginess, making each bite much more enjoyable. Here’s how to toast your buns to perfection:
- Choosing the Right Bun: Opt for fresh, soft buns that are sturdy enough to hold up to the juicy burger. Popular options like brioche, potato, and pretzel buns add rich flavor and texture.
- Buttering the Buns: For a golden-brown, crispy exterior, spread butter or oil on the cut side of the bun. This will not only enhance flavor but also create a crisp, slightly crunchy texture that complements the juicy patty.
- Toasting Methods:
- In a Skillet: Preheat a non-stick skillet or cast-iron pan on medium heat. Place the buns cut-side down and press them gently with a spatula. Toast for 1-2 minutes until they’re golden brown and crispy.
- On a Grill: If grilling your burgers, throw the buns on the grill too. Place them cut-side down over indirect heat for 30-60 seconds to achieve a crispy surface with a touch of smokiness.
Melt the Cheese: How to Get That Perfect Gooey Layer
A good burger isn’t complete without a perfectly melted cheese layer. Here’s how to melt cheese that’s gooey and delightful:
- Choosing the Right Cheese: Some cheeses melt better than others. Cheddar, American, and Swiss are classic options, offering great meltability and flavor. For a twist, try mozzarella or pepper jack for extra creaminess or a spicy kick.
- Melt Timing: Add cheese to the patty just before it’s fully cooked—around 1-2 minutes before you’re done. The heat from the patty will melt the cheese without overcooking it.
- Using a Lid for Melting: To get that gooey, smooth melt, cover the pan or grill with a lid for about 30-60 seconds. The trapped steam will help the cheese melt evenly over the patty.
Extra Tips for Perfect Buns and Cheese
These additional tips will ensure you get the best results when toasting buns and melting cheese:
- Toasting Without Overdoing It: Don’t toast the buns too long or they may become too crispy and dry. The goal is a light, golden-brown crust that adds texture without overpowering the burger.
- Layering Cheese: For an extra-rich flavor, consider layering two types of cheese. For example, combine cheddar for sharpness with Swiss for creaminess. This blend gives your burger a sophisticated flavor profile.
- Cheese and Bun Balance: Make sure you don’t overload the bun with cheese. A good ratio is one or two slices that cover the patty without spilling over.
Final Touch: Assembling the Burger
Once your buns are toasted and cheese is perfectly melted, it’s time to put everything together:
- Assemble in the Right Order: Start with the toasted bottom bun, then layer on your cheese-covered patty, followed by your toppings like lettuce, tomatoes, pickles, and onions. Finally, top with the toasted top bun.
- Serving Immediately: Serve your burger immediately to keep the cheese melty and the bun crispy. The perfect balance of textures will ensure that every bite is mouthwatering.
Conclusion: Toasted Buns and Melted Cheese Elevate Your Burger
The right buns and cheese are essential for making the ultimate burger. With the proper toasting technique and the perfect cheese melt, you’re sure to create a burger that stands out. Remember, balance is key—a crunchy bun with gooey, melted cheese makes for a burger experience that’s hard to beat.
Expert Tips to Get Juicy, Flavorful Burgers Every Time
To expand your options and add more flavor to your burgers, here are 15 of the best burger recipes you need to try this weekend.
Why You Shouldn’t Overwork the Meat
When it comes to making the perfect burger patty, one of the most common mistakes people make is overworking the ground beef. While it may seem like handling the meat more would make for a firmer patty, this actually leads to a tougher, denser burger that lacks the juicy, tender texture that makes a great burger irresistible. Here’s why it’s crucial to avoid overworking the meat and how to do it right:
1. Overworking the Meat Causes Toughness
Ground beef contains muscle fibers and connective tissue. When you mix or handle the meat too much, you activate these proteins, which can lead to a tough, dense patty. The more you manipulate the meat, the more you compress the fibers, and this can turn your otherwise juicy burger into something rubbery or dry. The key to a tender, flavorful burger is to handle the meat gently and minimally to avoid developing this toughness.
2. Less Juiciness: Overworking Leads to Dry Burgers
One of the key qualities that makes a burger irresistible is its juiciness. Fat content in ground beef is responsible for the moisture in the patty. When you overwork the meat, you not only break down its structure but also cause the fat to leach out more, reducing the juiciness of the burger. As a result, you end up with a dry burger that lacks the satisfying bite and flavor that a perfectly cooked, well-seasoned patty should have.
3. Texture and Consistency: The Right Balance of Tenderness
A well-made burger patty has a light, airy texture. Overworking the meat can make the mixture overly compact and dense, which affects both the texture and overall consistency of the patty. When handled gently, the ground beef will retain its natural air pockets, which contribute to a light, tender bite. This ensures that when you bite into your burger, it has the perfect balance between tenderness and juiciness.
4. How to Handle the Meat Properly
The good news is that achieving the perfect burger patty is simple once you understand how to handle the meat correctly. Here’s how to avoid overworking it:
- Use Your Hands Gently: Rather than using utensils or heavy tools, gently use your hands to mix the meat. This allows you to control the amount of handling while keeping the texture intact.
- Minimal Mixing: When mixing in seasonings and other ingredients, stir the meat just until the ingredients are incorporated. This should only take a few folds, not long periods of mixing.
- Form the Patties Gently: When shaping the patties, try not to press the meat too firmly. Instead, lightly shape it into a ball and then flatten it. Use your thumbs to create a small indent in the center of the patty, which helps it cook evenly and prevents it from puffing up too much during cooking.
- Avoid Overpacking the Patties: If you make the patties too tight or too thick, the meat will be compacted even further, leading to a tougher, drier texture. Aim for patties that are uniform in size and not overpacked to ensure they cook evenly and stay juicy.
5. Letting the Patties Rest
After forming your patties, it’s important to let them rest for a few minutes before cooking. This gives the meat a chance to firm up and will also help the burger retain its shape when it cooks. This resting time allows the fat to redistribute and settle, further contributing to a juicy burger. However, even during this step, be mindful not to press or squeeze the patties—this could release the fat too early and result in a dry burger.
Conclusion: Gentle Handling for Perfectly Tender Burgers
In short, overworking the meat while making burger patties is a surefire way to end up with tough, dry, and flavorless burgers. By handling the meat with care and minimizing your contact with it, you allow the natural tenderness and juiciness to shine through. Gentle mixing, proper seasoning incorporation, and careful shaping all contribute to creating a burger that is flavorful, juicy, and tender. With these tips, you can ensure that every burger you make is a mouthwatering experience from the first bite to the last.
Using a Meat Thermometer for Perfect Doneness
Achieving the perfect level of doneness is crucial for making a great burger. Whether you like your burger rare, medium, or well-done, using a meat thermometer is the most reliable way to ensure your burger is cooked to perfection. This tool takes the guesswork out of the equation, allowing you to cook your burgers just the way you like them every single time. Here’s why you should use a meat thermometer and how it helps you achieve the perfect burger:
1. Why a Meat Thermometer Is Essential for Burger Perfection
One of the biggest challenges when cooking burgers is determining their doneness. Color alone isn’t a reliable indicator, as ground beef can appear brown or gray even when undercooked, or the outside might look done while the inside is still raw. Using a meat thermometer ensures that you know exactly when your burger has reached the correct internal temperature for the level of doneness you prefer.
- Avoid Under-Cooking or Over-Cooking: A meat thermometer removes the guesswork and helps you avoid undercooked burgers (which can pose a health risk due to bacteria like E. coli or Salmonella) or overcooking, which can lead to dry, tough burgers.
- Achieve Consistent Results: Every time you cook a burger, you can rely on the thermometer to ensure consistency. Whether you’re grilling for a party or making a quick dinner, the thermometer gives you the confidence that your burgers will always be perfectly cooked.
2. Understanding Ideal Burger Temperatures
Different levels of doneness require different internal temperatures. Here’s a quick guide on the ideal temperatures for the perfect burger:
- Rare: 120-125°F (49-52°C) – Cool red center, very juicy.
- Medium-Rare: 130-135°F (54-57°C) – Warm, pink center, juicy but slightly firmer.
- Medium: 140-145°F (60-63°C) – Slightly pink in the center, tender and juicy.
- Medium-Well: 150-155°F (66-68°C) – Slightly pink center, firm but still juicy.
- Well-Done: 160°F+ (71°C+) – No pink, firm, and fully cooked through.
Using a thermometer allows you to cook to these exact temperatures and ensures that your burgers are just how you like them every time.
3. How to Properly Use a Meat Thermometer
Using a meat thermometer is straightforward, but there are a few tips to keep in mind to get an accurate reading and avoid damaging your burger:
- Insert the Thermometer Correctly: Insert the thermometer into the thickest part of the patty, avoiding any fat or bone if applicable. For burgers, this is typically in the center. Make sure the thermometer isn’t touching the cooking surface, as that will give a false reading.
- Check Early and Often: It’s better to check your burger’s temperature early rather than late to avoid overcooking. Insert the thermometer once you think the burger is getting close to being done, and then check every few minutes. This allows you to catch the perfect moment before the burger reaches its ideal temperature.
- Wait for the Temperature to Stabilize: Let the thermometer sit in the burger for a few seconds to ensure that it gives an accurate reading. If the temperature keeps rising even after you’ve removed the thermometer, your burger may be overcooked.
- Don’t Forget Carry-Over Cooking: Keep in mind that burgers continue to cook for a few minutes after you take them off the grill or pan, even if you’ve removed them from the heat. This is known as carry-over cooking, and the temperature can rise by an additional 5°F (3°C). To account for this, remove the burger when it’s about 5°F (3°C) below your target temperature.
4. Benefits of Using a Meat Thermometer
Using a meat thermometer not only ensures food safety but also gives you several other benefits:
- Enhanced Flavor: By cooking the burger to the ideal doneness, you preserve its natural flavors. Overcooked burgers often become dry and lack flavor, but a perfectly cooked burger is juicy, tender, and packed with flavor.
- Health and Safety: Undercooking ground beef can lead to the presence of harmful bacteria. By using a thermometer to check the internal temperature, you ensure that the meat reaches a safe temperature to avoid foodborne illness.
- Consistency: Whether you’re cooking for one or grilling for a crowd, the thermometer guarantees that every burger you make is cooked just the way you want it. No more guessing or cutting into the patty to check!
5. Choosing the Right Meat Thermometer
Not all meat thermometers are created equal. Here’s what to look for when choosing one:
- Instant-Read Thermometer: These provide quick and accurate readings, making them ideal for checking the temperature of burgers as they cook. They typically give a reading in about 5-10 seconds.
- Digital vs. Analog: Digital thermometers are easy to read and often give more precise readings, while analog thermometers are more affordable but may require a bit more experience to use correctly.
- Probe Length: Look for a thermometer with a probe long enough to reach the center of the patty. A probe that’s too short may not give an accurate reading if the patty is thick.
Conclusion: Perfect Doneness with the Help of a Meat Thermometer
Using a meat thermometer is the most reliable way to achieve the perfect burger every time. It takes the guesswork out of cooking, ensuring that your burgers are cooked to the ideal level of doneness, whether you prefer a juicy medium-rare or a well-done patty. By investing in a meat thermometer and using it properly, you can enhance the flavor, juiciness, and safety of your burgers. Don’t risk serving an overcooked or undercooked burger—let the thermometer do the work for you!
How to Keep Burger Patties from Falling Apart
One of the most frustrating issues when making homemade burgers is when the patties fall apart during cooking. This not only leads to a messy grilling experience but also results in a burger that’s difficult to eat and loses its texture. Whether you’re grilling, pan-frying, or broiling, there are a few key factors that contribute to burger patties holding their shape and maintaining their integrity. Here’s how to keep your burger patties from falling apart:
1. Use the Right Ground Beef Ratio
The fat-to-lean ratio in the ground beef you use is critical to the texture and ability of the burger patty to hold together. If the meat is too lean, it can become dry and crumbly, making it more likely to fall apart. On the other hand, if the fat content is too high, the patties might fall apart due to excess moisture and grease.
- Ideal Ratio: For the best texture and binding power, aim for ground beef that’s around 80% lean and 20% fat. This ratio ensures that your patties will stay juicy while still holding their shape during cooking.
- Avoid Lean Meat: Ground beef that’s 90% lean or higher can cause your patties to fall apart because there’s not enough fat to help hold the patty together. Look for fattier cuts for a better burger that stays intact.
2. Handle the Meat Gently
While it’s tempting to mix and work the ground beef to ensure that it’s thoroughly combined, overworking the meat can lead to a tough, dense patty that’s more likely to break apart during cooking.
- Mix Gently: Use your hands to gently mix in any seasonings or additional ingredients. Over-mixing creates tough, overworked meat that won’t hold together well. The key is to handle the meat as little as possible and only mix until the ingredients are incorporated.
- Shape the Patties Lightly: When shaping the patties, don’t press them down too firmly. Over-packing the patties makes them dense and can cause them to crumble. Instead, gently form the patties with your hands, pressing them just enough to shape them into a round or oval patty. Avoid compacting the meat too much.
3. Use a Binding Agent
Adding a binding agent to the ground beef mixture helps the patty hold together better, preventing it from falling apart. Bindings like bread crumbs, eggs, and oats absorb moisture and provide structure to the patties. Without a binding agent, the fat and juices from the meat can make the patty too loose, causing it to disintegrate during cooking.
- Eggs: Eggs are a great natural binder and will help the patty hold together. One egg per pound of ground beef is a good rule of thumb.
- Bread Crumbs: Dry bread crumbs or panko can help absorb moisture and provide extra structure. You can also soak them in a bit of milk to create a more moist mixture that helps prevent patties from falling apart.
- Oats: Oats, particularly ground oats, can also be used as a binder. They absorb moisture and give the patties a slightly denser texture while still helping them stay together.
- Cheese (optional): A small amount of grated cheese mixed into the patty can also help improve cohesion and add flavor.
4. Keep the Patties Cold
Another important step in keeping your burger patties intact is making sure they stay cold before cooking. Warm patties tend to fall apart more easily when they hit the hot grill or pan because the fat starts to liquefy, causing the meat to lose its shape.
- Chill the Patties: Once you’ve shaped the patties, refrigerate them for at least 30 minutes. This helps the fat set and the patties firm up, making them less likely to fall apart during cooking.
- Avoid Overworking the Patties After Shaping: If you’ve shaped the patties and handled them too much after that, they can warm up and become soft. Try not to re-shape them too many times once they’ve been formed.
5. Make a Dimple in the Center of the Patty
A helpful trick to prevent your burger patties from shrinking or puffing up during cooking is to make a small dimple in the center of the patty before cooking. This technique ensures that the patty cooks evenly and doesn’t form a dome in the middle, which can cause it to crack or fall apart.
- How to Do It: Use your thumb to gently press down in the center of each patty, creating a slight indentation. This allows the patty to cook more evenly, keeping its shape intact.
6. Don’t Overcook the Patties
Overcooking burgers can cause them to dry out, which increases the likelihood that they will fall apart. When cooking, aim for the ideal doneness for your preferred taste while keeping the patty juicy and tender.
- Use a Meat Thermometer: To avoid overcooking, use a meat thermometer to monitor the internal temperature of your burgers. For a medium burger, aim for an internal temperature of about 140-145°F (60-63°C).
- Rest After Cooking: After the patties are cooked to your desired level, let them rest for a few minutes. This allows the juices to redistribute and prevents the patties from drying out.
7. Cooking on a Well-Oiled Surface
If you’re grilling or pan-frying your burgers, cooking on a well-oiled surface can also help prevent them from sticking and falling apart. Whether using a grill, cast-iron skillet, or griddle, make sure the cooking surface is well-greased to avoid friction that can cause the patties to break apart.
- Oil the Grill Grates or Pan: Lightly oil the cooking surface using a paper towel dipped in oil or use a non-stick spray for grilling. This ensures that the patties can be flipped easily without falling apart.
Conclusion: Keep Your Patties Together for Perfect Burgers
Preventing your burger patties from falling apart is all about using the right techniques and paying attention to details. By using the proper ground beef ratio, handling the meat gently, adding a binding agent, keeping the patties cold, and cooking with care, you’ll end up with a perfectly cooked, intact burger every time. These simple tips ensure your burgers are not only delicious but hold their shape, providing a satisfying bite from the first to the last. Happy burger-making!
The Right Way to Assemble a Burger (Layer by Layer)
Assembling the perfect burger isn’t just about slapping a patty between two buns. The way you layer your burger plays a crucial role in ensuring every bite is balanced, flavorful, and structurally sound. By layering your ingredients in the right order, you can avoid soggy buns, maintain flavor integrity, and ensure that each element shines through. Here’s how to assemble a burger the right way, layer by layer:
1. Start with the Bottom Bun: The Foundation
The bottom bun acts as the foundation of the burger. It holds everything together, so it’s important to ensure it’s sturdy and able to withstand the juices from the patty and condiments.
- Toast or Grill the Bun: Begin by lightly toasting or grilling the bottom bun. This helps create a protective barrier that keeps the bun from absorbing too much moisture from the burger patty and toppings. You can toast it with a small amount of butter or oil for extra flavor.
- Choose the Right Bun: Pick a bun that’s strong enough to hold the burger’s weight. Brioche, potato rolls, or a classic sesame seed bun are all great options. Avoid overly soft buns, as they can easily become soggy and fall apart.
2. Apply a Layer of Condiments (But Not Too Much)
Condiments add flavor and moisture, but too much can make the burger soggy and difficult to eat. The key is to apply just the right amount.
- Spread Evenly: Start by spreading a thin layer of your favorite condiments—ketchup, mustard, or mayo—on the bottom bun. You can also use specialty sauces like barbecue sauce or aioli, depending on the flavor profile you’re going for.
- Don’t Overdo It: Remember that the burger’s juices and the condiments on other layers will add moisture, so keep the bottom layer light. You can also use a layer of pickles or onions underneath the condiments to absorb extra moisture and keep things crisp.
3. Add the Lettuce for Crunch and Freshness
Lettuce is a common topping for burgers, but it’s not just for decoration. The lettuce helps to add a fresh crunch that contrasts the rich, savory flavors of the patty and cheese. It also acts as a moisture barrier, preventing the bun from getting soggy.
- Use Crisp, Fresh Lettuce: Opt for leafy lettuce varieties like Romaine or Iceberg. They’re sturdier than delicate greens like spinach and can withstand the heat and moisture from the burger patty.
- Layer the Lettuce Before the Patty: Place the lettuce directly on top of the condiments. This acts as a shield, keeping the burger patty’s juices from soaking into the bottom bun.
4. The Burger Patty: The Heart of the Burger
Now comes the star of the show—the patty! This is where all the flavors come together, and it’s essential that your patty is cooked just right. Whether grilled, pan-fried, or broiled, your burger patty should be perfectly seasoned and juicy.
- Place the Patty Directly on the Lettuce: After cooking your patty, place it gently on the lettuce. Make sure it’s centered so that every bite has a nice balance of patty and toppings.
- Rest the Patty Before Assembling: Let your patty rest for a few minutes after cooking. This allows the juices to redistribute, making the patty more flavorful and preventing it from leaking too much juice onto the other layers.
5. Add the Cheese: Melty Goodness
Cheese is often the defining touch that elevates a burger to the next level. A perfectly melted slice of cheese adds a creamy, savory richness that complements the flavor of the patty.
- Choose the Right Cheese: Classic choices include cheddar, American, or Swiss, but you can get creative with cheeses like blue cheese, gouda, or pepper jack for added depth and flavor.
- Melt the Cheese: As soon as the patty is cooked, top it with a slice of cheese and let it melt. You can do this by covering the pan or grill with a lid for a minute, allowing the cheese to melt over the hot patty. This ensures that the cheese gets gooey and envelops the patty, providing that irresistible cheesy bite.
6. Add Pickles, Onions, and Other Toppings
Pickles and onions are essential toppings that add tang, crunch, and additional layers of flavor. Depending on your preference, you can opt for dill pickles, sweet pickles, or even pickled jalapeños for a spicy kick.
- Pickles: Place a few slices of pickles on top of the melted cheese. They cut through the richness of the patty and cheese with their tangy flavor.
- Onions: Whether you prefer raw onions, grilled onions, or caramelized onions, they add a sweet or sharp bite that complements the savory patty. Layer them on top of the cheese or pickles, depending on your preference.
- Other Toppings: You can also add sliced tomatoes, sautéed mushrooms, or fried onions for extra texture and flavor. The key is to balance the flavors and not overwhelm the patty with too many ingredients.
7. The Top Bun: Closing the Deal
Finally, finish assembling your burger by adding the top bun. The top bun completes the structure, sealing in all the flavors and ensuring the burger holds together as you take each delicious bite.
- Toast the Top Bun (Optional): While not always necessary, toasting the top bun adds a nice crunch and prevents it from becoming soggy. If you didn’t toast the bottom bun, you can toast both for extra texture.
- Press Gently: Once the top bun is in place, press the burger down gently to help the ingredients settle. This also helps the cheese melt into the patty and makes the burger easier to hold.
8. Serve Immediately and Enjoy
Now that your burger is perfectly assembled, it’s time to enjoy it! Serve your burger immediately, while the patty is still hot, the cheese is melted, and the toppings are fresh. A well-assembled burger not only looks delicious but also ensures that each bite is a perfect combination of flavors and textures.
Conclusion: Perfect Layering Equals Perfect Flavor
Assembling a burger isn’t just about stacking ingredients—it’s about creating a balanced and flavorful combination that holds together perfectly. By following this step-by-step layering guide, you can ensure that every bite of your homemade burger is satisfying, juicy, and full of flavor. From the toasted bun to the perfectly melted cheese, each layer plays a critical role in creating the ultimate burger experience.
Best Side Dishes and Sauces to Serve with Your Burgers
Crispy French Fries and Onion Rings
No burger is truly complete without a side of crispy, golden fries or crispy onion rings. These classic sides not only complement the rich, savory flavors of a burger but also bring a satisfying crunch and texture that elevates the entire meal. Perfecting these sides can be a game-changer in your burger experience. Here’s everything you need to know about creating crispy French fries and onion rings that will steal the spotlight.
1. Perfecting French Fries: A Step-by-Step Guide
Choosing the Right Potato for Crispy Fries
- Russet Potatoes: For the crispiest fries, start with Russet potatoes. Their high starch content ensures a fluffy interior and a golden, crispy exterior when fried or baked. Other varieties like Yukon Gold are too waxy, which results in soggy fries.
Prepping the Potatoes Properly
- Peel or Leave the Skin: Depending on your preference, you can either peel the potatoes or leave the skin on for extra texture and flavor. If you leave the skin, be sure to wash the potatoes thoroughly.
Cutting the Potatoes
- Even Slices: Slice the potatoes evenly to ensure they cook uniformly. Classic French fries are usually thin, but thicker fries or steak fries can be just as delicious. Keep them consistent to avoid under or overcooked pieces.
2. Double Frying for the Perfect Crisp
First Fry: The Blanching Process
- Lower Temperature: Start by heating oil to 325°F (163°C). Fry the potatoes in small batches for 4–5 minutes. At this stage, the fries should become soft and slightly golden but not browned.
Second Fry: The Crispy Finish
- Increase the Heat: After resting, heat the oil to 375°F (190°C). Fry the potatoes again for 2–3 minutes until they are golden brown and crispy. This double-frying method ensures a light, crispy exterior and a fluffy interior.
3. Seasoning and Serving Your Fries
Seasoning Right After Frying
- Add Flavor While Hot: Once your fries are golden and crispy, sprinkle them immediately with sea salt. You can also add garlic powder, paprika, or cayenne pepper for added flavor.
Creative Seasoning Ideas
- Loaded Fries: To make your fries extra special, try adding cheese, crispy bacon, or a drizzle of ranch dressing. This is a fun way to elevate the flavor.
Dip Options:
- Classic and Creative Dips: Serve your fries with traditional ketchup, mayonnaise, or barbecue sauce. For a more adventurous taste, create a spicy dip with sriracha and mayo or try a tangy aioli.
4. Crispy Onion Rings: The Secret to the Perfect Crunch
Choosing the Right Onion for Rings
- Yellow or Sweet Onions: Yellow or sweet onions like Vidalia work best for onion rings because they have a mild, sweet flavor that balances the crispy batter.
Slicing the Onion Rings
- Thicker Rings Are Better: Slice your onions into ½-inch thick rings. Thicker rings hold up better when frying and provide the perfect texture — a crispy coating and a tender inside.
5. The Battering and Frying Process for Onion Rings
Making the Perfect Batter
- Light and Crispy: Combine flour, cornstarch, baking powder, and salt to create a light, crispy batter. Add sparkling water or beer to give it the right amount of airiness. The carbonation helps the batter fry light and crisp.
Dipping and Coating
- Double Dipping for Extra Crispiness: Dip the onion rings first into the batter, then coat them lightly in flour before frying. This will create an extra crispy exterior.
6. Frying the Onion Rings
Heating the Oil
- Optimal Oil Temperature: Heat your oil to 375°F (190°C) for the perfect fry. If the oil is too cold, the batter will absorb too much oil, making the onion rings greasy.
Frying in Small Batches
- Avoid Overcrowding: Fry the onion rings in small batches to ensure they cook evenly. After 2–3 minutes, the onion rings should turn golden brown and crispy. Be sure to flip them gently to avoid breaking.
7. Draining and Seasoning the Onion Rings
Drain the Excess Oil
- Paper Towels Are Key: Place the fried onion rings on a paper towel-lined plate to drain any excess oil, keeping them crisp.
Seasoning Immediately
- Add Salt and Flavor: Season the onion rings right after frying while they’re still hot. A sprinkle of salt is essential, but you can also experiment with pepper, cayenne, or a squeeze of lemon for a zesty finish.
8. Serving Your Onion Rings
Perfect Pairings for Onion Rings
- Dips and Sauces: Serve your crispy onion rings with classic dips like ranch dressing, ketchup, or barbecue sauce. For something different, try a tangy mustard or a spicy aioli to complement the sweetness of the onion.
Flavor Variations
- Cornmeal or Parmesan-Coated: For a unique twist, you can substitute flour with cornmeal for added crunch, or mix grated Parmesan into the batter for a savory twist.
Conclusion: Crispy Sides, Perfect Burger
By following these techniques, you can easily elevate your homemade burger experience with crispy French fries and onion rings. Perfectly prepared fries and onion rings add texture, flavor, and a satisfying crunch to your meal, complementing the juicy, flavorful burger. With these expert tips, you’ll never have to settle for soggy sides again — your fries and onion rings will always come out crispy and delicious!
Homemade Coleslaw and Potato Salad: The Perfect Burger Sides
Why Coleslaw and Potato Salad Are Ideal Burger Sides
Coleslaw and potato salad are classic, crowd-pleasing sides that perfectly complement a juicy burger. Their creamy textures and refreshing flavors balance the richness of the burger, creating a satisfying meal. These sides are not only easy to make but also versatile, allowing you to experiment with ingredients and seasonings for unique variations.
Coleslaw: A Crisp and Creamy Side
Choosing the Right Vegetables
To make coleslaw, start with fresh, crisp cabbage as your base. Green cabbage is the most commonly used, but you can also mix in red cabbage for a pop of color and a slightly sharper flavor. Shredding the cabbage finely ensures that each bite has a nice crunch and is evenly coated in dressing.
Add-ins for Extra Texture and Flavor
While cabbage is the main ingredient, adding other vegetables can enhance the texture and flavor. Carrots, thinly sliced or shredded, bring sweetness and color. You can also include ingredients like sliced bell peppers, onions, or even apples for an unexpected touch of sweetness and crunch.
Creamy Dressing: The Secret to Perfect Coleslaw
The dressing is what makes the coleslaw truly delicious. A classic coleslaw dressing is made from mayonnaise, vinegar (apple cider vinegar or white vinegar), sugar, and a pinch of salt. Some recipes add a dollop of Dijon mustard or a dash of celery seed for extra depth of flavor. The key to a creamy yet tangy dressing is to balance the sweet and sour elements, so taste and adjust the ingredients to your preference.
Let It Sit for Maximum Flavor
Once your coleslaw is mixed, cover it and refrigerate it for at least 30 minutes before serving. This resting time allows the flavors to meld together and the cabbage to soften slightly, creating a perfect texture.
Potato Salad: Comfort in Every Bite
Choosing the Right Potatoes for Salad
For potato salad, choose waxy potatoes like Yukon Gold or Red Bliss. These potatoes hold their shape well when boiled and provide a creamy texture without becoming mushy. Avoid starchy potatoes like Russets, as they can break apart and become too soft for a salad.
Boiling the Potatoes Just Right
To get perfectly boiled potatoes for salad, place them in a pot of cold water and bring to a boil. Then, reduce the heat and simmer until the potatoes are tender but still firm enough to hold their shape when diced. Overcooking them can result in a mushy salad, so check them regularly.
Creamy and Tangy Dressing for Potato Salad
A classic potato salad dressing combines mayonnaise, mustard (Dijon or yellow), and vinegar. Some recipes include a bit of pickle juice or sour cream to enhance the tangy flavor. Add salt, pepper, and a pinch of paprika to season. For a twist, try adding fresh herbs like parsley or dill for extra freshness.
Add-ins for Extra Flavor
Potato salad is highly customizable. Some popular additions include chopped hard-boiled eggs, pickles, onions, and bacon. You can even incorporate other vegetables like celery or chives for extra crunch and flavor. Keep the ingredients simple and fresh, so they don’t overpower the potato’s natural taste.
Chill Before Serving
Like coleslaw, potato salad benefits from chilling in the refrigerator for a few hours before serving. This allows the flavors to meld together, creating a more cohesive dish.
Tips for Perfecting Both Sides
Adjusting the Dressing
The key to both coleslaw and potato salad is to ensure the dressing is balanced — neither too thick nor too runny. If you find the dressing too thick, add a splash of vinegar or a little water to loosen it up. For a richer dressing, add more mayonnaise or sour cream.
Make Ahead for Convenience
Both coleslaw and potato salad are excellent make-ahead options. Preparing them a day in advance allows the flavors to develop and makes your meal preparation easier. Just be sure to store them in an airtight container in the fridge.
Serving Suggestions
For an added touch, garnish your coleslaw and potato salad with fresh herbs or extra toppings like chopped green onions, bacon bits, or paprika. These small touches can elevate the presentation and add even more flavor.
Conclusion: The Ultimate Burger Sides
Coleslaw and potato salad are the perfect sides to elevate your burger meal. The creamy, tangy flavors of the coleslaw and the hearty, comforting nature of the potato salad create a balanced, satisfying meal that complements any type of burger. Whether you’re hosting a barbecue or enjoying a casual dinner, these sides will always impress your guests and leave them coming back for more.
Tasty Burger Sauces You Can Make at Home
Why Homemade Sauces Make a Difference
Homemade burger sauces can elevate your burger experience, adding layers of flavor that store-bought sauces often lack. They allow you to tailor the taste to your liking, whether you prefer tangy, creamy, spicy, or savory options. Plus, making your own burger sauce is simple and cost-effective, and you can experiment with different ingredients to create a signature sauce that your friends and family will rave about.
Classic Burger Sauce: The All-Time Favorite
Ingredients
The classic burger sauce combines mayonnaise, ketchup, and yellow mustard as its base. These ingredients bring together the perfect balance of creaminess, sweetness, and tanginess. Add a teaspoon of pickle relish for a touch of sweetness and texture, and season with garlic powder, onion powder, paprika, and a dash of Worcestershire sauce for extra flavor complexity.
How to Make It
To make this timeless sauce, simply combine all the ingredients in a bowl and stir well until smooth. Taste and adjust the seasoning to your preference. For a creamier sauce, you can add more mayonnaise, or for a spicier kick, increase the amount of mustard or a splash of hot sauce.
Why It Works
This classic burger sauce is a perfect match for any burger, adding a smooth, slightly tangy flavor that complements both the meat and the toppings without overwhelming them.
Spicy Sriracha Mayo: A Bold Kick
Ingredients
For a spicy twist, Sriracha sauce is the key ingredient in this burger sauce. Combine mayonnaise with Sriracha to your desired spice level, and add a small spoonful of honey or brown sugar for a touch of sweetness. A squeeze of lime juice will add a fresh citrusy zing, while a pinch of garlic powder and onion powder deepens the flavor.
How to Make It
In a bowl, mix together the mayonnaise and Sriracha sauce. Adjust the spice level by adding more Sriracha if you like it hot. Stir in the honey for sweetness and the lime juice for brightness. Taste and adjust seasoning as needed.
Why It Works
This sauce is perfect for anyone who enjoys spicy food. The creamy mayo balances out the heat from the Sriracha, making it a great choice for burgers that have bold toppings or grilled flavors.
Garlic Parmesan Sauce: Creamy and Savory
Ingredients
If you love garlic and cheese, this sauce is for you! To make a garlic Parmesan sauce, start with a base of mayonnaise or sour cream. Add freshly minced garlic or garlic powder, grated Parmesan cheese, and a splash of lemon juice to brighten the flavor. A pinch of Italian seasoning or dried basil can enhance the herbaceous notes of this sauce.
How to Make It
In a mixing bowl, combine the mayonnaise or sour cream with the garlic, Parmesan cheese, lemon juice, and seasonings. Stir until smooth and well combined. You can also add a bit of olive oil for extra richness, especially if you’re using sour cream as the base.
Why It Works
This rich, garlicky sauce pairs wonderfully with burgers that feature grilled chicken or vegetarian patties. It’s creamy, savory, and brings a unique flavor profile that transforms a simple burger into something gourmet.
Tangy BBQ Sauce: Sweet and Smoky
Ingredients
BBQ sauce is a classic burger topping, and making your own at home is both fun and rewarding. Start with ketchup as the base, then add apple cider vinegar for tang, and brown sugar or honey for sweetness. For smokiness, include a teaspoon of liquid smoke or smoked paprika, and finish with a pinch of chili powder or cayenne pepper to add some heat.
How to Make It
Mix together the ketchup, vinegar, and sugar in a bowl. Add the spices and adjust the sweetness and tanginess to suit your taste. If you want a thicker sauce, simmer it on low heat for a few minutes until it thickens to your liking.
Why It Works
BBQ sauce is perfect for burgers that need a smoky, tangy punch. It’s particularly great on burgers with bacon or grilled vegetables, adding a delightful contrast to the richness of the meat.
Avocado Crema: Creamy and Refreshing
Ingredients
Avocado crema is a fresh, creamy sauce that works well on burgers that need a little extra creaminess and a touch of avocado flavor. Simply blend together ripe avocado, sour cream or Greek yogurt, lime juice, and cilantro. Add a pinch of salt and a touch of garlic powder for seasoning, and you have a refreshing, smooth sauce.
How to Make It
Place the avocado, sour cream, lime juice, and cilantro in a blender or food processor. Pulse until smooth and creamy. Taste and adjust with more lime juice or seasoning if needed. If you prefer a thinner consistency, add a little water or extra lime juice to loosen it up.
Why It Works
This creamy, tangy sauce adds a cool contrast to spicy or grilled burgers. It’s perfect for chicken burgers, fish burgers, or even veggie burgers.
How to Customize Your Burger Sauce
Experiment with Add-ins
The beauty of making your own burger sauce is the ability to customize it based on your preferences. You can add ingredients like bacon bits for extra smoky flavor, pickled jalapeños for heat, or fresh herbs like parsley or chives for added freshness. Try different combinations to create a burger sauce that’s uniquely yours.
Adjusting the Consistency
If you prefer a thicker sauce, use more mayonnaise or sour cream, or even add some cream cheese for a richer texture. To make a thinner sauce, add more vinegar, lemon juice, or water.
Making Sauces in Advance
Most of these sauces can be made in advance and stored in the refrigerator for up to a week. In fact, they often taste better after sitting for a few hours, as the flavors have time to meld together.
Conclusion: Bring Your Burger to the Next Level
Homemade burger sauces add excitement and flavor to your meal, taking a regular burger and transforming it into something truly special. Whether you prefer a classic, creamy sauce or a spicy, smoky one, there’s a recipe here for every taste. By making these sauces at home, you have complete control over the ingredients and can customize each one to suit your preferences. Try out different sauces with your burgers and see how they elevate your next burger night!
Common Mistakes to Avoid When Making Burgers at Home
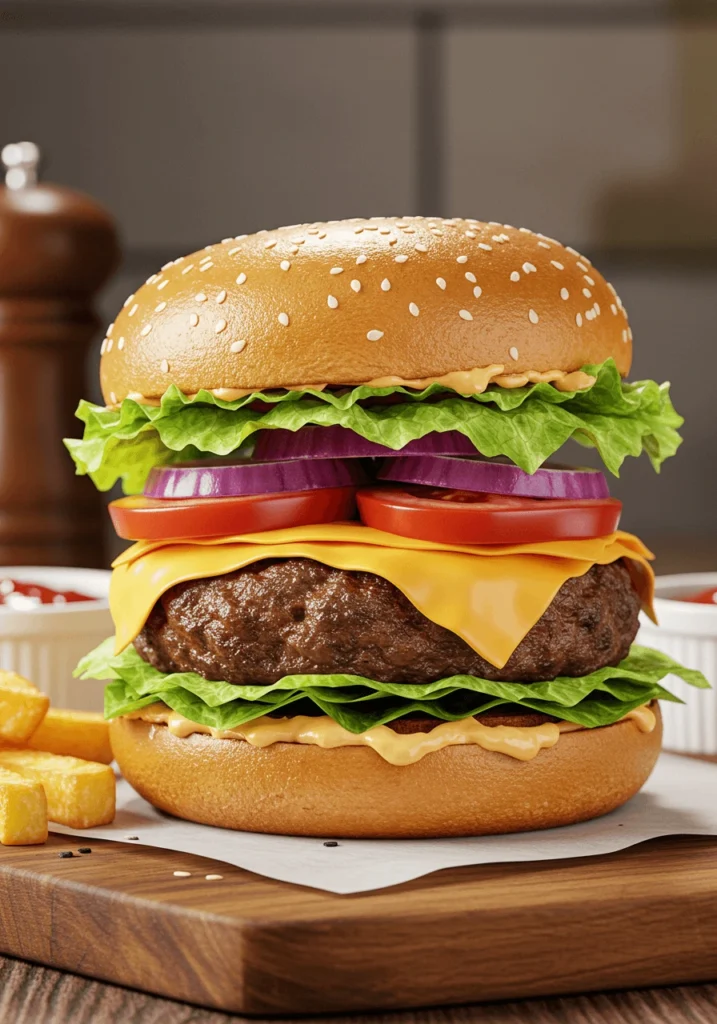
Using Lean Meat Only: Why Fat Matters
The Importance of Fat in Burger Patties
When making burgers, the choice of meat is crucial, and one of the most common mistakes people make is using lean meat exclusively. While lean meat may seem like the healthier option, it’s not always the best choice for creating juicy, flavorful burgers. The fat content in the meat plays a vital role in both the texture and flavor of your burger patty. Fat isn’t just there to add richness, it also helps to bind the meat together and keeps it from becoming dry during cooking.
Why Fat Enhances Burger Flavor
Fat is a key ingredient in achieving a tender, juicy burger with a mouthwatering flavor. When fat melts during cooking, it helps to carry and distribute the seasonings and natural flavors of the meat, resulting in a richer taste. The fat also prevents the meat from becoming too dense and dry, which can happen when using lean cuts. This is especially important for creating a restaurant-quality burger that’s packed with flavor and moisture.
Fat Content: The Ideal Ratio
The most common ratio for ground beef used in burgers is 80/20, meaning 80% lean meat and 20% fat. This ratio strikes the perfect balance, giving your burger enough fat to stay juicy while not being overly greasy. If you go too lean, such as using a 90/10 or 95/5 blend, your burger may turn out dry and tough, lacking the rich flavor that makes burgers so delicious.
If you’re looking to control the fat content for health reasons, it’s important to keep in mind that some fat is necessary to maintain the overall taste and texture of the burger. Reducing fat too much can result in an unsatisfying burger experience.
The Risks of Overusing Lean Meat
When using too lean meat, the consequences are noticeable both in flavor and texture. A burger made from meat that’s too lean can easily become tough and dry. This is because there is not enough fat to lubricate the meat as it cooks, which leads to a chewier patty. Additionally, the absence of fat means the burger won’t have the same richness and savory flavor that comes from the natural fats in the meat.
Another issue with lean meat is that it can be more prone to shrinking as it cooks, which leads to burgers that shrink in size and become less satisfying. The fat content in a higher-fat burger patty helps the burger maintain its size and texture during cooking.
Fat’s Role in Binding and Moisture Retention
Fat does more than just add flavor; it also helps in binding the ground meat together. Fat keeps the meat moist, which prevents the burger from becoming overly dry or crumbly. Without enough fat, your burger patty might fall apart easily, leading to a less enjoyable eating experience. The fat essentially acts as a binder, holding the meat together and maintaining its juiciness.
In addition, fat enhances the mouthfeel of the burger. It provides a satisfying, smooth texture that makes each bite feel more luxurious. Fat also contributes to caramelization when the burger is cooked, creating a deliciously crispy, golden-brown crust.
Choosing the Right Cut of Meat for Your Burger
If you want a burger with the ideal fat content, it’s essential to choose the right cuts of meat. Common cuts used for burgers include chuck, brisket, and sirloin. Chuck is often favored for its higher fat content, typically around 20%. Brisket offers a richer, beefier flavor, while sirloin tends to be leaner, and you may want to blend it with a fattier cut like chuck for balance.
For a more gourmet burger, some people even opt for a blend of meats. For example, mixing chuck and brisket can give your burger an elevated flavor profile, offering a combination of richness and tenderness.
How to Incorporate Fat Without Compromising Health
If you’re concerned about the fat content of your burger but don’t want to sacrifice flavor, there are a few things you can do to strike a balance. Consider using leaner cuts of meat, such as ground turkey or chicken, and then incorporating a small amount of high-quality fat. For example, you can mix in a tablespoon of olive oil or bacon fat to retain some of the juicy texture and flavor without overloading on saturated fats. You can also experiment with adding flavorful cheese or avocado as a topping to enhance the richness of the burger without relying on fatty ground beef.
Fat and the Cooking Process
The fat in the meat also plays an important role during the cooking process. As the patty cooks, the fat renders (melts), keeping the burger moist and helping it cook evenly. If you use too lean a cut of meat, the patty may not cook evenly, and it might dry out on the outside while remaining undercooked in the center. With the right fat content, the burger will cook through without losing its juiciness.
Conclusion: Fat is Key for a Perfect Burger
While it’s tempting to choose leaner cuts of meat for health reasons, fat is essential for making burgers that are juicy, flavorful, and satisfying. The ideal fat content in your burger patty—around 20%—will ensure that your burger stays moist, flavorful, and tender. Don’t be afraid to embrace the fat; it’s what makes the burger experience so delicious!
Skipping the Toasted Buns: Why It’s a Mistake You Don’t Want to Make
The Role of Toasted Buns in a Perfect Burger
When it comes to making the best burger, many people focus on the meat, toppings, and condiments but forget about an essential component—the bun. Toasting the buns is one of the most important steps in assembling a burger that not only tastes great but also holds up to the juicy patty and toppings. Skipping this step is a common mistake that can result in a soggy, underwhelming burger experience.
Why Toasting the Buns Makes a Difference
Toasting the buns serves multiple purposes. First, it adds a crispy texture to the outside of the bread, creating a satisfying contrast with the tender, juicy patty inside. This added crunch enhances the mouthfeel, making each bite more enjoyable. Second, toasting helps to create a protective layer on the bun that prevents it from becoming soggy from the burger juices and condiments. Without this layer, the bun absorbs moisture from the patty, resulting in a soggy, unappetizing texture that can make your burger fall apart.
Toasting the buns also improves flavor. Whether you use a buttered bun or just toast it lightly, the process of browning the bread adds a slight nuttiness and richness to the overall burger experience. The mild sweetness of a toasted brioche or a savory taste from a toasted sesame seed bun can complement the flavors of the patty, sauces, and toppings.
The Best Methods for Toasting Buns
There are several methods to achieve the perfect toasted bun, and each has its advantages depending on the type of bun you’re using and your cooking setup. Here are a few popular methods:
- Grill Toasting: If you’re already grilling the burger patties, take advantage of the grill to toast your buns. Place them cut-side down on the grill for about 1-2 minutes, until they achieve a golden brown color. This method adds a smoky flavor to the buns that pairs perfectly with grilled meat.
- Pan Toasting: If you’re pan-frying your burgers, you can toast your buns in the same skillet. Lightly butter the cut sides of the buns, and toast them in the skillet over medium heat for 2-3 minutes, until golden and crispy. This method gives the buns a delicious buttery flavor and an even, crispy texture.
- Oven Toasting: For a larger batch or when you want to toast many buns at once, the oven is a great option. Preheat the oven to 350°F (175°C), place the buns on a baking sheet, and bake for 5-7 minutes until golden brown. This method is less hands-on but ensures even toasting across the buns.
- Toaster: For a quick and easy option, you can use a toaster to toast the buns. Simply cut the buns in half and pop them in the toaster until they’re lightly browned. While this method is convenient, it may not give the buns the same golden crisp as other methods, but it can still be effective if you’re short on time.
What Happens When You Skip Toasting?
Skipping the step of toasting the buns might seem like a time-saver, but it can lead to a less-than-ideal burger. When you don’t toast the buns, they tend to absorb more moisture from the meat and condiments, turning soft and soggy. A soggy bun doesn’t provide the same satisfying texture, and it can also make it harder to hold the burger together, leading to an unfortunate mess.
Without the crispiness of a toasted bun, the burger lacks that crucial contrast in textures. A burger with a soft, mushy bun often feels like one big, uniform mass, without the satisfying layers of crunch and tenderness that make a great burger memorable.
Buns That Benefit Most from Toasting
While any burger bun can be toasted, certain types of buns benefit more from this step. Brioche buns, for example, are soft and buttery, and toasting them enhances their flavor and texture. Sesame seed buns also toast beautifully, providing extra crunch and a mild nutty flavor. Even classic potato buns can benefit from a light toasting, making them crispier while still maintaining their pillowy softness.
If you’re using a sourdough or ciabatta bun, toasting is especially important to help bring out their flavor and ensure they hold up to the burger’s juicy interior. The more delicate and porous the bun, the more important it is to toast it to prevent sogginess.
Tips for Toasting Without Overdoing It
It’s important to keep an eye on your buns while toasting to avoid burning them. Over-toasting can result in an overly hard, charred exterior that can detract from the burger experience. Aim for a golden-brown toast with just the right amount of crispiness to create a perfect balance of texture. If you’re using butter, make sure to spread it evenly to avoid uneven toasting, and if you’re grilling, be mindful of how long the buns are exposed to the direct heat.
Final Thoughts on Toasted Buns
Toasting the buns might seem like a simple step, but it plays a critical role in the overall success of your burger. It adds texture, prevents sogginess, enhances flavor, and makes the burger more enjoyable to eat. Whether you’re grilling, pan-frying, or using the oven, toasting the buns will elevate your burger to a whole new level. Don’t skip it—your taste buds will thank you!
Overcooking or Undercooking Your Burger Patties: Why It’s Crucial to Get It Right
The Importance of Achieving the Right Doneness
When it comes to cooking burgers, one of the most critical aspects of preparing the perfect patty is ensuring that it’s cooked to the right doneness. Both overcooking and undercooking can result in a disappointing burger, either making it too dry and tough or unsafe to eat. Understanding how to achieve the perfect burger patty is essential for not only great taste but also food safety.
Overcooking: The Dry and Tough Burger Problem
Overcooking your burger patty is one of the most common mistakes that can completely ruin the eating experience. When you cook a burger for too long, the meat’s juices escape, leaving the patty dry and rubbery. This results in a tough texture that’s far from the juicy, tender bite you’re aiming for.
Burgers are best when they are cooked to a medium or medium-well doneness, where the inside remains moist while still being fully cooked. Overcooking can strip the patty of its natural flavors, leaving it bland and unappetizing. For beef burgers, this is particularly important because lean cuts can dry out quickly if cooked for too long.
It’s also important to note that different types of meat will require different cooking times. For example, lean beef tends to dry out more easily than ground pork or lamb, which have higher fat content. To avoid overcooking, aim for a burger that’s cooked through but retains some of its juiciness.
Undercooking: The Safety and Flavor Risks
On the other hand, undercooking a burger can pose serious health risks, especially if the meat is not cooked to the right internal temperature. Undercooked meat can harbor harmful bacteria like E. coli, Salmonella, or Listeria, which can lead to foodborne illnesses. This is particularly a concern with ground beef, as the grinding process can spread bacteria throughout the meat.
Beyond safety, an undercooked burger often has a raw or mushy center, which can result in an unpleasant texture and taste. While some people prefer a rare or medium-rare burger, it’s essential to use the right techniques and a reliable meat thermometer to ensure the burger is cooked safely. For beef burgers, the USDA recommends cooking ground beef to an internal temperature of 160°F (71°C) to ensure it’s safe to eat.
The Ideal Burger Doneness
Achieving the perfect doneness for your burger isn’t just about safety—it’s also about flavor and texture. Here’s a general guide to how long you should cook your burger based on doneness:
- Rare: Cooks to an internal temperature of 120-125°F (49-52°C). The center is red and cool. (This level of doneness is not recommended for ground beef due to safety concerns.)
- Medium-Rare: Cooks to an internal temperature of 130-135°F (54-57°C). The center is warm and slightly pink. (Best for people who prefer a juicy, tender burger but still want to minimize health risks by using high-quality, fresh meat.)
- Medium: Cooks to an internal temperature of 140-145°F (60-63°C). The center is pink and hot. This is often considered the “perfect” burger doneness for those who want a juicy patty that’s still fully cooked.
- Medium-Well: Cooks to an internal temperature of 150-155°F (66-68°C). The center is just a hint of pink. For those who prefer a firmer patty without losing too much juiciness.
- Well-Done: Cooks to an internal temperature of 160°F (71°C) or higher. The patty is fully cooked through, with no pink. While this is safe, it may result in a dry and less flavorful burger.
How to Achieve the Perfect Doneness
Achieving the right doneness can be challenging without the right tools. Here are a few tips to help you get it right:
- Use a Meat Thermometer: The best way to ensure your burger is cooked to the perfect temperature is by using a meat thermometer. Insert it into the center of the patty to check its internal temperature. This is the most accurate way to avoid both overcooking and undercooking.
- Don’t Press on the Patties: While grilling or pan-frying your burger, avoid pressing down on the patties with a spatula. Doing so squeezes out the natural juices, leading to a drier patty and potentially making it cook faster than you intend. Let the patty cook undisturbed for the best results.
- Let It Rest: After cooking, let your burger rest for a few minutes. This allows the juices to redistribute within the patty, ensuring it stays moist and flavorful. Resting also prevents the burger from falling apart when you cut into it.
Using a Meat Thermometer for Accurate Results
A meat thermometer is one of the most essential tools in a kitchen for ensuring your burgers are cooked to the perfect doneness. It gives you the confidence that your burger is cooked safely without overcooking it. Insert the thermometer into the thickest part of the patty, making sure it doesn’t touch the grill or pan, as that can give inaccurate readings.
Remember, different types of meat might have slightly different cooking times. For instance, chicken burgers need to reach an internal temperature of 165°F (74°C) for safety, while beef burgers should hit 160°F (71°C). For turkey burgers, aim for an internal temperature of 165°F (74°C) as well.
Signs of Overcooking or Undercooking
There are some visual clues you can look for when checking if your burger is overcooked or undercooked:
- Overcooked Burgers: If the edges of the burger are excessively browned or charred, the patty feels firm when pressed, and juices run clear, it’s likely overcooked. Overcooked burgers will also have a noticeable lack of juices when you cut into them.
- Undercooked Burgers: If the center of the patty is pink and cool to the touch, the burger is likely undercooked. Additionally, an undercooked burger may feel soft or squishy, as it hasn’t had enough time to firm up during cooking.
Conclusion: Strike the Right Balance
Perfecting the doneness of your burger is key to delivering a delicious meal. While you want your burger to be cooked enough to ensure food safety, you also don’t want to sacrifice flavor and texture. Use a meat thermometer to ensure your patty reaches the ideal internal temperature and follow the tips above to avoid overcooking or undercooking. With the right doneness, your burgers will be juicy, flavorful, and a hit every time.
Forgetting to Let the Patties Rest Before Serving: Why It’s Essential for Juicy Burgers
The Importance of Resting Burger Patties
After grilling or pan-frying your burger patties, it can be tempting to dive right in and serve them immediately, especially when they’re sizzling hot and smelling delicious. However, skipping the resting step is one of the biggest mistakes you can make when preparing burgers. Letting your patties rest before serving might seem like an unnecessary step, but it’s actually crucial for preserving the juiciness and flavor of your burger.
What Happens When You Skip the Resting Step?
When you cook a burger, the heat forces the juices inside the patty to move towards the center. If you cut or bite into the burger immediately after cooking, all those flavorful juices are released, often leaving you with a dry patty. Resting your burger gives the juices time to redistribute and settle back throughout the meat, resulting in a juicier, more flavorful burger.
Without this brief resting period, the meat will feel dry and lack that satisfying, mouthwatering juiciness that makes a homemade burger so irresistible.
How Long Should You Let the Patties Rest?
The general rule of thumb is to let your burger patties rest for 3 to 5 minutes after they come off the grill or stovetop. This short resting time allows the juices to redistribute throughout the patty, preventing them from spilling out when you take a bite. While the burger is resting, it will also finish cooking a bit from residual heat, ensuring the meat is cooked to the ideal doneness.
For larger or thicker patties, you may want to let them rest for up to 10 minutes to ensure they’re as juicy as possible.
Why Don’t You Want to Skip Resting Time?
When you skip the resting time, the juices inside the burger remain locked in the center and are forced out as soon as you bite into or cut the burger. This leads to a dry, tough texture that’s unappetizing and lacks flavor. Resting is essential for maintaining the perfect balance of tenderness and juiciness in your burger.
Moreover, the carryover cooking effect will help the burger finish cooking evenly. Even after you remove the patties from the heat source, they will continue to cook for a short period due to the retained heat. Allowing the patty to rest helps prevent overcooking and ensures that the burger is perfectly cooked all the way through.
The Benefits of Letting Burger Patties Rest
Resting your patties brings several important benefits:
- Preserving Juiciness: As the patty rests, the juices are reabsorbed into the meat, giving you a much juicier burger. If you skip this step, those flavorful juices will end up on your plate rather than in your burger.
- Better Flavor: The redistribution of juices helps enhance the overall flavor of the burger, as the meat’s natural oils and seasoning stay locked inside. The result is a more flavorful bite every time.
- Even Cooking: Letting the burger rest allows for a more even cooking process. This ensures that the meat is fully cooked from edge to edge, and the burger won’t be raw in the center or overcooked at the edges.
- Aesthetically Better Presentation: Resting your burger allows it to hold together better when you assemble it. Without resting, the patty may fall apart, and the juices may spill onto the bun, making for a less appealing presentation.
What Happens If You Skip Resting for Thicker Burgers?
If you’re cooking a thick burger patty, the resting time becomes even more crucial. Thicker patties take longer to cook through, and residual heat will continue to cook them once removed from the heat. If you don’t let the burger rest, you may find that the middle is undercooked, while the outside is overcooked.
Additionally, larger patties contain more moisture, and without resting, that moisture won’t have the chance to redistribute properly. This can lead to a dry, tough texture, even if the patty is technically cooked all the way through.
Tips for the Best Results
- Resting on a Cooling Rack: If you’ve made multiple patties, place them on a cooling rack to rest rather than directly on the plate or grill. This helps prevent steam buildup and ensures the patties remain firm and juicy.
- Cover with Foil: To maintain warmth while allowing the juices to redistribute, you can loosely cover the patties with aluminum foil as they rest. This will help retain heat without trapping moisture, preventing sogginess.
- Don’t Overdo It: While resting is important, don’t leave your patties resting for too long. You don’t want them to cool down too much, so after a few minutes, it’s time to assemble your burgers and serve them hot.
Resting Time Is Key for the Perfect Burger Experience
When you take the time to rest your burger patties, you’re ensuring the juiciest, most flavorful burger possible. Don’t rush through the process—this brief pause makes all the difference. By allowing the juices to redistribute, you’re creating a burger that’s not only safe to eat but also packed with all the flavors and textures that make for a great burger.
Conclusion: Your Perfect Burger Awaits!
By following these foolproof burger recipes and expert tips, you can easily create juicy, flavorful burgers every time. From choosing the right meat and seasoning it just right to mastering the perfect cooking technique, these recipes ensure that your homemade burgers will impress. Plus, with endless options for toppings, sides, and sauces, you can personalize each burger to suit your tastes, making every meal a delicious adventure.
Don’t hesitate to try out these tips, experiment with different combinations of toppings and sides, and most importantly, have fun with it! Burger making is as much about creativity as it is about technique.
We’d love to hear how your burgers turn out—leave a comment below, share your favorite burger creations, or pin this recipe for later. Happy cooking, and may your burgers always be juicy and delicious!