
Introduction
There’s nothing more comforting than a warm, golden crumble fresh from the oven. With its buttery topping and juicy fruit filling, it’s simple, satisfying, and always a crowd-pleaser. Whether you want a cozy dessert or a quick treat to impress guests, crumble recipes are both easy and versatile.
In this guide, you’ll learn how to make the perfect crumble. We’ll cover the essential ingredients, step-by-step instructions, expert tips, and delicious variations.
Whether you’re a beginner or an experienced baker, you’ll discover how to create a crumble that’s crispy on top and bursting with flavor every time.
Essential Ingredients for the Perfect Crumble
Choosing the Best Fruits for Your Crumble
The fruit filling is the heart of any great crumble. Choosing the right fruits can make the difference between a deliciously balanced dessert and one that’s too sweet or too watery. Here’s how to select the best fruits for your crumble recipes.
Go for Seasonal and Ripe Fruits
Fresh, ripe, and in-season fruits deliver the best flavor and texture. Apples, berries, rhubarb, peaches, and plums are classic crumble choices because they hold their shape and develop rich flavors when baked. Using seasonal fruit also means your crumble will taste fresher and more vibrant.
Mix Sweet and Tart Varieties
A balance of sweet and tart fruits gives your crumble a more complex flavor. For example, pairing sweet strawberries with tangy rhubarb, or sweet apples with tart blackberries, creates a contrast that keeps each bite interesting. If your fruit is very sweet, you can also add a splash of lemon juice to brighten the flavors.
Consider the Fruit’s Texture
Firm fruits like apples, pears, and peaches hold up well during baking and won’t turn mushy. Juicier fruits like berries and plums can release a lot of liquid, so consider mixing them with a firmer fruit or adding a spoonful of cornstarch or flour to the filling to thicken it.
Try Delicious Fruit Combinations
Don’t be afraid to get creative with your fruit choices. Here are a few tried-and-true combos for delicious crumbles:
- Apple and Blackberry Crumble
- Peach and Raspberry Crumble
- Strawberry and Rhubarb Crumble
- Blueberry and Pear Crumble
Mixing different fruits can add layers of flavor, color, and texture to your dessert.
Can You Use Frozen Fruits?
Yes — frozen fruits work well when fresh fruit isn’t available. There’s no need to thaw them first, but you may want to add an extra tablespoon of cornstarch to absorb the extra moisture they release during baking.
Choosing the Best Fruits for Your Crumble
The fruit filling is the heart of any great crumble. Choosing the right fruits can make the difference between a deliciously balanced dessert and one that’s too sweet or too watery. To get it right, here’s how to select the best fruits for your crumble recipes.
Go for Seasonal and Ripe Fruits
First and foremost, fresh, ripe, and in-season fruits deliver the best flavor and texture. Apples, berries, rhubarb, peaches, and plums are classic crumble choices because they hold their shape and develop rich flavors when baked. Moreover, using seasonal fruit means your crumble will taste fresher and more vibrant.
Mix Sweet and Tart Varieties
For a more complex flavor, it’s a good idea to balance sweet and tart fruits. For example, pairing sweet strawberries with tangy rhubarb, or sweet apples with tart blackberries, creates a contrast that keeps each bite interesting. If your fruit is very sweet, you can also add a splash of lemon juice to brighten the flavors and cut through the sweetness.
Consider the Fruit’s Texture
In addition, texture plays a big role in the final result. Firm fruits like apples, pears, and peaches hold up well during baking and won’t turn mushy. On the other hand, juicier fruits like berries and plums can release a lot of liquid. Therefore, it’s helpful to mix them with a firmer fruit or add a spoonful of cornstarch or flour to the filling to thicken it.
Try Delicious Fruit Combinations
To make your crumble even more exciting, don’t be afraid to get creative with your fruit choices. Here are a few tried-and-true combos for delicious crumbles:
- Apple and Blackberry Crumble
- Peach and Raspberry Crumble
- Strawberry and Rhubarb Crumble
- Blueberry and Pear Crumble
Not only do these combinations add layers of flavor, but they also bring beautiful colors and varied textures to your dessert.
Can You Use Frozen Fruits?
Absolutely — frozen fruits work well when fresh fruit isn’t available. Better yet, there’s no need to thaw them first. However, you may want to add an extra tablespoon of cornstarch to absorb the extra moisture they release during baking. As a result, your filling will stay thick and luscious instead of watery.
Optional Add-Ins for Extra Flavor
While a basic crumble topping made with flour, sugar, and butter is absolutely delicious on its own, you can elevate the flavor and texture with a few optional add-ins. These ingredients can bring new dimensions to your crumble, whether you’re looking for a hint of spice, extra crunch, or a fruity twist. Here are some fantastic options to consider:
Spices: Warmth and Depth
Adding a few spices to your crumble topping can completely transform its flavor. For instance, a dash of cinnamon brings warmth and pairs beautifully with apples or pears. Similarly, nutmeg and ginger can add a subtle, aromatic kick to the mix. If you prefer a more complex flavor, try a combination of cloves or allspice. These spices not only add depth but also make your crumble feel more cozy and festive.
Rolled Oats: Chewy Texture
For a bit of chewiness and extra texture, add rolled oats to the crumble topping. They absorb some of the juices from the fruit filling and create a rustic, satisfying crunch. Rolled oats work wonderfully in crumbles made with apples, berries, or stone fruits. However, if you want an even heartier texture, consider using steel-cut oats — though these will require a bit longer to bake to get tender.
Nuts: Extra Crunch and Nutty Flavor
If you love nuts, incorporating them into your crumble is a great way to add extra crunch and flavor. Chopped pecans, walnuts, and almonds are particularly popular, offering both a satisfying bite and a rich, nutty flavor. Additionally, hazelnuts or pistachios can lend an exotic twist to your crumble topping. Simply add about 1/2 cup of chopped nuts to the flour, butter, and sugar mixture, and you’ll enjoy a delightful texture contrast with the fruit.
Citrus Zest: Freshness and Fragrance
To brighten up the flavors, try adding a little citrus zest. The zest of a lemon, orange, or lime can bring a refreshing burst of flavor that balances out the sweetness of the fruit filling. Lemon zest, in particular, works wonderfully with apple or blueberry crumbles, while orange zest complements stone fruits like peaches and plums. Just a teaspoon or so will do, but you can add more depending on your preference.
Sweeteners: Customize the Sweetness
Another option is to experiment with alternative sweeteners. For a more complex, caramel-like flavor, try using brown sugar or maple syrup in place of regular white sugar. These options not only enhance the crumble topping but also pair beautifully with autumn fruits like pears and apples. If you’re looking for a healthier alternative, honey or agave syrup can also be used to add sweetness while keeping things a bit lighter.
Vanilla and Almond Extract: A Flavor Boost
Lastly, adding a few drops of vanilla extract or almond extract can do wonders for your crumble. Vanilla adds a comforting, familiar sweetness, while almond extract imparts a lovely, nutty fragrance. Both extracts work well in almost any crumble recipe, particularly when paired with fruits like apples, pears, or stone fruits. You don’t need much—just 1/2 teaspoon of either extract will make a significant difference.
Conclusion
These optional add-ins can take your crumble from simple to spectacular. Whether you want more texture, sweetness, or a burst of spice, there’s an option here for everyone. Feel free to experiment and create a personalized crumble that suits your taste. The best part? You can always adjust these add-ins based on the fruit you’re using and the flavors you enjoy most.
Ingredient Swaps for Dietary Needs
Everyone deserves to enjoy a delicious crumble, no matter their dietary needs. Whether you’re baking for someone with gluten intolerance, a vegan diet, or other dietary restrictions, there are plenty of simple ingredient swaps that can help you create a crumble that suits everyone. Here’s a guide to make your crumble both delicious and inclusive without compromising on flavor.
Gluten-Free Crumble Topping
For those who need to avoid gluten, swapping regular all-purpose flour with a gluten-free flour blend is a simple and effective solution. These blends often contain a mix of rice flour, potato starch, and tapioca flour, which work well in baked goods. Additionally, you can use almond flour or coconut flour for a different flavor and texture. However, you may need to adjust the amount of liquid in the topping, as these flours can absorb moisture differently.
If you’re using oats in your crumble topping, be sure to opt for gluten-free oats, as regular oats may be contaminated with gluten during processing. These oats still provide that lovely chewy texture, without the gluten.
Dairy-Free and Vegan Crumble
To make your crumble dairy-free or vegan, the easiest swap is replacing butter with a plant-based alternative. Options like vegan butter, coconut oil, or even olive oil work wonderfully in the crumble topping. Coconut oil, in particular, gives the topping a subtle coconut flavor, which pairs nicely with tropical fruits like mango or pineapple.
For a creamier fruit filling in a vegan crumble, try using coconut milk or almond milk in place of dairy-based cream or milk. If you’re looking for a more indulgent option, cashew cream can add richness and creaminess without the dairy.
Low-Sugar or Diabetic-Friendly Crumble
For those who need to watch their sugar intake, reducing the amount of sugar in your crumble topping is easy. You can swap out granulated sugar for Stevia, erythritol, or monk fruit sweetener — all of which provide sweetness without the calories and blood sugar spikes associated with traditional sugar.
If you’re using a sweetener like Stevia, be sure to check the conversion chart, as Stevia can be much sweeter than sugar. Additionally, opt for low-sugar fruits like berries, rhubarb, and green apples, which will keep the overall sugar content of the crumble low while still providing natural sweetness.
Nut-Free Crumble
For people with nut allergies, a great substitute for nut-based flours like almond flour is sunflower seed flour or pumpkin seed flour. These seed-based flours provide a similar texture to almond flour and can be easily substituted in equal amounts. If you want to keep the crumble nut-free, you can also skip the nuts entirely and use seeds like sunflower seeds, chia seeds, or pumpkin seeds for crunch.
To add flavor and texture, consider including shredded coconut or flaxseeds, both of which are great additions to a nut-free crumble and provide healthy fats and fiber.
Keto-Friendly Crumble
If you’re following a Keto diet, you can make your crumble topping low-carb by swapping out traditional flour for almond flour or coconut flour. Both of these flours are low in carbohydrates, making them ideal for a keto-friendly dessert. Additionally, you can replace sugar with erythritol or monk fruit sweetener, which won’t spike blood sugar levels.
For a crunchy topping, you can add flaked coconut or crushed nuts, keeping it low-carb while still providing texture. Lastly, make sure to use berries like blackberries, raspberries, or strawberries, which are low in carbs compared to other fruits.
Paleo Crumble
For those following the Paleo diet, opt for almond flour or coconut flour for your crumble topping. Both are Paleo-friendly and deliver a light, crumbly texture. Replace sugar with maple syrup or honey, as these are natural sweeteners approved in the Paleo diet.
For a more decadent crumble, you can add chopped dates for sweetness, while still maintaining the Paleo guidelines. You can also use ghee or coconut oil in place of butter, giving the topping that delicious buttery flavor without any dairy.
Conclusion
As you can see, there are plenty of ways to adjust your crumble recipe to accommodate various dietary preferences without compromising on taste or texture. Whether you’re baking for someone with gluten intolerance, following a vegan lifestyle, or simply reducing sugar, these swaps can help you make the perfect crumble for everyone. Feel free to get creative and customize your crumble to suit any dietary need — after all, the best part of baking is making something that everyone can enjoy.
Step-by-Step Guide to Making a Crumble
Preparing the Fruit Filling
The fruit filling is the foundation of any great crumble, and how you prepare it can make all the difference. While it’s important to choose the right fruits, the way you prepare them ensures a perfect balance of flavor and texture. The following steps will guide you through the process, ensuring that your fruit filling is thick, flavorful, and not too watery.
Wash and Peel the Fruit
The first step in preparing the fruit filling is to wash your fruit thoroughly to remove any dirt, pesticides, or wax. If you’re using fruits like pears, apples, or peaches, it’s a good idea to peel them, especially if you prefer a smoother filling. For fruits like berries or cherries, you can leave the skins on since they’ll break down during baking, adding natural texture to the filling. However, it’s essential to remove any pits or stones from stone fruits like cherries or plums.
Cut the Fruit into Uniform Pieces
Next, cut your fruit into uniform pieces to ensure even cooking. For apples and pears, coring and slicing them into about 1/2-inch thick pieces works best. This size allows them to soften without becoming mushy. For berries, you may want to halve larger ones like strawberries to match the size of smaller fruits like blueberries. The key here is consistency — try to keep the pieces roughly the same size to ensure they cook at the same rate.
Toss the Fruit with Sweeteners and Thickeners
Once your fruit is prepped, it’s time to enhance its flavor. Sugar is often added to fruit fillings to balance any natural tartness, especially if you’re working with rhubarb or green apples. However, feel free to adjust the sweetness based on your preference or dietary needs. For a low-sugar option, you can substitute stevia, monk fruit sweetener, or erythritol for regular sugar.
In addition to sugar, thickeners like cornstarch or arrowroot powder are essential to prevent the filling from becoming too runny. Add about 1 to 2 tablespoons of cornstarch per 4 cups of fruit. Mix the fruit with the thickener before placing it into your crumble dish to ensure it’s evenly distributed and absorbed. This helps the filling set during baking, giving it a thick and velvety consistency.
Add Spices and Flavor Enhancers
For extra depth of flavor, don’t forget to add a few spices or flavor enhancers to your fruit filling. Cinnamon is a classic addition, especially for apple-based crumbles, and pairs wonderfully with nutmeg and cloves. For a citrusy twist, lemon juice and lemon zest bring out the natural brightness of the fruit, especially in blueberries and blackberries. If you’re feeling adventurous, a splash of vanilla extract or almond extract can add a lovely, fragrant note to the filling.
Let the Fruit Mixture Rest
After mixing your fruit with the sweeteners, thickeners, and spices, it’s beneficial to let the mixture rest for about 15 to 30 minutes before transferring it to the baking dish. This allows the juices to be released from the fruit, helping the flavors meld together and giving the thickening agents time to work their magic. The resting period also allows the fruit to release any excess moisture, preventing your crumble from becoming soggy.
Taste and Adjust
Before you pour the fruit mixture into the crumble dish, be sure to taste it. This is your opportunity to adjust the sweetness or acidity. If it’s too tart, you can add a little more sugar or honey. If it’s too sweet, a small squeeze of lemon juice can help balance it out. The key here is finding the perfect balance so the fruit filling complements the crumble topping perfectly.
Conclusion
Preparing the fruit filling is an essential step in making the perfect crumble. By choosing the right fruit, adding the right amount of sweetness and thickener, and enhancing it with spices and flavors, you’ll create a filling that’s both flavorful and well-textured. Don’t forget to let the mixture rest to bring out the best in your fruit. Once you’ve perfected your filling, all that’s left is to top it with your crumble topping and bake to golden perfection.
Mixing the Crumble Topping
The crumble topping is key to a perfect crumble. It should be buttery, crumbly, and golden. Getting it right is crucial for a balanced texture that contrasts with the soft fruit filling. Here’s how to mix the perfect crumble topping:
Start with the Right Ingredients
Use the right balance of flour, butter, and sugar. The basic ratio is 1:1:1 — one cup of each. This creates a crumbly texture. You can adjust based on your preference. More butter makes it richer, while less flour results in a lighter topping.
Cut in the Butter
Cut the cold butter into small cubes. Add it to the dry ingredients. Use a pastry cutter or your fingertips to rub the butter into the flour. Aim for small pea-sized pieces of butter. Avoid overmixing. The butter should still be visible.
Incorporate the Sugar
Add the sugar to the mixture. Use granulated sugar for sweetness or brown sugar for a richer flavor. For a low-sugar option, substitute with erythritol or monk fruit sweetener. If desired, add a pinch of salt to balance the sweetness.
Achieving the Right Texture
The mixture should resemble coarse breadcrumbs. For a chunky topping, leave some butter visible. For a finer topping, mix more until it forms small crumbs. The goal is a crumby texture, not powdery or doughy.
Add Oats or Nuts for Extra Crunch
To boost texture, add rolled oats or chopped nuts like almonds, pecans, or walnuts. These ingredients add chewiness and a nice crunch. Mix them in gently after incorporating the butter and sugar.
Chill the Topping
After mixing, chill the topping for at least 30 minutes. This helps the butter firm up. It creates a flakier, more crumbly topping. If you’re in a hurry, you can skip this step, but it does make a difference.
Final Tips
- Don’t Overmix: Stop mixing once the ingredients come together.
- Test Consistency: The topping should hold together when pressed but crumble when fluffed with a fork.
- Storage: You can store the topping in the fridge or freezer for later use. Let it thaw before using if frozen.
Conclusion
Mixing the crumble topping is all about achieving the right balance of ingredients and texture. Whether you prefer it extra crunchy or lightly crumbly, this method will give you a perfect topping every time. Just follow the steps, and enjoy a delicious crumble!
Assembling Your Crumble in a Baking Dish
Assembling your crumble in a baking dish is the final step before popping it into the oven. It’s important to layer the fruit filling and crumble topping properly to ensure even cooking and a balanced texture. Here’s how to assemble your crumble for the best results:
Choosing the Right Baking Dish
The size and shape of your baking dish are crucial for achieving the right crumble. A square or rectangular dish works best for a traditional crumble, allowing for even spreading of the topping. A 9×9-inch or 8×8-inch dish is ideal for small batches, while a larger dish (such as 9×13 inches) works well for bigger servings. Make sure your dish is oven-safe and has enough depth to hold the layers of fruit and crumble.
Layering the Fruit Filling
Start by evenly spreading the fruit filling at the bottom of the baking dish. The fruit should be well-mixed with the sugar, spices, and any thickening agents like cornstarch. This mixture will form the flavorful base of your crumble. If you’re using multiple fruits, like apples and berries, mix them thoroughly so that each bite is full of flavor. Be sure to press the fruit mixture down gently to create an even layer.
For an even bake, make sure the fruit is spread in a uniform layer across the bottom of the dish. If the fruit is too thick or uneven in some areas, the crumble may not bake uniformly, leading to some areas being too soggy or too dry.
Topping with the Crumble
Once the fruit layer is in place, it’s time to add the crumble topping. Spoon the crumble topping over the fruit layer in small dollops, ensuring that it covers the fruit completely. For an even distribution, you can use your hands to spread the topping gently. Don’t press the topping down too hard — you want it to stay light and crumbly.
Leave some gaps in the crumble topping, as this allows the heat to circulate during baking, resulting in a crispy finish. You want a little bit of space between the topping and the edges of the dish to prevent the crumble from becoming too dense.
Even Out the Top
Once the crumble topping is in place, use the back of a spoon or your hands to gently press the topping down, just enough to ensure it stays in place. Avoid compressing it too much, as this could lead to a denser topping. The key is to maintain a balance of crispness on top and lightness underneath.
If you prefer a crunchier topping, you can sprinkle a small amount of sugar (granulated or brown) on top before baking. The sugar will caramelize as it bakes, adding extra crunch and golden color.
Optional: Add a Little Butter on Top
For an extra touch of richness, you can dot the top of the crumble with small bits of cold butter before placing it in the oven. This will create a crispier, more golden topping. Just scatter a few small cubes of butter over the top of the crumble before baking — a little goes a long way!
Baking Tips
Before placing your assembled crumble into the oven, make sure to preheat the oven to the right temperature. Typically, crumbles bake at 350°F (175°C), but this can vary depending on the recipe and the type of fruit used. Bake for 35-45 minutes, or until the topping is golden brown and crispy and the fruit filling is bubbling and soft.
While baking, it’s a good idea to place a baking sheet on the lower rack to catch any potential overflow of juices from the fruit. This will keep your oven clean and prevent burning.
Let It Rest Before Serving
Once the crumble is out of the oven, let it rest for 10-15 minutes before serving. This will allow the juices to settle, and the crumble will firm up slightly, making it easier to serve in neat portions. If you try to scoop it right out of the oven, the filling might be too runny, and the topping may fall apart.
Conclusion
Assembling your crumble in the baking dish is the final touch that transforms your ingredients into a delicious dessert. By layering the fruit evenly, distributing the crumble topping properly, and adding a few finishing touches like butter or sugar, you’ll ensure a perfectly baked crumble with the ideal balance of flavors and textures. Remember to let it rest before serving for the best results!
Baking Tips for a Golden Brown Crumble
Baking the perfect crumble isn’t just about putting it in the oven and hoping for the best. To achieve that golden-brown, crispy topping with a bubbling, flavorful fruit filling, a few key tips will help you get the best results every time. Follow these steps to ensure your crumble turns out perfectly baked:
Preheat the Oven for Consistent Cooking
Always preheat your oven to the correct temperature before baking. This ensures that the crumble bakes evenly from the moment it enters the oven. Typically, crumbles bake at 350°F (175°C), but some recipes may call for slightly higher or lower temperatures depending on the type of fruit used. Preheating the oven helps the butter in the crumble topping to melt quickly, resulting in a crispy texture rather than a soggy one.
Use the Right Oven Position
The placement of your crumble in the oven can affect how evenly it bakes. For best results, place your baking dish on the middle rack. This allows heat to circulate around the crumble, helping it cook evenly. Placing it too high or too low in the oven can cause uneven cooking, leading to a burnt topping or an undercooked filling.
If you’re using a convection oven, you might need to reduce the temperature by 20-25°F (about 10-15°C) to prevent the topping from browning too quickly while the filling still cooks.
Check the Topping Frequently
While your crumble bakes, keep a close eye on the topping. It should develop a golden-brown color and become crispy. If the topping is browning too quickly, cover the dish loosely with aluminum foil and continue baking. This will prevent the top from burning while allowing the filling to continue cooking.
Bake Until Bubbles Appear
To know when the crumble is fully baked, look for bubbling fruit around the edges of the dish. This is a clear sign that the fruit is cooked through and the juices have thickened. If you see that the topping has browned but the filling isn’t bubbling, it’s a good idea to give it a little more time. You can also check the fruit’s texture with a fork; it should be tender, not mushy.
Monitor the Topping Texture
The texture of the topping is key to the perfect crumble. As the crumble bakes, the butter in the topping will melt and combine with the dry ingredients to create a golden, crunchy crust. If the topping is not browning to your liking after 30 minutes, increase the oven temperature by 10-15°F (5-7°C), but keep a watchful eye to prevent burning.
Allow Enough Baking Time
Crumbles typically bake for 35-45 minutes. However, depending on your oven, the size of the dish, and the type of fruit, the time can vary. If the top is golden brown and the filling is bubbling, it’s done. Make sure not to underbake it, as the filling needs enough time to cook and thicken.
If you want a thicker filling, you can bake the crumble for an additional 10-15 minutes. This will allow the juices to reduce and the fruit to soften further.
Rest Before Serving
After baking, let your crumble rest for 10-15 minutes before serving. This allows the filling to set and the flavors to develop. If you serve it too soon, the filling might be too runny, and the crumble topping could be too soft. During the resting period, the fruit’s juices will thicken and become more cohesive, resulting in a better texture.
Optional: Broil for Extra Crispiness
If you prefer an extra-crispy crumble topping, you can switch your oven to the broil setting for the last 2-3 minutes of baking. Watch it closely to avoid burning, but this step will help create a beautiful, golden brown top. Broiling is especially useful if the topping hasn’t browned as much as you’d like during the baking process.
Use a Baking Sheet to Catch Drips
To prevent any messy spills in your oven, place a baking sheet or aluminum foil on the lower rack of the oven. This will catch any juices or crumbs that might spill over the edges of the dish while the crumble bakes. This tip will keep your oven clean and avoid smoke from burnt sugar or fruit juices.
Let the Crumble Rest Before Serving
Once your crumble has finished baking, allow it to rest for at least 10-15 minutes. This will not only give the filling a chance to set but also help you serve it more neatly. The topping will also firm up slightly, making it easier to scoop out without it falling apart.
Conclusion
By following these baking tips, you’ll be well on your way to achieving the perfect golden brown crumble. Preheating your oven, checking the topping frequently, and allowing the crumble to rest are all essential steps to ensure your dessert turns out beautifully every time. Keep these tips in mind, and you’ll be able to serve up a warm, delicious crumble that’s perfectly baked, with a crispy topping and juicy fruit filling!
Expert Tips for the Best Crumble Texture and Flavor
Secrets to a Crispy Crumble Topping
The crumble topping is what makes this dessert irresistible. A crispy, golden-brown topping contrasts perfectly with the soft, juicy fruit filling, making every bite a delightful experience. Here are the secrets to achieving that ideal crispy crumble topping that will elevate your dessert to perfection:
Use Cold Butter for the Perfect Texture
The first secret to a crispy crumble topping is starting with cold butter. When the butter is cold, it doesn’t fully melt into the flour right away, which creates pockets of fat within the topping. These pockets turn golden and crispy as they bake, providing the flaky, crunchy texture that makes a crumble so delicious.
If you don’t have time to chill the butter, you can also cut it into small cubes and work quickly. Avoid using melted butter, as it will result in a dense topping rather than a light and crispy one.
Achieve the Right Crumble Ratio
The classic crumble topping is a combination of flour, butter, and sugar in a 1:1:1 ratio. The flour gives the topping structure, while the butter provides richness and crispiness. However, if you want an extra-crispy topping, consider slightly increasing the butter-to-flour ratio.
For example, use 1 ½ cups of butter for every 1 cup of flour. This extra butter will melt and crisp up, creating a crunchier texture. Just be careful not to go overboard, as too much butter can make the topping greasy.
Incorporate a Crunchy Element
For an even more crispy topping, add a crunchy element such as rolled oats, chopped nuts, or even granola. Oats are a classic addition, providing chewiness and texture, while nuts like almonds, pecans, or walnuts will give your crumble topping a delightful crunch.
Incorporating these ingredients into the topping not only enhances the crunch but also adds an extra layer of flavor. Toast the nuts beforehand for an even deeper crunch and nutty flavor.
Don’t Overmix the Topping
When mixing the crumble topping, the goal is to create small clumps of flour and butter. If you overmix the topping, you risk creating a fine, powdery texture rather than a chunky, crisp one. Use your hands or a pastry cutter to work the butter into the flour until it forms pea-sized clumps. This will help you achieve the signature crumby texture that’s so desirable.
Once the butter is well incorporated but still visible in small bits, stop mixing. Overworking the dough could lead to a dense, tough topping, which won’t bake up as crispy.
Use Granulated or Brown Sugar
The type of sugar you use can affect the texture and flavor of your topping. Granulated sugar creates a light, crisp finish, while brown sugar adds a deeper flavor and a slightly chewier texture. For the crispiest topping, stick with granulated sugar or a mix of both. If you prefer a richer flavor, brown sugar will give you a lovely caramelized crunch.
Turbinado sugar or demerara sugar is another great option, as it has larger crystals that will caramelize nicely, resulting in a crunchier, more textured topping.
Chill the Topping Before Baking
Just like the butter, the crumble topping itself benefits from a brief chill before baking. After preparing the topping, place it in the fridge for at least 30 minutes. Chilling the topping helps it stay firm and crumble when baked, rather than melting into a soggy mess. This step is especially important if you like a super crunchy topping.
If you’re in a rush, you can also freeze the crumble topping for about 10-15 minutes to achieve a similar result.
Bake at the Right Temperature
Baking your crumble at the right temperature ensures the topping crisps up without burning. A moderate heat of 350°F (175°C) is ideal, as it allows the topping to bake slowly, developing a golden-brown color while maintaining its crispness. If your topping isn’t as crispy as you like, you can increase the temperature slightly toward the end of baking, but be careful not to burn it.
Broil for Extra Crispiness
If you want an extra-crispy topping, broil the crumble for the last 2-3 minutes of baking. This will give the topping a nice, golden finish, especially if you like your crumble to have a slightly caramelized crunch. Keep a close eye on it while broiling to avoid burning.
Use a Thin Layer of Topping
The thickness of your crumble topping also plays a role in how crispy it will be. For the crispiest result, don’t overload the fruit with too much topping. A thin layer of crumble will bake up crispier and lighter than a thick, dense layer. You want just enough topping to provide crunch without overwhelming the fruit underneath.
Let the Crumble Rest After Baking
Once your crumble is done baking, let it rest for 10-15 minutes before serving. This allows the topping to cool and crisp up even further. If you serve the crumble immediately after baking, the topping may still be soft and not as crunchy.
Conclusion
Achieving a crispy, golden crumble topping is all about the right technique and ingredients. By using cold butter, getting the ratios right, adding crunchy elements, and being careful not to overmix, you can create a topping that’s as crispy as it is delicious. Chilling the topping before baking and using a broil at the end will help achieve that perfect finish. Follow these tips, and your crumble will have the ideal crunchy, golden topping every time!
Balancing Sweetness and Tartness in Fruit
The key to a perfect fruit crumble lies in balancing the sweetness and tartness of the fruit filling. The combination of these two flavors creates a harmonious contrast, making each bite of crumble more satisfying. Too much sweetness can overwhelm the taste, while too much tartness can result in an overly sour dessert. Here’s how to achieve that ideal balance:
Choose the Right Mix of Fruits
When selecting fruits for your crumble, it’s important to consider their natural flavor profile. Some fruits are naturally sweet, while others are more tart. For the best results, try combining sweet fruits with tart fruits to balance the flavors.
- Sweet Fruits: Apples (like Gala or Fuji), pears, peaches, and berries like strawberries are naturally sweet.
- Tart Fruits: Rhubarb, Granny Smith apples, and sour cherries provide a tangy contrast to sweeter fruits.
For example, a classic combination is sweet strawberries mixed with tart rhubarb. The sweetness of the strawberries balances the tartness of the rhubarb, creating a more complex and satisfying flavor profile.
Adjust the Sugar Levels Based on Fruit Type
Different fruits have different levels of natural sweetness, which means you’ll need to adjust the amount of sugar you add to the filling. Sweet fruits like ripe peaches or strawberries may need less sugar, while tart fruits like cranberries or Granny Smith apples might require more.
As a general rule, start by adding 1/4 to 1/3 cup of sugar for every 4 cups of fruit. You can always adjust based on your preference and the sweetness of the fruit you’re using. Taste the fruit mixture before baking and add more sugar if necessary, but be careful not to overpower the fruit’s natural flavors.
Use Lemon or Lime Juice for Tartness
Sometimes, even sweet fruits can benefit from a little tartness to enhance their natural flavors. Adding a small amount of lemon or lime juice can help balance the sweetness and bring out the fruit’s natural brightness. This works especially well for berries, apples, or pears.
A tablespoon of lemon juice or zest added to the fruit filling can help to brighten the flavor without making the filling too sour. Just be cautious with the amount of acid you add, as it’s meant to complement the sweetness, not overpower it.
Toss in a Pinch of Salt
While it might seem counterintuitive, adding a pinch of salt to your fruit filling can actually enhance the balance between sweetness and tartness. Salt works by reducing the perception of sweetness, which in turn brings out the tartness of the fruit.
A small pinch of salt, around 1/8 teaspoon, is enough to enhance the flavors without making the crumble taste salty. This technique is especially useful when working with overly sweet fruits or when you want to bring out the tanginess of tart fruits.
Consider the Type of Sweetener
While granulated sugar is the most common sweetener, experimenting with other sweeteners can add an extra layer of flavor to your crumble. For example, brown sugar adds molasses-like depth and a slight caramel flavor that can complement the tartness of fruits like apples or peaches.
You can also use honey, maple syrup, or agave nectar for a more natural sweetness. These liquid sweeteners add subtle flavor complexity and a slight depth that works particularly well with stone fruits (like plums and apricots) or tart berries.
Thicken the Filling for Better Balance
To prevent your fruit filling from becoming too runny, use a thickening agent like cornstarch, arrowroot powder, or tapioca flour. These ingredients help to bind the juices released by the fruit, creating a thicker, more cohesive filling that keeps its balance of sweet and tart flavors intact.
The amount of thickener you use depends on the moisture content of the fruit. For a typical 4-cup fruit filling, start with 1-2 tablespoons of cornstarch. If you’re using a mix of particularly juicy fruits, you may need to increase this amount slightly to avoid a soupy filling.
Taste and Adjust as You Go
Before baking your crumble, always taste the fruit filling. The combination of sweetness and tartness should be well-balanced, and the flavors should be vibrant, not flat. If the fruit mixture tastes too tart, add a little extra sugar, a spoonful at a time, and if it’s too sweet, squeeze in a bit more lemon juice or add a pinch of salt.
Remember that fruit filling will often taste more intense after baking, so don’t be afraid to let the mixture sit for a few minutes and taste it again before assembling your crumble.
Consider Fruit Ripeness
The ripeness of your fruit plays a significant role in how sweet or tart it will taste. Overripe fruits tend to be sweeter, while underripe fruits can be more tart. For the best flavor balance, use perfectly ripe fruit whenever possible.
- Ripe fruits like peaches, apricots, or berries will require less sugar, as they have natural sweetness.
- Slightly underripe fruits, such as Granny Smith apples or rhubarb, will need more sugar or a higher tart component (like lemon juice) to balance the flavor.
Blend Fruits for a Balanced Flavor
Another great way to balance sweetness and tartness is by using a blend of fruits with different flavor profiles. For example, combining sweet apples with tart cranberries or sweet blueberries with sour cherries can provide a more complex and satisfying fruit base.
This technique ensures that every spoonful of crumble has a balance of both sweet and tart flavors, which is especially important if you want to please a variety of palates.
Conclusion
Balancing the sweetness and tartness in your fruit crumble is all about selecting the right fruits, adjusting the sugar levels, and using a few simple techniques to enhance the natural flavors. By mixing sweet and tart fruits, using lemon or lime juice, and experimenting with different sweeteners, you can create a filling that is bright, vibrant, and perfectly balanced. Don’t forget to taste and adjust the flavors as you go to ensure your crumble hits the right note every time!
Mistakes to Avoid When Making Crumble
Making a perfect crumble may seem straightforward, but common mistakes can easily affect the texture and flavor of the final dish. Whether you’re a beginner or an experienced baker, it’s important to avoid these pitfalls. Here are the key mistakes to watch out for and tips on how to fix them:
1. Using Overripe or Underripe Fruit
A common mistake is using overripe or underripe fruit. Overripe fruit tends to become mushy and loses its shape, while underripe fruit can be too firm and lacks the right level of sweetness. The best crumble filling has tender, juicy fruit that still holds its shape.
Tip to Avoid:
Aim for fruit that is ripe but not too soft or too firm. For apples and pears, choose varieties that are firm but slightly yielding when pressed. Berries should be plump, while stone fruits like peaches should be slightly soft to the touch and fragrant.
2. Overmixing the Crumble Topping
The texture of the topping is key to a good crumble. Overmixing the crumble will make it dense and doughy, which is not what you’re aiming for. Instead, you want a light, crumbly texture with visible butter chunks.
Tip to Avoid:
Use your fingers or a pastry cutter to mix the topping. Stop mixing as soon as the butter is cut into small, pea-sized pieces. This ensures the right texture. Overworking the mixture will melt the butter too much into the flour, leading to a heavy, dense topping.
3. Skipping the Chilling Step
If you skip chilling the crumble topping before baking, you risk a soggy, oily topping. Chilling the mixture ensures that the butter stays solid, which results in a crispier topping once baked.
Tip to Avoid:
After preparing the crumble topping, place it in the fridge for at least 30 minutes. If you’re in a hurry, you can speed up the process by freezing the topping for 10-15 minutes before adding it to your fruit filling.
4. Using the Wrong Size Baking Dish
Choosing the wrong size dish can ruin your crumble. If the dish is too small, the filling may overflow. On the other hand, if it’s too large, the topping may burn before the fruit has a chance to cook through.
Tip to Avoid:
Pick a baking dish that provides the right depth for even cooking. A 9-inch round or 8×8-inch square baking dish is ideal for most crumble recipes. If you’re doubling the recipe, adjust the cooking time and temperature to ensure even baking.
5. Not Adjusting Sugar Levels for Different Fruits
Every fruit has a different sweetness level. For example, rhubarb is tart, while peaches are sweet. If you don’t adjust the sugar accordingly, your crumble might end up too sweet or not sweet enough.
Tip to Avoid:
Taste the fruit filling before baking and adjust the sugar accordingly. If you’re using tart fruit like rhubarb or blackberries, increase the sugar. For sweeter fruit like apples or pears, you may want to cut back on the sugar. Start with ¼ cup sugar per 4 cups of fruit and adjust to taste.
6. Adding Too Much Topping
While it’s tempting to load up on crumble topping, too much can overwhelm the fruit filling. It’s important to have a balance, so the fruit shines through while still providing the desired crunchy topping.
Tip to Avoid:
Aim for a thin, even layer of crumble topping. The filling should be visible beneath the topping, which will bake up crisp and provide the perfect ratio of fruit to crunch. Adding too much topping can result in a heavier and less balanced dessert.
7. Baking at the Wrong Temperature
Baking your crumble at the wrong temperature can lead to uneven cooking. If the oven temperature is too high, the topping will burn before the filling has time to cook. If it’s too low, the topping won’t crisp up as it should.
Tip to Avoid:
Bake your crumble at a moderate 350°F (175°C). This will allow the topping to turn golden brown and crispy, while the filling gets a chance to cook through without burning. If the topping begins to brown too quickly, cover the dish loosely with foil and continue baking until the filling is bubbling.
8. Not Letting It Rest After Baking
Serving the crumble immediately can make the topping too soft, and the fruit filling may still be runny. Letting the crumble rest allows the filling to set and the topping to firm up.
Tip to Avoid:
Allow the crumble to cool for 10-15 minutes before serving. This will help the filling thicken and the topping retain its crispness, giving you the perfect texture for serving.
9. Forgetting to Use a Thickening Agent for Juicy Fruits
Some fruits, especially those with a high water content like berries, release a lot of juice while baking. Without a thickening agent, this can result in a soupy filling that doesn’t hold together.
Tip to Avoid:
Use cornstarch or tapioca flour to thicken the fruit filling. For every 4 cups of fruit, add about 1-2 tablespoons of cornstarch. This helps absorb the excess juices and ensures a more cohesive filling.
By avoiding these common mistakes, you’ll be well on your way to creating the perfect crumble every time. Whether you’re making a traditional apple crumble or experimenting with different fruits, these tips will help you achieve the ideal balance of crisp topping and juicy filling. Happy baking!
Can You Make Crumble in Advance?
Crumble is one of those classic desserts that not only tastes amazing fresh out of the oven but also holds up well when made in advance. Whether you’re preparing for a busy week ahead or hosting a dinner party and need to streamline the cooking process, making your crumble ahead of time can be a real time-saver. Here’s how you can prepare it in advance without sacrificing flavor or texture:
1. Preparing the Fruit Filling in Advance
The fruit filling is the heart of the crumble, and it can easily be prepped a day or two ahead of time. You can cook the fruit mixture as you would for the crumble and store it in an airtight container in the fridge. The sugar and any thickening agents (like cornstarch) will help draw out the flavors of the fruit, making the filling even more delicious as it sits.
Tip:
When preparing the fruit in advance, make sure to allow it to cool completely before refrigerating it. This prevents excess moisture from building up and keeps the texture intact. If you’re making a fruit combination with berries or rhubarb, consider slightly undercooking them to prevent them from becoming mushy during storage.
2. Prepping the Crumble Topping Early
You can also prepare the crumble topping ahead of time and store it in the fridge or freezer. Mix the dry ingredients (flour, sugar, oats) with the butter, and then refrigerate it. This step not only saves you time on the day of baking but also improves the texture of the crumble. Chilling the topping helps the butter stay cold, which results in a crispier, more crumbly topping when baked.
Tip:
If you’re storing the crumble topping for more than a couple of days, freeze it. Just make sure to place it in an airtight container or a resealable bag. When you’re ready to bake, you can add the chilled topping directly on top of the fruit filling, and it will bake beautifully.
3. Assembling and Storing in the Fridge
Once you’ve prepped both the fruit filling and crumble topping, you can assemble the entire dish in advance. Layer the cooled fruit filling in a baking dish, and top it with the crumble mixture. Cover the dish with plastic wrap or foil and store it in the refrigerator for up to 24-48 hours.
Tip:
If you’re assembling the crumble ahead of time, ensure the fruit filling is cool to the touch before topping it with the crumble. This prevents the butter in the topping from melting prematurely, which could affect its texture. You can also freeze the assembled crumble for up to 3 months, making it perfect for future use.
4. Freezing the Assembled Crumble
Crumble is an excellent dish for freezing, and it maintains its flavor and texture remarkably well. After assembling the crumble, you can freeze it in a baking dish. Cover it tightly with plastic wrap and foil to prevent freezer burn. When ready to bake, simply transfer it directly from the freezer to the oven (without thawing) and bake for about 10-15 minutes longer than the usual baking time.
Tip:
For the best results when freezing a crumble, make sure the fruit filling is well thickened so it doesn’t release too much liquid during freezing and baking. If the crumble topping seems too soft or wet after thawing, you can add a little extra flour to balance the consistency before baking.
5. Reheating Leftover Crumble
If you have leftover crumble that you made in advance and stored, reheating it is simple. Bake it in a preheated oven at 350°F (175°C) for about 15-20 minutes until the topping becomes crisp again and the filling is hot. If you’re reheating a single portion, you can pop it in the microwave for a quicker option, but the texture of the topping may not be as crispy.
Tip:
To keep the topping crispy when reheating, consider placing the crumble under the broiler for a minute or two at the end of baking. This will help to bring back that golden, crisp finish.
In summary, making a crumble in advance is not only possible but highly recommended for convenience. Whether you’re prepping the fruit filling, the crumble topping, or the entire dish, these simple steps will allow you to save time without compromising the flavor or quality. The best part? Crumble is a versatile dessert that holds up well in storage, so you can enjoy it any time you like—fresh or reheated!
Delicious Crumble Variations to Try
Classic Apple Crumble Recipe
Apple crumble is a beloved dessert that combines the warmth and sweetness of apples with the crunch and buttery goodness of a crumble topping. It’s simple to prepare, requires just a few ingredients, and is perfect for any occasion, from cozy family dinners to holiday gatherings. Here’s how you can make a classic apple crumble that will have everyone coming back for seconds:
Ingredients for the Apple Filling
The apple filling is the base of the crumble, and the key to a good filling lies in choosing the right variety of apples. A mix of tart and sweet apples is ideal for a well-balanced flavor. Granny Smith apples are perfect for their tartness, while Honeycrisp or Gala apples offer a natural sweetness. Together, they create a filling that’s perfectly balanced between sweet and tangy.
- 6-8 medium apples (mix of tart and sweet varieties like Granny Smith and Honeycrisp)
- 2 tbsp lemon juice (to prevent browning and add a hint of tartness)
- 1/2 cup granulated sugar (adjust to taste depending on the sweetness of your apples)
- 2 tbsp all-purpose flour (to thicken the juices as the apples cook)
- 1 tsp ground cinnamon (for warmth and flavor)
- 1/4 tsp ground nutmeg (optional, adds a cozy spice note)
- 1/4 cup water or apple juice (helps to soften the apples while baking)
Tip:
To enhance the flavor, you can also add a handful of raisins or dried cranberries to the filling for a chewy texture and extra burst of sweetness. Alternatively, a splash of vanilla extract can elevate the flavor profile.
Making the Apple Filling
- Preheat your oven to 350°F (175°C).
- Peel and core the apples, then slice them into even pieces—about 1/2-inch thick. This allows the apples to cook evenly and ensures that they don’t become mushy.
- Toss the apple slices in a large bowl with the lemon juice, sugar, cinnamon, and nutmeg. The lemon juice not only prevents browning but also adds brightness to the filling.
- Add flour to the apple mixture to help thicken the juices as the crumble bakes. Stir until everything is well-coated.
- Place the apple mixture in the bottom of a greased 8×8-inch baking dish or a 9-inch round pie dish.
Ingredients for the Crumble Topping
The crumble topping is what gives the dessert its signature texture. It’s buttery, crumbly, and slightly sweet, creating the perfect contrast to the soft apple filling beneath. The topping can be as simple or as elaborate as you like, but for a classic apple crumble, you’ll need just a few basic ingredients:
- 1 cup all-purpose flour (the main structure of the crumble)
- 1/2 cup rolled oats (adds texture and a chewy element to the topping)
- 1/2 cup granulated sugar (or a mix of sugar and brown sugar for extra caramel notes)
- 1/4 tsp ground cinnamon (optional, but it enhances the flavor of the topping)
- 1/2 cup unsalted butter (cold and cubed, for a flaky, buttery texture)
- Pinch of salt (to balance out the sweetness)
Tip:
For a deeper flavor, you can swap some of the granulated sugar for brown sugar, which will add a rich, caramelized flavor to the topping. You can also try adding a small amount of almond meal or ground almonds for a nutty finish.
Making the Crumble Topping
- In a large mixing bowl, combine the flour, oats, sugar, and cinnamon.
- Add the cold, cubed butter to the dry ingredients. Use your fingers, a pastry cutter, or a fork to rub the butter into the dry ingredients. Continue working the mixture until it resembles coarse breadcrumbs with small pea-sized lumps of butter.
- Once the topping is ready, sprinkle it evenly over the apple filling in the baking dish.
Tip:
To get the crispiest topping, avoid overmixing. The goal is to keep the butter in small, solid chunks, which will melt and create a crispy, crumbly texture when baked.
Baking the Apple Crumble
- Place the assembled crumble in the preheated oven and bake for about 40-45 minutes, or until the topping is golden brown and the filling is bubbling around the edges.
- Keep an eye on the crumble during the final minutes of baking. If the topping starts to brown too quickly, loosely cover the dish with aluminum foil to prevent it from burning.
- Once baked, let the crumble rest for 10-15 minutes before serving. This will allow the filling to set and thicken, making it easier to serve.
Tip:
For an extra touch, you can add a scoop of vanilla ice cream or a dollop of whipped cream on top of the warm apple crumble for a truly indulgent dessert.
Serving and Enjoying Your Classic Apple Crumble
Apple crumble is best served warm, and it pairs wonderfully with a variety of side dishes. Try it with a scoop of creamy vanilla ice cream, a drizzle of heavy cream, or a spoonful of custard. The balance of hot, sweet fruit with cool, creamy toppings is simply irresistible.
Whether you’re enjoying it alone or serving it at a dinner party, this classic apple crumble will never disappoint. It’s a dessert that’s comforting, nostalgic, and guaranteed to please everyone who takes a bite. Enjoy!
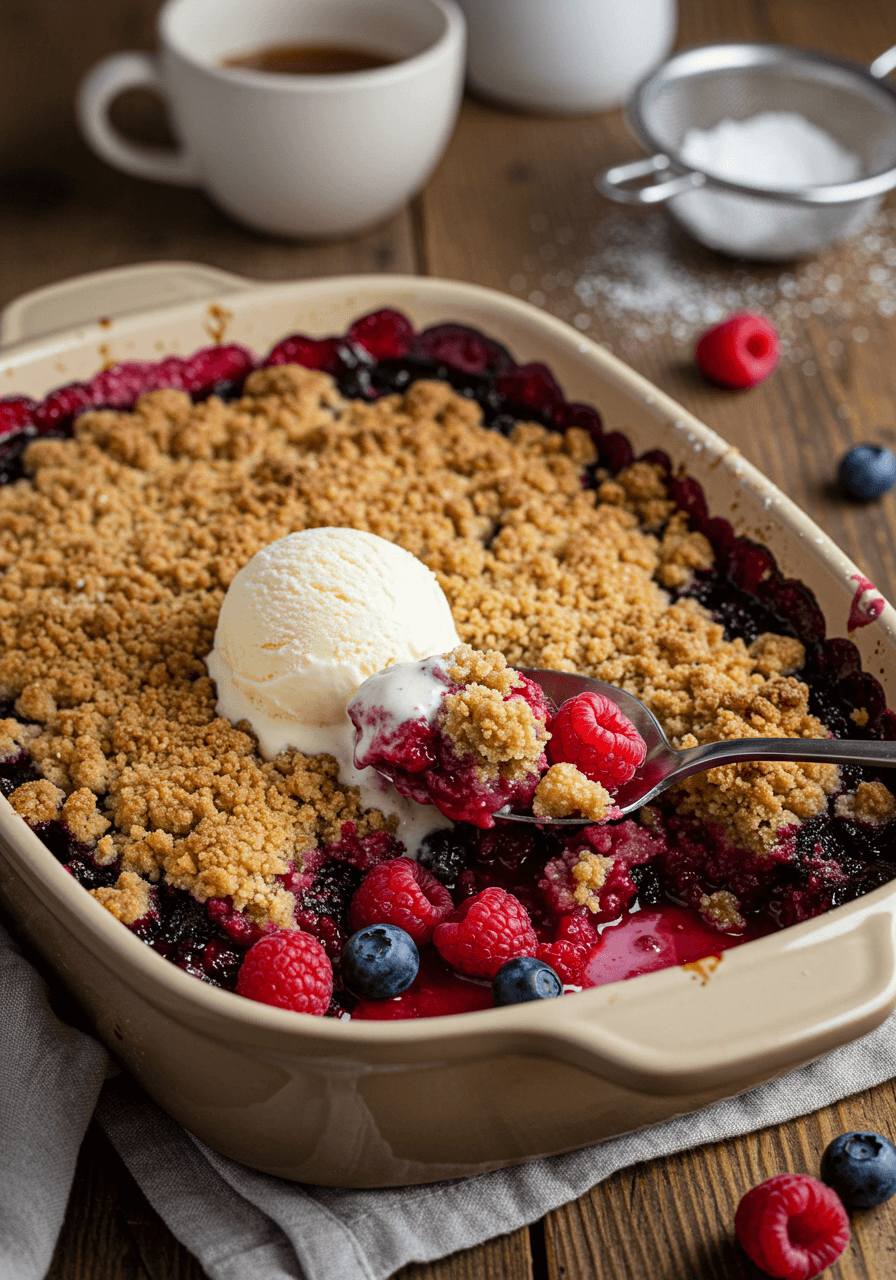
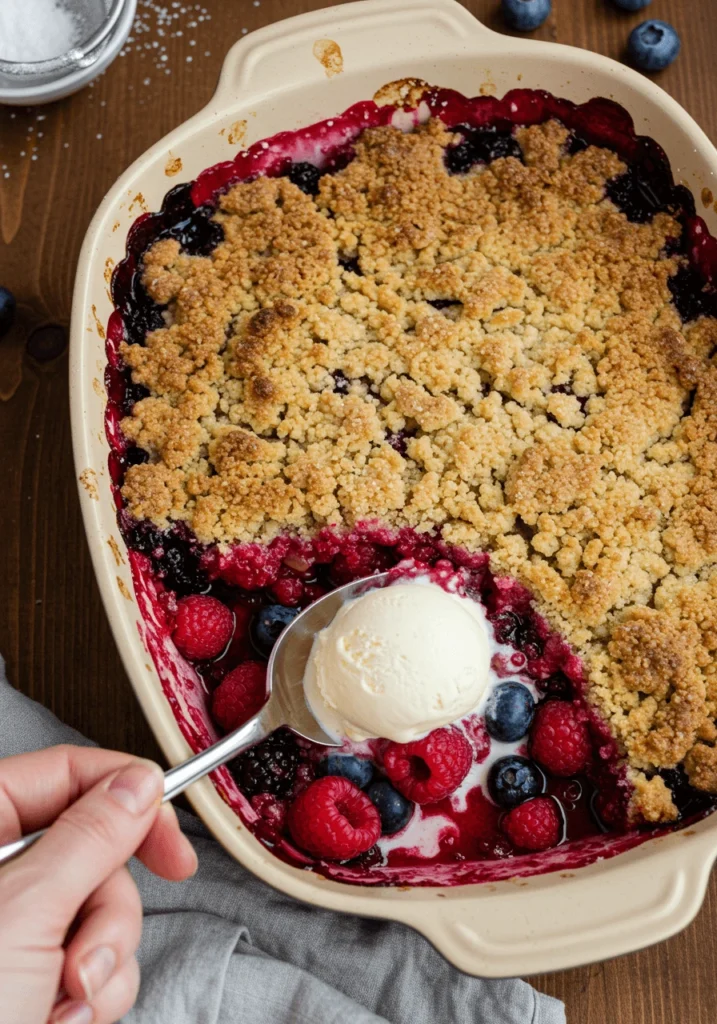
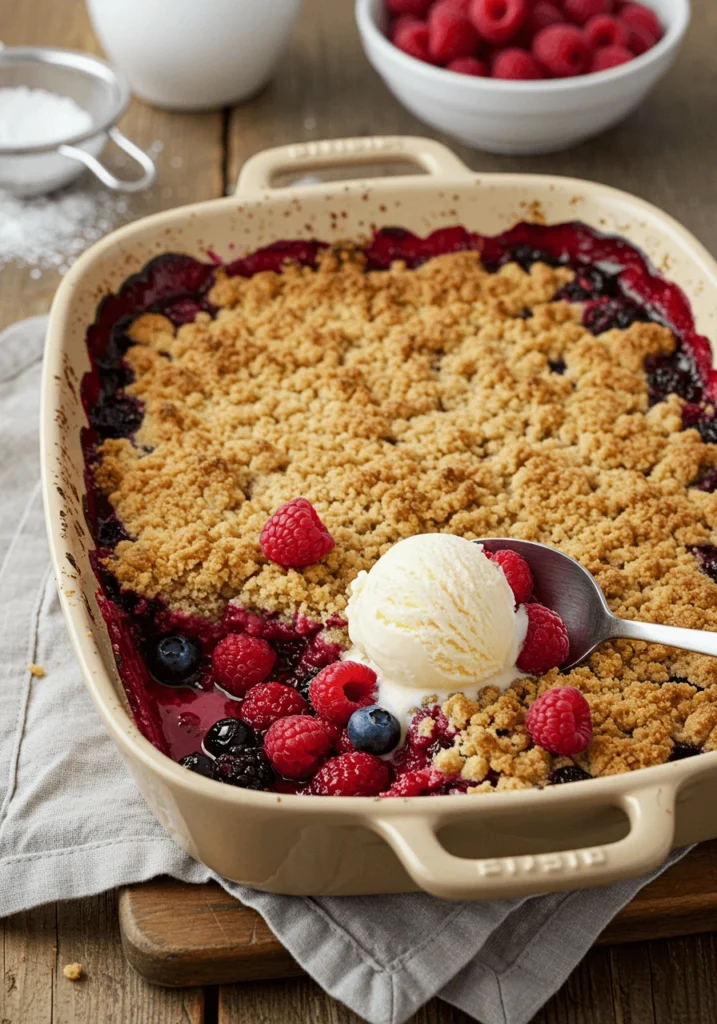
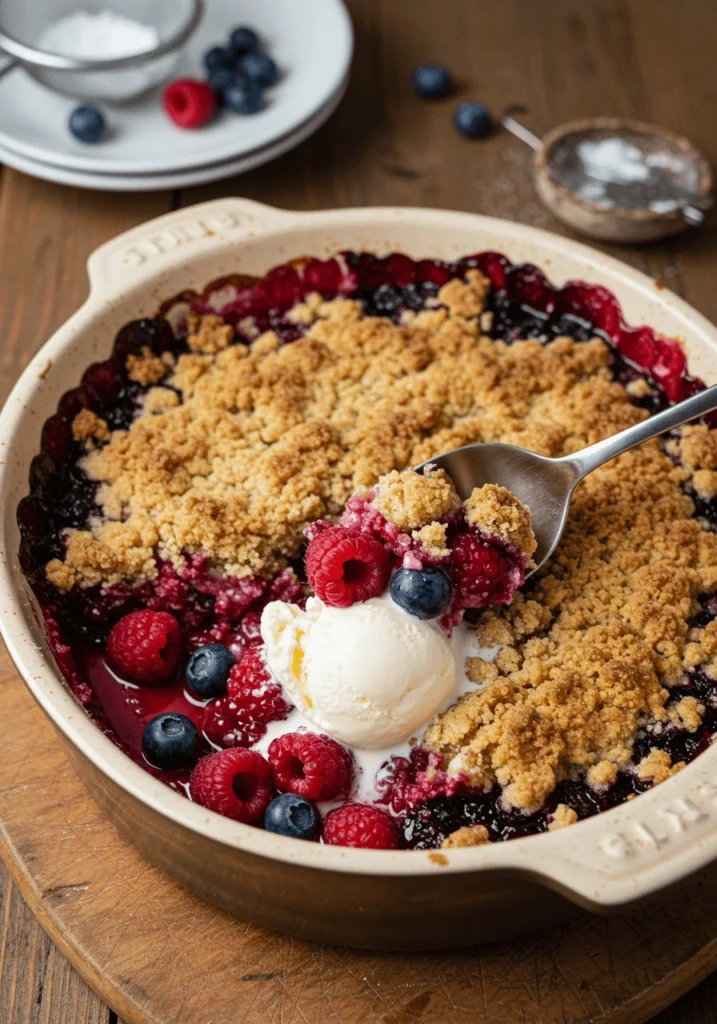
Mixed Berry Crumble Recipe
A mixed berry crumble is a delightful twist on the classic fruit crumble, combining the sweet, tangy flavors of various berries with a buttery, crisp topping. It’s a fantastic dessert for any occasion, especially during the berry season when you can enjoy the fruits at their freshest. Here’s how to create a delicious and easy mixed berry crumble that’s sure to become a favorite.
Ingredients for the Berry Filling
The beauty of a mixed berry crumble lies in the variety of berries used, each adding a unique flavor and texture to the filling. You can use any combination of fresh or frozen berries, such as blueberries, strawberries, raspberries, and blackberries. The balance of sweet and tart berries creates a vibrant filling that’s perfect for the crumble topping.
- 3 cups mixed berries (fresh or frozen – a mix of blueberries, raspberries, strawberries, and blackberries)
- 1/2 cup granulated sugar (adjust based on the sweetness of the berries)
- 2 tbsp cornstarch (helps thicken the juices from the berries as they bake)
- 1 tsp lemon juice (adds brightness and prevents the berries from becoming too sweet)
- 1 tsp vanilla extract (optional, enhances the depth of flavor)
- Pinch of salt (to balance out the sweetness)
Tip:
If you use frozen berries, thaw them and drain any excess liquid before using them in the crumble. This prevents the filling from becoming too watery and ensures a thicker, more flavorful result.
Making the Berry Filling
- Preheat your oven to 350°F (175°C).
- Mix the berries, sugar, cornstarch, lemon juice, vanilla extract, and a pinch of salt in a large mixing bowl. Stir gently to coat the berries in the mixture without crushing them.
- Transfer the berry mixture to a greased 8×8-inch baking dish or a similar-sized dish. Spread the berries evenly in the dish to ensure an even distribution of fruit.
Tip:
For extra flavor, you can add a sprinkle of cinnamon or a dash of nutmeg to the berry filling. These spices will complement the sweetness of the berries and enhance the overall taste of the crumble.
Ingredients for the Crumble Topping
The topping for a mixed berry crumble is similar to a classic crumble topping but with a few variations to make it extra crunchy and flavorful. It’s made with a combination of butter, sugar, flour, and oats, which create a wonderfully crumbly texture when baked.
- 1 cup all-purpose flour (the main base of the topping)
- 1/2 cup rolled oats (adds texture and a chewy component)
- 1/2 cup granulated sugar (or you can use a mix of sugar and brown sugar for a richer flavor)
- 1/4 tsp ground cinnamon (optional, for added warmth)
- 1/2 cup unsalted butter (cold and cut into cubes for the perfect crumble texture)
- Pinch of salt (balances the sweetness of the topping)
Tip:
If you prefer a slightly nutty flavor, consider adding a handful of chopped almonds, pecans, or walnuts to the topping. The nuts will add an extra layer of crunch and richness to the finished crumble.
Making the Crumble Topping
- In a large mixing bowl, combine the flour, oats, sugar, cinnamon, and a pinch of salt.
- Add the cold, cubed butter to the dry ingredients. Use your fingers, a pastry cutter, or a fork to rub the butter into the dry ingredients until it resembles coarse breadcrumbs. You should have small, pea-sized clumps of butter throughout the mixture.
- Once the topping is ready, sprinkle it evenly over the prepared berry filling in the baking dish.
Tip:
For an extra-crispy topping, avoid overworking the butter into the flour. The key is to leave small lumps of butter throughout, which will melt and create a wonderfully crunchy topping as it bakes.
Baking the Mixed Berry Crumble
- Place the assembled crumble in the preheated oven and bake for about 35-45 minutes, or until the topping is golden brown and crisp and the berry filling is bubbling around the edges.
- If the topping begins to brown too quickly, you can loosely cover the dish with aluminum foil for the first 20 minutes of baking, then remove it to allow the topping to crisp up.
Tip:
To ensure an evenly cooked crumble, rotate the baking dish halfway through the cooking time. This helps the crumble bake uniformly, particularly if your oven has hot spots.
Serving and Enjoying Your Mixed Berry Crumble
Once your crumble is golden and fragrant, remove it from the oven and let it rest for about 10-15 minutes before serving. This allows the berry juices to set and makes the crumble easier to scoop.
Mixed berry crumble is best served warm, and it pairs perfectly with a scoop of vanilla ice cream, a dollop of whipped cream, or a drizzle of custard. The contrast between the warm, tangy berries and the crispy, buttery topping is simply irresistible.
Tip:
For a gourmet touch, you can serve your crumble with a sprinkle of fresh mint leaves or a light dusting of powdered sugar just before serving.
Storing and Reheating Leftover Mixed Berry Crumble
If you happen to have leftovers, mixed berry crumble can be stored in the refrigerator for up to 3 days. Simply cover the dish with plastic wrap or aluminum foil to keep it fresh. When you’re ready to enjoy it again, reheat the crumble in the oven at 350°F (175°C) for 15-20 minutes, or until the topping becomes crispy again and the filling is hot. For a quicker option, you can microwave individual portions.
Tip:
You can also freeze leftover mixed berry crumble. Just cover it tightly with plastic wrap and foil, and store it in the freezer for up to 3 months. To reheat, bake directly from the freezer at 375°F (190°C) for about 45 minutes or until heated through and golden on top.
This mixed berry crumble recipe is a crowd-pleaser, offering the perfect balance of sweet and tart flavors, with a deliciously buttery, crunchy topping. Whether you’re making it for a weeknight dessert or a special occasion, it’s guaranteed to impress. Enjoy the fresh flavors of summer all year long with this simple, yet irresistible, dessert!
Rhubarb and Strawberry Crumble Recipe
Rhubarb and strawberry crumble is a classic dessert combination, loved for its balance of tart rhubarb and sweet strawberries, paired with a buttery, crunchy topping. The unique tartness of rhubarb is beautifully complemented by the sweetness of strawberries, creating a harmonious filling that’s both refreshing and comforting. This crumble is perfect for spring and summer when both rhubarb and strawberries are in season, but it can be enjoyed all year round with frozen fruit. Let’s dive into how to make this delectable crumble!
Ingredients for the Rhubarb and Strawberry Filling
The filling is what gives the crumble its character, and using fresh or frozen rhubarb and strawberries creates a deliciously balanced flavor profile. Rhubarb provides a sharp, tangy bite, while strawberries add a juicy sweetness that balances out the rhubarb’s tartness. The key to a great filling is ensuring that the fruit retains its texture and that the sweetness and tartness are well-balanced.
- 3 cups rhubarb (fresh, chopped into 1-inch pieces)
- 2 cups strawberries (hulled and sliced, or use frozen)
- 1/2 cup granulated sugar (adjust to your taste, depending on the sweetness of your fruit)
- 1 tbsp lemon juice (adds brightness and helps to balance the flavors)
- 1 tbsp cornstarch (thickens the juices released by the fruit as it cooks)
- 1/4 tsp vanilla extract (optional, enhances the depth of flavor)
- Pinch of salt (to balance sweetness)
Tip:
Rhubarb is very tart, so if you like a sweeter filling, feel free to increase the sugar amount. If using frozen strawberries, make sure to thaw and drain them before using to avoid excess liquid in the filling.
Making the Rhubarb and Strawberry Filling
- Preheat your oven to 350°F (175°C).
- In a large mixing bowl, combine the chopped rhubarb and sliced strawberries. Toss them with sugar, cornstarch, lemon juice, vanilla extract, and a pinch of salt.
- Gently stir to coat the fruit evenly in the mixture, but be careful not to mash the strawberries or break up the rhubarb.
- Transfer the mixture into a greased 8×8-inch baking dish or a similar-sized baking dish, spreading the fruit evenly across the bottom.
Tip:
If you want to add more texture and flavor, you can include a handful of chopped almonds or walnuts in the fruit mixture before baking. These add a nice crunch and complement the sweetness of the crumble topping.
Ingredients for the Crumble Topping
The topping is key to the classic crumble texture—crisp, buttery, and golden brown. The crumble topping should contrast the soft, juicy fruit filling, and it’s made using simple pantry staples like flour, butter, oats, and sugar. For this rhubarb and strawberry crumble, adding rolled oats gives the topping a hearty, slightly chewy texture that balances out the fruit’s tenderness.
- 1 cup all-purpose flour (the base of the crumble)
- 1/2 cup rolled oats (adds texture and chewiness)
- 1/2 cup granulated sugar (or a combination of granulated and brown sugar for a deeper flavor)
- 1/4 tsp ground cinnamon (optional, enhances the warm flavor)
- 1/2 cup cold unsalted butter (cut into small cubes)
- Pinch of salt (to enhance the sweetness)
Tip:
For an extra flavorful topping, you can substitute some of the granulated sugar with brown sugar for a caramel-like flavor. If you want to add more crunch, consider incorporating chopped nuts or shredded coconut into the topping.
Making the Crumble Topping
- In a mixing bowl, combine flour, oats, sugar, cinnamon, and a pinch of salt.
- Add the cold, cubed butter to the dry ingredients. Use your fingers, a pastry cutter, or a fork to cut the butter into the mixture. Continue until the mixture resembles coarse breadcrumbs, with some larger pea-sized clumps of butter still intact.
- Once the crumble topping is ready, sprinkle it evenly over the rhubarb and strawberry filling in the baking dish, covering the fruit completely.
Tip:
If you prefer a super-crisp topping, you can also mix in a small handful of almond meal or cornmeal. These ingredients give the topping a slightly grainy texture and add an extra crunch.
Baking the Rhubarb and Strawberry Crumble
- Place the crumble in the preheated oven and bake for about 40-45 minutes, or until the topping is golden brown and the fruit filling is bubbling and slightly thickened.
- Keep an eye on the crumble during the final minutes of baking. If the topping begins to brown too quickly, loosely cover it with aluminum foil to prevent burning.
- Once the crumble is done, remove it from the oven and let it rest for about 10-15 minutes before serving. This allows the fruit filling to set and makes it easier to serve.
Tip:
For extra visual appeal, you can sprinkle the crumble with a little demerara sugar before baking. This will give the topping an added crunch and a subtle golden hue when baked.
Serving and Enjoying Your Rhubarb and Strawberry Crumble
Rhubarb and strawberry crumble is best served warm, right out of the oven, but it can also be enjoyed at room temperature. For an indulgent treat, top the crumble with a generous scoop of vanilla ice cream, a dollop of whipped cream, or a drizzle of custard. The contrast of the warm fruit filling and the cold, creamy topping is simply divine.
Tip:
For an extra burst of flavor, garnish with fresh mint leaves or a few fresh strawberry slices just before serving. This adds a touch of color and a fresh, herbal note that complements the sweetness of the crumble.
Storing and Reheating Leftover Rhubarb and Strawberry Crumble
If you have leftovers, rhubarb and strawberry crumble can be stored in the refrigerator for up to 3 days. Just cover the baking dish with plastic wrap or aluminum foil. To reheat, simply pop it back in the oven at 350°F (175°C) for about 15-20 minutes, or until the topping is crispy and the filling is heated through. Alternatively, you can microwave individual portions for a quick snack.
Tip:
For longer storage, you can freeze your leftover crumble. Cover it tightly with plastic wrap and foil, and store it in the freezer for up to 3 months. When you’re ready to enjoy it again, bake it straight from the freezer at 375°F (190°C) for about 45 minutes or until hot and crispy.
This rhubarb and strawberry crumble recipe is a perfect balance of sweet and tart flavors, with a crispy, buttery topping. It’s a delightful dessert that’s easy to make and guaranteed to satisfy any sweet craving. Whether you’re enjoying it on a cozy evening or serving it at a gathering, this crumble will be a hit with everyone!
Savory Crumble Ideas (Yes, It’s a Thing!)
While crumbles are traditionally a sweet dessert, they can easily be adapted to savory dishes. Savory crumbles are a great option for a comforting meal, whether for lunch, dinner, or a unique appetizer. Let’s explore how to make these savory crumbles and how they can be used in a variety of meals.
The Base of a Savory Crumble
Just like the classic sweet version, the savory crumble topping consists of a few basic ingredients, with key substitutions to bring in savory flavors.
- Flour: Stick to all-purpose flour or whole wheat flour for a heartier texture.
- Butter: Use butter for richness, or swap it with olive oil or dairy-free butter for dietary preferences.
- Cheese: Add cheddar, parmesan, or feta for a cheesy, umami-packed topping.
- Herbs & Spices: Focus on herbs like thyme, rosemary, oregano, and spices like garlic powder for an aromatic topping.
- Crunchy Bits: Incorporate nuts like almonds or seeds like pumpkin seeds to add crunch.
This foundation gives you a variety of options, depending on the flavor profile you’re aiming for in your savory crumble.
Savory Crumble Recipe Ideas
Savory crumbles can be customized to suit a variety of dishes, from hearty vegetables to protein-filled options. Let’s dive into a few savory crumble recipes you can try at home.
1. Vegetable and Herb Crumble
A vegetable crumble can be the star of your meal, packed with nutritious vegetables and the flavors of fresh herbs. Perfect as a side or a vegetarian main dish.
- Key Ingredients: Roasted zucchini, eggplant, carrots, and spinach combined with fresh herbs like thyme and oregano.
- Topping: A mixture of oats, cheddar, and herbs for a crispy, cheesy topping.
This dish is customizable based on your favorite vegetables. Add tomatoes, bell peppers, or any other seasonal produce to adjust to your personal tastes.
2. Chicken and Mushroom Crumble
Hearty and satisfying, this chicken and mushroom crumble is the perfect meal for a cozy dinner. It combines tender chicken and earthy mushrooms, all topped with a crispy, cheesy crumble.
- Key Ingredients: Sautéed chicken, mushrooms, and garlic, with a splash of white wine or vegetable broth for extra flavor.
- Topping: A blend of breadcrumbs, cheddar, and fresh thyme gives this crumble its rich, crispy topping.
This dish is hearty enough to be the main course, and it pairs wonderfully with a green salad.
3. Lentil and Tomato Crumble
For a plant-based option, try a lentil and tomato crumble. This dish is filling, nutritious, and packed with flavor, making it a great vegetarian or vegan meal.
- Key Ingredients: Lentils, tomatoes, and carrots cooked with garlic and curry powder.
- Topping: A blend of parmesan, breadcrumbs, and a dash of curry powder for a savory and slightly spiced topping.
This recipe is hearty and flavorful, and it’s an excellent dish for meal prep, as it keeps well in the fridge.
4. Potato and Leek Crumble
This comforting dish features a creamy potato filling with the sweetness of leeks, all topped with a crispy, cheesy crumble. It’s perfect for a cozy meal during the colder months.
- Key Ingredients: Mashed potatoes, sautéed leeks, and a splash of cream or milk.
- Topping: Cheddar, breadcrumbs, and rosemary make a fragrant, savory topping.
You can also add some crispy bacon bits to make this even richer and more indulgent.
5. Spinach and Ricotta Crumble
A light and creamy spinach and ricotta crumble is a great way to enjoy fresh greens in a savory dish. The ricotta adds creaminess while the spinach brings a vibrant, earthy flavor.
- Key Ingredients: Spinach, ricotta cheese, garlic, and a touch of nutmeg for added depth.
- Topping: Parmesan, breadcrumbs, and a bit of oregano for an aromatic finish.
This dish is great as a side or even as a main, especially if you’re looking for something lighter.
Tips for Making Savory Crumbles
- Balance Your Topping and Filling: As with sweet crumbles, make sure the topping doesn’t overwhelm the filling. A good balance between the crunchy topping and the filling ensures every bite is just right.
- Use Seasonal Ingredients: A savory crumble is an excellent way to showcase seasonal produce. Whether you’re using fall squash or spring peas, pick ingredients that are fresh and in season to bring the best flavor to your dish.
- Play with Spices: Don’t shy away from using bold spices like smoked paprika, cumin, or even chili flakes to add depth and warmth to your savory crumbles.
Conclusion: Savory Crumbles Are the New Comfort Food
Savory crumbles offer a fresh take on a classic dish, turning it into something versatile and savory that can be served for any meal. Whether you go for a vegetable-packed crumble or a hearty chicken and mushroom version, there’s no wrong way to make it. These savory crumbles are an easy, customizable, and comforting dish that will impress your guests or satisfy your family.
Serving and Storing Your Crumble

Best Ways to Serve Crumble
A perfectly baked crumble is a treat on its own, but how you serve it can take the experience to the next level. Whether you want to enhance its flavor, texture, or simply make it more satisfying, there are countless delicious ways to serve crumble. Let’s explore some of the best options to make your dessert truly unforgettable.
1. Serve Warm for Ultimate Comfort
First and foremost, crumbles are best enjoyed warm, straight from the oven. Serving it warm brings out the full depth of the fruit’s natural sweetness and keeps the topping beautifully crisp. The contrast between the juicy, tender filling and the crunchy, buttery topping is at its best when the crumble is freshly baked.
If you’ve made the crumble ahead of time, simply reheat individual portions in the microwave or the whole dish in the oven to restore its comforting warmth.
2. Pair with a Scoop of Ice Cream
One of the most popular ways to serve crumble is with a generous scoop of ice cream. The cold, creamy texture of the ice cream beautifully contrasts with the warm crumble. Vanilla ice cream is a classic choice because its subtle flavor complements almost any fruit combination.
However, don’t hesitate to try bolder options like cinnamon ice cream, honeycomb, or even caramel swirl for extra indulgence. The melting ice cream also adds a luscious sauce-like quality that makes every bite more luxurious.
3. Add a Dollop of Whipped Cream or Crème Fraîche
If you prefer something lighter than ice cream, whipped cream is an excellent option. Soft, airy whipped cream balances the richness of the crumble topping. You can sweeten it slightly with a touch of vanilla or powdered sugar.
Alternatively, for a more sophisticated twist, opt for crème fraîche. Its subtle tanginess pairs wonderfully with sweeter fruits like apples, berries, and peaches, cutting through the sweetness for a well-rounded bite.
4. Drizzle with Custard or Cream
Another classic serving suggestion — especially in the UK — is to pour warm custard over the crumble. The creamy custard seeps into the fruit and topping, creating a smooth, velvety texture that complements the crisp crumble.
If custard feels too heavy, a splash of pouring cream can offer a similar effect with a lighter touch. Both options create a rich, decadent dessert that’s perfect for cooler evenings.
5. Sprinkle with Fresh Herbs or Citrus Zest (For a Gourmet Touch)
For an elegant finish, consider garnishing your crumble with a sprinkle of fresh herbs like mint or basil. These add a pop of color and a burst of freshness that lifts the entire dish.
Additionally, finely grated lemon zest or orange zest over the top can brighten the flavors, especially when serving berry-based crumbles. These small touches not only enhance taste but also make your dessert look more visually appealing.
6. Serve with a Side of Yogurt (For Breakfast or Brunch)
Crumble isn’t just for dessert! You can serve it with a scoop of Greek yogurt or natural yogurt for a delicious breakfast or brunch option. The tangy yogurt balances the sweetness and makes the dish feel lighter and more wholesome.
This is a fantastic idea if you’ve made a fruit-forward crumble using apples, berries, or peaches — it feels indulgent yet is perfectly suited for a morning treat.
Pro Tip: Always Let the Crumble Rest Before Serving
Even though it’s tempting to dive right in, letting your crumble rest for 5 to 10 minutes after baking allows the fruit filling to thicken slightly. This resting time makes serving easier and ensures you get a perfect balance of fruit and topping in every spoonful.
How to Store Leftover Crumble
While crumble is often so delicious that it disappears quickly, there are times when you’ll have leftovers. Properly storing your leftover crumble ensures you can continue enjoying it with the same great flavor and texture. Here’s everything you need to know about storing crumble safely and effectively.
1. Let the Crumble Cool Completely
Before you even think about storing, it’s crucial to let your crumble cool to room temperature. If you cover or refrigerate it while it’s still warm, condensation can form. This added moisture can make the topping soggy and affect both the texture and flavor.
To cool your crumble properly, simply leave it uncovered on a wire rack for about 30 to 60 minutes. Once it’s no longer warm to the touch, it’s ready to store.
2. Store in the Refrigerator for Short-Term Use
For short-term storage, the refrigerator is your best option. Transfer your crumble into an airtight container, or if it’s still in the baking dish, cover it tightly with plastic wrap or aluminum foil.
Properly covered, crumble can be stored in the refrigerator for up to 3 to 4 days. During this time, the fruit filling remains fresh, and the topping stays relatively crisp—although some softening is normal.
3. Reheat Properly to Restore Texture
When you’re ready to enjoy your leftovers, reheating is key to reviving the crumble’s original crispness. For the best results, reheat it in the oven rather than the microwave.
Preheat your oven to 350°F (175°C) and warm the crumble, uncovered, for 10–15 minutes, or until heated through. This method helps crisp up the topping again, whereas microwaving tends to make it soft and less appealing.
If you’re in a hurry, microwaving individual portions works fine—but expect a softer texture.
4. Freeze for Long-Term Storage
If you want to store your crumble for a longer period, freezing is an excellent option. You can freeze both baked and unbaked crumble.
For baked crumble, allow it to cool completely, then transfer it to a freezer-safe airtight container or wrap the baking dish tightly in both plastic wrap and foil. It can be frozen for up to 3 months.
For unbaked crumble, assemble the crumble in a freezer-safe dish but don’t bake it. Wrap it tightly and freeze. When you’re ready to bake, you can bake it straight from frozen—just add an extra 10–15 minutes to the baking time.
Always label your containers with the date to keep track of freshness.
5. Important Storage Tips to Remember
- Portion leftovers before storing if possible — it makes reheating quicker and more convenient.
- Avoid storing crumble with ice cream or custard— always add these toppings fresh when serving leftovers.
- Check for spoilage before eating leftovers after several days. If you notice any off smells, mold, or excess moisture, discard the crumble.
Pro Tip: If you know ahead of time that you’ll have leftovers, consider baking your crumble in smaller, individual ramekins. This makes both storage and reheating easier and keeps portions tidy and appealing.
Can You Freeze Crumble?
Absolutely — crumble freezes beautifully, making it a fantastic make-ahead dessert option. Whether you have leftovers you want to save or you’re prepping a dessert in advance, freezing crumble helps lock in both flavor and texture for later enjoyment. However, to get the best results, it’s important to freeze it correctly. Here’s everything you need to know.
1. Freezing Baked Crumble
If you’ve already baked your crumble and have leftovers, freezing is a simple way to extend its shelf life.
First, allow the crumble to cool completely at room temperature. This step is essential because freezing a warm crumble can cause condensation, leading to freezer burn and soggy texture later on.
Once cooled, transfer the crumble into an airtight container or wrap the entire baking dish tightly with plastic wrap followed by a layer of aluminum foil. Proper wrapping protects it from freezer odors and prevents ice crystals from forming.
Baked crumble can be frozen for up to 3 months. When you’re ready to enjoy it again, thaw it overnight in the refrigerator and then reheat in a 350°F (175°C) oven for about 15–20 minutes until warmed through and the topping is crisp again.
2. Freezing Unbaked Crumble
Freezing unbaked crumble is also a smart strategy, especially if you’re planning ahead for entertaining or want a quick dessert on hand.
To freeze unbaked crumble, assemble the fruit filling and topping in a freezer-safe baking dish, but do not bake it yet. Cover the dish tightly with plastic wrap and foil, just like you would for the baked version.
Unbaked crumble can also be frozen for up to 3 months. When you’re ready to bake it, there’s no need to thaw it first. Simply bake it straight from frozen, adding an extra 10–15 minutes to the usual baking time. Keep an eye on the topping — if it starts to brown too quickly, loosely cover it with foil partway through baking.
3. Tips for Freezing Crumble Successfully
To ensure your frozen crumble tastes as fresh as possible, keep these tips in mind:
- Label and date your container so you know when it was frozen. This helps avoid forgotten freezer items.
- Use freezer-safe dishes like ceramic, metal, or disposable aluminum pans — these can go straight from freezer to oven safely.
- Freeze in portions if you anticipate only reheating small servings. Dividing into individual ramekins or containers makes thawing and reheating faster and easier.
- Avoid freezing crumbles with high water-content fruits alone (like watermelon) — fruits like apples, berries, rhubarb, and peaches freeze better and maintain their texture after baking.
4. Does Freezing Affect Crumble Texture?
While freezing crumble works well, it’s worth noting that the topping might lose a bit of its signature crispness after being frozen and reheated — especially if it’s been frozen for a long time.
However, reheating the crumble uncovered in the oven usually helps restore much of the topping’s crunch. Adding an extra sprinkle of fresh crumble topping before reheating can also freshen up the texture if needed.
Pro Tip: If you’re freezing an unbaked crumble, you can store the fruit filling and topping separately in two containers. This way, you can assemble them fresh just before baking, which helps maintain maximum crispness.
Conclusion
Crumble recipes are truly the ultimate comfort dessert — they’re easy to make, endlessly customizable, and always a crowd-pleaser. With just a few simple ingredients and techniques, you can create a dessert that feels both homey and impressive. Whether you’re using classic apples, juicy berries, or even experimenting with savory twists, there’s a crumble recipe to suit every taste.
Don’t hesitate to mix things up. Try new combinations of fruits, add your favorite spices or nuts to the topping, or swap ingredients to suit your dietary needs. The possibilities are endless, and half the fun is making the recipe your own.
I’d love to hear from you! Leave a comment below sharing your favorite crumble variation or your best crumble-making tip. Your ideas might inspire fellow readers to try something new.
If you enjoyed this guide, be sure to check out some of my other delicious dessert recipes, like my How to Make French Toast or Top 5 Banana Bread Recipes to Satisfy Your Cravings, for even more baking inspiration.